
...
- Update the SSW repository:
Блок кода title on both hosts sudo sh -c "echo deb [arch=amd64] http://archive.eltex.org/ssw/jammy/3.18 stable main extras external > /etc/apt/sources.list.d/eltex-ecss10-stable.list"
- Update the packetspackages:
Блок кода title on both hosts sudo apt update
...
Предупреждение title Pay attention Make a full backup. - Update PostgreSQL:
- Check the addresses where the Postgres database is running, run the following command:
Блок кода title on ecss2 psql -Upostgres -decss_storekeeper_db -h localhost -p5439 -c "SELECT node_local_dsn FROM bdr.bdr_nodes;"
Подсказка Default password is "postgres1"
Блок кода title Example: psql -Upostgres -decss_storekeeper_db -h localhost -p5439 -c "SELECT node_local_dsn FROM bdr.bdr_nodes;" Password for user postgres: node_local_dsn --------------------------------------------------------------------------------------- host=10.0.10.51 port=5439 dbname=ecss_storekeeper_db user=postgres password=postgres1 host=10.0.10.52 port=5439 dbname=ecss_storekeeper_db user=postgres password=postgres1 (2 rows) - Disable the Docker container:
Блок кода title on ecss2 sudo docker compose -f /srv/ecss/ecss-postgres-bdr-ssw/docker-compose.container.yml down
Блок кода title Example sudo docker compose -f /srv/ecss/ecss-postgres-bdr-ssw/docker-compose.container.yml down [+] down 2/2 ✔ Container ecss-postgres-bdr-ssw-postgres-container-1 Removed ✔ Network ecss-postgres-bdr-ssw_default Removed
- Remove the old deb packetpackage, since it doesn't support the upgrade option:
Блок кода title on ecss2 sudo apt remove ecss-postgres-bdr-ssw
Предупреждение title Important! Execut the remove command, not purge, because 'remove' saves the 'volumes' directory containing the database tables.
Блок кода title Example: sudo apt remove ecss-postgres-bdr-ssw Reading package lists… Ready . . . The following packages will be DELETED: ecss-postgres-bdr-ssw . . . Would you like to continue? [Y/N] y Removing ecss-postgres-bdr-ssw (17.1.0.59+ssw) …
- Install the new deb package:
Блок кода title on ecss2 sudo apt install ecss-postgres-bdr-ssw
Предупреждение title Important! During installation, you will be asked the same questions as during the initial installation:
Your answers must match the instructions in the procedure exactly; otherwise, the system will attempt to create a new database, and the installation will fail.Информация Question Answer Example Current IP address of the network interface.
Предупреждение Select an IP address: the same one used during the initial installation,
since replication is tied to specific IP addresses.(checked in step "a", 10.0.10.52 in the example).
10.0.10.52 (must be specified) 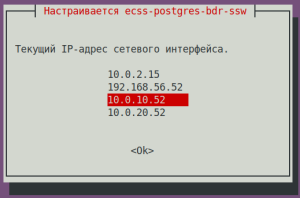
Installation in a cluster?
Select <Yes> if the package is being installed on a cluster node.Yes (default value) 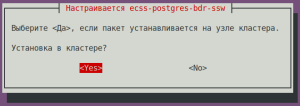
Is this node master?
Предупреждение title Important! Answer NO! Otherwise it'll try to create new bdr,
which will be impossible and will lead to installation error).No (default value) 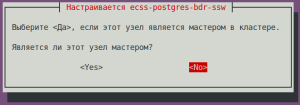
IP address used to connect to the cluster:
Предупреждение title Important! IP of the neighbor node (specified during its installation, checked in step "a", 10.0.10.51 in the example).
10.0.10.51 (must be specified) 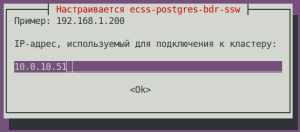
Блок кода title If the installation is successful, during the replication setup phase, we will see sudo apt install ecss-postgres-bdr-ssw . . . ============================= Checking replication status ============================= BDR replication is configured correctly: the data matches. . . . ======================================================= ======================================================= ecss-postgres-bdr-ssw successfully installed/updated! ======================================================= ======================================================= ┏┓┏┓┏┓┏┳┓┏┓┳┓┏┓┏┓ ┳┓┳┓┳┓ ┏┓┏┓┓ ┏ ┃┃┃┃┗┓ ┃ ┃┓┣┫┣ ┗┓ ┣┫┃┃┣┫ ┗┓┗┓┃┃┃ ┣┛┗┛┗┛ ┻ ┗┛┛┗┗┛┗┛ ┻┛┻┛┛┗ ┗┛┗┛┗┻┛
- After the installation make sure, that the new image is loaded and the docker started. Run the following command:
Блок кода title on ecss2 docker ps
Блок кода title Example: docker ps CONTAINER ID IMAGE COMMAND CREATED STATUS PORTS NAMES 80ef72d3b125 git.eltex.loc:4567/ecss/ecss-postgresbdr:3.18 "/docker-entrypoint.…" 8 minutes ago Up 8 minutes 0.0.0.0:5439->5432/tcp, [::]:5439->5432/tcp ecss-postgres-bdr-ssw-postgres-container-1
- Check the addresses where the Postgres database is running, run the following command:
- Updating SSW.
- Updating the
ecss-dns-envpackage:Блок кода title on ecss2 sudo apt install ecss-dns-env
- Updating the
ecss-userpackage:Блок кода title on ecss2 sudo apt install ecss-user
- Updating the
ecss-utilspackage:Блок кода title on ecss2 sudo apt install ecss-utils
Раскрыть title If the ELM licensing is used Install the License Provider package:
Блок кода title on ecss2 sudo apt install ecss-license-provider
When installing the
ecss-license-providerpackage the following questions will be asked:Questions Answers Examples License Provider listen ip:
0.0.0.0 (default value) 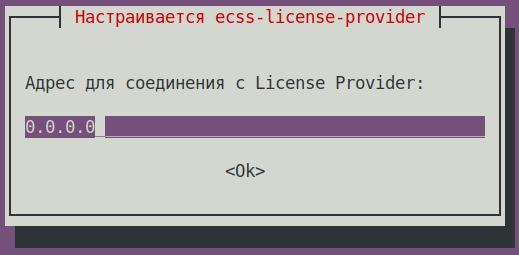
License Provider listen port: 4321 (default value) 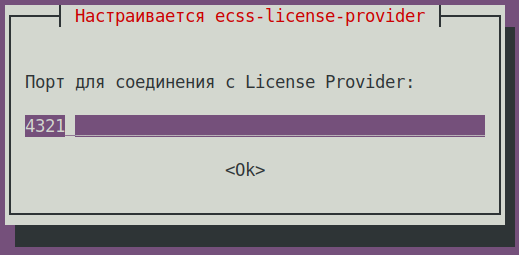
Log level: info (default value),
other options: debug, error, info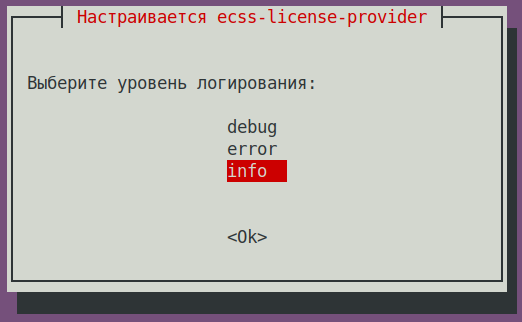
License Provider cluster key: specify a unique name
ecss-lm-cluster (default value)Подсказка Managers with the same names will attempt to form a cluster for mutual failover.
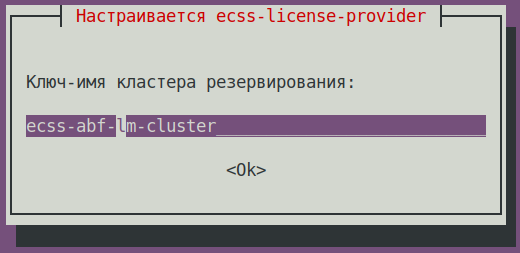
The data is saved to the
/etc/ecss/ecss-license-provider/config.envfile:Без форматирования ECSS_LM_HOST=0.0.0.0 ECSS_LM_PORT=4321 ECSS_LM_LOG_LEVEL=info RELEASE_COOKIE=ecss-abf-lm-cluster
License Provider (LP) configuration
The
ecss-license-providerservice uses two configuration files:/etc/ecss/ecss-license-provider/config.envand/etc/ecss/ecss-license-provider/config.yaml.The information is saved to the
config.envfile when the ecss-license-provider is installed.The config.yaml file contains general settings for connecting to the ELM server and information about licenses: what licenses to take, where to take them from, and where to send them, all this information should be configured manually.
To fill out these fields, open theБлок кода title information in the file after installation elm_addresses: [] licenses: [] ecss_nodes: []
ecss-elm-adapterconfiguration file used in the version 3.17/etc/ecss/ecss-elm-adapter/config.env:Блок кода title on ecss2 cat /etc/ecss/ecss-elm-adapter/config.env ELM_HOST=elm.eltex-co.ru ELM_PORT=8099 ECSS_PRODUCT_ID=ECSS2000000 ECSS_LICENSE_KEY=ssw987654 LOG_LEVEL=info LICENCE_FAIL_TIMER_SECONDS=10 LICENCE_PULL_TIMER_SECONDS=360
In the
elm_addressesfield, you must specify a list of ELM servers to which you want to connect to obtain licenses.
First address in the list is used as the main one. Additional lines contain backup addresses.
Example:Блок кода title Example: elm_addresses: - "elm.eltex-co.ru:8099" - "192.168.111.22:8099" - "elm-3.eltex.loc:8099"
Then licenses in the licenses field are specified.- The id can be anything, as long as it is unique for each license. It only affects the license address on the License Provider itself (e.g., 0, 1, 2, 3).
- kind. For SSW, only SSW (in uppercase) is supported.
- type is set to elm if this license is to be requested from the ELM server. If you need to use an SSW file-based license, set the type to ecss_license.
- For the elm type, you must specify the license_key and product_id fields to identify the license.
- For the ecss_license type, specify the license field, which contains the static license key.
Примечание license_key = ECSS_LICENSE_KEY and product_id = ECSS_PRODUCT_ID parameters must match the data previously uploaded to the ELM server.
ecss_nodes block.
You must specify the details of the services that will receive the license. A service is defined by three parameters:
- id - the service identifier. In the case of SSW, this must match the ECSS_ID of the SSW being licensed.
- kind - the type of service being licensed. As with the licenses block, the SSW and AUP types are supported. For SSW, only the SSW type is supported.
- license_id - the identifier of the license that will be sent to this service. It corresponds to the license identifiers from the licenses block
Примечание Two SSWs with different ECSS_IDs cannot receive the same license; a configuration with such an assignment will be marked as invalid.
Additionally, two SSWs with identical ECSS_IDs cannot simultaneously obtain the same license from a single License Provider; therefore, it is extremely important to set your ECSS_ID correctly and ensure it is unique, at least within the scope of the License Provider being used.Подсказка ECSS_ID format.
It must begin and end with a Latin letter or a digit; periods and dashes may be used within the string.Без форматирования [A-Za-z0-9][A-Za-z0-9.-][A-Za-z0-9]
Примечание For an SSW operating in a cluster, specify only one entry in the ecss_nodes block per cluster; you cannot specify entries individually for each host. Otherwise, two requests with the same ECSS_ID will be generated, which is not allowed.
Блок кода title Example of a config.yaml file based on data from the file elm_addresses: - "elm.eltex-co.ru:8099" licenses: - id: 0 kind: SSW type: elm license_key: "ssw987654" product_id: "ECSS2000000" ecss_nodes: - id: eltex1.test kind: SSW license_id: 0
Restart the
ecss-license-provider.serviceservice to up date the configuration from the/etc/ecss/ecss-license-provider/config.yamlfile via the following command:Блок кода title for a cluster execute on both hosts sudo systemctl restart ecss-license-provider.service
Раскрыть title If a file-based license is used No addditional actions required.
- Update the ecss-node package:
Блок кода title on ecss2 sudo apt install ecss-node
Информация ecss-nodeinstallation questions:Question Answer Example Cookie for the core node: (specify the unique cookie for the core, the example uses ecss-core-example)
Предупреждение In a cluster cookies should be unique for the nodes of the same type.
ecss-core-example (needs to be entered) 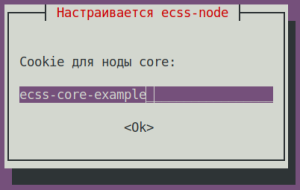
Cookie for the ds node: (specify the unique cookie for the ds, the example uses ecss-ds-example)
Предупреждение In a cluster cookies should be unique for the nodes of the same type.
ecss-ds-example (needs to be entered) 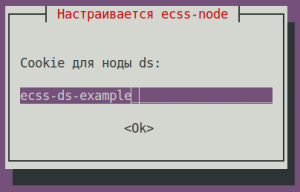
Cookie for the mediator node: (specify the unique cookie for the mediator, the example uses ecss-mediator-example)
Предупреждение In a cluster cookies should be unique for the nodes of the same type.
ecss-mediator-example (needs to be entered) 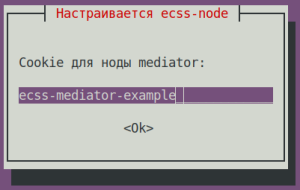
Cookie for the pa-sip node: (specify the unique cookie for the pa-sip, the example uses ecss-pa-sip-example)
Предупреждение In a cluster cookies should be unique for the nodes of the same type.
ecss-pa-sip-example(needs to be entered)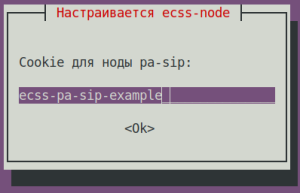
Cookie for the mycelium node: (specify the unique cookie for the mycelium, the example uses ecss-mycelium-example)
Предупреждение In a cluster cookies should be unique for the nodes of the same type.
ecss-mycelium-example (needs to be entered) 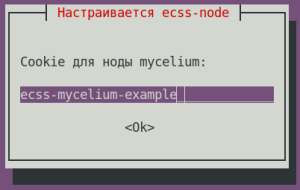
Предупреждение Accept all configuration file changes
- Updating the
- Enable the nodes.
Enable the SSW services using the following commands:Блок кода title on ecss2 sudo systemctl unmask ecss-ds ecss-mycelium ecss-mediator ecss-core ecss-pa-sip ecss-sorm
Блок кода title on ecss2 sudo systemctl enable ecss-ds ecss-mycelium ecss-mediator ecss-core ecss-pa-sip ecss-sorm
Предупреждение title Pay attention Before starting the SSW nodes, change the cluster name (to any other name—just make sure it doesn’t match that of a neighbor (ecss1) or any other potential PBX in your network, otherwise it will try to connect to it). To do this, in the
/etc/ecss/ecss-mycelium/mycelium.configfile change the "{cluster_name, 'eltex.test'}" line to "{cluster_name, 'eltex1.test'}", for example.Блок кода title on ecss2 sudo nano /etc/ecss/ecss-mycelium/mycelium.config
Блок кода title Example: [ {mycelium_broker, [ {cluster_name, 'eltex1.test'}, {compress_module, elx_data_nif}, {session_gc_timeout, 3000}, {queue_gc_timeout, infinity} . . . - Starting SSW on ecss2. Start the following services:
ecss-myceliumБлок кода title on ecss2 sudo systemctl start ecss-mycelium
ecss-dsБлок кода title on ecss2 sudo systemctl start ecss-ds
ecss-coreБлок кода title on ecss2 sudo systemctl start ecss-core
ecss-mediatorБлок кода title on ecss2 sudo systemctl start ecss-mediator
Предупреждение Do not start PA-SIP yet
- Check the status of services by running the
system-statuscommand in CoCon:Блок кода title performed in CoCon /system-status Checking... ┌─┬───────────────┬────────────────────────┬───────────────┬────────────┬──────┐ │ │ Node │ Release │ Erlang nodes │Mnesia nodes│Uptime│ ├─┼───────────────┼────────────────────────┼───────────────┼────────────┼──────┤ │ │core1@ecss2 │ecss-core-3.18.0.217 │core1@ecss2 │not running │1m 28s│ │ │ds1@ecss2 │ecss-ds-3.18.0.217 │ds1@ecss2 │ds1@ecss2 │1m 32s│ │ │md1@ecss2 │ecss-mediator-3.18.0.217│md1@ecss2 │md1@ecss2 │1m 23s│ │ │mycelium1@ecss2│ecss-mycelium-3.18.0.217│mycelium1@ecss2│not running │1m 37s│ │ │sorm1@ecss2 │ecss-sorm-3.18.0.217 │sorm1@ecss2 │not running │1m 56s│ └─┴───────────────┴────────────────────────┴───────────────┴────────────┴──────┘ All services are started. Active media resource selected list specific: ┌─────────────┬───────────┬─────────────┬───────────┬───────────┐ │ Node │ MSR │ MSR │ Cc-status │ Cc-uptime │ │ │ │ version │ │ │ ├─────────────┼───────────┼─────────────┼───────────┼───────────┤ │ core1@ecss2 │ msr.ecss1 │ 3.17.1.0.27 │ connected │ 00:00:14 │ │ │ msr.ecss2 │ 3.17.1.0.27 │ connected │ 00:00:16 │ └─────────────┴───────────┴─────────────┴───────────┴───────────┘
Раскрыть title If the ELM licensing is used Disable the ecss-elm-adapterservice on ecss1 using the command below:Блок кода title on ecss1 sudo systemctl stop ecss-elm-adapter.service
Configure SSW connection to License Provider by running the command below in CoCon, (in the example License Provider is installed in a cluster, host IPs are 10.0.10.51 and 10.0.10.52. Port value is taken from the
/etc/ecss/ecss-license-provider/config.envfile, 4321 by default):Блок кода title performed in CoCon /system/licence/manager/set --hosts [https://10.0.10.51:4321, https://10.0.10.52:4321]
Подсказка If License Provider is installed on SSW hosts specify the OAM IP addresses.
After command execution check the connection status using the following command:
Блок кода title performed in CoCon /system/licence/manager/show-status ┌───────────────────────┬───────┬─────┐ │ Host │Current│Alive│ ├───────────────────────┼───────┼─────┤ │https://10.0.10.51:4321│* │true │ │https://10.0.10.52:4321│ │true │ └───────────────────────┴───────┴─────┘
All hosts should have the alive=true status. One should have the "current" status.
- Current – shows to which host the SSW is connected. If there is a connection, it is specified by *, and if there isn't – nothing is specified.
- Alive – shows the host availability status (healthcheck).
Информация title Connecting to the License Manager A lack of connection to the License Provider or ELM will result in a loss of access to the token, leading to critical failures and a transition to emergency mode; after this period, if the connection is not restored, the system will switch to the default license.
This behavior applies only when operating in ELM mode.
If status of one of the License Provider hosts is current, a request for uploading the license to SSW can be sent using the following command:
Блок кода title performed in CoCon /cluster/storage/ds1/licence/request
Блок кода title type=elm /cluster/storage/ds1/licence/request Licence received [******* ] 6s 2ms Success: Licence parameters applied
Блок кода title type=elm /cluster/storage/ds1/licence/list-licence ┌──┬───────────────────┬────────────┬──────┬────────────────┬────────────────────┬────────────────────┬─────────┐ │Id│Creation date(UTC) │ SSW ID │Active│ Description │Comm. Exp. Date(UTC)│Expiration date(UTC)│Time left│ ├──┼───────────────────┼────────────┼──────┼────────────────┼────────────────────┼────────────────────┼─────────┤ │1 │03.02.2026 16:26:34│ECSS2000000 │* │ECSS ELM License│03.02.2027 16:26:34 │14.03.2026 10:49:12 │1d 6h 59m│ │0 │01.01.1990 00:00:00│ECSS DEFAULT│ │Default licence │ │ │ │ └──┴───────────────────┴────────────┴──────┴────────────────┴────────────────────┴────────────────────┴─────────┘
Раскрыть title If a file-based license is used No additional actions are required.
- Updating the
ecss-restfspackage.Подсказка Accept all new configuration files by choosing Y. Блок кода title on ecss2 sudo apt install ecss-restfs
- Updating the
ecss-media-serverpackage.Блок кода title on ecss2 sudo apt install ecss-media-server
- Updating the
ecss-media-resourcespackage.Блок кода title on ecss2 sudo apt install ecss-media-resources
- Updating the
ecss-web-confpackage.Блок кода title on ecss2 sudo apt install ecss-web-conf
Раскрыть title Updating optional service packages Check the list of installed services using the following command:
Блок кода title on ecss2 sudo dpkg -l | grep ecss
Блок кода title Example: sudo dpkg -l | grep ecss ii ecss-cc-ui 17.1.0.36+cc-ui amd64 Eltex/ECSS-10 UI and API for call center ii ecss-dns-env 18.0.0 amd64 Eltex/ECSS-10 Configuration settings for domain service ii ecss-media-resources 18.0.0 amd64 Eltex/ECSS-10 Media resources ii ecss-media-server 18.0.7 amd64 Eltex/ECSS-10 Media server ii ecss-node 18.0.217 amd64 Eltex/ECSS-10 Node services ii ecss-peeper-client 17.1.0.23 amd64 Eltex/ECSS-10 peeper client ii ecss-postgres-bdr-ssw 18.0.0+ssw amd64 Eltex/Postgres BDR ii ecss-restfs 18.0.21 amd64 Eltex/ECSS-10 RestFS API interface for filesystem ii ecss-teleconference-ui 17.1.0.23 amd64 Eltex/ECSS-10 UI and API for Teleconference ii ecss-user 18.0.0 amd64 Eltex/ECSS-10 SSW user environment ii ecss-utils 18.0.0 amd64 Eltex/ECSS-10 Utilities for reading binary logs ii ecss-web-conf 18.0.31 amd64 Eltex/ECSS-10 Web configurator
Based on the results of running the command, reinstall packages with version 17.1.*. In this example —
ecss-cc-ui/ecss-peeper-client/ecss-teleconference-ui.Updating the
ecss-teleconference-uipackage.Блок кода title on ecss2 sudo apt install ecss-teleconference-ui
Updating the
ecss-crm-serverpackage.Блок кода title on ecss2 sudo apt install ecss-crm-server
Updating the
ecss-cc-uipackage.Блок кода title on ecss2 sudo apt install ecss-cc-ui
Updating the
ecss-call-apipackage.Блок кода title on ecss2 sudo apt install ecss-call-api
Updating the
ecss-peeper-clientpackage.Блок кода title on ecss2 sudo apt install ecss-peeper-client
Раскрыть title If the ELM licensing is used Delete the no longer used ecss-elm-adapterpackage using the following command:Блок кода title on ecss2 sudo apt purge ecss-elm-adapter
Раскрыть title If a file-based license is used No additional actions are required
...
- Perform clusterization on ecss1:
Подсказка The
ecss-control attachcommand is run at this step to make replicating Postgres database possible. This behavior is safe because the node has already been shut down.Блок кода title on ecss1 sudo ecss-control attach
- Updating PostgreSQL:
- Check on which addresses the Postgres database is connected and run the following command:
Блок кода title on ecss1 psql -Upostgres -decss_storekeeper_db -h localhost -p5439 -c "SELECT node_local_dsn FROM bdr.bdr_nodes;"
Блок кода title Example: default password is "postgres1" psql -Upostgres -decss_storekeeper_db -h localhost -p5439 -c "SELECT node_local_dsn FROM bdr.bdr_nodes;" Password for user postgres: node_local_dsn --------------------------------------------------------------------------------------- host=10.0.10.51 port=5439 dbname=ecss_storekeeper_db user=postgres password=postgres1 host=10.0.10.52 port=5439 dbname=ecss_storekeeper_db user=postgres password=postgres1 (2 rows) - Disable the Docker container:
Блок кода title on ecss1 sudo docker compose -f /srv/ecss/ecss-postgres-bdr-ssw/docker-compose.container.yml down
Блок кода title Example: sudo docker compose -f /srv/ecss/ecss-postgres-bdr-ssw/docker-compose.container.yml down [+] down 2/2 ✔ Container ecss-postgres-bdr-ssw-postgres-container-1 Removed ✔ Network ecss-postgres-bdr-ssw_default Removed
- Delete the old deb package since it doesn't support the upgrade option:
Блок кода title on ecss1 sudo apt remove ecss-postgres-bdr-ssw
Предупреждение title Important! Run remove, not purge, because remove saves the volumes directory containing the database tables.
Блок кода title Example: sudo apt remove ecss-postgres-bdr-ssw Reading packetpackage lists… Ready . . . The following packetspackages will be REMOVED: ecss-postgres-bdr-ssw . . . Do you want to continue? [y/n] y Removing ecss-postgres-bdr-ssw (17.1.0.59+ssw) …
- Install the new deb package:
Блок кода title on ecss1 sudo apt install ecss-postgres-bdr-ssw
Предупреждение title Important! During the installation the same questions will be asked as during the initial installation:
The answers should be exactly as specified in the procedure, otherwise there will be an attempt to create a new database and the installation will result in error.Информация Question
Answer Example Current IP address of the network interface.
Предупреждение Select an IP: the same one used during the initial installation,
since replication is tied to specific IPs.(checked in step "a" of the instruction, 10.0.10.51 is used in the example)
10.0.10.51 (needs to be selected) 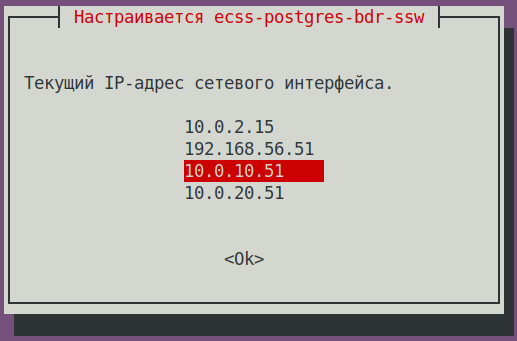
Installing to cluster?
Select <Yes>, if the package is installed to the cluster node.Yes (default value) 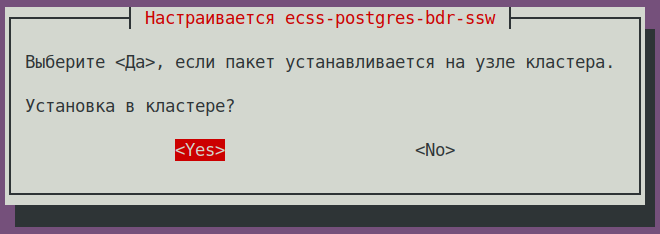
Is this node master?
Предупреждение NO! (Important! If a different answer is given, the impossible attempt
at creating a new bdr will be made and the installation will result in error)No (default value) 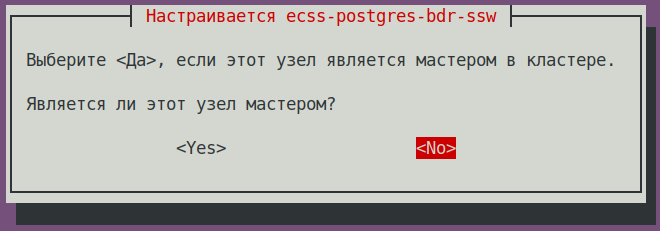
IP address used to connect to the cluster:
Предупреждение IP of the neighboring node (specified during its installation)
(checked in step "a" of the instruction, 10.0.10.52 is used in the example)
10.0.10.52 (needs to be specified) 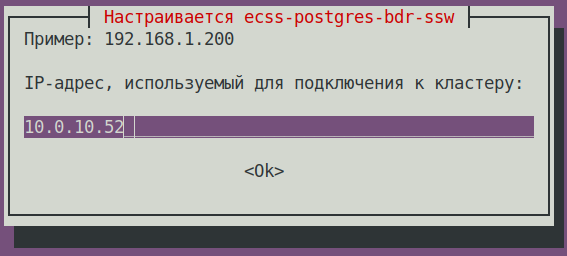
Блок кода title If the installation is successful, during the replication setup phase, we will see sudo apt install ecss-postgres-bdr-ssw . . . ============================= Checking replication status ============================= BDR replication is configured correctly: the data matches. . . . ======================================================= ======================================================= ecss-postgres-bdr-ssw successfully installed/updated! ======================================================= ======================================================= ┏┓┏┓┏┓┏┳┓┏┓┳┓┏┓┏┓ ┳┓┳┓┳┓ ┏┓┏┓┓ ┏ ┃┃┃┃┗┓ ┃ ┃┓┣┫┣ ┗┓ ┣┫┃┃┣┫ ┗┓┗┓┃┃┃ ┣┛┗┛┗┛ ┻ ┗┛┛┗┗┛┗┛ ┻┛┻┛┛┗ ┗┛┗┛┗┻┛
- After the installation, to make sure that the new image is uploaded and Docker has started, run the following command:
Блок кода title on ecss1 docker ps
Блок кода title Example: docker ps CONTAINER ID IMAGE COMMAND CREATED STATUS PORTS NAMES f53bd28c78ff git.eltex.loc:4567/ecss/ecss-postgresbdr:3.18 "/docker-entrypoint.…" 3 minutes ago Up 3 minutes 0.0.0.0:5439->5432/tcp, [::]:5439->5432/tcp ecss-postgres-bdr-ssw-postgres-container-1
- Check on which addresses the Postgres database is connected and run the following command:
- Updating the
ecss-dns-envpackage.Блок кода title on ecss1 sudo apt install ecss-dns-env
Подсказка When updating, accept all new configuration files using Y. - Updating the
ecss-userpackage:Блок кода title on ecss1 sudo apt install ecss-user
- Updating the
ecss-utilspackage:Блок кода title on ecss1 sudo apt install ecss-utils
Раскрыть title If the ELM licensing is used Install the License Provider package:
Блок кода title on ecss2 sudo apt install ecss-license-provider
When istalling the
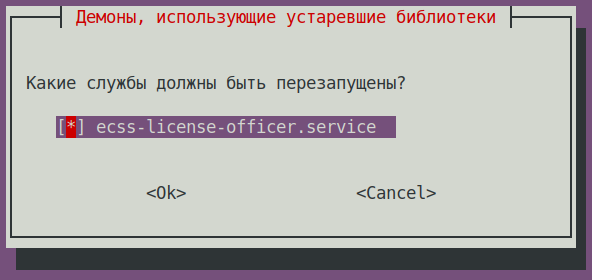
ecss-license-providerpackage, the following questions will be asked:Question Answer Example License Provider listen ip:
0.0.0.0 (default value) License Provider listen port: 4321 (default value) Log level: info (default value),
possible options: debug, error, infoLicense Provider cluster key: specify a unique name
ecss-lm-cluster (default value)Подсказка Managers with identical names will try to form a cluster for mutual redundancy. What services should be restarted? ecss-license-provider.service (default value)
The data is saved to the
/etc/ecss/ecss-license-provider/config.envfile:Без форматирования ECSS_LM_HOST=0.0.0.0 ECSS_LM_PORT=4321 ECSS_LM_LOG_LEVEL=info RELEASE_COOKIE=ecss-abf-lm-cluster
Configuring License Provider (LP)
The
ecss-license-providerservice uses two configuration files:/etc/ecss/ecss-license-provider/config.envand/etc/ecss/ecss-license-provider/config.yaml.Information is saved to the
config.envfile during theecss-license-providerpackage installation.The
config.yamlfile contains main settings for connecting to the ELM server: where to take licenses from, whic licenses to take, and where to send them. All of this should be configured manually.
To fill in these fields open theБлок кода title information in the file after installation elm_addresses: [] licenses: [] ecss_nodes: []
ecss-elm-adapterconfiguration file used in the version 3.17/etc/ecss/ecss-elm-adapter/config.env:Блок кода title on ecss2 cat /etc/ecss/ecss-elm-adapter/config.env ELM_HOST=elm.eltex-co.ru ELM_PORT=8099 ECSS_PRODUCT_ID=ECSS2000000 ECSS_LICENSE_KEY=ssw987654 LOG_LEVEL=info LICENCE_FAIL_TIMER_SECONDS=10 LICENCE_PULL_TIMER_SECONDS=360
It is necessary to specify the ELM servers list to which you wnat to connect to obtain licenses, in the
elm_addressesfield. First address in the list is used as the main one. Additional lines contain backup addresses.Подсказка Eltex ELM server address is "elm.eltex-co.ru:8099".
Example:
- "elm.eltex-co.ru:8099"
- "192.168.111.22:8099"
- "elm-3.eltex.loc:8099"
Then licenses are specified in the licenses field.- The id can be anything, as long as it is unique for each license. It only affects the license address on the License Provider itself (e.g., 0, 1, 2, 3).
- kind. For SSW, only SSW (in uppercase) is supported.
- type is set to elm if this license is to be requested from the ELM server. If you need to use an SSW file-based license, set the type to ecss_license.
- for the elm type, you must specify the license_key and product_id fields to identify the license.
- for the ecss_license type, specify the license field containing the static license key.
Примечание The license_key = ECSS_LICENSE_KEY and product_id = ECSS_PRODUCT_ID parameters must match the data previously uploaded to the ELM server.
The ecss_nodes block.
This block must specify the details of the services that will receive the license. A service is specified by three parameters:
- id - the service identifier. For SSW, this must match the ECSS_ID of the SSW being licensed.
- kind - the type of service being licensed. Similar to the licenses block, the SSW and AUP types are supported. For SSW, only SSW is supported.
- license_id - the identifier of the license that will be sent to this service. It corresponds to the license identifiers from the licenses block.
Примечание Two SSWs with different ECSS_IDs cannot receive the same license; a configuration with such an assignment will be marked as invalid
In addition, two SSWs with the same ECSS_ID cannot simultaneously obtain the same license from a single License Provider; therefore, it is extremely important to set your ECSS_ID correctly and ensure that it is unique, at least within the scope of the License Provider you are using.Подсказка ECSS_ID format.
It must begin and end with a Latin letter or number; periods and dashes may be used within the text.Без форматирования [A-Za-z0-9][A-Za-z0-9.-][A-Za-z0-9]
Примечание For an SSW running in a cluster, specify only one entry in the ecss_nodes block per cluster; you cannot specify entries individually for each host. Otherwise, two requests with the same ECSS_ID will be generated, which is not allowed.
Блок кода title Example of a config.yaml file based on data from the file elm_addresses: - "elm.eltex-co.ru:8099" licenses: - id: 0 kind: SSW type: elm license_key: "ssw987654" product_id: "ECSS2000000" ecss_nodes: - id: eltex1.test kind: SSW license_id: 0
Restart the
ecss-license-provider.serviceservice for updating configuration from the/etc/ecss/ecss-license-provider/config.yamlfile using the following command:Блок кода title on both hosts if there is a cluster sudo systemctl restart ecss-license-provider.service
Раскрыть title If a file-based license is used No additional actions are required
- Updating the
ecss-nodepackage:Блок кода title on ecss1 sudo apt install ecss-node
Информация title on ecss1 ecss-nodeinstallation questionsQuestion Answer Example Cookie for the core node: (specify the unique cookie for the core, the example uses ecss-core-example)
Предупреждение In a cluster configuration, nodes of the similar type should have the same cookies.
ecss-core-example (needs to be entered) Cookie for the ds node: (specify the unique cookie for the ds, the example uses ecss-ds-example)
Предупреждение In a cluster configuration, nodes of the similar type should have the same cookies.
ecss-ds-example (needs to be entered) Cookie for the mediator node: (specify the unique cookie for the mediator, the example uses ecss-mediator-example)
Предупреждение In a cluster configuration, nodes of the similar type should have the same cookies.
ecss-mediator-example (needs to be entered) Cookie for the pa-sip node: (specify the unique cookie for the pa-sip, the example uses ecss-pa-sip-example)
Предупреждение In a cluster configuration, nodes of the similar type should have the same cookies.
ecss-pa-sip-example (needs to be entered) Cookie for the mycelium node: (specify the unique cookie for the mycelium, the example uses ecss-mycelium-example)
Предупреждение In a cluster configuration, nodes of the similar type should have the same cookies.
ecss-mycelium-example (needs to be entered) Предупреждение Accept all configuration file changes
- Enable SSW services:
Блок кода title on ecss1 sudo systemctl unmask ecss-ds ecss-mycelium ecss-mediator ecss-core ecss-pa-sip
Блок кода title on ecss1 sudo systemctl enable ecss-ds ecss-mycelium ecss-mediator ecss-core ecss-pa-sip
Предупреждение title Attention Before starting the SSW nodes, change thename of the cluster to the name specified for the ecss2 server (in step 3.4). To do that, in the
/etc/ecss/ecss-mycelium/mycelium.configfile change the line "{cluster_name, 'eltex.test'}," to "{cluster_name, 'eltex1.test'}," for example.Блок кода title on ecss1 sudo nano /etc/ecss/ecss-mycelium/mycelium.config
Блок кода title Example: [ {mycelium_broker, [ {cluster_name, 'eltex1.test'}, {compress_module, elx_data_nif}, {session_gc_timeout, 3000}, {queue_gc_timeout, infinity} . . . - Launch mycelium service on ecss1 and use CoCon to make sure that the service is up and mycelium nodes of the ecss1 and ecss2 hosts are visible:
Блок кода title on ecss1 sudo systemctl start ecss-mycelium
Блок кода title performed in CoCon /system-status Checking... ┌─┬───────────────┬────────────────────────┬───────────────────────────────┬─────────────────────┬───────┐ │ │ Node │ Release │ Erlang nodes │ Mnesia nodes │Uptime │ ├─┼───────────────┼────────────────────────┼───────────────────────────────┼─────────────────────┼───────┤ │ │core1@ecss2 │ecss-core-3.18.0.249 │core1@ecss1,core1@ecss2 │not running │12m 12s│ │ │ds1@ecss2 │ecss-ds-3.18.0.249 │ds1@ecss1,ds1@ecss2 │ds1@ecss1,ds1@ecss2 │12m 12s│ │ │md1@ecss2 │ecss-mediator-3.18.0.249│md1@ecss1,md1@ecss2 │md1@ecss1,md1@ecss2 │12m 12s│ │ │mycelium1@ecss1│ecss-mycelium-3.18.0.249│mycelium1@ecss1,mycelium1@ecss2│not running │12m 14s│ │ │mycelium1@ecss2│ecss-mycelium-3.18.0.249│mycelium1@ecss1,mycelium1@ecss2│not running │12m 13s│ │ │sip1@ecss2 │ecss-pa-sip-3.18.0.249 │sip1@ecss1,sip1@ecss2 │sip1@ecss1,sip1@ecss2│12m 13s│ └─┴───────────────┴────────────────────────┴───────────────────────────────┴─────────────────────┴───────┘ All services are started. Active media resource selected list specific: ┌─────────────┬───────────┬─────────────┬───────────┬───────────┐ │ Node │ MSR │ MSR │ Cc-status │ Cc-uptime │ │ │ │ version │ │ │ ├─────────────┼───────────┼─────────────┼───────────┼───────────┤ │ core1@ecss2 │ msr.ecss1 │ 3.17.1.0.27 │ connected │ 00:10:50 │ │ │ msr.ecss2 │ 3.18.0.7 │ connected │ 00:10:51 │ └─────────────┴───────────┴─────────────┴───────────┴───────────┘
- On ecss1, start the ds service and use CoCon to verify that the ds service is available on both ecss1 and ecss2:
Блок кода title on ecss1 sudo systemctl start ecss-ds
Блок кода title performed in CoCon /system-status Checking... ┌─┬───────────────┬────────────────────────┬───────────────────────────────┬─────────────────────┬───────┐ │ │ Node │ Release │ Erlang nodes │ Mnesia nodes │Uptime │ ├─┼───────────────┼────────────────────────┼───────────────────────────────┼─────────────────────┼───────┤ │ │core1@ecss2 │ecss-core-3.18.0.249 │core1@ecss1,core1@ecss2 │not running │12m 12s│ │ │ds1@ecss1 │ecss-ds-3.18.0.249 │ds1@ecss1,ds1@ecss2 │ds1@ecss1,ds1@ecss2 │12m 14s│ │ │ds1@ecss2 │ecss-ds-3.18.0.249 │ds1@ecss1,ds1@ecss2 │ds1@ecss1,ds1@ecss2 │12m 12s│ │ │md1@ecss2 │ecss-mediator-3.18.0.249│md1@ecss1,md1@ecss2 │md1@ecss1,md1@ecss2 │12m 12s│ │ │mycelium1@ecss1│ecss-mycelium-3.18.0.249│mycelium1@ecss1,mycelium1@ecss2│not running │12m 14s│ │ │mycelium1@ecss2│ecss-mycelium-3.18.0.249│mycelium1@ecss1,mycelium1@ecss2│not running │12m 13s│ │ │sip1@ecss2 │ecss-pa-sip-3.18.0.249 │sip1@ecss1,sip1@ecss2 │sip1@ecss1,sip1@ecss2│12m 13s│ └─┴───────────────┴────────────────────────┴───────────────────────────────┴─────────────────────┴───────┘ All services are started. Active media resource selected list specific: ┌─────────────┬───────────┬─────────────┬───────────┬───────────┐ │ Node │ MSR │ MSR │ Cc-status │ Cc-uptime │ │ │ │ version │ │ │ ├─────────────┼───────────┼─────────────┼───────────┼───────────┤ │ core1@ecss2 │ msr.ecss1 │ 3.17.1.0.27 │ connected │ 00:10:50 │ │ │ msr.ecss2 │ 3.18.0.7 │ connected │ 00:10:51 │ └─────────────┴───────────┴─────────────┴───────────┴───────────┘
- Next, follow the same steps to start the
ecss-mediator,ecss-pa-sip, andecss-coreservices using the following commands:Блок кода title on ecss1 sudo systemctl start ecss-core
Блок кода title on ecss1 sudo systemctl start ecss-mediator
Check the status in CoCon:Блок кода title on ecss1 sudo systemctl start ecss-pa-sip
Блок кода title Result: /system-status Checking... ┌─┬───────────────┬────────────────────────┬───────────────────────────────┬─────────────────────┬───────┐ │ │ Node │ Release │ Erlang nodes │ Mnesia nodes │Uptime │ ├─┼───────────────┼────────────────────────┼───────────────────────────────┼─────────────────────┼───────┤ │ │core1@ecss1 │ecss-core-3.18.0.249 │core1@ecss1,core1@ecss2 │not running │12m 14s│ │ │core1@ecss2 │ecss-core-3.18.0.249 │core1@ecss1,core1@ecss2 │not running │12m 12s│ │ │ds1@ecss1 │ecss-ds-3.18.0.249 │ds1@ecss1,ds1@ecss2 │ds1@ecss1,ds1@ecss2 │12m 14s│ │ │ds1@ecss2 │ecss-ds-3.18.0.249 │ds1@ecss1,ds1@ecss2 │ds1@ecss1,ds1@ecss2 │12m 12s│ │ │md1@ecss1 │ecss-mediator-3.18.0.249│md1@ecss1,md1@ecss2 │md1@ecss1,md1@ecss2 │12m 14s│ │ │md1@ecss2 │ecss-mediator-3.18.0.249│md1@ecss1,md1@ecss2 │md1@ecss1,md1@ecss2 │12m 12s│ │ │mycelium1@ecss1│ecss-mycelium-3.18.0.249│mycelium1@ecss1,mycelium1@ecss2│not running │12m 14s│ │ │mycelium1@ecss2│ecss-mycelium-3.18.0.249│mycelium1@ecss1,mycelium1@ecss2│not running │12m 13s│ │ │sip1@ecss1 │ecss-pa-sip-3.18.0.249 │sip1@ecss1,sip1@ecss2 │sip1@ecss1,sip1@ecss2│12m 14s│ │ │sip1@ecss2 │ecss-pa-sip-3.18.0.249 │sip1@ecss1,sip1@ecss2 │sip1@ecss1,sip1@ecss2│12m 13s│ └─┴───────────────┴────────────────────────┴───────────────────────────────┴─────────────────────┴───────┘ All services are started. Active media resource selected list specific: ┌─────────────┬───────────┬─────────────┬───────────┬───────────┐ │ Node │ MSR │ MSR │ Cc-status │ Cc-uptime │ │ │ │ version │ │ │ ├─────────────┼───────────┼─────────────┼───────────┼───────────┤ │ core1@ecss1 │ msr.ecss1 │ 3.17.1.0.27 │ connected │ 00:10:51 │ │ │ msr.ecss2 │ 3.18.0.7 │ connected │ 00:10:48 │ │ core1@ecss2 │ msr.ecss1 │ 3.17.1.0.27 │ connected │ 00:10:50 │ │ │ msr.ecss2 │ 3.18.0.7 │ connected │ 00:10:51 │ └─────────────┴───────────┴─────────────┴───────────┴───────────┘
- Enable the
keepalivedservice.Блок кода title on ecss1 sudo systemctl enable --now keepalived
Раскрыть title If the ELM licensing is used Configure the SSW connection to the License Provider using the following command in CoCon (in this example, the License Provider is installed in a cluster, and the host IP addresses are 10.0.10.51 and 10.0.10.52, The default port value from the
/etc/ecss/ecss-license-provider/config.envfile is 4321)Блок кода title performed in CoCon /system/licence/manager/set --hosts [https://10.0.10.51:4321, https://10.0.10.52:4321]
After execution, check the connection status with the following command:
Блок кода title performed in CoCon /system/licence/manager/show-status ┌───────────────────────┬───────┬─────┐ │ Host │Current│Alive│ ├───────────────────────┼───────┼─────┤ │https://10.0.10.51:4321│* │true │ │https://10.0.10.52:4321│ │true │ └───────────────────────┴───────┴─────┘
All hosts must have a status of alive=true. One must be “current.”
- Current - indicates which host the SSW is connected to. If there is a connection, * is displayed; if not, nothing is displayed.
- Alive - displays the host’s availability status (healthcheck).
Информация title Connecting to the License Manager A lack of connection to the License Provider or ELM is equivalent to a lack of access to the token, which will lead to critical failures and a transition to emergency mode; after a certain period, if the connection is not restored, the system will switch to the Default license.
This behavior applies only when operating in ELM mode.
If the status for one of the License Provider hosts is shown as “current,” you can send a request to upload the license to the SSW using the following command:
Блок кода title performed in CoCon /cluster/storage/ds1/licence/request
Блок кода title type=elm /cluster/storage/ds1/licence/request Licence received [******* ] 6s 2ms Success: Licence parameters applied
Блок кода title type=elm /cluster/storage/ds1/licence/list-licence ┌──┬───────────────────┬────────────┬──────┬────────────────┬────────────────────┬────────────────────┬─────────┐ │Id│Creation date(UTC) │ SSW ID │Active│ Description │Comm. Exp. Date(UTC)│Expiration date(UTC)│Time left│ ├──┼───────────────────┼────────────┼──────┼────────────────┼────────────────────┼────────────────────┼─────────┤ │1 │03.02.2026 16:26:34│ECSS2000000 │* │ECSS ELM License│03.02.2027 16:26:34 │14.03.2026 10:49:12 │1d 6h 59m│ │0 │01.01.1990 00:00:00│ECSS DEFAULT│ │Default licence │ │ │ │ └──┴───────────────────┴────────────┴──────┴────────────────┴────────────────────┴────────────────────┴─────────┘
Раскрыть title If a file-based license is used No additional actions are required
- Updating the
ecss-restfspackage:Блок кода title on ecss1 sudo apt install ecss-restfs
- Updating the
ecss-media-serverpackage:
Update the configuration:Блок кода title on ecss1 sudo apt install ecss-media-server
To check and fix theБлок кода title на ecss1 sudo dpkg-reconfigure ecss-media-server
/etc/ecss/ecss-media-server/config.xmlfile if needed:Раскрыть title Example Блок кода title on ecss1 <?xml version="1.0" encoding="utf-8"?> <config date="05:27:38 07.12.2024"> <general log-level="3" log-rotate="yes" max-calls="8192" max-vid-calls="8192" max-in-group="512" load-sensor="media" load-delta="10" calls-delta="100" spool-dir-size="100M" log-name="msr.log" log-path="/var/log/ecss/media-server" use-srtp="disabled" enable-ice-transport="no" ice-update="no" aggressive-ice="yes" stun-server="" suspicious-mode="no"/> <transport bind-addr="10.0.20.82" port="5040" transport="udp+tcp"/> <!-- By default configured public TURN-server --> <turn-server use-turn="no" host="numb.viagenie.ca" user="webrtc@live.com" password="muazkh"/> <media mixer-clock-rate="8000" use-vad="no" cng-level="0" jb-size="60" rtcp-timeout="0" rtp-timeout="350" udp-src-check="no" cn-multiplier="3" port-start="12000" port-range="2048" tias-in-sdp="no" thread-cnt="2" vid-enc-threads="2" vid-dec-threads="2" video-conf-layout="evenly" keyframe-interval="1000" vid-decode-delay="100" silence-threshold="-30" dtmf-flash-disable="no" video-dscp="0" other-dscp="0" dummy-video-src="/usr/share/ecss-media-server/video/dummy_video.yuv" video-enc-width="640" video-enc-height="360" finalsilence="1000" rtcp-stat-dump="yes" dtmf-tg-fpc-loop="10" dtmf-tg-fit="1" dtmf-tg-fot="2" dtmf-tg-volume="12288"/> <codec pcma="3" pcmu="2" ilbc="0" gsm="0" g722="3" g726="0" g729="1" speex="5" l16="0" g7221="6" opus="0" h264="1" h263-1998="2" t38="1" tel-event-pt="0"/> <accounts> <!-- <dynamic msr_name="msr.name" realm="sip:127.0.0.1:5000" dtmf_mode="rfc+inband+info" auth_name="user" auth_password="password" /> --> </accounts> <pbyte> <mcc bind-addr="10.0.20.82" port="5700"/> </pbyte> <conf_dir path="/etc/ecss/ecss-media-server/conf.d"/> <metrics enable="no"/> <rtp> <auto addr-v4=""/> </rtp> </config> - Updating the
ecss-media-resourcespackage:Блок кода title on ecss1 sudo apt install ecss-media-resources
- Updating the
ecss-web-confpackage:Блок кода title on ecss1 sudo apt install ecss-web-conf
Раскрыть title Updating optional service packages Check the installed services list using the following command:
Блок кода title on ecss1 sudo dpkg -l | grep ecss
Блок кода title Example: sudo dpkg -l | grep ecss ii ecss-cc-ui 17.1.0.53+cc-ui amd64 Eltex/ECSS-10 UI and API for call center ii ecss-dns-env 18.0.0 amd64 Eltex/ECSS-10 Configuration settings for domain service ii ecss-license-master 1.0.77 amd64 Eltex/ECSS-10 license master ii ecss-media-resources 18.0.0 amd64 Eltex/ECSS-10 Media resources ii ecss-media-server 18.0.7 amd64 Eltex/ECSS-10 Media server ii ecss-node 18.0.249 amd64 Eltex/ECSS-10 Node services ii ecss-peeper-client 17.1.0.23 amd64 Eltex/ECSS-10 peeper client ii ecss-postgres-bdr-ssw 18.0.0+ssw amd64 Eltex/Postgres BDR ii ecss-restfs 18.0.22 amd64 Eltex/ECSS-10 RestFS API interface for filesystem ii ecss-teleconference-ui 17.1.0.31 amd64 Eltex/ECSS-10 UI and API for Teleconference ii ecss-user 18.0.0 amd64 Eltex/ECSS-10 SSW user environment ii ecss-utils 18.0.0 amd64 Eltex/ECSS-10 Utilities for reading binary logs ii ecss-web-conf 18.0.31 amd64 Eltex/ECSS-10 Web configurator
After executing teh command reinstall the packages taht have the 17.1.* version. In this example –
ecss-cc-ui/ecss-peeper-client/ecss-teleconference-ui.Updating the
ecss-teleconference-uipackage.Блок кода title on ecss1 sudo apt install ecss-teleconference-ui
Updating the
ecss-cc-uipackage:Блок кода title on ecss1 sudo apt install ecss-cc-ui
Updating the
ecss-peeper-clientpackage:Блок кода title on ecss1 sudo apt install ecss-peeper-client
Раскрыть title If the ELM licensing is used Delete the ecss-elm-adapterpackage that's no longer used, via the following command:Блок кода title on ecss1 sudo apt purge ecss-elm-adapter
Раскрыть title If a file-based license is used No additional actions are required.