
...
- Update the SSW repository:
Блок кода title on both hosts sudo sh -c "echo deb [arch=amd64] http://archive.eltex.org/ssw/jammy/3.18 stable main extras external > /etc/apt/sources.list.d/eltex-ecss10-stable.list"
- Update the packetspackages:
Блок кода title on both hosts sudo apt update
...
Предупреждение title Pay attention Make a full backup. - Update PostgreSQL:
- Check the addresses where the Postgres database is running, run the following command:
Блок кода title on ecss2 psql -Upostgres -decss_storekeeper_db -h localhost -p5439 -c "SELECT node_local_dsn FROM bdr.bdr_nodes;"
Подсказка Default password is "postgres1"
Блок кода title Example: psql -Upostgres -decss_storekeeper_db -h localhost -p5439 -c "SELECT node_local_dsn FROM bdr.bdr_nodes;" Password for user postgres: node_local_dsn --------------------------------------------------------------------------------------- host=10.0.10.51 port=5439 dbname=ecss_storekeeper_db user=postgres password=postgres1 host=10.0.10.52 port=5439 dbname=ecss_storekeeper_db user=postgres password=postgres1 (2 rows) - Disable the Docker container:
Блок кода title on ecss2 sudo docker compose -f /srv/ecss/ecss-postgres-bdr-ssw/docker-compose.container.yml down
Блок кода title Example sudo docker compose -f /srv/ecss/ecss-postgres-bdr-ssw/docker-compose.container.yml down [+] down 2/2 ✔ Container ecss-postgres-bdr-ssw-postgres-container-1 Removed ✔ Network ecss-postgres-bdr-ssw_default Removed
- Remove the old deb packetpackage, since it doesn't support the upgrade option:
Блок кода title on ecss2 sudo apt remove ecss-postgres-bdr-ssw
Предупреждение title Important! Execut the remove command, not purge, because 'remove' saves the 'volumes' directory containing the database tables.
Блок кода title Example: sudo apt remove ecss-postgres-bdr-ssw Reading package lists… Ready . . . The following packages will be DELETED: ecss-postgres-bdr-ssw . . . Would you like to continue? [Y/N] y Removing ecss-postgres-bdr-ssw (17.1.0.59+ssw) …
- Install the new deb package:
Блок кода title on ecss2 sudo apt install ecss-postgres-bdr-ssw
Предупреждение title Important! During installation, you will be asked the same questions as during the initial installation:
Your answers must match the instructions in the procedure exactly; otherwise, the system will attempt to create a new database, and the installation will fail.Информация Question Answer Example Current IP address of the network interface.
Предупреждение Select an IP address: the same one used during the initial installation,
since replication is tied to specific IP addresses.(checked in step "аa", 10.0.10.52 in the example).
10.0.10.52 (must be specified) 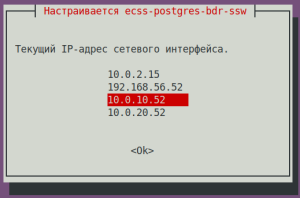
Installation in a cluster?
Select <Yes> if the package is being installed on a cluster node.Yes (default value) 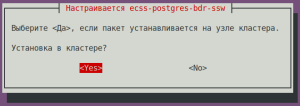
Is this node master?
Предупреждение title Important! Answer NO! Otherwise it'll try to create new bdr,
which will be impossible and will lead to installation error).No (default value) 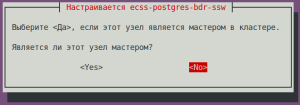
IP address used to connect to the cluster:
Предупреждение title Important! IP of the neighbor node (specified during its installation, checked in step "аa", 10.0.10.51 in the example).
10.0.10.51 (must be specified) 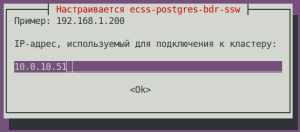
Блок кода title If the installation is successful, during the replication setup phase, we will see sudo apt install ecss-postgres-bdr-ssw . . . ============================= Checking replication status ============================= BDR replication is configured correctly: the data matches. . . . ======================================================= ======================================================= ecss-postgres-bdr-ssw successfully installed/updated! ======================================================= ======================================================= ┏┓┏┓┏┓┏┳┓┏┓┳┓┏┓┏┓ ┳┓┳┓┳┓ ┏┓┏┓┓ ┏ ┃┃┃┃┗┓ ┃ ┃┓┣┫┣ ┗┓ ┣┫┃┃┣┫ ┗┓┗┓┃┃┃ ┣┛┗┛┗┛ ┻ ┗┛┛┗┗┛┗┛ ┻┛┻┛┛┗ ┗┛┗┛┗┻┛
- After the installation make sure, that the new image is loaded and the docker started. Run the following command:
Блок кода title on ecss2 docker ps
Блок кода title Example: docker ps CONTAINER ID IMAGE COMMAND CREATED STATUS PORTS NAMES 80ef72d3b125 git.eltex.loc:4567/ecss/ecss-postgresbdr:3.18 "/docker-entrypoint.…" 8 minutes ago Up 8 minutes 0.0.0.0:5439->5432/tcp, [::]:5439->5432/tcp ecss-postgres-bdr-ssw-postgres-container-1
- Check the addresses where the Postgres database is running, run the following command:
- Updating SSW.
- Updating the
ecss-dns-envpackage:Блок кода title on ecss2 sudo apt install ecss-dns-env
- Updating the
ecss-userpackage:Блок кода title on ecss2 sudo apt install ecss-user
- Updating the
ecss-utilspackage:Блок кода title on ecss2 sudo apt install ecss-utils
Раскрыть title If the ELM licensing is used Install the License Provider package:
Блок кода title on ecss2 sudo apt install ecss-license-provider
When installing the
ecss-license-providerpackage the following questions will be asked:Questions Answers Examples License Provider listen ip:
0.0.0.0 (default value) 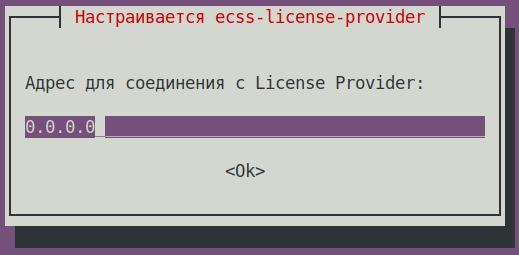
License Provider listen port: 4321 (default value) 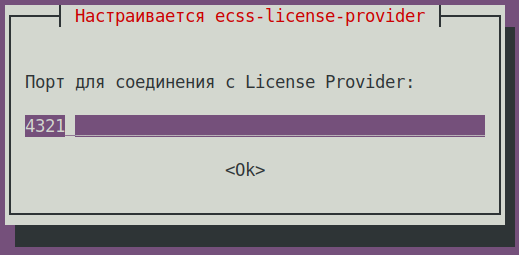
Log level: info (default value),
other options: debug, error, info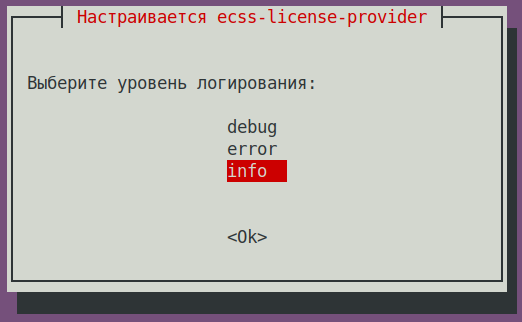
License Provider cluster key: specify a unique name
ecss-lm-cluster (default value)Подсказка Managers with the same names will attempt to form a cluster for mutual failover.
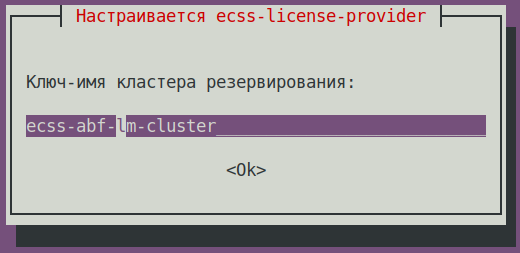
The data is saved to the
/etc/ecss/ecss-license-provider/config.envfile:Без форматирования ECSS_LM_HOST=0.0.0.0 ECSS_LM_PORT=4321 ECSS_LM_LOG_LEVEL=info RELEASE_COOKIE=ecss-abf-lm-cluster
License Provider (LP) configuration
The
ecss-license-providerservice uses two configuration files:/etc/ecss/ecss-license-provider/config.envand/etc/ecss/ecss-license-provider/config.yaml.The information is saved to the
config.envfile when the ecss-license-provider is installed.The config.yaml файл содержит основные настройки для подключения к ELM-серверу, откуда брать лицензии, какие лицензии, и куда их потом передавать, все это нужно сконфигурировать вручнуюfile contains general settings for connecting to the ELM server and information about licenses: what licenses to take, where to take them from, and where to send them, all this information should be configured manually.
To fill out these fields, open theБлок кода title information in the file after installation elm_addresses: [] licenses: [] ecss_nodes: []
ecss-elm-adapterconfiguration file used in the version 3.17/etc/ecss/ecss-elm-adapter/config.env:Блок кода title on ecss2 cat /etc/ecss/ecss-elm-adapter/config.env ELM_HOST=elm.eltex-co.ru ELM_PORT=8099 ECSS_PRODUCT_ID=ECSS2000000 ECSS_LICENSE_KEY=ssw987654 LOG_LEVEL=info LICENCE_FAIL_TIMER_SECONDS=10 LICENCE_PULL_TIMER_SECONDS=360
В поле In the
elm_addressesнеобходимо указать список серверов ELM, к которым мы хотим подключаться для получения лицензий.
Первый адрес в списке используется как основной. Дополнительные строки с адресами работают как резерв.
пример field, you must specify a list of ELM servers to which you want to connect to obtain licenses.
First address in the list is used as the main one. Additional lines contain backup addresses.
Example:Блок кода title ПримерExample: elm_addresses: - "elm.eltex-co.ru:8099" - "192.168.111.22:8099" - "elm-3.eltex.loc:8099"
Далее задаются лицензии в поле licensesThen licenses in the licenses field are specified.- id может быть любой, главное, чтобы был уникальный у каждой лицензии. Влияет только на адрес лицензии на самом License Provider (например The id can be anything, as long as it is unique for each license. It only affects the license address on the License Provider itself (e.g., 0, 1, 2, 3).
- kind. Для For SSW поддерживается только , only SSW (заглавными буквамиin uppercase) is supported.
- type выбирается как elm, если запрашивать данную лицензию нужно с ELM-сервера. Если нужно использовать файловую лицензию SSW, то тип выбирается как is set to elm if this license is to be requested from the ELM server. If you need to use an SSW file-based license, set the type to ecss_license.
- при elm типе необходимо задать поля For the elm type, you must specify the license_key и and product_id для идентификации лицензииfields to identify the license.при
- For the ecss_license типе задаётся поле license, содержащее ключ статической лицензии type, specify the license field, which contains the static license key.
Примечание Параметры license_key = ECSS_LICENSE_KEY иKEY and product_id = ECSS_PRODUCT_ID должны быть согласованы с данными, ранее загруженными на ELM-сервере.parameters must match the data previously uploaded to the ELM server.
Блок ecss_nodes block. В
You must specify the details of the services that will receive the license. A service is defined by three parameters нем необходимо указать данные сервисов, которые будут получать лицензию. Сервис задается тремя параметрами:
- id - идентификатор сервиса. В случае с SSW должен совпадать с the service identifier. In the case of SSW, this must match the ECSS_ID лицензируемого of the SSW being licensed.
- kind - тип лицензируемого сервиса. по аналогии с блоком лицензий поддерживаются типы SSW и AUP. Для SSW поддерживается только SSWthe type of service being licensed. As with the licenses block, the SSW and AUP types are supported. For SSW, only the SSW type is supported.
- license_id - идентификатор лицензии, которая будет отправляться на данный сервис. Соответствует идентификаторам лицензии из блока licenses.
Примечание Два SSW с разными ECSS_ID не могут получить одну и ту же лицензию, конфигурация с таким распределением будет помечена некорректной.
Кроме того, два SSW с одинаковыми ECSS_ID не смогут одновременно получать одну и ту же лицензию с одного License Provider, поэтому крайне важно корректно устанавливать свой ECSS_ID и делать его уникальным как минимум в зоне видимости используемого License Provider.- the identifier of the license that will be sent to this service. It corresponds to the license identifiers from the licenses block
Примечание Two SSWs with different ECSS_IDs cannot receive the same license; a configuration with such an assignment will be marked as invalid.
Additionally, two SSWs with identical ECSS_IDs cannot simultaneously obtain the same license from a single License Provider; therefore, it is extremely important to set your ECSS_ID correctly and ensure it is unique, at least within the scope of the License Provider being used.Подсказка ECSS_ID format.
It must begin and end with a Latin letter or a digit; periods and dashes may be used within the stringПодсказка Формат ECSS_ID.
Начинается и заканчивается обязательно латинской буквой или цифрой, в теле могут использоваться точки и тире.Без форматирования [A-Za-z0-9][A-Za-z0-9.-][A-Za-z0-9]
Примечание Для SSW, работающего в кластере, указываем только одну запись в блок ecss_nodes на кластер, индивидуально для каждого хоста указывать нельзя. Иначе будут генерироваться два запроса с одинаковым ECSS_ID что недопустимоFor an SSW operating in a cluster, specify only one entry in the ecss_nodes block per cluster; you cannot specify entries individually for each host. Otherwise, two requests with the same ECSS_ID will be generated, which is not allowed.
Блок кода title Пример: файла Example of a config.yaml на основе данных из файла file based on data from the file elm_addresses: - "elm.eltex-co.ru:8099" licenses: - id: 0 kind: SSW type: elm license_key: "ssw987654" product_id: "ECSS2000000" ecss_nodes: - id: eltex1.test kind: SSW license_id: 0
Выполнить перезагрузку сервиса Restart the
ecss-license-provider.serviceдля обновления конфигурации из файла service to up date the configuration from the/etc/ecss/ecss-license-provider/config.yamlследующей командой file via the following command:Блок кода title если кластер, то на обоих хостахfor a cluster execute on both hosts sudo systemctl restart ecss-license-provider.service
Раскрыть title В случае использования файловой лицензии Никаких дополнительных действий выполнять не требуется.
If a file-based license is used No addditional actions required.
- Update the Выполнить обновление пакета ecss-node package:
Блок кода title на on ecss2 sudo apt install ecss-node
Информация ВОПРОСЫ ПРИ УСТАНОВКЕ
ecss-nodeinstallation questions:ВопросQuestion ОтветAnswer ПримерExample Cookie для ноды for the core node: (указать уникальный cookie для core, в примере specify the unique cookie for the core, the example uses ecss-core-example)
Предупреждение В кластерной конфигурации cookie должны быть одинаковые для нод одного типаIn a cluster cookies should be unique for the nodes of the same type.
ecss-core-example (необходимо ввестиneeds to be entered) 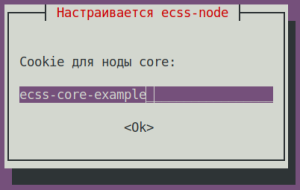
Cookie для ноды for the ds node: (указать уникальный cookie для ds, в примере specify the unique cookie for the ds, the example uses ecss-ds-example)
Предупреждение В кластерной конфигурации cookie должны быть одинаковые для нод одного типаIn a cluster cookies should be unique for the nodes of the same type.
ecss-ds-example (необходимо ввестиneeds to be entered) 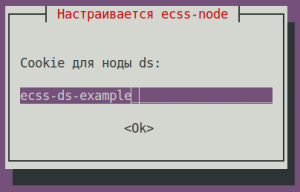
Cookie для ноды for the mediator node: (указать уникальный cookie для mediator, в примере specify the unique cookie for the mediator, the example uses ecss-mediator-example)
Предупреждение В кластерной конфигурации cookie должны быть одинаковые для нод одного типаIn a cluster cookies should be unique for the nodes of the same type.
ecss-mediator-example (необходимо ввестиneeds to be entered) 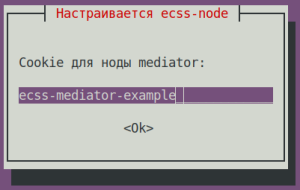
Cookie для ноды for the pa-sip node: (указать уникальный cookie для specify the unique cookie for the pa-sip, в примере the example uses ecss-pa-sip-example)
Предупреждение В кластерной конфигурации cookie должны быть одинаковые для нод одного типаIn a cluster cookies should be unique for the nodes of the same type.
ecss-pa-sip-example(необходимо ввестиneeds to be entered)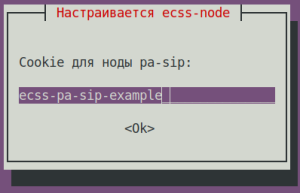
Cookie для ноды for the mycelium node: (указать уникальный cookie для mycelium, в примере specify the unique cookie for the mycelium, the example uses ecss-mycelium-example)
Предупреждение В кластерной конфигурации cookie должны быть одинаковые для нод одного типаIn a cluster cookies should be unique for the nodes of the same type.
ecss-mycelium-example (необходимо ввестиneeds to be entered) 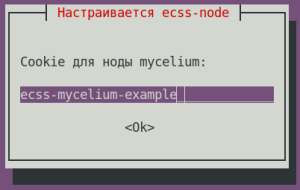
Cookie для ноды sorm: (указать уникальный cookie для sorm, в примере ecss-sorm-example)
Предупреждение В кластерной конфигурации cookie должны быть одинаковые для нод одного типа.
ecss-sorm-example(необходимо ввести)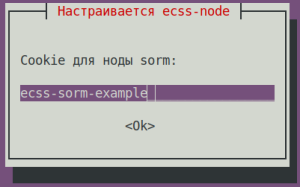
Предупреждение Принимаем все изменения файлов конфигурации
Предупреждение Accept all configuration file changes
- Updating the
- Enable the nodes.
Enable the SSW services using the following commandsВключаем ноды.
Включить сервисы SSW следующими командами:Блок кода title на on ecss2 sudo systemctl unmask ecss-ds ecss-mycelium ecss-mediator ecss-core ecss-pa-sip ecss-sorm
Блок кода title на on ecss2 sudo systemctl enable ecss-ds ecss-mycelium ecss-mediator ecss-core ecss-pa-sip ecss-sorm
Предупреждение title Внимание Pay attention Before starting the SSW nodes, change the cluster name (to any other name—just make sure it doesn’t match that of a neighbor (ecss1) or any other potential PBX in your network, otherwise it will try to connect to it). To do this, in the Перед запуском нод SSW изменяем имя кластера (на любое другое, главное, чтобы оно не совпадало с соседом (ecss1)/любой другой потенциальной АТС в вашей сети, иначе он попробует к ней подключиться). Для этого правим в файле
/etc/ecss/ecss-mycelium/mycelium.configстроку file change the "{cluster_name, 'eltex.test'}," для примера на line to "{cluster_name, 'eltex1.test'}", "for example.Блок кода title на on ecss2 sudo nano /etc/ecss/ecss-mycelium/mycelium.config
Без форматированияcode title ПримерExample: [ {mycelium_broker, [ {cluster_name, 'eltex1.test'}, {compress_module, elx_data_nif}, {session_gc_timeout, 3000}, {queue_gc_timeout, infinity} . . . - Запуск Starting SSW на on ecss2. Запустить следующие сервисыStart the following services:
ecss-myceliumБлок кода title на on ecss2 sudo systemctl start ecss-mycelium
ecss-dsБлок кода title на on ecss2 sudo systemctl start ecss-ds
ecss-coreБлок кода title на on ecss2 sudo systemctl start ecss-core
ecss-mediatorБлок кода title на on ecss2 sudo systemctl start ecss-mediator
Подсказка Если лицензия поддерживает СОРМ3, то запустить также сервис
ecss-sorm.
Если сервисБлок кода title на ecss2 sudo systemctl start ecss-sormecss-sormоказался замаскирован, то выполнить следующие командыПредупреждение Do not start PA-SIP yet
- Check the status of services by running the
system-statuscommand in CoCon:Блок кода title на ecss2 sudo systemctl unmask ecss-sorm sudo systemctl start ecss-sormПодсказка Для корректной работы SORM3 необходимо выполнить команду для SORM-экстрактора. Данную команду необходимо выполнить для каждого домена в SSW.
Блок кода title выполняется в CoCon /domain/<Имя_домена>/sorm3/set extractor_node sorm1@ecss2панель title Для примера: /domain/test_domain/sorm3/info┌──────────────────┬───────────┬─────────────┐│ Property │ Domain │ Value │├──────────────────┼───────────┼─────────────┤│adaptation │test_domain│undefined ││enabled │test_domain│true ││entrypoint_profile│test_domain│test ││extractor_ip │test_domain│192.168.47.94││extractor_node │test_domain│sorm1@ecss1 │└──────────────────┴───────────┴─────────────┘/domain/test_domain/sorm3/set extractor_node sorm1@ecss2Property "extractor_node" successfully changed from:sorm1@ecss1tosorm1@ecss2./domain/test_domain/sorm3/info┌──────────────────┬───────────┬─────────────┐│ Property │ Domain │ Value │├──────────────────┼───────────┼─────────────┤│adaptation │test_domain│undefined ││enabled │test_domain│true ││entrypoint_profile│test_domain│test ││extractor_ip │test_domain│192.168.47.94││extractor_node │test_domain│sorm1@ecss2 │└──────────────────┴───────────┴─────────────┘Команду повторить для всех доменов в SSW
Предупреждение Пока не запускаем PA-SIP
Проверить статус сервисов, для этого выполнить в CoCon командуperformed in CoCon /system-status Checking... ┌─┬───────────────┬────────────────────────┬───────────────┬────────────┬──────┐ │ │ Nodesystem-status:Без форматирования title выполняется в CoCon /system-status Checking... ┌─┬───────────────┬────────────────────────┬───────────────┬────────────┬──────┐ │ │ Node │ Release │ Erlang nodes │Mnesia nodes│Uptime│ ├─┼───────────────┼────────────────────────┼───────────────┼────────────┼──────┤ │ │core1@ecss2 │ecss-core-3.18.0.217 │core1@ecss2 │not running │1m 28s│ │ │ds1@ecss2 │ecss-ds-3.18.0.217 │ds1@ecss2 │ds1@ecss2 │1m 32s│ │ │md1@ecss2 │ecss-mediator-3.18.0.217│md1@ecss2 │md1@ecss2 │1m 23s│ │ │mycelium1@ecss2│ecss-mycelium-3.18.0.217│mycelium1@ecss2│not running │1m 37s│ │ │sorm1@ecss2 │ecss-sorm-3.18.0.217 │sorm1@ecss2 │not running │1m 56s│ └─┴───────────────┴────────────────────────┴───────────────┴────────────┴──────┘ All services are started. Active media resource selected list specific: ┌─────────────┬───────────┬─────────────┬───────────┬───────────┐ │ Node │ MSR │ MSR │ Cc-status │ Cc-uptime │ │ │ │ version │ │ │ ├─────────────┼───────────┼─────────────┼───────────┼───────────┤ │ core1@ecss2 │ msr.ecss1 │ 3.17.1.0.27 │ connected │ 00:00:14 │ │ │ msr.ecss2 │ 3.17.1.0.27 │ connected │ 00:00:16 │ └─────────────┴───────────┴─────────────┴───────────┴───────────┘ Раскрыть title В случае использования ELM-лицензирования If the ELM licensing is used Disable the На ecss1 отключить сервис ecss-elm-adapter, выполнив команду service on ecss1 using the command below:Блок кода title на on ecss1 sudo systemctl stop ecss-elm-adapter.service
Выполнить конфигурацию подключения SSW к License Provider следующей командой в Configure SSW connection to License Provider by running the command below in CoCon, (в примере in the example License Provider установлен в кластере, IP-адреса хостов is installed in a cluster, host IPs are 10.0.10.51 и and 10.0.10.52. Значение порта из файла Port value is taken from the
/etc/ecss/ecss-license-provider/config.envпо умолчанию 4321 file, 4321 by default):Блок кода title выполняется в performed in CoCon /system/licence/manager/set --hosts [https://10.0.10.51:4321, https://10.0.10.52:4321]
Подсказка В случае установки License Provider на хостах SSW указывать IP-адреса OAM.
If License Provider is installed on SSW hosts specify the OAM IP addresses.
After command execution check the connection status using the following commandПосле выполнения проверить статус подключения командой:
Блок кода title выполняется в performed in CoCon /system/licence/manager/show-status ┌───────────────────────┬───────┬─────┐ │ Host │Current│Alive│ ├───────────────────────┼───────┼─────┤ │https://10.0.10.51:4321│* │true │ │https://10.0.10.52:4321│ │true │ └───────────────────────┴───────┴─────┘
Все хосты должны иметь статус All hosts should have the alive=true . Один должен быть status. One should have the "current" status.
- Current - отображает к какому хосту подключён SSW. Если есть подключение, указывается *, если нет - ничего не указано.– shows to which host the SSW is connected. If there is a connection, it is specified by *, and if there isn't – nothing is specified.
- Alive – shows the host availability status Alive - отображает статус доступности хоста (healthcheck).
Информация title Подключение к Connecting to the License Manager Отсутствие подключения к A lack of connection to the License Provider или ELM будет равноценно отсутствию доступа к токену, что приведёт к критическим авариям, переходу в аварийный режим по истечению которого, если связь не будет восстановлена, система перейдёт на Default-лицензию.
Это поведение применимо только при работе в elm-режиме.
or ELM will result in a loss of access to the token, leading to critical failures and a transition to emergency mode; after this period, if the connection is not restored, the system will switch to the default license.
This behavior applies only when operating in ELM mode.
If status of one of the License Provider hosts is current, a request for uploading the license to SSW can be sent using the following commandЕсли статус к одному из хостов License Provider показан current, можно посылать запрос на загрузку лицензии на SSW командой:
Блок кода title выполняется в performed in CoCon /cluster/storage/ds1/licence/request
Блок кода title type=elm /cluster/storage/ds1/licence/request Licence received [******* ] 6s 2ms Success: Licence parameters applied
Блок кода title type=elm /cluster/storage/ds1/licence/list-licence ┌──┬───────────────────┬────────────┬──────┬────────────────┬────────────────────┬────────────────────┬─────────┐ │Id│Creation date(UTC) │ SSW ID │Active│ Description │Comm. Exp. Date(UTC)│Expiration date(UTC)│Time left│ ├──┼───────────────────┼────────────┼──────┼────────────────┼────────────────────┼────────────────────┼─────────┤ │1 │03.02.2026 16:26:34│ECSS2000000 │* │ECSS ELM License│03.02.2027 16:26:34 │14.03.2026 10:49:12 │1d 6h 59m│ │0 │01.01.1990 00:00:00│ECSS DEFAULT│ │Default licence │ │ │ │ └──┴───────────────────┴────────────┴──────┴────────────────┴────────────────────┴────────────────────┴─────────┘
Раскрыть title В случае использования файловой лицензии Никаких дополнительных действий выполнять не требуется.
If a file-based license is used No additional actions are required.
- Updating the Обновление пакета
ecss-restfspackage.Подсказка Принять все новые конфигурационные файлы, выбирая Accept all new configuration files by choosing Y. Блок кода title на on ecss2 sudo apt install ecss-restfs
- Обновление пакета Updating the
ecss-media-serverpackage.Блок кода title на on ecss2 sudo apt install ecss-media-server
- Обновление пакета Updating the
ecss-media-resources: package.Блок кода title на on ecss2 sudo apt install ecss-media-resources
- Обновление пакета Updating the
ecss-web-confpackage.Блок кода title на on ecss2 sudo apt install ecss-web-conf
Раскрыть title Обновление пакетов опциональных сервисов Updating optional service packages Check the list of installed services using the following commandПроверить список установленных сервисов командой:
Блок кода title на on ecss2 sudo dpkg -l | grep ecss
Без форматированияcode title ПримерExample: sudo dpkg -l | grep ecss ii ecss-cc-ui 17.1.0.36+cc-ui amd64 Eltex/ECSS-10 UI and API for call center ii ecss-dns-env 18.0.0 amd64 Eltex/ECSS-10 Configuration settings for domain service ii ecss-media-resources 18.0.0 amd64 Eltex/ECSS-10 Media resources ii ecss-media-server 18.0.7 amd64 Eltex/ECSS-10 Media server ii ecss-node 18.0.217 amd64 Eltex/ECSS-10 Node services ii ecss-peeper-client 17.1.0.23 amd64 Eltex/ECSS-10 peeper client ii ecss-postgres-bdr-ssw 18.0.0+ssw amd64 Eltex/Postgres BDR ii ecss-restfs 18.0.21 amd64 Eltex/ECSS-10 RestFS API interface for filesystem ii ecss-teleconference-ui 17.1.0.23 amd64 Eltex/ECSS-10 UI and API for Teleconference ii ecss-user 18.0.0 amd64 Eltex/ECSS-10 SSW user environment ii ecss-utils 18.0.0 amd64 Eltex/ECSS-10 Utilities for reading binary logs ii ecss-web-conf 18.0.31 amd64 Eltex/ECSS-10 Web configurator
По результатам выполнения команды переустановить пакеты имеющие версию Based on the results of running the command, reinstall packages with version 17.1.*. В данном примере In this example —
ecss-cc-ui/ecss-peeper-client/ecss-teleconference-ui.Обновление пакета Updating the
ecss-teleconference-uipackage.Блок кода title на on ecss2 sudo apt install ecss-teleconference-ui
Обновление пакета Updating the
ecss-crm-serverpackage.Блок кода title на on ecss2 sudo apt install ecss-crm-server
Обновление пакета Updating the
ecss-cc-uipackage.Блок кода title на on ecss2 sudo apt install ecss-cc-ui
Обновление пакета Updating the
ecss-call-apipackage.Блок кода title на on ecss2 sudo apt install ecss-call-api
Обновление пакета Updating the
ecss-peeper-clientpackage.Блок кода title на on ecss2 sudo apt install ecss-peeper-client
Раскрыть title В случае использования ELM-лицензирования If the ELM licensing is used Delete the no longer used Удалить больше не используемый пакет ecss-elm-adapterкомандой package using the following command:Блок кода title на on ecss2 sudo apt purge ecss-elm-adapter
Раскрыть title В случае использования файловой лицензии Никаких дополнительных действий выполнять не требуется.
4 Перевод нагрузки на ecss2
If a file-based license is used No additional actions are required
4 Transferring the load to ecss2
- Start the
keepalivedservice.
Before starting thekeepalivedservice, the Запуск сервисаkeepalived
Перед запуском сервисаkeepalivedнеобходимо стартовать сервисecss-pa-sipservice should be started:Блок кода title на on ecss2 sudo systemctl start ecss-pa-sip
Блок кода title на on ecss2 sudo systemctl enable --now keepalived
Информация Запуском сервисов Starting the
ecss-pa-sipиkeepalivedвыполняется перевод трафика с ecss1 на ecss2. Это первый шаг переключения трафика на ecss2, полный перевод будет после отключения сервисаkeepalivedна ecss1 на следующих шагах. andkeepalivedservices transfers traffic from ecss1 to ecss2. This is the first step of switching traffic to ecss2, complete transfer will happen after disabling thekeepalivedservcie on ecss1 during the following steps. - Prepare ecss1 for the update by transfering all traffic to ecss2 (the command is performed on Подготовить ecss1 к обновлению, для этого перевести весь трафик на ecss2 (команда выполняется на ecss1):
Блок кода title на on ecss1 sudo systemctl disable --now keepalived.service
- Командой
ifconfigпроверьте, что все VRRP-адреса Use theifconfigcommand to make sure that all VRRP addresses (VRRP IP-SIP1 / VRRP IP-SIP2) находятся на are located on ecss2.Блок кода title на on ecss2 ifconfig
5
...
Preparations on ecss1
Предупреждение title Внимание Выполнить полную резервную копию (см. Регламентное обслуживание и резервное копирование). Pay attention Do a complete backup - After splitting the cluster is is necessary to disable all nodes on the ecss1 serverПосле разделения кластера необходимо выключить все ноды на сервере ecss1:
Блок кода title на on ecss1 sudo systemctl mask --now ecss-ds ecss-mycelium ecss-mediator ecss-core ecss-pa-sip ecss-sorm
Информация При выполнении указанной команды будет уведомлениеAfter executing the command the following notification will appear.
Без форматирования Warning: The unit file, source configuration file or drop-ins of ecss-ds.service changed on disk. Run 'systemctl daemon-reload' to reload units. Warning: The unit file, source configuration file or drop-ins of ecss-mycelium.service changed on disk. Run 'systemctl daemon-reload' to reload units. Warning: The unit file, source configuration file or drop-ins of ecss-mediator.service changed on disk. Run 'systemctl daemon-reload' to reload units. Warning: The unit file, source configuration file or drop-ins of ecss-core.service changed on disk. Run 'systemctl daemon-reload' to reload units. Warning: The unit file, source configuration file or drop-ins of ecss-pa-sip.service changed on disk. Run 'systemctl daemon-reload' to reload units.
Эти сообщения не являются ошибкой. Продолжать выполнение процедурыThese messages are not an error. Continue the procedure.
6
...
Updating the SSW services on ecss1
- Perform clusterization on ecss1Выполнить на ecss1 объединение в кластер:
Подсказка Команда The
ecss-control attachвыполняется на этом шаге для возможности создания репликации БД Postgres. Такое поведение безопасно, потому что нода уже выведена из эксплуатации command is run at this step to make replicating Postgres database possible. This behavior is safe because the node has already been shut down.Блок кода title на on ecss1 sudo ecss-control attach
- Обновление Updating PostgreSQL:
- Проверить, на каких адресах подключена БД Postgres, выполнить командуCheck on which addresses the Postgres database is connected and run the following command:
Блок кода title на on ecss1 psql -Upostgres -decss_storekeeper_db -h localhost -p5439 -c "SELECT node_local_dsn FROM bdr.bdr_nodes;"
Блок кода title Пример: пароль по умолчанию Example: default password is "postgres1" psql -Upostgres -decss_storekeeper_db -h localhost -p5439 -c "SELECT node_local_dsn FROM bdr.bdr_nodes;" Password for user postgres: node_local_dsn --------------------------------------------------------------------------------------- host=10.0.10.51 port=5439 dbname=ecss_storekeeper_db user=postgres password=postgres1 host=10.0.10.52 port=5439 dbname=ecss_storekeeper_db user=postgres password=postgres1 (2 rows) - Выключить docker-контейнерDisable the Docker container:
Блок кода title на on ecss1 sudo docker compose -f /srv/ecss/ecss-postgres-bdr-ssw/docker-compose.container.yml down
Без форматированияcode title ПримерExample: sudo docker compose -f /srv/ecss/ecss-postgres-bdr-ssw/docker-compose.container.yml down [+] down 2/2 ✔ Container ecss-postgres-bdr-ssw-postgres-container-1 Removed ✔ Network ecss-postgres-bdr-ssw_default Removed - Удалить старый deb-пакет, так как опция upgrade не поддержанаDelete the old deb package since it doesn't support the upgrade option:
Блок кода title на on ecss1 sudo apt remove ecss-postgres-bdr-ssw
Предупреждение title ВажноImportant! Выполнить именно Run remove, а не not purge, так как remove сохраняет директорию volumes с таблицами нашей БД.because remove saves the volumes directory containing the database tables.
Блок кодаnoformat title ПримерExample: sudo apt remove ecss-postgres-bdr-ssw ЧтениеReading списковpackage пакетов…lists… ГотовоReady . . . Следующие пакеты будут УДАЛЕНЫThe following packages will be REMOVED: ecss-postgres-bdr-ssw . . . Хотите продолжитьDo you want to continue? [Дy/нn] y УдаляетсяRemoving ecss-postgres-bdr-ssw (17.1.0.59+ssw) …
- Установить новый deb-пакетInstall the new deb package:
Блок кода title на on ecss1 sudo apt install ecss-postgres-bdr-ssw
Предупреждение title Важно! Во время установки будут заданы вопросы как при первоначальной установке:
Ответы должны точно соответствовать указанным в процедуре, иначе будет выполнена попытка создать новую базу данных, и установка завершится ошибкой.Important! During the installation the same questions will be asked as during the initial installation:
The answers should be exactly as specified in the procedure, otherwise there will be an attempt to create a new database and the installation will result in error.Информация Question
Answer Example Current IP address of the network interface.
Предупреждение Select an IP: the same one used during the initial installation,
since replication is tied to specific IPs.(checked in step "a" of the instruction,
Информация Вопрос Ответ Пример Текущий IP-адрес сетевого интерфейса.
Предупреждение Выберите IP: тот же, что и при первоначальной установке,
так как репликация завязана на конкретные IP.(проверили в пункте "а", в примере 10.0.10.51 is used in the example)
10.0.10.51 (необходимо выбратьneeds to be selected) 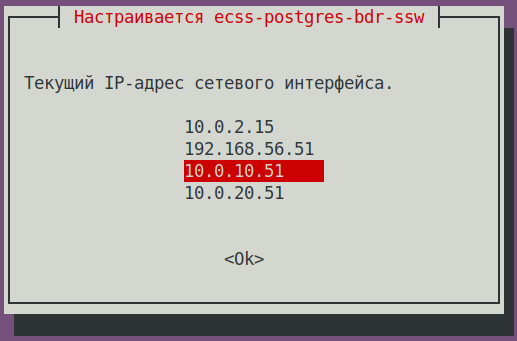
Установка в кластереInstalling to cluster?
Выберите <Да>, если пакет устанавливается на узле кластера.Select <Yes>, if the package is installed to the cluster node.Yes (default valueДа (значение по умолчанию) 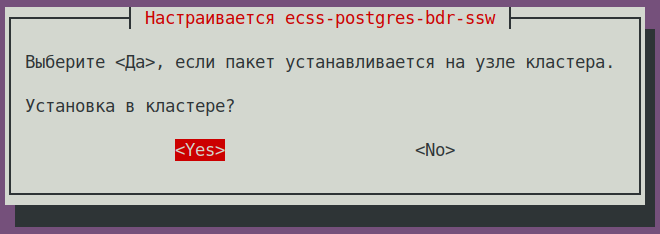 Является
 ли этот узел мастеромIs this node master?
Предупреждение НЕТNO! (Важно!, иначе он попытается создать новую bdr,
чего сделать не сможет и установка завершится с ошибкой)Нет (значение по умолчанию) 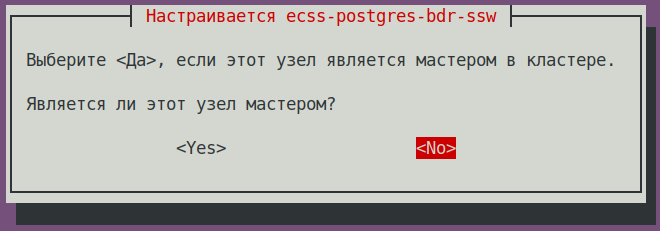
Important! If a different answer is given, the impossible attempt
at creating a new bdr will be made and the installation will result in error)No (default value) IP address used to connect to the clusterIP-адрес, используемый для подключения к кластеру:
Предупреждение IP соседней ноды (который указывали при её установке,of the neighboring node (specified during its installation)
(checked in step "a" of the instruction, проверили в пункте "а", в примере 10.0.10.52 is used in the example)
10.0.10.52 (необходимо указатьneeds to be specified) 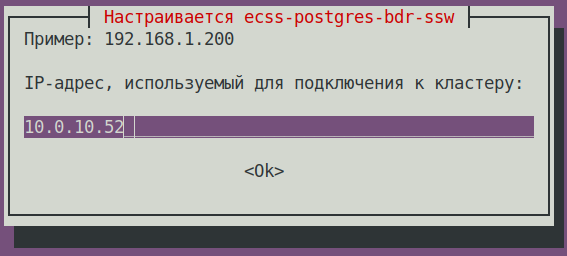
Блок кода title При успешной установке, на этапе поднятия репликации увидим:If the installation is successful, during the replication setup phase, we will see sudo apt install ecss-postgres-bdr-ssw . . . ============================= Checking replication status ============================= РепликацияBDR replication BDRis настроенаconfigured корректноcorrectly: the данныеdata совпадаютmatches. . . . ======================================================= ======================================================= ecss-postgres-bdr-ssw successfully installed/updated! ======================================================= ======================================================= ┏┓┏┓┏┓┏┳┓┏┓┳┓┏┓┏┓ ┳┓┳┓┳┓ ┏┓┏┓┓ ┏ ┃┃┃┃┗┓ ┃ ┃┓┣┫┣ ┗┓ ┣┫┃┃┣┫ ┗┓┗┓┃┃┃ ┣┛┗┛┗┛ ┻ ┗┛┛┗┗┛┗┛ ┻┛┻┛┛┗ ┗┛┗┛┗┻┛
- После установки проверить, что загрузился новый образ и стартовал docker, выполнить командуAfter the installation, to make sure that the new image is uploaded and Docker has started, run the following command:
Блок кода title на on ecss1 docker ps
Блок кода title ПримерExample: docker ps CONTAINER ID IMAGE COMMAND CREATED STATUS PORTS NAMES f53bd28c78ff git.eltex.loc:4567/ecss/ecss-postgresbdr:3.18 "/docker-entrypoint.…" 3 minutes ago Up 3 minutes 0.0.0.0:5439->5432/tcp, [::]:5439->5432/tcp ecss-postgres-bdr-ssw-postgres-container-1
- Проверить, на каких адресах подключена БД Postgres, выполнить командуCheck on which addresses the Postgres database is connected and run the following command:
- Обновление пакета Updating the
ecss-dns-envpackage.Блок кода title на on ecss1 sudo apt install ecss-dns-env
Подсказка При обновлении принимать новые конфигурационные файлы -When updating, accept all new configuration files using Y. - Обновление пакета Updating the
ecss-userpackage:Блок кода title на on ecss1 sudo apt install ecss-user
- Обновление пакета Updating the
ecss-utilspackage:Блок кода title на on ecss1 sudo apt install ecss-utils
Раскрыть title В случае использования ELM-лицензирования If the ELM licensing is used Install the License Provider packageУстановить пакет License Provider:
Блок кода title на on ecss2 sudo apt install ecss-license-provider
При установке пакета When istalling the
ecss-license-providerбудут заданы вопросы package, the following questions will be asked:ВопросQuestion Ответы Примеры Адрес для соединения с License Provider:Answer Example License Provider listen ip:
0.0.0.0 (значение по умолчаниюdefault value) Порт для соединения с License Provider:License Provider listen port: 4321 (значение по умолчаниюdefault value) Выберите уровень логирования:
Log level:info (значение по умолчаниюdefault value),
возможные вариантыpossible options: debug, error, infoКлюч-имя кластера резервирования:
License Provider cluster key:specify a unique nameуказать уникальное имя
ecss-lm-cluster (значение по умолчаниюdefault value)Подсказка Менеджеры с одинаковыми именами попытаются собраться в кластер для взаимного резервированияManagers with identical names will try to form a cluster for mutual redundancy. Какиеслужбы должны быть перезапущеныWhat services should be restarted? ecss-license-provider.service (значение по умолчаниюdefault value)
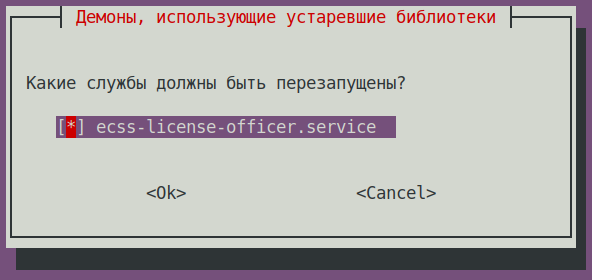
Данные сохраняются в файле The data is saved to the
/etc/ecss/ecss-license-provider/config.envfile:Без форматирования ECSS_LM_HOST=0.0.0.0 ECSS_LM_PORT=4321 ECSS_LM_LOG_LEVEL=info RELEASE_COOKIE=ecss-abf-lm-cluster
Конфигурация Configuring License Provider (LP)
Сервис The
ecss-license-providerиспользует два конфигурационных файла: service uses two configuration files:/etc/ecss/ecss-license-provider/config.envи and/etc/ecss/ecss-license-provider/config.yaml.В файл Information is saved to the
config.envинформация сохраняется в момент установки пакета file during theecss-license-providerpackage installation.The
config.yamlфайл содержит основные настройки для подключения к ELM-серверу, откуда брать лицензии, какие лицензии, и куда их потом передавать, все это нужно сконфигурировать вручную file contains main settings for connecting to the ELM server: where to take licenses from, whic licenses to take, and where to send them. All of this should be configured manually.
Для заполнения этих полей откройте файл конфигурации To fill in these fields open theБлок кода title информация в файле после установкиinformation in the file after installation elm_addresses: [] licenses: [] ecss_nodes: []
ecss-elm-adapterиспользуемого в версии configuration file used in the version 3.17/etc/ecss/ecss-elm-adapter/config.env:Блок кода title на on ecss2 cat /etc/ecss/ecss-elm-adapter/config.env ELM_HOST=elm.eltex-co.ru ELM_PORT=8099 ECSS_PRODUCT_ID=ECSS2000000 ECSS_LICENSE_KEY=ssw987654 LOG_LEVEL=info LICENCE_FAIL_TIMER_SECONDS=10 LICENCE_PULL_TIMER_SECONDS=360
В полеIt is necessary to specify the ELM servers list to which you wnat to connect to obtain licenses, in the
elm_addressesнеобходимо указать список серверов ELM, к которым мы хотим подключаться для получения лицензий. Первый адрес в списке используется как основной. Дополнительные строки с адресами работают как резерв field. First address in the list is used as the main one. Additional lines contain backup addresses.Подсказка Адрес ELM-сервера Элтекс - Eltex ELM server address is "elm.eltex-co.ru:8099".
примерExample:
- "elm.eltex-co.ru:8099"
- "192.168.111.22:8099"
- "elm-3.eltex.loc:8099"
Далее задаются лицензии в поле licenses
Then licenses are specified in the licenses field.- id может быть любой, главное, чтобы был уникальный у каждой лицензии. Влияет только на адрес лицензии на самом License Provider (например The id can be anything, as long as it is unique for each license. It only affects the license address on the License Provider itself (e.g., 0, 1, 2, 3).
- kind. Для For SSW поддерживается только , only SSW (заглавными буквамиin uppercase) is supported.
- type выбирается как elm, если запрашивать данную лицензию нужно с ELM-сервера. Если нужно использовать файловую лицензию SSW, то тип выбирается как is set to elm if this license is to be requested from the ELM server. If you need to use an SSW file-based license, set the type to ecss_license.
- при elm типе необходимо задать поля for the elm type, you must specify the license_key и and product_id для идентификации лицензииfields to identify the license.при
- for the ecss_license типе задаётся поле license содержащее ключ статической лицензииlicense type, specify the license field containing the static license key.
Примечание Параметры The license_key = ECSS_LICENSE_KEYи and product_id = ECSS_PRODUCT_IDдолжны быть согласованы с данными ранее загруженными на ELM-сервере. parameters must match the data previously uploaded to the ELM server.
The Блок ecss_nodes block. В
This block must specify the details of the services that will receive the license. A service is specified by three parameters нем необходимо указать данные сервисов, которые будут получать лицензию. Сервис задается тремя параметрами:
- id - идентификатор сервиса. В случае с SSW должен совпадать с the service identifier. For SSW, this must match the ECSS_ID лицензируемого of the SSW being licensed.
- kind - тип лицензируемого сервиса. по аналогии с блоком лицензий поддерживаются типы SSW и AUP. Для SSW поддерживается только SSWthe type of service being licensed. Similar to the licenses block, the SSW and AUP types are supported. For SSW, only SSW is supported.
- license_id - идентификатор лицензии, которая будет отправляться на данный сервис. Соответствует идентификаторам лицензии из блока licenses.
Примечание Два SSW с разными ECSS_ID не могут получить одну и ту же лицензию, конфигурация с таким распределением будет помечена некорректной.
Кроме того, два SSW с одинаковыми ECSS_ID не смогут одновременно получать одну и ту же лицензию с одного License Provider, поэтому крайне важно корректно устанавливать свой ECSS_ID и делать его уникальным как минимум в зоне видимости используемого License Provider.- the identifier of the license that will be sent to this service. It corresponds to the license identifiers from the licenses block.
Примечание Two SSWs with different ECSS_IDs cannot receive the same license; a configuration with such an assignment will be marked as invalid
In addition, two SSWs with the same ECSS_ID cannot simultaneously obtain the same license from a single License Provider; therefore, it is extremely important to set your ECSS_ID correctly and ensure that it is unique, at least within the scope of the License Provider you are using.Подсказка ECSS_ID format.
It must begin and end with a Latin letter or number; periods and dashes may be used within the text.Подсказка Формат ECSS_ID.
Начинается и заканчивается обязательно латинской буквой или цифрой, в теле могут использоваться точки и тире.Без форматирования [A-Za-z0-9][A-Za-z0-9.-][A-Za-z0-9]
Примечание Для SSW, работающего в кластере, указываем только одну запись в блок ecss_nodes на кластер, индивидуально для каждого хоста указывать нельзя. Иначе будут генерироваться два запроса с одинаковым ECSS_ID что недопустимоFor an SSW running in a cluster, specify only one entry in the ecss_nodes block per cluster; you cannot specify entries individually for each host. Otherwise, two requests with the same ECSS_ID will be generated, which is not allowed.
Блок кода title Пример: файла Example of a config.yaml на основе данных из файла file based on data from the file elm_addresses: - "elm.eltex-co.ru:8099" licenses: - id: 0 kind: SSW type: elm license_key: "ssw987654" product_id: "ECSS2000000" ecss_nodes: - id: eltex1.test kind: SSW license_id: 0
Выполнить перезагрузку сервиса Restart the
ecss-license-provider.serviceдля обновления конфигурации из файлаserviceservice for updating configuration from the/etc/ecss/ecss-license-provider/config.yamlследующей командой file using the following command:Блок кода title если кластер, то на обоих хостахon both hosts if there is a cluster sudo systemctl restart ecss-license-provider.service
Раскрыть title В случае использования файловой лицензии Никаких дополнительных действий выполнять не требуется.
If a file-based license is used No additional actions are required
- Updating the Обновление пакета
ecss-nodepackage:Блок кода title на on ecss1 sudo apt install ecss-node
Информация title на on ecss1 ВОПРОСЫ ПРИ УСТАНОВКЕ
ecss-node: installation questionsВопросQuestion ОтветAnswer ПримерExample Cookie для ноды for the core node: (указать уникальный cookie для core, в примере specify the unique cookie for the core, the example uses ecss-core-example)
Предупреждение В кластерной конфигурации cookie должны быть одинаковые для нод одного типаIn a cluster configuration, nodes of the similar type should have the same cookies.
ecss-core-example (необходимо ввестиneeds to be entered) Cookie для ноды for the ds node: (указать уникальный cookie для ds, в примере specify the unique cookie for the ds, the example uses ecss-ds-example)
Предупреждение В кластерной конфигурации cookie должны быть одинаковые для нод одного типаIn a cluster configuration, nodes of the similar type should have the same cookies.
ecss-ds-example (необходимо ввестиneeds to be entered) Cookie для ноды for the mediator node: (указать уникальный cookie для mediator, в примере specify the unique cookie for the mediator, the example uses ecss-mediator-example)
Предупреждение В кластерной конфигурации cookie должны быть одинаковые для нод одного типаIn a cluster configuration, nodes of the similar type should have the same cookies.
ecss-mediator-example (необходимо ввестиneeds to be entered) Cookie для ноды for the pa-sip node: (указать уникальный cookie для specify the unique cookie for the pa-sip, в примере the example uses ecss-pa-sip-example)
Предупреждение В кластерной конфигурации cookie должны быть одинаковые для нод одного типаIn a cluster configuration, nodes of the similar type should have the same cookies.
ecss-pa-sip-example (необходимо ввестиneeds to be entered) Cookie для ноды for the mycelium node: (указать уникальный cookie для mycelium, в примере ecss-mycelium-example)
Предупреждение В кластерной конфигурации cookie должны быть одинаковые для нод одного типа.
ecss-mycelium-example (необходимо ввести) Cookie для ноды sorm: (указать уникальный cookie для sorm, в примере ecss-sormspecify the unique cookie for the mycelium, the example uses ecss-mycelium-example)
Предупреждение В кластерной конфигурации cookie должны быть одинаковые для нод одного типаIn a cluster configuration, nodes of the similar type should have the same cookies.
ecss-sormmycelium-example (необходимо ввестиexample (needs to be entered) Предупреждение Принимаем все изменения файлов конфигурации
Accept all configuration file changes
- Enable SSW servicesВключить сервисы SSW:
Блок кода title на on ecss1 sudo systemctl unmask ecss-ds ecss-mycelium ecss-mediator ecss-core ecss-pa-sip
Блок кода title на on ecss1 sudo systemctl enable ecss-ds ecss-mycelium ecss-mediator ecss-core ecss-pa-sip
Предупреждение title Внимание Attention Before starting the SSW nodes, change thename of the cluster to the name specified for the ecss2 server (in step Перед запуском нод SSW, изменяем имя кластера (на имя указанное для сервера ecss2(на шаге 3.4). Для этого правим в файле To do that, in the
/etc/ecss/ecss-mycelium/mycelium.configстроку file change the line "{cluster_name, 'eltex.test'}," для примера на to "{cluster_name, 'eltex1.test'}," for example.Блок кода title на on ecss1 sudo nano /etc/ecss/ecss-mycelium/mycelium.config
Без форматированияcode title ПримерExample: [ {mycelium_broker, [ {cluster_name, 'eltex1.test'}, {compress_module, elx_data_nif}, {session_gc_timeout, 3000}, {queue_gc_timeout, infinity} . . . - На ecss1 запустите сервис mycelium и в CoCon проверьте, что сервис поднялся и видно ноды mycelium хостов ecss1/ ecss2Launch mycelium service on ecss1 and use CoCon to make sure that the service is up and mycelium nodes of the ecss1 and ecss2 hosts are visible:
Блок кода title на on ecss1 sudo systemctl start ecss-mycelium
Без форматированияcode title выполняется в performed in CoCon /system-status Checking... ┌─┬───────────────┬────────────────────────┬───────────────────────────────┬─────────────────────┬───────┐ │ │ Node │ Release │ Erlang nodes │ Mnesia nodes │Uptime │ ├─┼───────────────┼────────────────────────┼───────────────────────────────┼─────────────────────┼───────┤ │ │core1@ecss2 │ecss-core-3.18.0.249 │core1@ecss1,core1@ecss2 │not running │12m 12s│ │ │ds1@ecss2 │ecss-ds-3.18.0.249 │ds1@ecss1,ds1@ecss2 │ds1@ecss1,ds1@ecss2 │12m 12s│ │ │md1@ecss2 │ecss-mediator-3.18.0.249│md1@ecss1,md1@ecss2 │md1@ecss1,md1@ecss2 │12m 12s│ │ │mycelium1@ecss1│ecss-mycelium-3.18.0.249│mycelium1@ecss1,mycelium1@ecss2│not running │12m 14s│ │ │mycelium1@ecss2│ecss-mycelium-3.18.0.249│mycelium1@ecss1,mycelium1@ecss2│not running │12m 13s│ │ │sip1@ecss2 │ecss-pa-sip-3.18.0.249 │sip1@ecss1,sip1@ecss2 │sip1@ecss1,sip1@ecss2│12m 13s│ └─┴───────────────┴────────────────────────┴───────────────────────────────┴─────────────────────┴───────┘ All services are started. Active media resource selected list specific: ┌─────────────┬───────────┬─────────────┬───────────┬───────────┐ │ Node │ MSR │ MSR │ Cc-status │ Cc-uptime │ │ │ │ version │ │ │ ├─────────────┼───────────┼─────────────┼───────────┼───────────┤ │ core1@ecss2 │ msr.ecss1 │ 3.17.1.0.27 │ connected │ 00:10:50 │ │ │ msr.ecss2 │ 3.18.0.7 │ connected │ 00:10:51 │ └─────────────┴───────────┴─────────────┴───────────┴───────────┘
- На ecss1 запустите сервис ds и в CoCon проверить, что сервис ds доступен на обоих хостах ecss1/ On ecss1, start the ds service and use CoCon to verify that the ds service is available on both ecss1 and ecss2:
Блок кода title на on ecss1 sudo systemctl start ecss-ds
Без форматированияcode title выполняется в performed in CoCon /system-status Checking... ┌─┬───────────────┬────────────────────────┬───────────────────────────────┬─────────────────────┬───────┐ │ │ Node │ Release │ Erlang nodes │ Mnesia nodes │Uptime │ ├─┼───────────────┼────────────────────────┼───────────────────────────────┼─────────────────────┼───────┤ │ │core1@ecss2 │ecss-core-3.18.0.249 │core1@ecss1,core1@ecss2 │not running │12m 12s│ │ │ds1@ecss1 │ecss-ds-3.18.0.249 │ds1@ecss1,ds1@ecss2 │ds1@ecss1,ds1@ecss2 │12m 14s│ │ │ds1@ecss2 │ecss-ds-3.18.0.249 │ds1@ecss1,ds1@ecss2 │ds1@ecss1,ds1@ecss2 │12m 12s│ │ │md1@ecss2 │ecss-mediator-3.18.0.249│md1@ecss1,md1@ecss2 │md1@ecss1,md1@ecss2 │12m 12s│ │ │mycelium1@ecss1│ecss-mycelium-3.18.0.249│mycelium1@ecss1,mycelium1@ecss2│not running │12m 14s│ │ │mycelium1@ecss2│ecss-mycelium-3.18.0.249│mycelium1@ecss1,mycelium1@ecss2│not running │12m 13s│ │ │sip1@ecss2 │ecss-pa-sip-3.18.0.249 │sip1@ecss1,sip1@ecss2 │sip1@ecss1,sip1@ecss2│12m 13s│ └─┴───────────────┴────────────────────────┴───────────────────────────────┴─────────────────────┴───────┘ All services are started. Active media resource selected list specific: ┌─────────────┬───────────┬─────────────┬───────────┬───────────┐ │ Node │ MSR │ MSR │ Cc-status │ Cc-uptime │ │ │ │ version │ │ │ ├─────────────┼───────────┼─────────────┼───────────┼───────────┤ │ core1@ecss2 │ msr.ecss1 │ 3.17.1.0.27 │ connected │ 00:10:50 │ │ │ msr.ecss2 │ 3.18.0.7 │ connected │ 00:10:51 │ └─────────────┴───────────┴─────────────┴───────────┴───────────┘
- Далее такими же действиями запустить сервисы: Next, follow the same steps to start the
ecss-mediator,ecss-pa-sip, andecss-coreследующими командами services using the following commands:Блок кода title на on ecss1 sudo systemctl start ecss-core
Блок кода title на on ecss1 sudo systemctl start ecss-mediator
Проверить статус в Check the status in CoCon:Блок кода title на on ecss1 sudo systemctl start ecss-pa-sip
Без форматированияcode title РезультатResult: /system-status Checking... ┌─┬───────────────┬────────────────────────┬───────────────────────────────┬─────────────────────┬───────┐ │ │ Node │ Release │ Erlang nodes │ Mnesia nodes │Uptime │ ├─┼───────────────┼────────────────────────┼───────────────────────────────┼─────────────────────┼───────┤ │ │core1@ecss1 │ecss-core-3.18.0.249 │core1@ecss1,core1@ecss2 │not running │12m 14s│ │ │core1@ecss2 │ecss-core-3.18.0.249 │core1@ecss1,core1@ecss2 │not running │12m 12s│ │ │ds1@ecss1 │ecss-ds-3.18.0.249 │ds1@ecss1,ds1@ecss2 │ds1@ecss1,ds1@ecss2 │12m 14s│ │ │ds1@ecss2 │ecss-ds-3.18.0.249 │ds1@ecss1,ds1@ecss2 │ds1@ecss1,ds1@ecss2 │12m 12s│ │ │md1@ecss1 │ecss-mediator-3.18.0.249│md1@ecss1,md1@ecss2 │md1@ecss1,md1@ecss2 │12m 14s│ │ │md1@ecss2 │ecss-mediator-3.18.0.249│md1@ecss1,md1@ecss2 │md1@ecss1,md1@ecss2 │12m 12s│ │ │mycelium1@ecss1│ecss-mycelium-3.18.0.249│mycelium1@ecss1,mycelium1@ecss2│not running │12m 14s│ │ │mycelium1@ecss2│ecss-mycelium-3.18.0.249│mycelium1@ecss1,mycelium1@ecss2│not running │12m 13s│ │ │sip1@ecss1 │ecss-pa-sip-3.18.0.249 │sip1@ecss1,sip1@ecss2 │sip1@ecss1,sip1@ecss2│12m 14s│ │ │sip1@ecss2 │ecss-pa-sip-3.18.0.249 │sip1@ecss1,sip1@ecss2 │sip1@ecss1,sip1@ecss2│12m 13s│ └─┴───────────────┴────────────────────────┴───────────────────────────────┴─────────────────────┴───────┘ All services are started. Active media resource selected list specific: ┌─────────────┬───────────┬─────────────┬───────────┬───────────┐ │ Node │ MSR │ MSR │ Cc-status │ Cc-uptime │ │ │ │ version │ │ │ ├─────────────┼───────────┼─────────────┼───────────┼───────────┤ │ core1@ecss1 │ msr.ecss1 │ 3.17.1.0.27 │ connected │ 00:10:51 │ │ │ msr.ecss2 │ 3.18.0.7 │ connected │ 00:10:48 │ │ core1@ecss2 │ msr.ecss1 │ 3.17.1.0.27 │ connected │ 00:10:50 │ │ │ msr.ecss2 │ 3.18.0.7 │ connected │ 00:10:51 │ └─────────────┴───────────┴─────────────┴───────────┴───────────┘
- Активация сервиса Enable the
keepalivedservice.Блок кода title на on ecss1 sudo systemctl enable --now keepalived
Раскрыть title В случае использования ELM-лицензирования If the ELM licensing is used Configure the SSW connection to the License Provider using the following command in CoCon (in this example, the License Provider is installed in a cluster, and the host IP addresses are Выполнить конфигурацию подключения SSW к License Provider следующей командой в CoCon, (в примере License Provider установлен в кластере, IP-адреса хостов 10.0.10.51 и and 10.0.10.52. значение порта из файла , The default port value from the
/etc/ecss/ecss-license-provider/config.envпо умолчанию file is 4321):Блок кода title выполняется в performed in CoCon /system/licence/manager/set --hosts [https://10.0.10.51:4321, https://10.0.10.52:4321]
После выполнения проверить статус подключения командойAfter execution, check the connection status with the following command:
Блок кода title выполняется в performed in CoCon /system/licence/manager/show-status ┌───────────────────────┬───────┬─────┐ │ Host │Current│Alive│ ├───────────────────────┼───────┼─────┤ │https://10.0.10.51:4321│* │true │ │https://10.0.10.52:4321│ │true │ └───────────────────────┴───────┴─────┘
Все хосты должны иметь статус All hosts must have a status of alive=true. Один должен быть "current". One must be “current.”
- Current - отображает к какому хосту подключён SSW. Если есть подключение, указывается *, если нет - ничего не указано.indicates which host the SSW is connected to. If there is a connection, * is displayed; if not, nothing is displayed.
- Alive - displays the host’s availability status Alive - отображает статус доступности хоста (healthcheck).
Информация title Подключение к Connecting to the License Manager Отсутствие подключения к License Provider \ ELM будет равноценно отсутствию доступа к токену, что приведёт к критическим авариям, переходу в аварийный режим по истечению которого, если связь не будет восстановлена, система перейдёт на Default-лицензию.
Это поведение применимо только при работе в elm-режиме.
A lack of connection to the License Provider or ELM is equivalent to a lack of access to the token, which will lead to critical failures and a transition to emergency mode; after a certain period, if the connection is not restored, the system will switch to the Default license.
This behavior applies only when operating in ELM mode.
If the status for one of the License Provider hosts is shown as “current,” you can send a request to upload the license to the SSW using the following commandЕсли статус к одному из хостов License Provider показан current, можно посылать запрос на загрузку лицензии на SSW командой:
Блок кода title выполняется в performed in CoCon /cluster/storage/ds1/licence/request
Блок кода title type=elm /cluster/storage/ds1/licence/request Licence received [******* ] 6s 2ms Success: Licence parameters applied
Блок кода title type=elm /cluster/storage/ds1/licence/list-licence ┌──┬───────────────────┬────────────┬──────┬────────────────┬────────────────────┬────────────────────┬─────────┐ │Id│Creation date(UTC) │ SSW ID │Active│ Description │Comm. Exp. Date(UTC)│Expiration date(UTC)│Time left│ ├──┼───────────────────┼────────────┼──────┼────────────────┼────────────────────┼────────────────────┼─────────┤ │1 │03.02.2026 16:26:34│ECSS2000000 │* │ECSS ELM License│03.02.2027 16:26:34 │14.03.2026 10:49:12 │1d 6h 59m│ │0 │01.01.1990 00:00:00│ECSS DEFAULT│ │Default licence │ │ │ │ └──┴───────────────────┴────────────┴──────┴────────────────┴────────────────────┴────────────────────┴─────────┘
Раскрыть title В случае использования файловой лицензии Никаких дополнительных действий выполнять не требуется.
If a file-based license is used No additional actions are required
- Updating the Обновление пакета
ecss-restfspackage:Блок кода title на on ecss1 sudo apt install ecss-restfs
- Обновление пакета Updating the
ecss-media-serverpackage:
Актуализировать конфигурациюUpdate the configuration:Блок кода title на on ecss1 sudo apt install ecss-media-server
Проверить и при необходимости исправить файл: To check and fix theБлок кода title на ecss1 sudo dpkg-reconfigure ecss-media-server
/etc/ecss/ecss-media-server/config.xmlfile if needed:Раскрыть title примерExample Без форматированияcode title на on ecss1 <?xml version="1.0" encoding="utf-8"?> <config date="05:27:38 07.12.2024"> <general log-level="3" log-rotate="yes" max-calls="8192" max-vid-calls="8192" max-in-group="512" load-sensor="media" load-delta="10" calls-delta="100" spool-dir-size="100M" log-name="msr.log" log-path="/var/log/ecss/media-server" use-srtp="disabled" enable-ice-transport="no" ice-update="no" aggressive-ice="yes" stun-server="" suspicious-mode="no"/> <transport bind-addr="10.0.20.82" port="5040" transport="udp+tcp"/> <!-- By default configured public TURN-server --> <turn-server use-turn="no" host="numb.viagenie.ca" user="webrtc@live.com" password="muazkh"/> <media mixer-clock-rate="8000" use-vad="no" cng-level="0" jb-size="60" rtcp-timeout="0" rtp-timeout="350" udp-src-check="no" cn-multiplier="3" port-start="12000" port-range="2048" tias-in-sdp="no" thread-cnt="2" vid-enc-threads="2" vid-dec-threads="2" video-conf-layout="evenly" keyframe-interval="1000" vid-decode-delay="100" silence-threshold="-30" dtmf-flash-disable="no" video-dscp="0" other-dscp="0" dummy-video-src="/usr/share/ecss-media-server/video/dummy_video.yuv" video-enc-width="640" video-enc-height="360" finalsilence="1000" rtcp-stat-dump="yes" dtmf-tg-fpc-loop="10" dtmf-tg-fit="1" dtmf-tg-fot="2" dtmf-tg-volume="12288"/> <codec pcma="3" pcmu="2" ilbc="0" gsm="0" g722="3" g726="0" g729="1" speex="5" l16="0" g7221="6" opus="0" h264="1" h263-1998="2" t38="1" tel-event-pt="0"/> <accounts> <!-- <dynamic msr_name="msr.name" realm="sip:127.0.0.1:5000" dtmf_mode="rfc+inband+info" auth_name="user" auth_password="password" /> --> </accounts> <pbyte> <mcc bind-addr="10.0.20.82" port="5700"/> </pbyte> <conf_dir path="/etc/ecss/ecss-media-server/conf.d"/> <metrics enable="no"/> <rtp> <auto addr-v4=""/> </rtp> </config> - Обновление пакета Updating the
ecss-media-resourcespackage:Блок кода title на on ecss1 sudo apt install ecss-media-resources
- Обновление пакета Updating the
ecss-web-confpackage:Блок кода title на on ecss1 sudo apt install ecss-web-conf
Раскрыть title Обновление пакетов опциональных сервисов Updating optional service packages Check the installed services list using the following commandПроверить список установленных сервисов командой:
Блок кода title на on ecss1 sudo dpkg -l | grep ecss
Без форматированияcode title ПримерExample: sudo dpkg -l | grep ecss ii ecss-cc-ui 17.1.0.53+cc-ui amd64 Eltex/ECSS-10 UI and API for call center ii ecss-dns-env 18.0.0 amd64 Eltex/ECSS-10 Configuration settings for domain service ii ecss-license-master 1.0.77 amd64 Eltex/ECSS-10 license master ii ecss-media-resources 18.0.0 amd64 Eltex/ECSS-10 Media resources ii ecss-media-server 18.0.7 amd64 Eltex/ECSS-10 Media server ii ecss-node 18.0.249 amd64 Eltex/ECSS-10 Node services ii ecss-peeper-client 17.1.0.23 amd64 Eltex/ECSS-10 peeper client ii ecss-postgres-bdr-ssw 18.0.0+ssw amd64 Eltex/Postgres BDR ii ecss-restfs 18.0.22 amd64 Eltex/ECSS-10 RestFS API interface for filesystem ii ecss-teleconference-ui 17.1.0.31 amd64 Eltex/ECSS-10 UI and API for Teleconference ii ecss-user 18.0.0 amd64 Eltex/ECSS-10 SSW user environment ii ecss-utils 18.0.0 amd64 Eltex/ECSS-10 Utilities for reading binary logs ii ecss-web-conf 18.0.31 amd64 Eltex/ECSS-10 Web configurator
По результатам выполнения команды переустановить пакеты имеющие версию After executing the command reinstall the packages taht have the 17.1.* . В данном примере — version. In this example –
ecss-cc-ui/ecss-peeper-client/ecss-teleconference-ui.Обновление пакета Updating the
ecss-teleconference-uipackage.Блок кода title на on ecss1 sudo apt install ecss-teleconference-ui
Обновление пакета Updating the
ecss-cc-uipackage:Блок кода title на on ecss1 sudo apt install ecss-cc-ui
Обновление пакета Updating the
ecss-peeper-clientpackage:Блок кода title на on ecss1 sudo apt install ecss-peeper-client
Раскрыть title В случае использования ELM-лицензирования If the ELM licensing is used Delete the Удалить больше не используемый пакет ecss-elm-adapterкомандой package that's no longer used, via the following command:Блок кода title на on ecss1 sudo apt purge ecss-elm-adapter
Раскрыть title В случае использования файловой лицензии Никаких дополнительных действий выполнять не требуется.
7 Проверка обновления
If a file-based license is used No additional actions are required.
7 Checking the update
- After the update is complete, make sure that all SSW services are functioning properlyПосле выполнения обновления проверить работу всех сервисов SSW.