
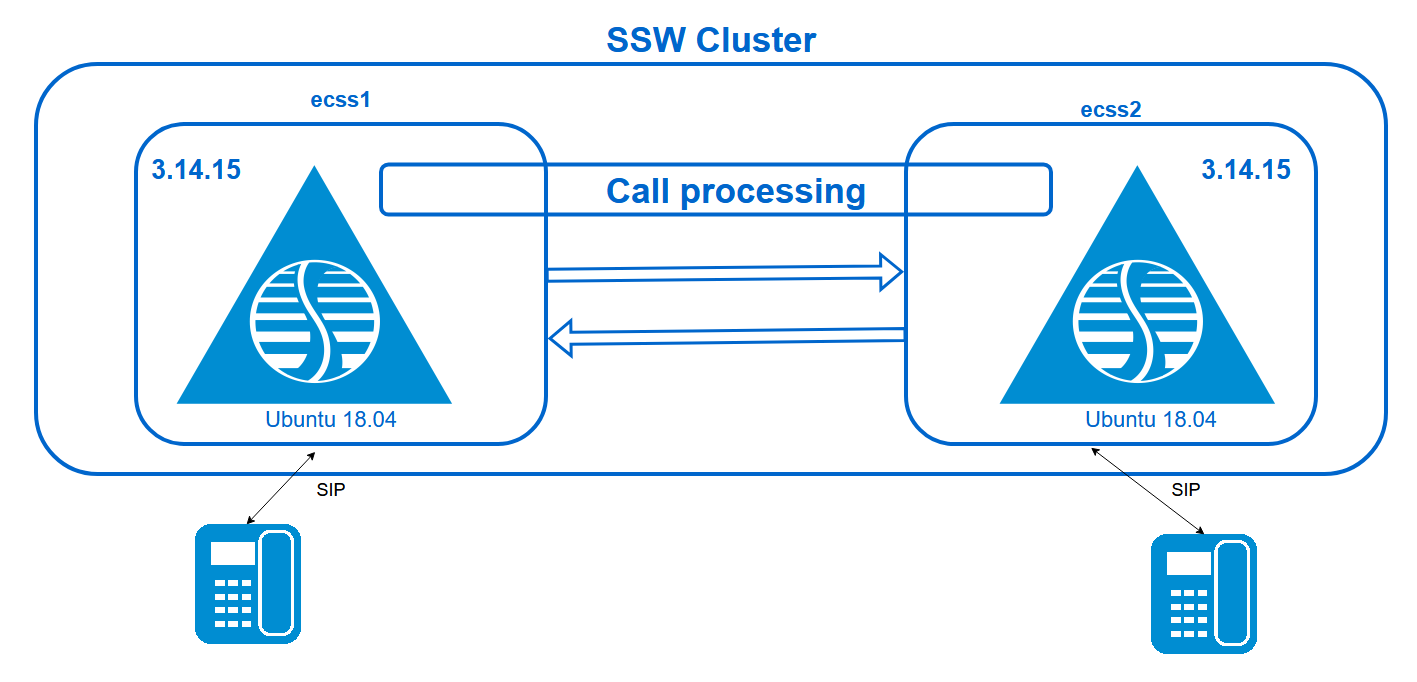
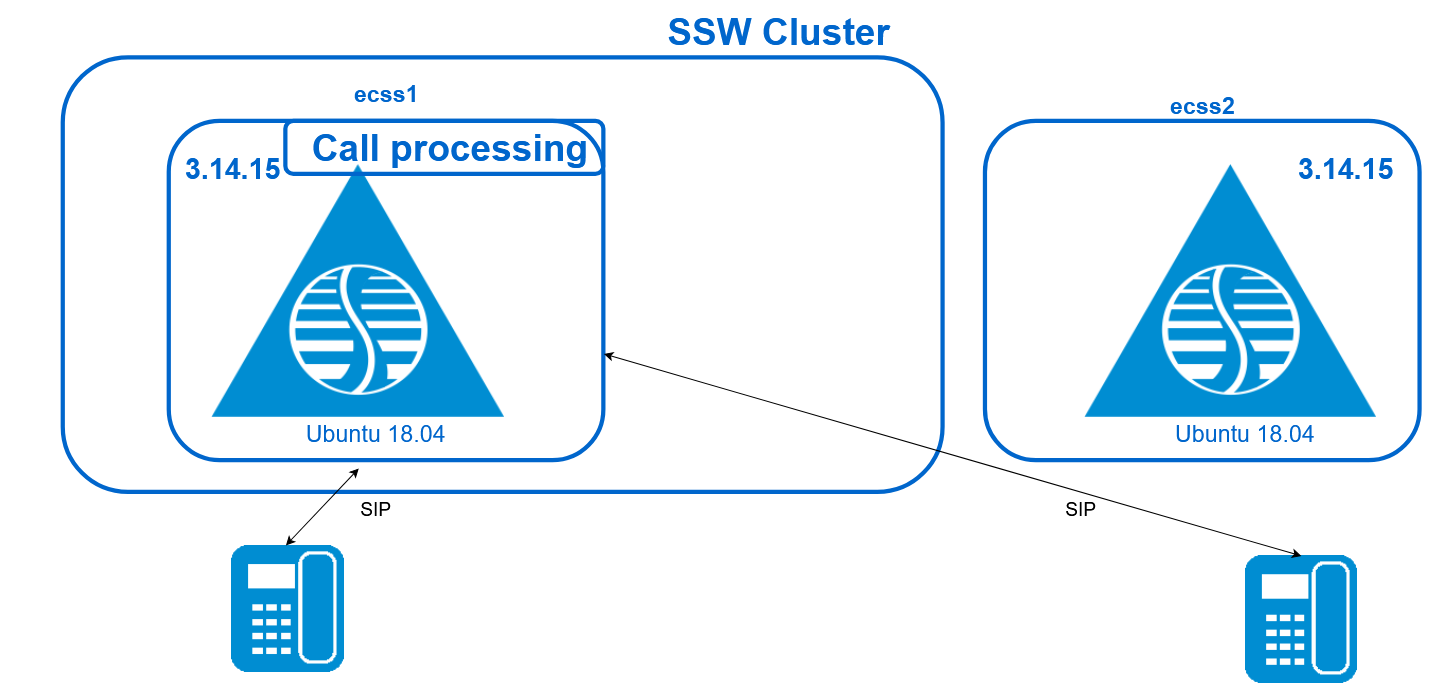
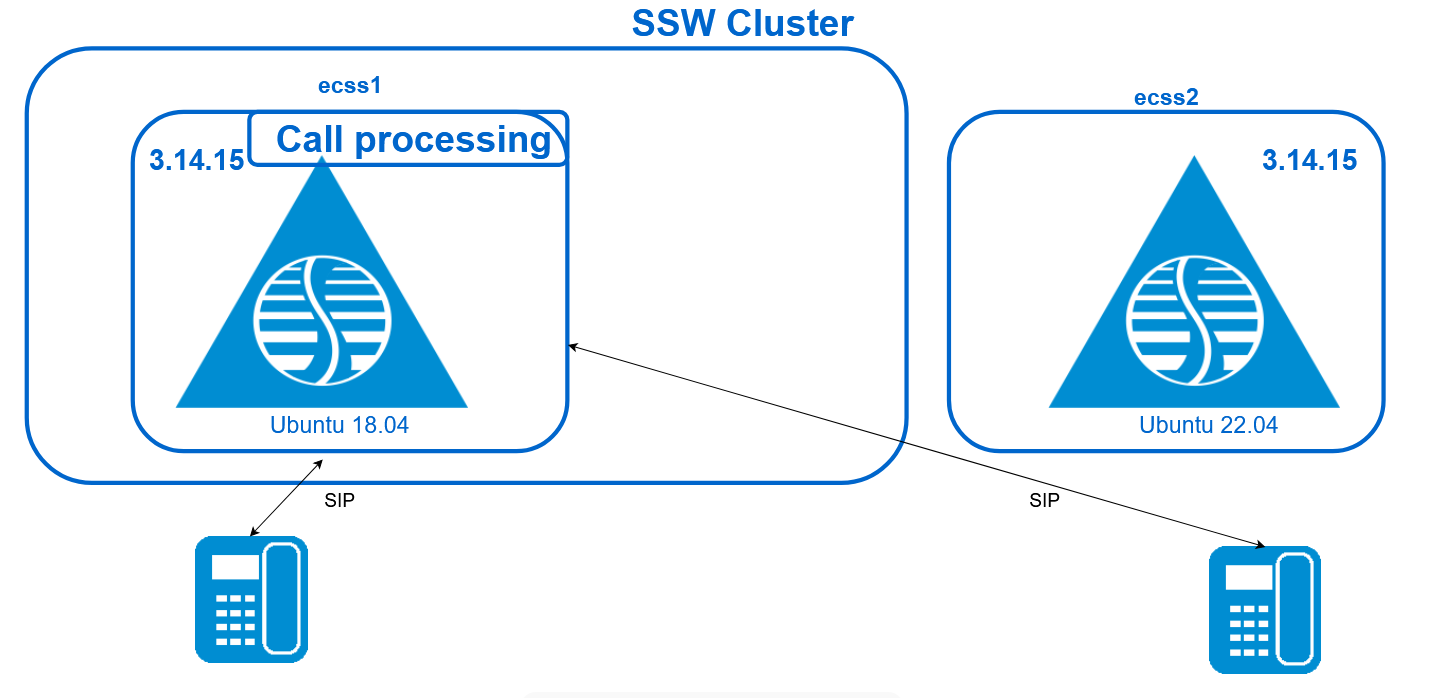
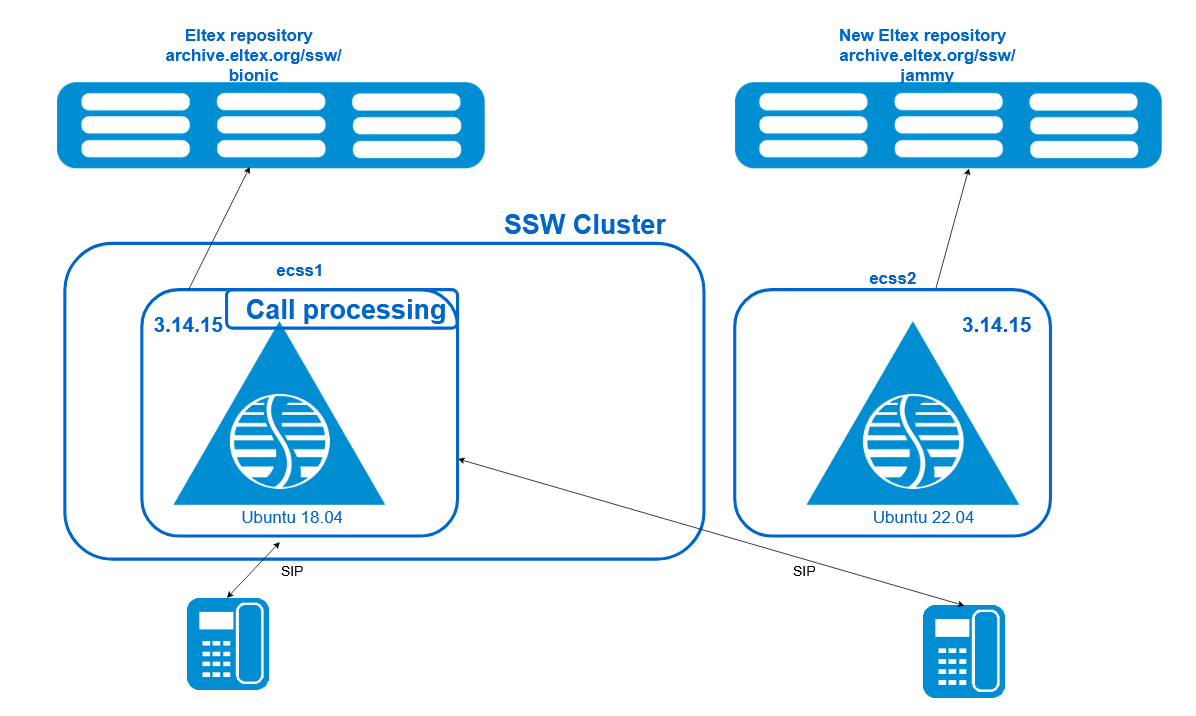
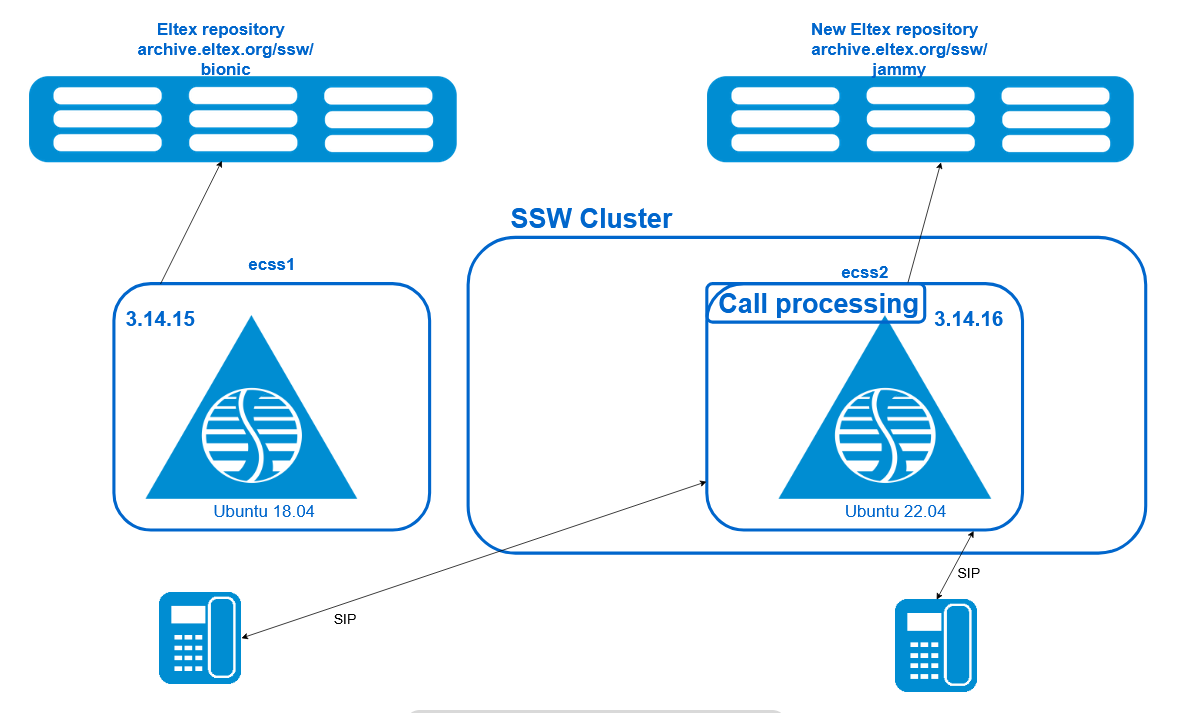
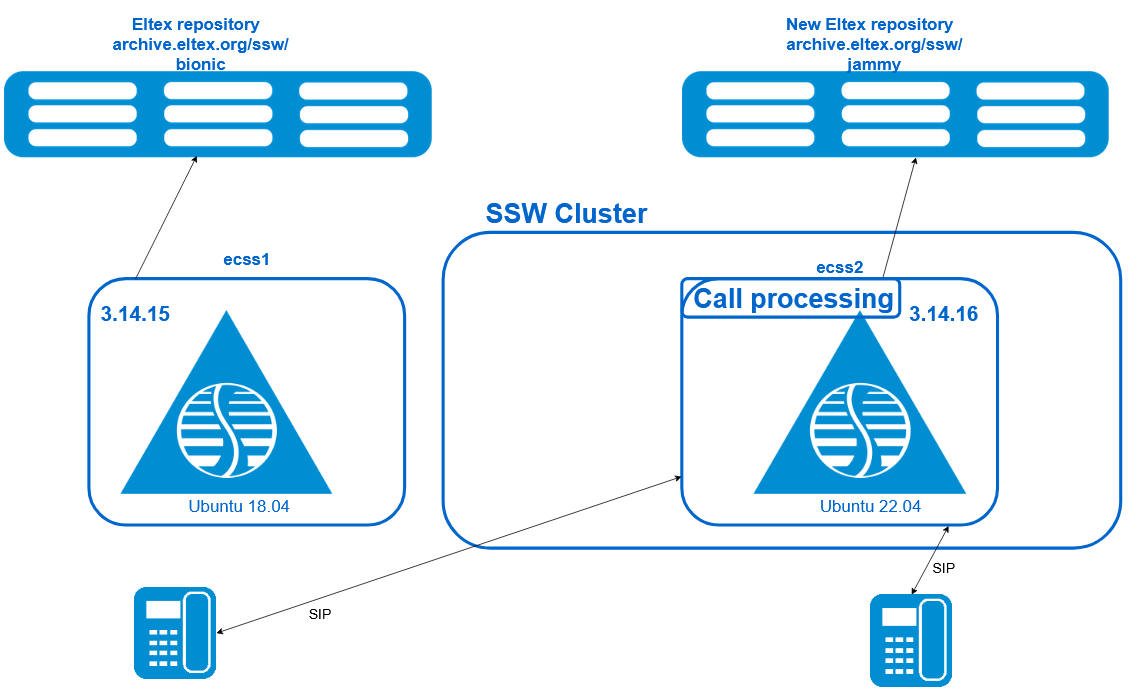
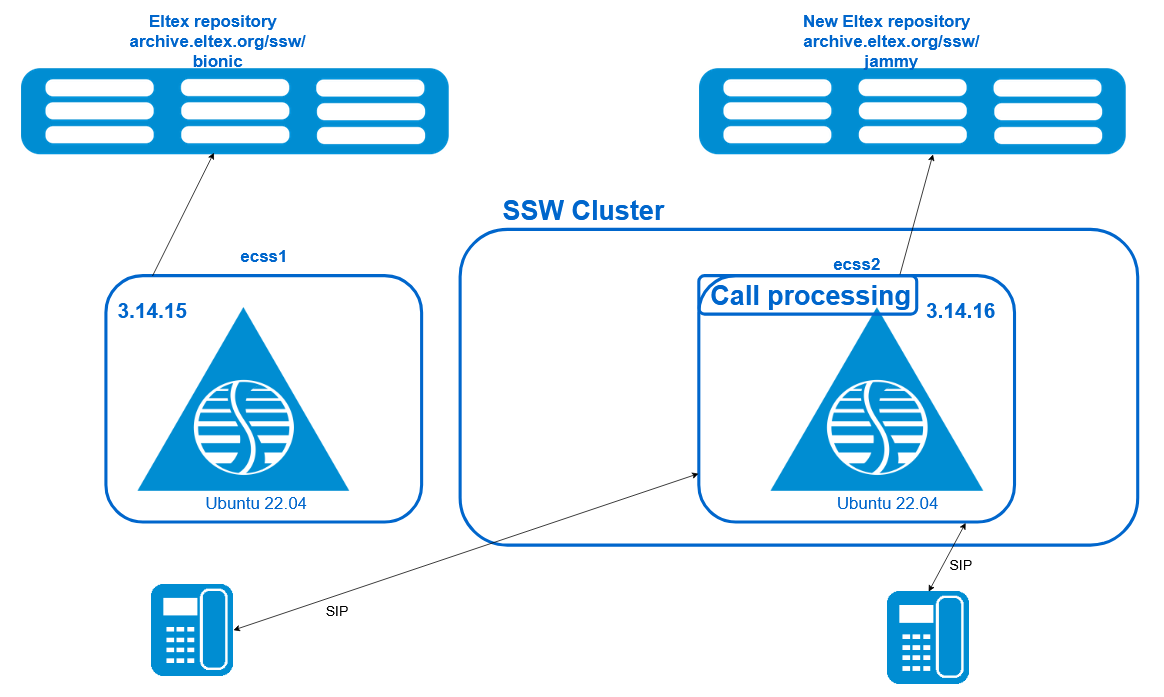
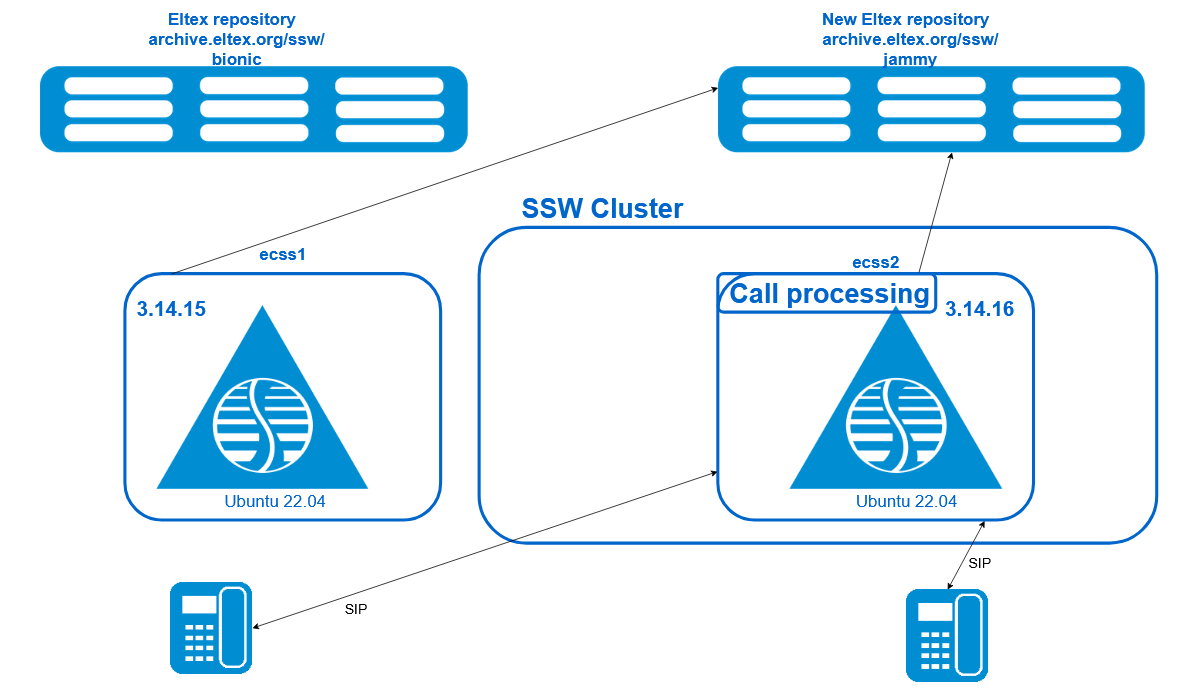
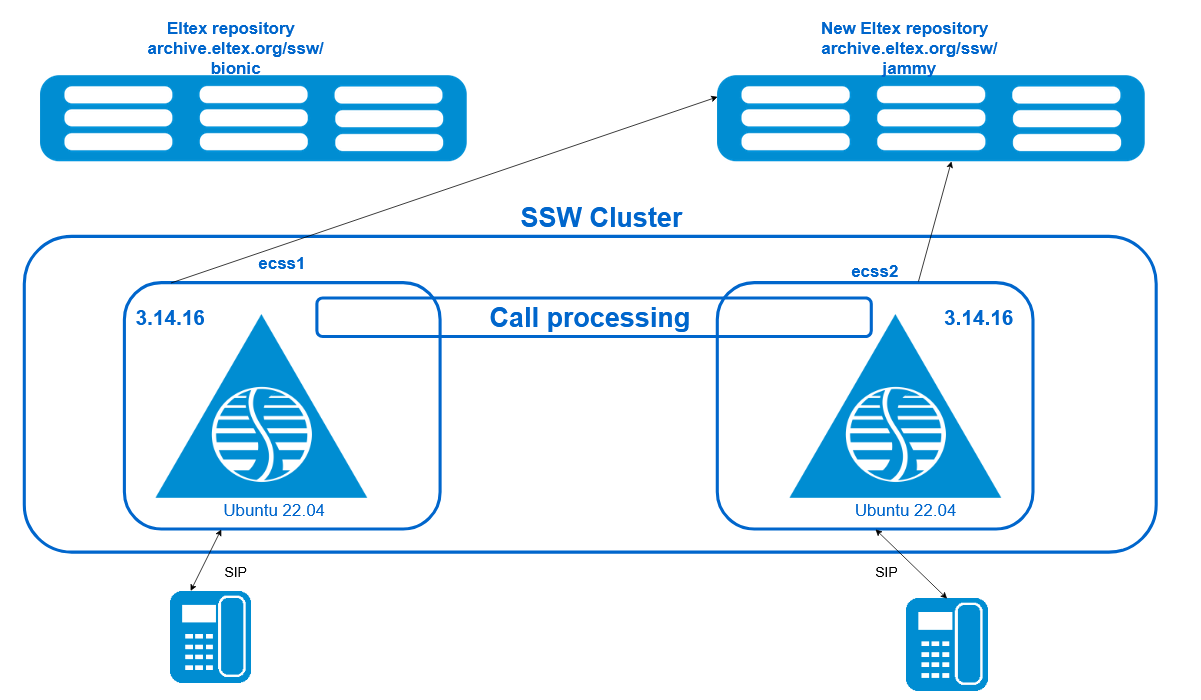
1 Preparatory steps on ecss2
- Run a full backup
- If you need the latest billing data, you must finalize the current CDR and download the CDR files to the remote server:
/domain/test_domain/cdr/make_finalize_cdr
Created file(s): cdr_20250822_11_51_16_1_c.csv
- Enable the setting to automatically sync files in a split (by larger size).на ecss1
sudo gluster volume set ecss_volume cluster.favorite-child-policy size
Stop MySQL replication.
Make sure the parameter values
Slave_IO_RunningиSlave_SQL_Runningequal toNo.на ecss1/ecss2sudo mysql -uroot -p -e 'STOP SLAVE;'
на ecss1/ecss2sudo mysql -uroot -p -e 'SHOW SLAVE STATUS \G;' | grep -E "Slave_IO_Running:|Slave_SQL_Running:"
примерsudo mysql -uroot -p -e 'SHOW SLAVE STATUS \G;' | grep -E "Slave_IO_Running:|Slave_SQL_Running:" . . . Slave_IO_Running: No Slave_SQL_Running: No . . .When upgrading a cluster, upgrade the servers one at a time. This ensures that one server is always running during an upgrade, and services will not be interrupted. To split the cluster, use the ecss-control tool on both servers.
SIP signaling is exchanged via the SIP-VRRP IP address. Similarly, the connection to MySQL is established via the MySQL-VRRP IP address. This functionality is implemented to migrate the IP address to another host in the event of a failure, shutdown, or maintenance of the primary host. IP address migration is controlled by the keepalive service on each host. To redirect traffic to the first server (ecss1), disable keepalive on the second host (ecss2). In this case, both SIP-VRRP IP addresses, as well as the MySQL-VRRP IP address, will be located on the first host (ecss1). Run the following command:
на ecss2sudo systemctl disable --now keepalived.service
- Use the ifconfig command to check that all VRRP IP addresses are on ecss1 (VRRP-mysql/VRRP-SIP1/VRRP-SIP2).на ecss1
ifconfig
- On ecss1, split the SSW into two independent servers using the following command:
The ecss-control command works with standard hostnames: ecss1/ecss2.
Check status:на ecss1sudo ecss-control detach
на ecss1sudo ecss-control status
Результат:sudo ecss-control detach detach host: ecss2, ip: 10.0.10.82 complete sudo ecss-control status locked ip: 10.0.10.82
If, after splitting, a "503 Service Unavailable" error appears on the first host when attempting to call/register, run the following commands on the problematic host: ecss-attach ecss-pa-sip
ecss-attach ecss-pa-sip
*********************************************************************************
! You attached to systemd-service ecss-pa-sip: sip1@ecss1.                         !
! To exit, press Ctrl+C, Ctrl+C.                                                   !
*********************************************************************************
Erlang/OTP 21 [erts-10.3.5.10] [source] [64-bit] [smp:8:8] [ds:8:8:10] [async-threads:1] [hipe]

Eshell V10.3.5.10  (abort with ^G)
(sip1@ecss1)1> sip_config:tring_is_connected().
false
(sip1@ecss1)2> sip_config:tring_is_connected(true).
ok
(sip1@ecss1)3> sip_config:tring_is_connected().
true
- After splitting the cluster, you need to mask all nodes on the server that will be updated first:на ecss2
sudo systemctl mask --now ecss-ds ecss-mycelium ecss-mediator ecss-core ecss-pa-sip ecss-sorm
There is one sorm node per cluster. If it's running on ecss1, a notification will be sent when the attached command is executed.
Unit /etc/systemd/system/ecss-sorm.service is masked, ignoring.
This message is not an error. Continue with the procedure.
- Perform a backup of the databases.
IMPORTANT! The data in the backup is correct.
Before creating a backup, make sure that the tolltickets table in your database does not contain obsolete fields using the command:
sudo mysql -uroot -p -e "SHOW CREATE TABLE ecss_calls_db.tolltickets\G;" | grep 'ss_info' || echo "Поле не найдено"
If the command shows "`ss_info` text COLLATE latin1_general_ci,", then bring the table to the current state with the command:
sudo mysql -uroot -p -e "ALTER TABLE ecss_calls_db.tolltickets DROP COLUMN ss_info;"
на ecss2sudo mysqldump -uroot -p --verbose --single-transaction --quote-names --complete-insert --extended-insert --routines --events --triggers --databases ecss_address_book ecss_audit ecss_calls_db ecss_dialer_db ecss_meeting_db ecss_numbers_db ecss_statistics ecss_subscribers ecss_system web_conf history_db > ./all_dump.sql
- Add the skip-log-bin and skip-slave-start parameters to the MySQL configuration on ecss2 (to avoid writing the database deletion process to the binary logs) by running the command:на ecss2
sudo sed -i '40i\skip-log-bin\nskip-slave-start' /etc/mysql/mysql.conf.d/mysqld.cnf
- Delete the backup configuration file (so that when deleting it, ecss-mysql does not load the configuration from it):на ecss2
sudo rm /var/lib/ecss/ecss-mysql/backup/mysqld.cnf
- Restart ecss-mysql with the new configuration:на ecss2
sudo systemctl restart mysql.service
- To ensure replication works correctly after the update, you need to save the ecss-mysql configuration files, so we'll create a separate backup for the files before the update:на ecss2
sudo cp -a /etc/ecss/ecss-mysql ~/ecss-mysql-etc-backup
- Delete ecss-web-conf and ecss-mysql, along with their configuration files (to avoid configuration errors during the update):
In the questions, change the MySQL IP to the local database IP
на ecss2sudo dpkg-reconfigure ecss-web-conf
на ecss2sudo apt purge ecss-web-conf
To questions about deleting databases → we answer yes to the questions - delete all databases
на ecss2sudo apt purge ecss-mysql
- Check that the databases have been deleted by running the command; the output should not contain any other databases except the system ones ('information_schema','mysql','performance_schema','sys'):на ecss2
sudo mysql -uroot -p -e "SHOW DATABASES;"
- If ecss-call-api and ecss-elph-api are used, they should be removed (to avoid dependency conflicts during the update).на ecss2
sudo apt-get remove ecss-call-api
sudo apt-get remove ecss-elph-api
- Remove skip-log-bin from the configuration file:на ecss2
sudo sed -i '/skip-log-bin/d' /etc/mysql/mysql.conf.d/mysqld.cnf
- Fix mysql packages (to prevent the package manager from deleting mysql when updating the system):на ecss2
sudo apt-mark hold mysql-*
- Install the nodejs package version (to ensure the distribution is updated correctly):на ecss2
sudo apt install nodejs=8.10.*
2 Upgrading the Ubuntu 18.04 operating system to ecss2
- Upgrading from Ubuntu 18.04 (Bionic) to Ubuntu 20.04 (Focal)на ecss2
do-release-upgrade -m server
на ecss2
If you receive a message:
Checking for a new Ubuntu release
Please install all available updates for your release before upgrading.run the following commands:
на ecss2sudo apt update
на ecss2sudo apt upgrade
на ecss2sudo apt dist-upgrade
You may also need to update the ecss-user package with the following command:
на ecss2sudo apt install ecss-user
and then repeat the do-release-upgrade -m server command:
на ecss2do-release-upgrade -m server
Answers to questions during the update
During the upgrade, accept all new ecss package configurations.
During the update process, the system may prompt you to reboot. Accept.
Checking the dnsmasq service.
If the dnsmasq service is not active after the update:
на ecss2systemctl is-active dnsmasq
примерsystemctl is-active dnsmasq failed
Run the following commands:
Delete the remaining configuration file:
Restart the service dnsmasq :на ecss2sudo rm /etc/dnsmasq.d/lxd
Check service status:на ecss2sudo systemctl restart dnsmasq
примерsystemctl is-active dnsmasq active
After these steps, the service should be active and work without errors.
Updating mysql packages.
Disable package pinning:
Update MySQL to version 8.0:на ecss2sudo apt-mark unhold mysql-*
на ecss2sudo apt install mysql-server
After the update, you need to update your MySQL settings for version 8.0.Answers to questions from the package manager
Important! When upgrading MySQL, you must leave the old configuration file /etc/mysql/mysql.conf.d/mysqld.conf intact to avoid losing the flags you set.
на ecss2sudo sed -i -e 's/^max_allowed_packet.*/max_allowed_packet = 64M/' \ -e 's/^thread_stack.*/thread_stack = 256K/' /etc/mysql/mysql.conf.d/mysqld.cnf- Finish updating the host with the following command:Check your Ubuntu version with the following command:на ecss2
sudo apt full-upgrade
на ecss2lsb_release -a
Result:lsb_release -a No LSB modules are available. Distributor ID: Ubuntu Description: Ubuntu 20.04.6 LTS Release: 20.04 Codename: focal
- Update from Ubuntu 20.04 (Focal) to Ubuntu 22.04 (Jammy)на ecss2
do-release-upgrade -m server
When the system reports:
do-release-upgrade -m server
Checking for a new Ubuntu release
You have not rebooted after updating a package which requires a reboot. Please reboot before upgrading.
perform a reboot with the following command:
на ecss2sudo reboot
and then repeat the command:
на ecss2do-release-upgrade -m server
Answers to questions during the update
During the upgrade, accept all new ecss package configurations.
During the update process, the system may prompt you to reboot. You should agree.
- After the update is complete, run the command:на ecss2
sudo apt autoremove
This step can take quite a long time.
- Upgrading from Ubuntu 18.04 (Bionic) to Ubuntu 20.04 (Focal)
3 Preparing to upgrade SSW services on ecss2
- Perform a split on ecss2:
The ecss-control command works with standard hostnames: ecss1/ecss2.
на ecss2sudo ecss-control detach
- Update the ssw repository:на ecss2
sudo sh -c "echo deb [arch=amd64] http://archive.eltex.org/ssw/jammy/3.14.16.1 stable main extras external > /etc/apt/sources.list.d/eltex-ecss10-stable.list"
- Temporarily fix the version of ecss-* packages to which you will need to upgrade:на ecss2
sudo sh -c "echo 'Package: ecss-*\nPin: version 14.16.1.*\nPin-Priority: 1001\n\nPackage: erlang*\nPin: version 2:24.3.10*\nPin-Priority: 1001' >> /etc/apt/preferences.d/eltex-ecss10"
- Perform package update:на ecss2
sudo apt update
- Disable nginx service:на ecss2
sudo systemctl disable --now nginx
- Perform a split on ecss2:
4 Updating SSW services on ecss2
- Updating the ecss-dns-env package:на ecss2
sudo apt install ecss-dns-env
When updating, you need to apply new configuration files (confirm with -Y)
After the update, you need to update the configuration by running the command. The answers to the questions are similar to the installation procedureна ecss2sudo dpkg-reconfigure ecss-dns-env
Update the ecss-user package:
на ecss2sudo apt install ecss-user
Updating the ecss-mysql package:
Before updating the ecss-mysql package to maintain compatibility with mysql v5.7, you need to enable the deprecated plugin in the mysql configuration by default:
на ecss2sudo sh -c "echo '[mysqld]\ndefault_authentication_plugin = mysql_native_password' >> /etc/mysql/conf.d/plugin.cnf"
Restart MySQL:
на ecss2sudo systemctl restart mysql
Install the ecss-mysql package:
на ecss2sudo apt install ecss-mysql
When installing, in response to the question "Path for external data-directory, where tables of databases will be created", you must specify the external directory for storing database tables, or accept the default value.
Move the backup of ecss-mysql configuration files (saved earlier) back:
на ecss2sudo rm -rf /etc/ecss/ecss-mysql && sudo cp -a ~/ecss-mysql-etc-backup /etc/ecss/ecss-mysql
Check and, if necessary, update the parameters in "/etc/ecss/ecss-mysql/mysql-checker.conf".
The "MASTER_HOST_IP" variable is the VRRP address for MySQL defined in the keepalived configuration.
- Enable ecss-mysql-checker.timer:на ecss2
sudo systemctl enable --now ecss-mysql-checker.timer
Loading a database backup:
Before loading a backup, you must modify it by specifying the external directory where the database tables are stored. Since the ecss-mysql database tables are installed in a separate directory (/var/lib/ecss-mysql), you must specify the external directory for all tables in the backup; otherwise, they will be created in the default data directory (/var/lib/mysql). Also, when loading a backup, disable binary logging.
After downloading the backup, reconfigure the ecss-mysql package to include the necessary v3.14.16 migrations that are missing from the backup.на ecss2sudo sed -E "s/(ENGINE=(MyISAM|InnoDB))/\1 DATA DIRECTORY = '\/var\/lib\/ecss-mysql'/g" all_dump.sql | (echo "SET sql_log_bin = 0;"; cat -) | sudo mysql -uroot -p
Restart replication with the command and make sure that the slave server has pulled all changes from the master (wait until the "Seconds_Behind_Master" variable becomes equal to 0, and the Relay_Master_Log_File value should match the Master_Log_File value).на ecss2sudo dpkg-reconfigure ecss-mysql
на ecss2sudo mysql -uroot -p -e "START SLAVE;"
на ecss2sudo mysql -e 'SHOW SLAVE STATUS \G;' | grep -E "Seconds_Behind_Master|Relay_Master_Log_File|Master_Log_File"
примерsudo mysql -e 'SHOW SLAVE STATUS \G;' | grep -E "Seconds_Behind_Master|Relay_Master_Log_File|Master_Log_File" [sudo] password for abf: Master_Log_File: server-mysql-bin.001152 Relay_Master_Log_File: server-mysql-bin.001152 Seconds_Behind_Master: 0
Remove the skip-slave-start parameter from the mysql configuration and backup file:на ecss2sudo sed -i '/skip-slave-start/d' /etc/mysql/mysql.conf.d/mysqld.cnf sudo sed -i '/skip-slave-start/d' /var/lib/ecss/ecss-mysql/backup/mysqld.cnf
It is not necessary to restart mysql - this option only affects the state of SLAVE when mysql starts, and it was started directly.
- Updating Erlang and SSW.
Before updating, enable ssw services using the following commands:на ecss2sudo systemctl unmask ecss-ds ecss-mycelium ecss-mediator ecss-core ecss-pa-sip ecss-sorm
на ecss2sudo systemctl enable ecss-ds ecss-mycelium ecss-mediator ecss-core ecss-pa-sip ecss-sorm
Before upgrading, uninstall the outdated version of Erlang. The following command will upgrade Erlang to version 24.3 and also upgrade the ecss-node and ecss-utils packages to the latest version:на ecss2sudo apt remove erlang-base-hipe
After upgrading Erlang, unmask the service that was masked when erlang-base-hipe was removed:If Erlang is not updated by removing the old package, first update ecss-node and ecss-utils, and then update the entire Erlang:
на ecss2sudo apt install ecss-node ecss-utils
на ecss2sudo apt install erlang
на ecss2sudo systemctl unmask epmd.socket epmd.service
Launch SSW on ecss2.
Before launching, change the cluster name to something different from the cluster name specified on ecss1. For example, add the "upd" suffix to the cluster name:
It is required because mycelium1 and mycelium2 find each other and in case of different versions - mycelium on ecss2 crashes.
на ecss2sudo nano /etc/ecss/ecss-mycelium/mycelium1.config
start the following services:на ecss2{mycelium_broker, [ {cluster_name, 'test_cluster_upd'},
ecss-myceliumecss-dsна ecss2sudo systemctl start ecss-mycelium
ecss-coreна ecss2sudo systemctl start ecss-ds
на ecss2sudo systemctl start ecss-core
ecss-mediator!!!DO NOT LAUNCH PA-SIP YET!!!
на ecss2sudo systemctl start ecss-mediator
- To check the status of services, run the system-status command in CoCon:выполняется в CoCon
/system-status
Checking...
┌─┬───────────────┬────────────────────────────┬───────────────┬────────────┬──────┐
│ │     Node      │          Release           │ Erlang nodes  │Mnesia nodes│Uptime│
├─┼───────────────┼────────────────────────────┼───────────────┼────────────┼──────┤
│ │core1@ecss2    │ecss-core-3.14.16.1.130     │core1@ecss2    │not running │2m 27s│
│ │ds1@ecss2      │ecss-ds-3.14.16.1.130       │ds1@ecss2      │ds1@ecss2   │2m 32s│
│ │md1@ecss2      │ecss-mediator-3.14.16.1.130 │md1@ecss2      │md1@ecss2   │2m 16s│
│ │mycelium1@ecss2│ecss-mycelium-3.14.16.1.130 │mycelium1@ecss2│not running │2m 39s│
│ │sorm1@ecss2    │ecss-sorm-3.14.16.1.130     │sorm1@ecss2    │not running │1m 56s│
└─┴───────────────┴────────────────────────────┴───────────────┴────────────┴──────┘

All services are started.

  Active media resource selected list specific:
┌─────────────┬───────────┬─────────────┬───────────┬───────────┐
│    Node     │    MSR    │     MSR     │ Cc-status │ Cc-uptime │
│             │           │   version   │           │           │
├─────────────┼───────────┼─────────────┼───────────┼───────────┤
│ core1@ecss2 │ msr.ecss1 │ 3.14.15.243 │ connected │ 00:00:10  │
│             │ msr.ecss2 │ 3.14.15.243 │ connected │ 00:00:10  │
└─────────────┴───────────┴─────────────┴───────────┴───────────┘
- Updating ecss-restfs.Accept all new configuration files by selecting Y.на ecss2
sudo apt install ecss-restfs
Updating the ecss-media-server package.
First, disable registration on the working host ecss1. To do this, comment out the line with the working host's realm in the configuration file (in the example, realm="sip:10.0.20.81:5000") with the following command (adding <!- - at the beginning of the line and - -> at the end of the line):
на ecss2sudo nano /etc/ecss/ecss-media-server/conf.d/default.xml
Perform update:пример<?xml version="1.0"?> <config> <accounts> <!--<dynamic msr_name="msr.ecss2" realm="sip:10.0.20.81:5000" dtmf_mode="rfc+inband+info" auth_name="user" auth_password="password"/>--> <dynamic msr_name="msr.ecss2" realm="sip:10.0.20.82:5000" dtmf_mode="rfc+inband+info" auth_name="user" auth_password="password"/> </accounts> </config>Update configuration:на ecss2sudo apt install ecss-media-server
Perform a check and, if necessary, edit the file using the command:на ecss2sudo dpkg-reconfigure ecss-media-server
на ecss2sudo nano /etc/ecss/ecss-media-server/config.xml
- Updating the package ecss-media-resources:на ecss2
sudo apt install ecss-media-resources
Updating the packageecss-web-conf
на ecss2sudo apt install ecss-web-conf
- Before transferring keepalived to the updated host, you need to copy the current ds database from ecss1 (otherwise, the registration database will be empty). Therefore, first, backup the Mnesia database to ecss1:
- Останавливаем ecss-ds на ecss2:
/node/ds1@ecss1/oasys/backup
Backup was successfully created at the path: "/var/lib/ecss/oasys/Mnesia.ds1@ecss1_20250930081517"
Using the scp command, copy the backup from ecss1 to ecss2.на ecss2sudo systemctl stop ecss-ds
We make a local copy of the current configuration:на ecss2scp -r ecss@ecss1:/var/lib/ecss/oasys/Mnesia.ds1@ecss1_20250930081517 /var/lib/ecss/oasys
We replace the local configuration with the backup configuration from ecss1:на ecss2sudo cp -a /var/lib/ecss/oasys/Mnesia.ds1@ecss2 /var/lib/ecss/oasys/Mnesia.ds1@ecss2-bkp
на ecss2sudo mv /var/lib/ecss/oasys/Mnesia.ds1@ecss1_20250930081517 /var/lib/ecss/oasys/Mnesia.ds1@ecss2
Run ecss-ds and ecss-pa-sip (to load current subscriber registrations):на ecss2sudo chown -R ssw:ssw /var/lib/ecss/oasys
на ecss2sudo systemctl start ecss-ds
Check the status of services with the command /system-status :на ecss2sudo systemctl start ecss-pa-sip
in CoCon/system-status Checking... ┌─┬───────────────┬────────────────────────────┬───────────────┬────────────┬──────┐ │ │ Node │ Release │ Erlang nodes │Mnesia nodes│Uptime│ ├─┼───────────────┼────────────────────────────┼───────────────┼────────────┼──────┤ │ │core1@ecss2 │ecss-core-3.14.16.1.130 │core1@ecss2 │not running │2m 27s│ │ │ds1@ecss2 │ecss-ds-3.14.16.1.130 │ds1@ecss2 │ds1@ecss2 │2m 32s│ │ │md1@ecss2 │ecss-mediator-3.14.16.1.130 │md1@ecss2 │md1@ecss2 │2m 16s│ │ │mycelium1@ecss2│ecss-mycelium-3.14.16.1.130 │mycelium1@ecss2│not running │2m 39s│ │ │sip1@ecss2 │ecss-pa-sip-3.14.16.1.130 │sip1@ecss2 │sip1@ecss2 │2m 22s│ │ │sorm1@ecss2 │ecss-sorm-3.14.16.1.130 │sorm1@ecss2 │not running │1m 56s│ └─┴───────────────┴────────────────────────────┴───────────────┴────────────┴──────┘ All services are started. Active media resource selected list specific: ┌─────────────┬───────────┬─────────────┬───────────┬───────────┐ │ Node │ MSR │ MSR │ Cc-status │ Cc-uptime │ │ │ │ version │ │ │ ├─────────────┼───────────┼─────────────┼───────────┼───────────┤ │ core1@ecss2 │ msr.ecss1 │ 3.14.15.243 │ connected │ 00:00:10 │ │ │ msr.ecss2 │ 3.14.16.1.0 │ connected │ 00:00:10 │ └─────────────┴───────────┴─────────────┴───────────┴───────────┘
- Launching the service keepalivedна ecss2
sudo systemctl enable --now keepalived
- After updating services, delete the ssw version commit file:на ecss2
sudo rm /etc/apt/preferences.d/eltex-ecss10
- Updating the ecss-dns-env package:
5 Подготовительные действия на ecss1
5 Preparatory steps on ecss1
- Run a full backup.
- Stop MySQL replication (on ecss2). Ensure that the Slave_IO_Running and Slave_SQL_Running parameters are set to No.на ecss2
sudo mysql -uroot -p -e 'STOP SLAVE;'
на ecss2sudo mysql -uroot -p -e 'SHOW SLAVE STATUS \G;' | grep -E "Slave_IO_Running:|Slave_SQL_Running:"
примерsudo mysql -uroot -p -e 'SHOW SLAVE STATUS \G;' | grep -E "Slave_IO_Running:|Slave_SQL_Running:" . . . Slave_IO_Running: No Slave_SQL_Running: No . . . - Prepare ecss1 for upgrade by transferring all traffic to ecss2 (the command is executed on ecss1):на ecss1
sudo systemctl disable --now keepalived.service
- Use the ifconfig command to check that all VRRP addresses (VRRP IP-mysql / VRRP IP-SIP1 / VRRP IP-SIP2) are on ecss2.на ecss2
ifconfig
If, after switching to ecss2, you receive a "503 Service Unavailable" error when attempting to call or register, run the following commands on the problematic host: ecss-attach ecss-pa-sip
ecss-attach ecss-pa-sip
*********************************************************************************
! You attached to systemd-service ecss-pa-sip: sip1@ecss1.                         !
! To exit, press Ctrl+C, Ctrl+C.                                                   !
*********************************************************************************
Erlang/OTP 21 [erts-10.3.5.10] [source] [64-bit] [smp:8:8] [ds:8:8:10] [async-threads:1] [hipe]

Eshell V10.3.5.10  (abort with ^G)
(sip1@ecss1)1> sip_config:tring_is_connected().
false
(sip1@ecss1)2> sip_config:tring_is_connected(true).
ok
(sip1@ecss1)3> sip_config:tring_is_connected().
true
- After splitting the cluster, you must shut down all nodes on the server ecss1:на ecss1
sudo systemctl mask --now ecss-ds ecss-mycelium ecss-mediator ecss-core ecss-pa-sip ecss-sorm
- Database backup (on ecss1):
IMPORTANT! correctness of the data in the backup.
Before creating a backup, make sure that the tolltickets table in your database does not contain obsolete fields using the command:
sudo mysql -uroot -p -e "SHOW CREATE TABLE ecss_calls_db.tolltickets\G;" | grep 'ss_info' || echo "Поле не найдено"
If the command shows "`ss_info` text COLLATE latin1_general_ci,", then bring the table to the current state with the command:
sudo mysql -uroot -p -e "ALTER TABLE ecss_calls_db.tolltickets DROP COLUMN ss_info;"
на ecss1sudo mysqldump -uroot -p --verbose --single-transaction --quote-names --complete-insert --extended-insert --routines --events --triggers --databases ecss_address_book ecss_audit ecss_calls_db ecss_dialer_db ecss_meeting_db ecss_numbers_db ecss_statistics ecss_subscribers ecss_system web_conf history_db > ./all_dump.sql
- Add the skip-log-bin and skip-slave-start parameters to the mysql configuration on ecss1 (to avoid writing the database deletion process to the binary logs):на ecss1
sudo sed -i '40i\skip-log-bin\nskip-slave-start' /etc/mysql/mysql.conf.d/mysqld.cnf
- Delete the backup configuration file (so that when deleting it, ecss-mysql does not load the configuration from it):на ecss1
sudo rm /var/lib/ecss/ecss-mysql/backup/mysqld.cnf
- Restart mysql with the new configuration:на ecss1
sudo systemctl restart mysql.service
- To ensure correct replication operation after the upgrade, you must save the ecss-mysql configuration files. Therefore, create a separate backup for the files before the upgrade:на ecss1
sudo cp -a /etc/ecss/ecss-mysql ~/ecss-mysql-etc-backup
- Delete ecss-web-conf and ecss-mysql along with their configuration files (to avoid configuration errors during the update):
In the questions, change the MySQL IP to the local database IP
на ecss1sudo dpkg-reconfigure ecss-web-conf
на ecss1sudo apt purge ecss-web-conf
To questions about deleting databases → we answer yes to the questions - delete all databases
на ecss1sudo apt purge ecss-mysql
- Check that the databases have been deleted using the command:
The output should not contain any other databases except system ones ('information_schema', 'mysql', 'performance_schema', 'sys').
на ecss1sudo mysql -uroot -p -e "SHOW DATABASES;"
- If you are using ecss-call-api and ecss-elph-api, remove them (to avoid dependency conflicts during the update):на ecss1
sudo apt remove ecss-call-api
sudo apt remove ecss-elph-api
- Remove skip-log-bin from the configuration file:на ecss1
sudo sed -i '/skip-log-bin/d' /etc/mysql/mysql.conf.d/mysqld.cnf
- Fix mysql packages (to prevent the package manager from deleting mysql when updating the system):на ecss1
sudo apt-mark hold mysql-*
- Install the nodejs package version (to ensure the distribution is updated correctly):на ecss1
sudo apt install nodejs=8.10.*
6 Upgrading the Ubuntu 18.04 operating system on ecss1
- Upgrading from Ubuntu 18.04 (Bionic) to Ubuntu 20.04 (Focal)на ecss1
do-release-upgrade -m server
If you receive a message:
Checking for a new Ubuntu release
Please install all available updates for your release before upgrading.run the following commands:
на ecss1sudo apt update
на ecss1sudo apt upgrade
на ecss1sudo apt dist-upgrade
You may also need to update the ecss-user package with the following command:
на ecss1sudo apt install ecss-user
and then repeat the command do-release-upgrade -m server:
на ecss1do-release-upgrade -m server
Ответы на вопросы во время обновления
During the upgrade, accept all new ecss package configurations.
- Checking the dnsmasq service
Checking the dnsmasq service
- If the dnsmasq service is not active after the update:на ecss1
systemctl is-active dnsmasq
Updating mysql packages.
Unpin packages:
- If the dnsmasq service is not active after the update:
- Update MySQL to version 8.0:на ecss1
sudo apt-mark unhold mysql-*
на ecss1sudo apt install mysql-server
After the update, you need to update the MySQL settings for version 8.0:Answers to questions from the package manager
Important! When upgrading MySQL, you must leave the old configuration file /etc/mysql/mysql.conf.d/mysqld.conf intact to avoid losing the flags you set.
на ecss1sudo sed -i -e 's/^max_allowed_packet.*/max_allowed_packet = 64M/' \ -e 's/^thread_stack.*/thread_stack = 256K/' /etc/mysql/mysql.conf.d/mysqld.cnf - Finish updating the host with the command:на ecss1
sudo apt full-upgrade
- Upgrade from Ubuntu 20.04 (Focal) to Ubuntu 22.04 (Jammy)на ecss1
do-release-upgrade -m server
Answers to questions during the update
During the upgrade, accept all new ecss package configurations.
- Once the update is complete, run:на ecss1
sudo apt autoremove
This step can take quite a long time.
- Upgrading from Ubuntu 18.04 (Bionic) to Ubuntu 20.04 (Focal)
7 Preparing to upgrade SSW services on ecss1
- Before upgrading, update the ssw repository:на ecss1
sudo sh -c "echo deb [arch=amd64] http://archive.eltex.org/ssw/jammy/3.14.16.1 stable main extras external > /etc/apt/sources.list.d/eltex-ecss10-stable.list"
- Temporarily fix the version of ecss-* packages to which you will need to upgrade:на ecss1
sudo sh -c "echo 'Package: ecss-*\nPin: version 14.16.1.*\nPin-Priority: 1001\n\nPackage: erlang*\nPin: version 2:24.3.10*\nPin-Priority: 1001' >> /etc/apt/preferences.d/eltex-ecss10"
- Update packages with the command:на ecss1
sudo apt update
- Before upgrading, update the ssw repository:
8 Updating SSW services on ecss1
- Updating the ecss-dns-env package.на ecss1
sudo apt install ecss-dns-env
When updating, accept new configuration files -Y.
After updating, update the configuration with the command:на ecss1sudo dpkg-reconfigure ecss-dns-env
- Updating the package ecss-user:на ecss1
sudo apt install ecss-user
- Updating the package ecss-mysql:
Since both hosts will be updated to MySQL v8.0, you need to disable the default plugin in the MySQL configuration and change the user plugin to ecss2.на ecss2sudo rm /etc/mysql/conf.d/plugin.cnf
на ecss2sudo mysql -uroot -p -N -e "SELECT CONCAT('ALTER USER \`', user, '\`@\`', host, '\` IDENTIFIED WITH caching_sha2_password;') FROM mysql.user WHERE plugin='mysql_native_password' AND user NOT IN ('root','replica','debian-sys-maint','mysql.session','mysql.sys');" | sudo mysqlNext, install the package ecss-mysql:Do not restart the MySQL service under any circumstances!
на ecss1sudo apt install ecss-mysql
Move the backup of ecss-mysql configuration files (saved earlier) back:When installing, in response to the question "Path for external data-directory, where tables of databases will be created", specify the external directory for storing database tables, or accept the default value.
Check and, if necessary, update the parameters in "/etc/ecss/ecss-mysql/mysql-checker.conf":на ecss1sudo rm -rf /etc/ecss/ecss-mysql && sudo cp -a ~/ecss-mysql-etc-backup /etc/ecss/ecss-mysql
Переменная "MASTER_HOST_IP" - это VRRP-адрес для MySQL, определенный в конфигурации keepalived.
- Enable ecss-mysql-checker.timerна ecss1
sudo systemctl enable --now ecss-mysql-checker.timer
- Loading a database backup. Before loading the backup, you must modify it by specifying the external directory for storing the database tables. Since the ecss-mysql database tables are installed in a separate directory (/var/lib/ecss-mysql), you must specify the external directory for all tables in the backup; otherwise, they will be created in the default data directory (/var/lib/mysql). Also, when loading the backup, disable binary logging.After downloading the backup, reconfigure the ecss-mysql package to include the necessary v3.14.16 migrations that are missing from the backup.на ecss1
sed -E "s/(ENGINE=(MyISAM|InnoDB))/\1 DATA DIRECTORY = '\/var\/lib\/ecss-mysql'/g" all_dump.sql | (echo "SET sql_log_bin = 0;"; cat -) | sudo mysql -uroot -p
After this, start replication with the command and make sure that the slave has pulled all the changes from the master (Seconds_Behind_Master should be equal to 0, and the value of Relay_Master_Log_File should match the value of Master_Log_File).на ecss1sudo dpkg-reconfigure ecss-mysql
на ecss1sudo mysql -uroot -p -e "START SLAVE"
на ecss1sudo mysql -e 'SHOW SLAVE STATUS \G;' | grep -E "Seconds_Behind_Master|Relay_Master_Log_File|Master_Log_File"
примерsudo mysql -e 'SHOW SLAVE STATUS \G;' | grep -E "Seconds_Behind_Master|Relay_Master_Log_File|Master_Log_File" Master_Log_File: server-mysql-bin.001152 Relay_Master_Log_File: server-mysql-bin.001152 Seconds_Behind_Master: 0
Удалить параметр skip-slave-start из конфигурации mysql и резервного файла:на ecss1sudo sed -i '/skip-slave-start/d' /etc/mysql/mysql.conf.d/mysqld.cnf
на ecss1sudo sed -i '/skip-slave-start/d' /var/lib/ecss/ecss-mysql/backup/mysqld.cnf
It is not necessary to restart mysql - this option only affects the state of SLAVE when mysql starts, and it was started directly. - Restore master-master replication by starting replication on ecss2 and make sure that the slave has pulled all changes from the master (Seconds_Behind_Master should be equal to 0, and the Relay_Master_Log_File value should match the Master_Log_File value):на ecss2
sudo mysql -uroot -p -e "START SLAVE;"
на ecss2sudo mysql -e 'SHOW SLAVE STATUS \G;' | grep "Seconds_Behind_Master"
примерsudo mysql -e 'SHOW SLAVE STATUS \G;' | grep -E "Seconds_Behind_Master|Relay_Master_Log_File|Master_Log_File" Master_Log_File: server-mysql-bin.001152 Relay_Master_Log_File: server-mysql-bin.001152 Seconds_Behind_Master: 0 Updating Erlang and SSW.
Enable SSW services before upgrading:
на ecss1sudo systemctl unmask ecss-ds ecss-mycelium ecss-mediator ecss-core ecss-pa-sip ecss-sorm
на ecss1sudo systemctl enable ecss-ds ecss-mycelium ecss-mediator ecss-core ecss-pa-sip ecss-sorm
To upgrade, uninstall the outdated version of Erlang. The command below will upgrade Erlang to version 24.3 and also upgrade the ecss-node and ecss-utils packages to the latest version:
на ecss1sudo apt remove erlang-base-hipe
If Erlang was not updated by removing the old package, then first update ecss-node and ecss-utils and then update the entire Erlang using the following commands:
на ecss1sudo apt install ecss-node ecss-utils
на ecss1sudo apt install erlang
After upgrading Erlang, unmask the service that was masked when erlang-base-hipe was removed:
на ecss1sudo systemctl unmask epmd.socket epmd.service
Launch SSW on the first host.
Before launching, change the cluster name to the same one set on ecss2 in the previous step.
на ecss1sudo nano /etc/ecss/ecss-mycelium/mycelium1.config
на ecss1{mycelium_broker, [ {cluster_name, 'test_cluster_upd'},- Immediately disguise the ecss-sorm service on ecss1, since we intend for ecss-sorm to run on a single host in the cluster.на ecss1
sudo systemctl mask ecss-sorm
- Perform cluster merging on ecss2:на ecss2
sudo ecss-control attach
- Service Keepalived activation.на ecss1
sudo systemctl enable --now keepalived
- On ecss1, start the mycelium service and check in CoCon that the service has started and the mycelium nodes of the ecss1/ecss2 hosts are visible:на ecss1
sudo systemctl start ecss-mycelium
выполняется в CoCon/system-status Checking... ┌─┬───────────────┬────────────────────────────┬───────────────────────────────┬────────────┬───────┐ │ │ Node │ Release │ Erlang nodes │Mnesia nodes│Uptime │ ├─┼───────────────┼────────────────────────────┼───────────────────────────────┼────────────┼───────┤ │ │core1@ecss2 │ecss-core-3.14.16.1.130 │core1@ecss2 │not running │3h 5m │ │ │ds1@ecss2 │ecss-ds-3.14.16.1.130 │ds1@ecss2 │ds1@ecss2 │3h 5m │ │ │md1@ecss2 │ecss-mediator-3.14.16.1.130 │md1@ecss2 │md1@ecss2 │3h 5m │ │ │mycelium1@ecss1│ecss-mycelium-3.14.16.1.130 │mycelium1@ecss1,mycelium1@ecss2│not running │10m 42s│ │ │mycelium1@ecss2│ecss-mycelium-3.14.16.1.130 │mycelium1@ecss1,mycelium1@ecss2│not running │3h 5m │ │ │sip1@ecss2 │ecss-pa-sip-3.14.16.1.130 │sip1@ecss2 │sip1@ecss2 │3h 5m │ │ │sorm1@ecss2 │ecss-sorm-3.14.16.1.130 │sorm1@ecss2 │not running │3h 5m │ └─┴───────────────┴────────────────────────────┴───────────────────────────────┴────────────┴───────┘ All services are started. Active media resource selected list specific: ┌─────────────┬───────────┬───────────────┬───────────┬───────────┐ │ Node │ MSR │ MSR │ Cc-status │ Cc-uptime │ │ │ │ version │ │ │ ├─────────────┼───────────┼───────────────┼───────────┼───────────┤ │ core1@ecss2 │ msr.ecss1 │ 3.14.15.243 │ connected │ 00:21:09 │ │ │ msr.ecss2 │ 3.14.16.1.0 │ connected │ 00:00:59 │ └─────────────┴───────────┴───────────────┴───────────┴───────────┘
- Before running ecss-ds on ecss1, you need to backup the /var/lib/ecss/oasys directory and delete it in order to load the latest database from another host. You can do this by renaming the existing directory:
After this, ecss-ds on host ecss1 will load the database from host ecss2.
на ecss1sudo mv /var/lib/ecss/oasys /var/lib/ecss/oasys-$(date +%Y%m%d-%H_%M)
- On ecss1, start the ds service and in CoCon check that the ds service is available on both hosts ecss1/ecss2:на ecss1
sudo systemctl start ecss-ds
выполняется в CoCon/system-status Checking... ┌─┬───────────────┬────────────────────────────┬───────────────────────────────┬───────────────────┬───────┐ │ │ Node │ Release │ Erlang nodes │ Mnesia nodes │Uptime │ ├─┼───────────────┼────────────────────────────┼───────────────────────────────┼───────────────────┼───────┤ │ │core1@ecss2 │ecss-core-3.14.16.1.130 │core1@ecss2 │not running │3h 13m │ │ │ds1@ecss1 │ecss-ds-3.14.16.1.130 │ds1@ecss1,ds1@ecss2 │ds1@ecss1,ds1@ecss2│12s │ │ │ds1@ecss2 │ecss-ds-3.14.16.1.130 │ds1@ecss1,ds1@ecss2 │ds1@ecss1,ds1@ecss2│3h 13m │ │ │md1@ecss2 │ecss-mediator-3.14.16.1.130 │md1@ecss2 │md1@ecss2 │3h 13m │ │ │mycelium1@ecss1│ecss-mycelium-3.14.16.1.130 │mycelium1@ecss1,mycelium1@ecss2│not running │18m 33s│ │ │mycelium1@ecss2│ecss-mycelium-3.14.16.1.130 │mycelium1@ecss1,mycelium1@ecss2│not running │3h 13m │ │ │sip1@ecss2 │ecss-pa-sip-3.14.16.1.130 │sip1@ecss2 │sip1@ecss2 │3h 13m │ │ │sorm1@ecss2 │ecss-sorm-3.14.16.1.130 │sorm1@ecss2 │not running │3h 12m │ └─┴───────────────┴────────────────────────────┴───────────────────────────────┴───────────────────┴───────┘ All services are started. Active media resource selected list specific: ┌─────────────┬───────────┬───────────────┬───────────┬───────────┐ │ Node │ MSR │ MSR │ Cc-status │ Cc-uptime │ │ │ │ version │ │ │ ├─────────────┼───────────┼───────────────┼───────────┼───────────┤ │ core1@ecss2 │ msr.ecss1 │ 3.14.15.243 │ connected │ 00:29:01 │ │ │ msr.ecss2 │ 3.14.16.1.0 │ connected │ 00:08:50 │ └─────────────┴───────────┴───────────────┴───────────┴───────────┘
- Next, run the services using the same steps: ecss-mediator, ecss-pa-sip, ecss-core with the following commands:на ecss1
sudo systemctl start ecss-mediator
на ecss1sudo systemctl start ecss-pa-sip
Check status in CoCon:на ecss1sudo systemctl start ecss-core
Результат:/system-status Checking... ┌─┬───────────────┬────────────────────────────┬───────────────────────────────┬─────────────────────┬──────┐ │ │ Node │ Release │ Erlang nodes │ Mnesia nodes │Uptime│ ├─┼───────────────┼────────────────────────────┼───────────────────────────────┼─────────────────────┼──────┤ │ │core1@ecss1 │ecss-core-3.14.16.1.130 │core1@ecss1,core1@ecss2 │not running │3m 50s│ │ │core1@ecss2 │ecss-core-3.14.16.1.130 │core1@ecss1,core1@ecss2 │not running │3h 22m│ │ │ds1@ecss1 │ecss-ds-3.14.16.1.130 │ds1@ecss1,ds1@ecss2 │ds1@ecss1,ds1@ecss2 │9m 42s│ │ │ds1@ecss2 │ecss-ds-3.14.16.1.130 │ds1@ecss1,ds1@ecss2 │ds1@ecss1,ds1@ecss2 │3h 22m│ │ │md1@ecss1 │ecss-mediator-3.14.16.1.130 │md1@ecss1,md1@ecss2 │md1@ecss1,md1@ecss2 │5m 22s│ │ │md1@ecss2 │ecss-mediator-3.14.16.1.130 │md1@ecss1,md1@ecss2 │md1@ecss1,md1@ecss2 │3h 22m│ │ │mycelium1@ecss1│ecss-mycelium-3.14.16.1.130 │mycelium1@ecss1,mycelium1@ecss2│not running │28m 4s│ │ │mycelium1@ecss2│ecss-mycelium-3.14.16.1.130 │mycelium1@ecss1,mycelium1@ecss2│not running │3h 23m│ │ │sip1@ecss1 │ecss-pa-sip-3.14.16.1.130 │sip1@ecss1,sip1@ecss2 │sip1@ecss1,sip1@ecss2│4m 40s│ │ │sip1@ecss2 │ecss-pa-sip-3.14.16.1.130 │sip1@ecss1,sip1@ecss2 │sip1@ecss1,sip1@ecss2│3h 22m│ │ │sorm1@ecss2 │ecss-sorm-3.14.16.1.130 │sorm1@ecss2 │not running │3h 22m│ └─┴───────────────┴────────────────────────────┴───────────────────────────────┴─────────────────────┴──────┘ All services are started. Active media resource selected list specific: ┌─────────────┬───────────┬───────────────┬───────────┬───────────┐ │ Node │ MSR │ MSR │ Cc-status │ Cc-uptime │ │ │ │ version │ │ │ ├─────────────┼───────────┼───────────────┼───────────┼───────────┤ │ core1@ecss1 │ msr.ecss1 │ 3.14.15.243 │ connected │ 00:02:37 │ │ core1@ecss2 │ msr.ecss1 │ 3.14.15.243 │ connected │ 00:38:31 │ │ │ msr.ecss2 │ 3.14.16.1.0 │ connected │ 00:18:20 │ └─────────────┴───────────┴───────────────┴───────────┴───────────┘
- Updating the package ecss-restfs:на ecss1
sudo apt install ecss-restfs
- Updating the package ecss-media-server:Update configuration:на ecss1
sudo apt install ecss-media-server
Check and, if necessary, manually correct the file → /etc/ecss/ecss-media-server/config.xmlна ecss1sudo dpkg-reconfigure ecss-media-server
Also, to register a media server from ecss2 to ecss1, it is needed to remove the previously added comments from the file /etc/ecss/ecss-media-server/conf.d/default.xml on ecss2:
Then restart the service:на ecss2sudo systemctl restart ecss-media-server.service
- Updating the package ecss-media-resources:на ecss1
sudo apt install ecss-media-resources
- Updating the package ecss-web-conf:на ecss1
sudo apt install ecss-web-conf
- After updating services, delete the ssw version commit file:на ecss1
sudo rm /etc/apt/preferences.d/eltex-ecss10
- Updating the ecss-dns-env package.