To ensure secure interaction between the administrator and the NAICE system, protection is implemented for the following user interfaces: lemmus, gavia, larus, castor, and sterna. All HTTP traffic is fully encrypted using the TLS protocol, which prevents data interception and unauthorized access.
During the installation of NAICE services, two self-signed certificates are automatically generated for the user interfaces. This ensures secure HTTPS communication based on the parameters specified in the configuration. For more information about installing NAICE services, see the corresponding section.
Different certificates are generated for two groups of services:
If a third-party Certificate Authority (CA) is available, the self-signed certificates can be replaced with certificates issued by the same CA.
The certificate must meet all of the following requirements to ensure correct operation with the NAICE service:
Certificate installation is performed in two stages:
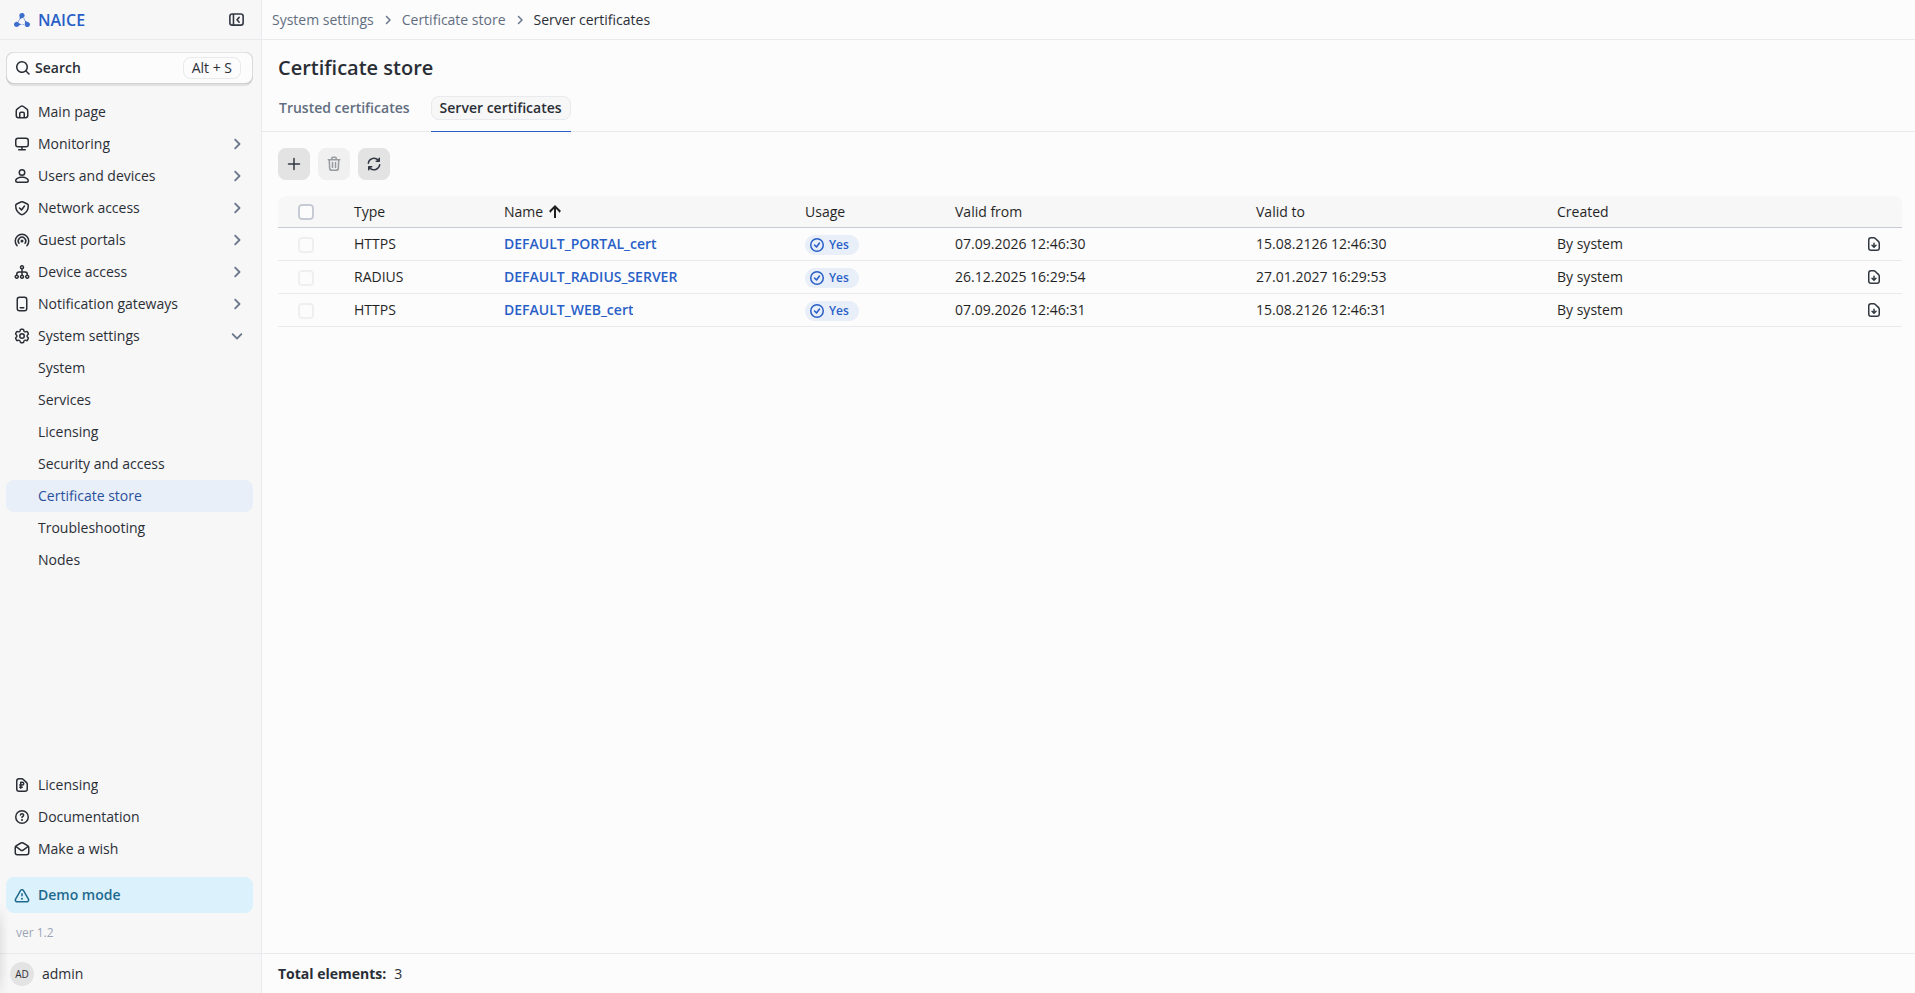
To upload your own certificates for the user interfaces in NAICE, go to the System settings → Certificate store → Server certificates page (access requires the system user to have the privilege to edit system settings). The page contains a table that already includes entries with the automatically generated self-signed certificates DEFAULT_WEB_<hostname> and DEFAULT_PORTAL_<hostname>, which are used by default in the system immediately after installation.
To open the certificate upload form, click  . In the form, select Certificate type — HTTPS.
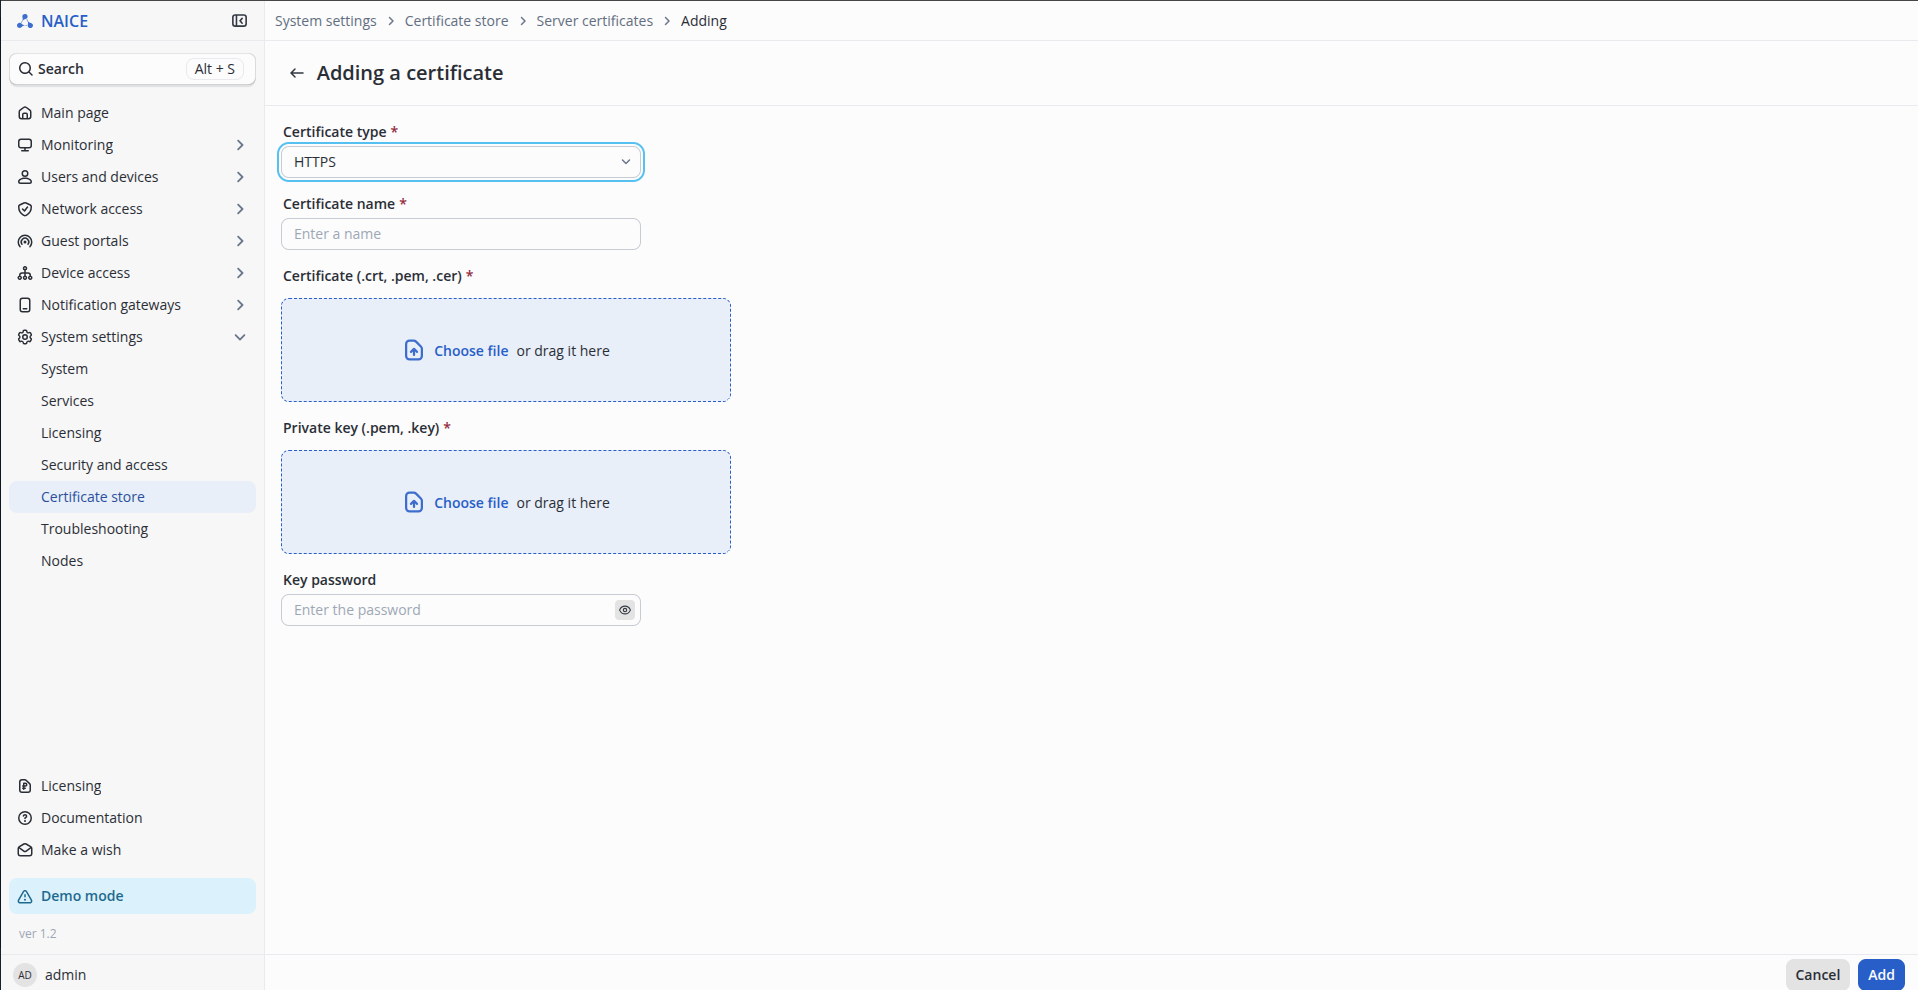
You must also fill in the remaining form fields:
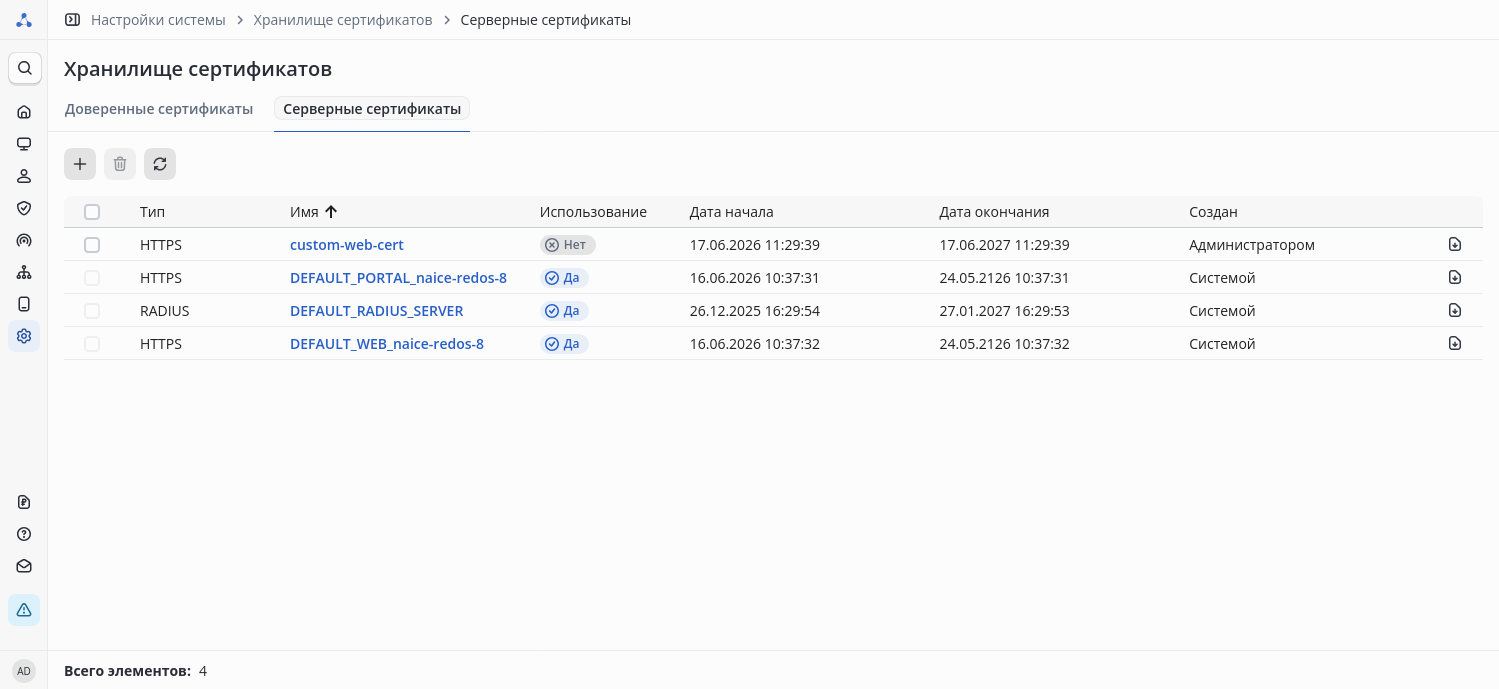
 After specifying all required settings, click the Add button. When the certificate is uploaded, an initial validation is performed – compliance with the requirements, matching the key to the certificate, and checking the certificate validity period. If everything is in order, the certificate is uploaded and a new entry appears in the server certificates table:
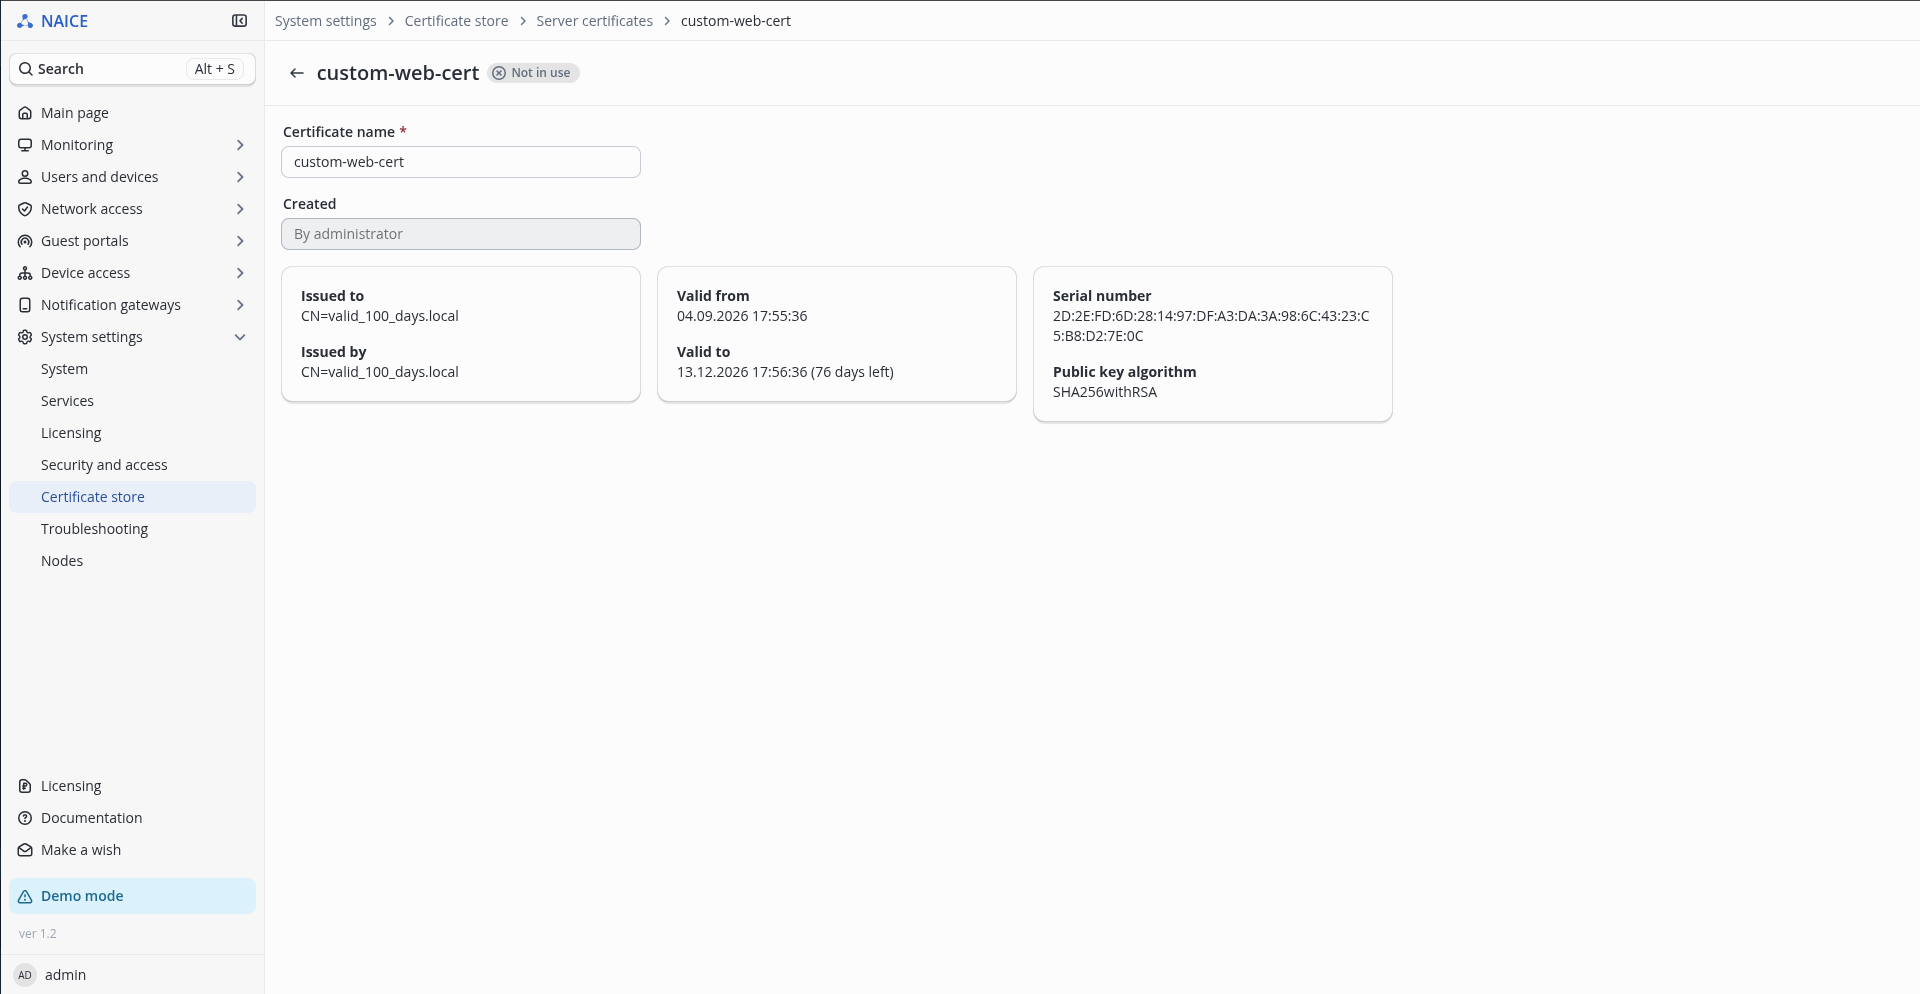
If necessary, you can view detailed information about the certificate by clicking the certificate name in the table:
The process of uploading certificates for the web interface and portal is identical.
When installing in a high-availability configuration without VRRP, you may need to use different security certificates for different NAICE nodes. In this case, at this stage you must upload certificates for all nodes. |
In the previous step, the certificates were uploaded to the store; now you need to configure their use. To do this, go to the System settings → Nodes page. This page contains a list of all NAICE nodes, the number of which varies depending on the installation scheme. For each node, node-specific settings can be configured.
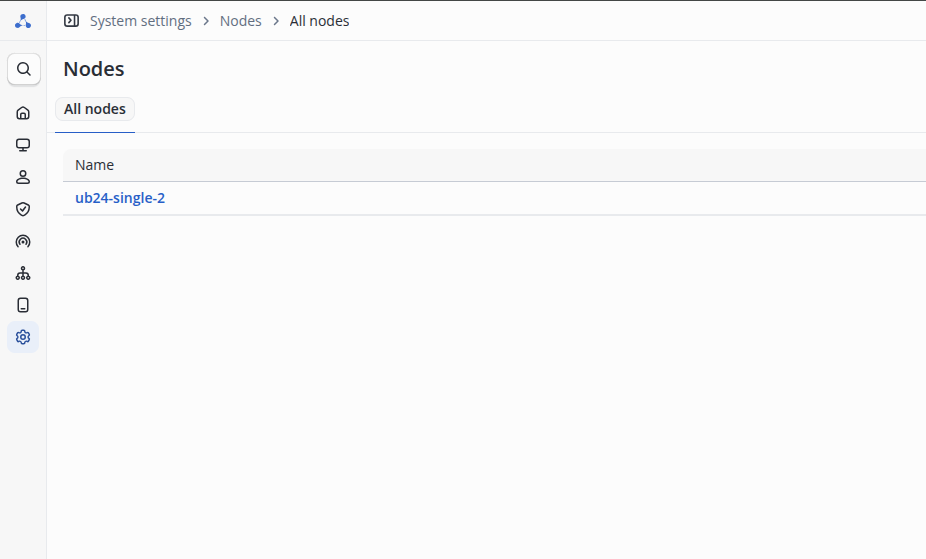
To access the settings, click the node name. You will be redirected to the configuration form:
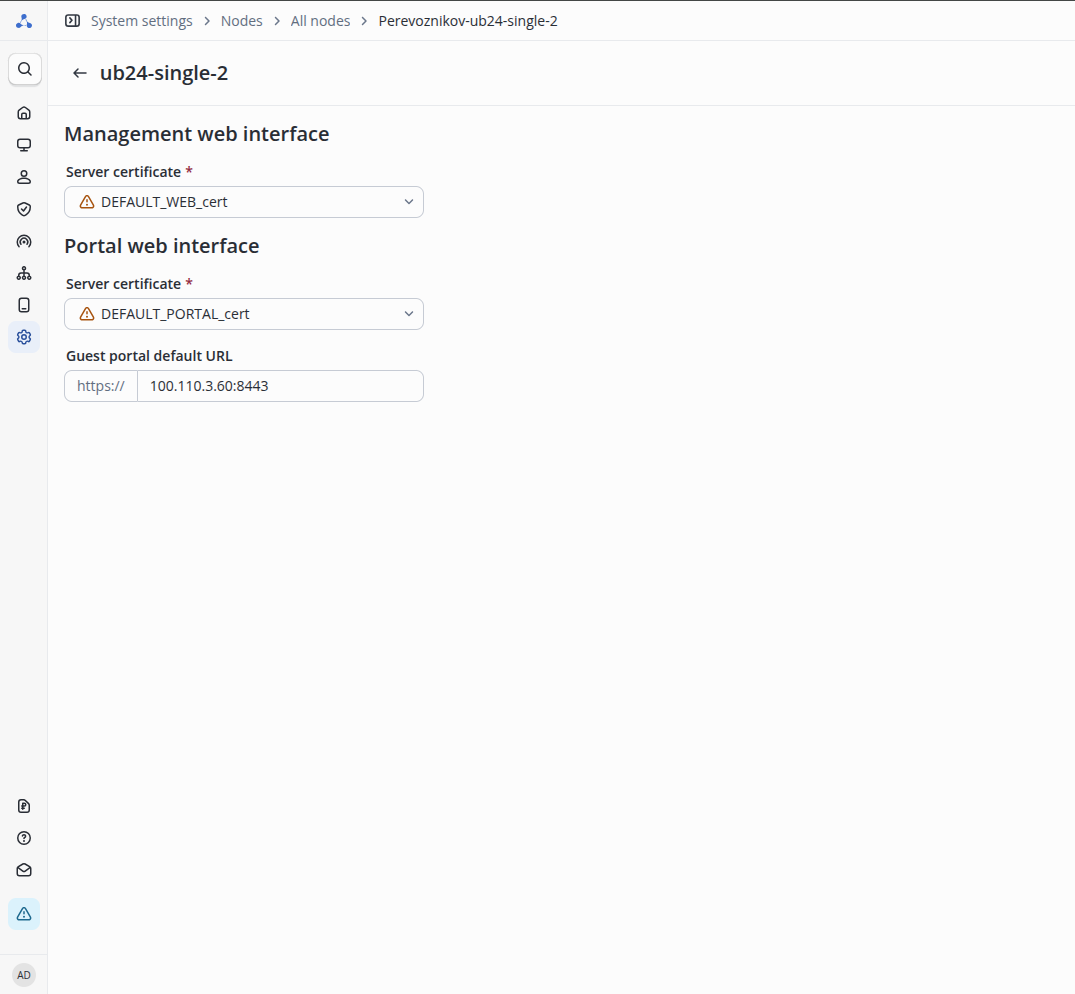 By default, the node uses the certificates that were automatically generated during the system installation. Using these certificates is insecure, as they are self-signed and are treated as untrusted by all browsers. The user must explicitly consent to access the site with such a certificate.
To replace the certificates with the previously uploaded ones, do the following:
The portal web interface configuration is available only with a license of the ADVANCED level or higher. |
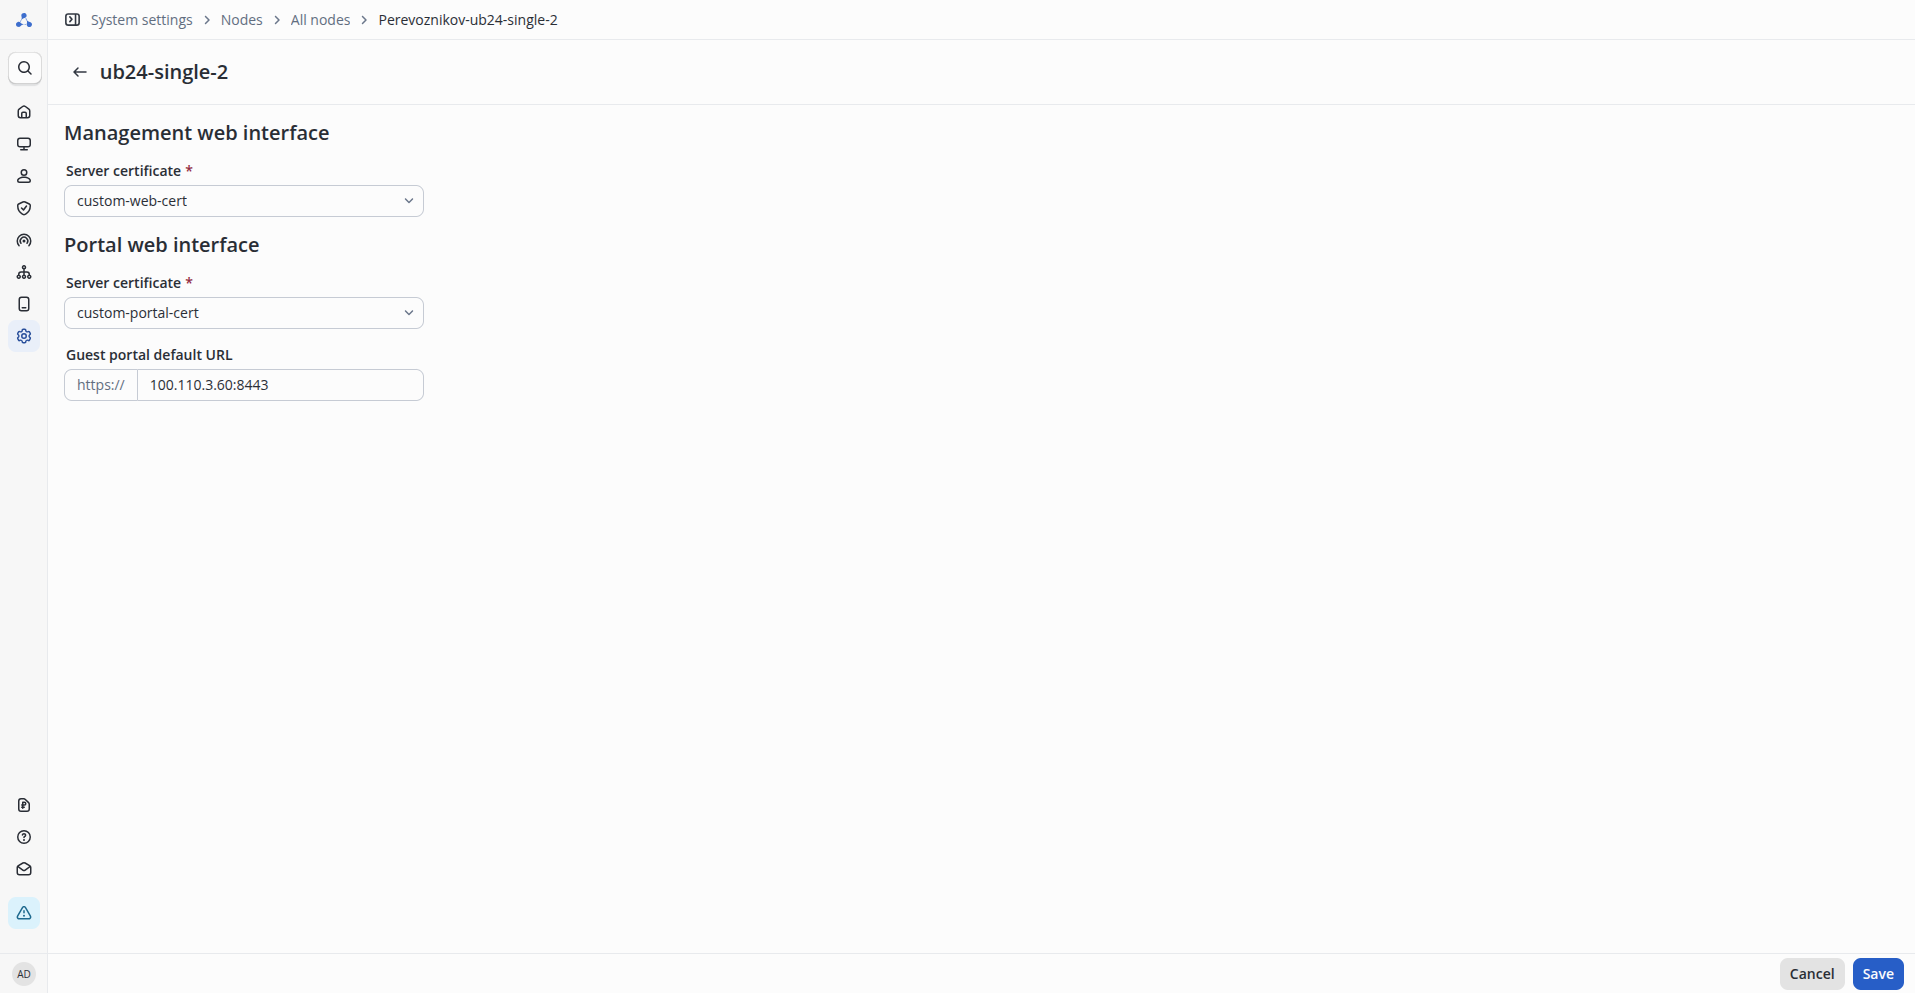 After selecting the required certificates, click Save.
Incorrect certificate configuration may result in loss of access to the web interfaces. After the settings are applied, the management interface will be restarted. To apply the settings in the browser, the page is automatically refreshed for the current system users, while their sessions are not terminated. |
If the installation uses a high-availability configuration, repeat the above steps for each node. The server certificates may be identical for different nodes. |
To view server certificates, go to the System settings → Certificate store → Server certificates page (access requires the system user to have the privilege to read system settings).
When you click the certificate name in the table, a page with detailed information about the certificate opens:
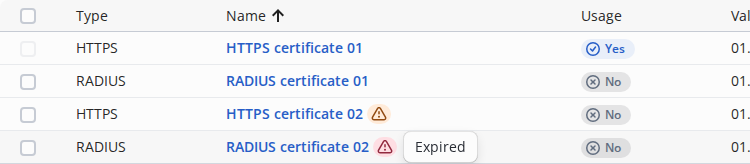
When a certificate validity period is approaching its end, starting 30 days before expiration, a yellow warning icon begins to appear next to the certificate name in the System settings → Certificate Store → Server certificates table in the web interface:
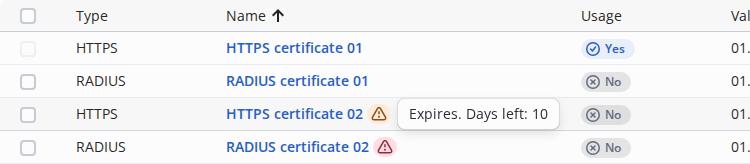 After the certificate expires, the icon turns red:
System events with similar warnings are also displayed on the Monitoring → System → System events page:
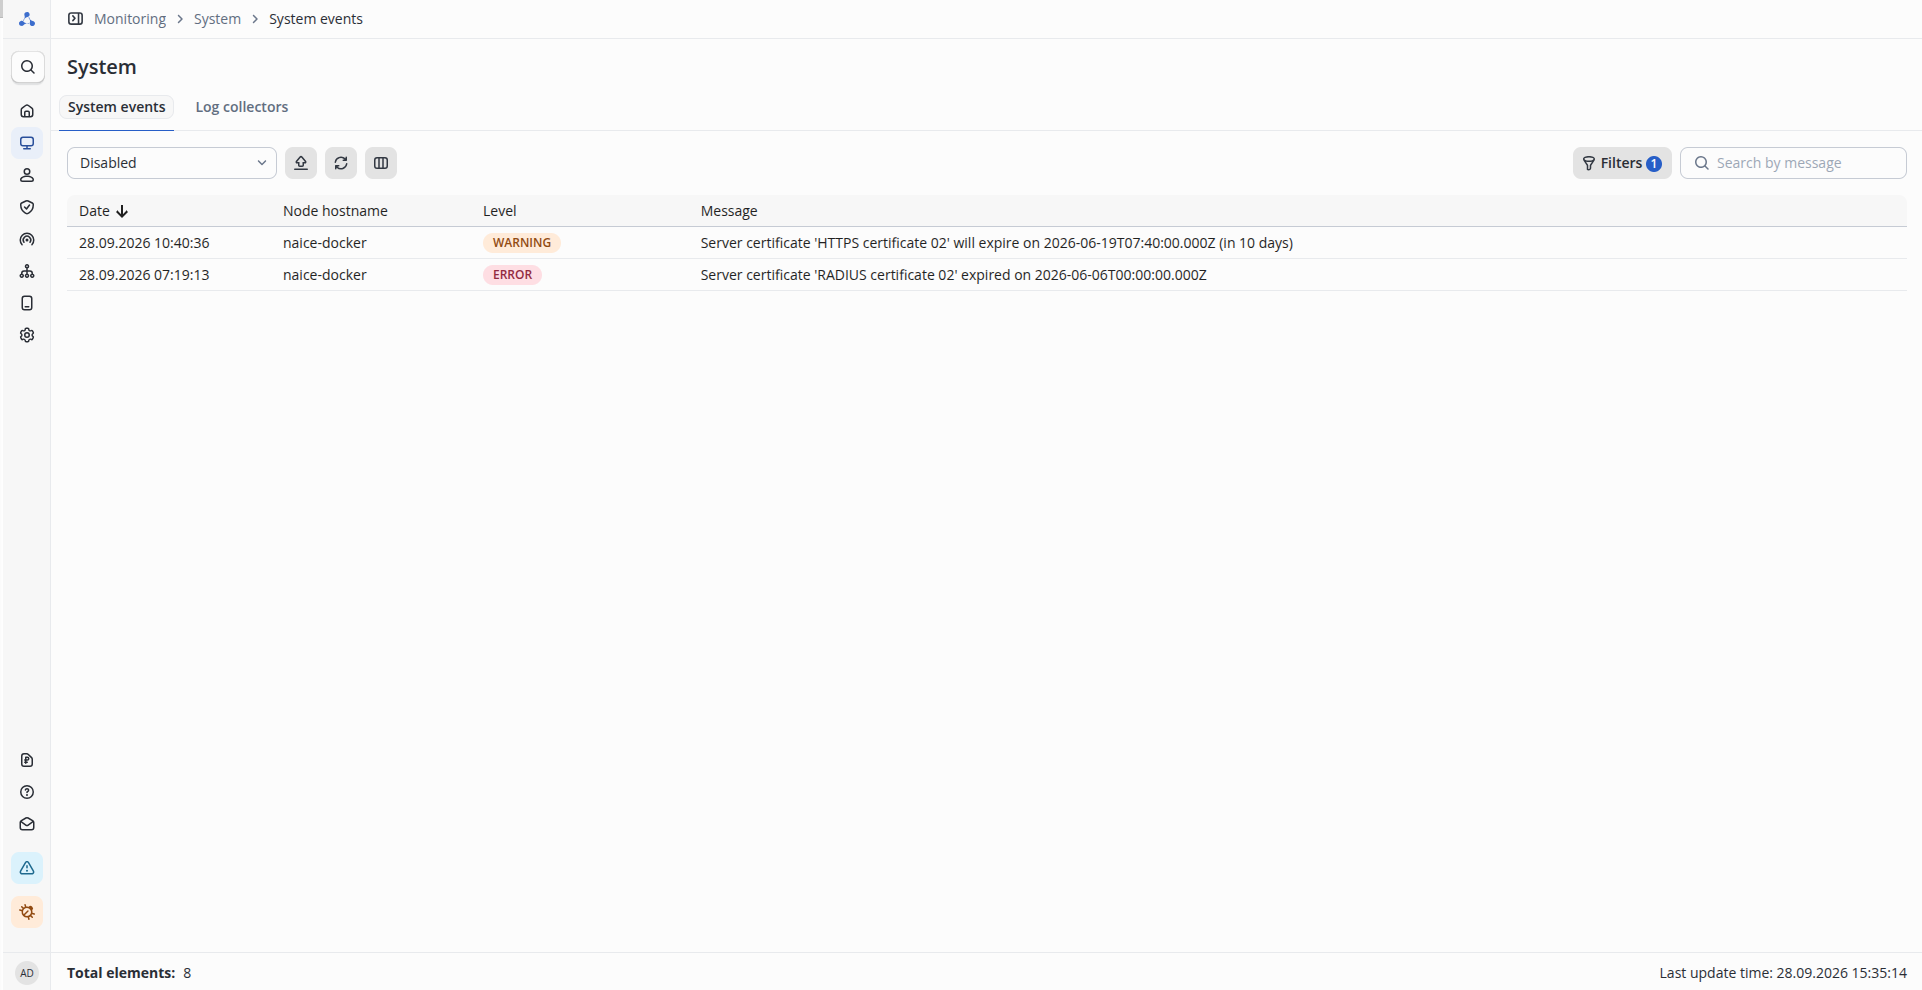 The events are repeated daily until the certificate is deleted.
View metrics or retrieve nginx parameters using the following command:
For NAICE web interface:
echo | openssl s_client -showcerts -connect <IP address or domain name>:443 2>&1 | openssl x509 -noout -dates |
For NAICE portal web interface:
echo | openssl s_client -showcerts -connect <IP address or domain name>:8443 2>&1 | openssl x509 -noout -dates |
Nginx provides a method that returns SSL certificate information in JSON format. |
Example output:
notBefore=Feb 25 04:32:04 2026 GMT notAfter=Feb 1 04:32:04 2126 GMT |
For naice-gavia:
curl -k https://<IP address or domain name of the host for NAICE>:8080/actuator/info |
For naice-lemmus:
curl -k https://<IP address or domain name of the host for NAICE>:8083/actuator/info |
For naice-castor:
curl -k https://<IP address or domain name of the host for NAICE>:8095/actuator/info |
{"certificationInfo":"[\n[\n Version: V3\n Subject: CN=naice.eltex.loc\n Signature Algorithm: SHA256withRSA, OID = 1.2.840.113549.1.1.11\n\n Key: Sun RSA public key, 2048 bits\n params: null\n modulus: 20486967698613267930909072363030876768829382668037653959787293720836693037928105253241476741132543189024216394802025956688056563424715596228948534991165300263386817165467478160825626126485740592732390380827272721590133814642584953058405940822026985924893382111244494224675400688570979828213773583419015857751195999453517367776747967524791333248346299091289472585316995257682843651922067607138984537621206898106292347585416976597088550184844009552218272531760031782701234470695835451229760735228708466934677559090711246811340726563284325073340020794600896874630686783268793254419061795884880349881938140092553567913571\n public exponent: 65537\n Validity: [From: Wed Feb 25 04:31:57 UTC 2026,\n To: Fri Feb 01 04:31:57 UTC 2126]\n Issuer: CN=naice.eltex.loc\n SerialNumber: 6b:91:5f:9f:fd:8a:aa:af:d1:49:ad:9d:5a:d3:5e:2f:f8:68:a0:dc\n\nCertificate Extensions: 4\n[1]: ObjectId: 2.5.29.37 Criticality=false\nExtendedKeyUsages [\n serverAuth\n clientAuth\n]\n\n[2]: ObjectId: 2.5.29.15 Criticality=true\nKeyUsage [\n DigitalSignature\n Non_repudiation\n Key_Encipherment\n Key_Agreement\n Key_CertSign\n]\n\n[3]: ObjectId: 2.5.29.17 Criticality=false\nSubjectAlternativeName [\n IPAddress: 100.110.3.35\n]\n\n[4]: ObjectId: 2.5.29.14 Criticality=false\nSubjectKeyIdentifier [\nKeyIdentifier [\n0000: D2 9A 06 D5 1F 13 45 D1 68 C3 EB 3C 08 26 DB 5C ......E.h..<.&.\\\n0010: FE E5 92 00 ....\n]\n]\n\n]\n Algorithm: [SHA256withRSA]\n Signature:\n0000: 7F 27 56 8D 5F E5 98 59 1A 82 0B 43 BB 24 19 AA .'V._..Y...C.$..\n0010: 8B A0 19 2E B2 12 63 6C 2B 2D B1 19 11 61 B4 58 ......cl+-...a.X\n0020: B7 10 91 F8 A5 60 54 98 0C D5 D9 88 2C 3F 53 C6 .....`T.....,?S.\n0030: 40 75 EC 49 CC 05 13 25 70 A2 43 55 67 86 D5 E7 @u.I...%p.CUg...\n0040: E6 60 50 CD 4F 1B 79 DB 9C 33 E1 BE 18 77 68 65 .`P.O.y..3...whe\n0050: FD 58 5B 6C BA 5C FA DB 4E 12 3B B4 1E 29 75 2A .X[l.\\..N.;..)u*\n0060: 72 BD 4F DA 7D 99 3F 7B D4 33 4C C8 10 EB 4E F2 r.O...?..3L...N.\n0070: 90 5A 57 BD 39 C3 D5 DA DF 18 A2 6C 86 45 3E 0C .ZW.9......l.E>.\n0080: 0A C7 E7 EF 88 16 E1 8F DF 81 0D 92 45 9A 46 7A ............E.Fz\n0090: 61 D3 0B A0 5E DA 7F F6 EF 35 5B E1 4F 91 D8 02 a...^....5[.O...\n00A0: 75 0A 99 52 5F 2F 24 A0 0C 7A 44 77 4E 4A F4 31 u..R_/$..zDwNJ.1\n00B0: D1 F9 35 BC BD A3 DF 08 71 16 AC 32 D4 F6 BF EE ..5.....q..2....\n00C0: 9F B5 25 58 64 08 BA D5 79 3C B7 77 E4 25 9B 92 ..%Xd...y<.w.%..\n00D0: 51 A6 38 21 F6 09 BA B1 20 C8 E1 69 9E 04 44 B6 Q.8!.... ..i..D.\n00E0: 43 A3 A9 99 63 72 53 B1 F9 36 9F E5 35 5E F8 02 C...crS..6..5^..\n00F0: F1 F5 6B 16 40 FA F3 73 68 48 7E 47 97 B8 92 D4 ..k.@..shH.G....\n\n]"} |
For naice-gavia:
https://<IP address or domain name of the host for NAICE>:8080/actuator/prometheus |
For naice-lemmus:
https://<IP address or domain name of the host for NAICE>:8083/actuator/prometheus |
For naice-castor:
https://<IP address or domain name of the host for NAICE>:8095/actuator/prometheus |
# HELP cert_valid_from The start date of the validity period in milliseconds
# TYPE cert_valid_from gauge
cert_valid_from{application="lemmus"} 1.771993917E12
# HELP cert_valid_to The end date of the validity period in milliseconds
# TYPE cert_valid_to gauge
cert_valid_to{application="lemmus"} 4.925593917E12
To verify the dates, use the following commands in the terminal: Convert the value to an integer:
Convert the resulting integer to a date:
The result will be a readable certificate validity start date. |