Install the platform using the evi-installer: a step-by-step setup wizard will automatically configure and launch the platform. There is no need to edit the files manually.
For large sites, the platform can be split across two servers: the “core” (management) and the video stream. In this case, the installation is repeated on each server (see the Installation on two servers section). |
To ensure continuous access to and storage of platform service logs, the platform also comes with the Clickstack service and a log collection agent. |
In the terminal, enter the following commands one after another:
sudo mkdir -p /etc/apt/keyrings curl -fsSL https://download.docker.com/linux/ubuntu/gpg | sudo gpg --dearmor -o /etc/apt/keyrings/docker.gpg echo "deb [arch=$(dpkg --print-architecture) signed-by=/etc/apt/keyrings/docker.gpg] https://download.docker.com/linux/ubuntu $(lsb_release -cs) stable" | sudo tee /etc/apt/sources.list.d/docker.list > /dev/null sudo apt update sudo apt install docker-ce docker-ce-cli containerd.io docker-buildx-plugin docker-compose-plugin -y sudo systemctl enable --now docker sudo usermod -aG docker $USER |
Download the appropriate evi-installer archive based on the operating system: Archive for evi-installer for Ubuntu. |
Unzip the evi-1.7.1.tar.gz archive into a separate folder on the server's hard drive.
Open a command prompt in the folder containing the installer and run the following command:
sudo ./install.sh |
Select the location of the master script, then choose one of the three installation options.
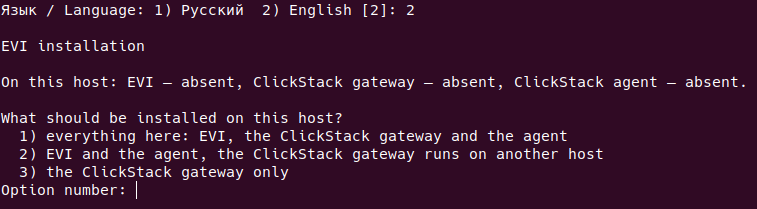
1. EVI, ClickStack gateway, and agent Install the EVI platform in one of two deployment options, the ClickStack gateway for log processing, and the agent for collecting logs and transmitting them to the ClickStack gateway 2. EVI and the agent; the ClickStack gateway is hosted on a separate server Install the EVI platform in one of two deployment options of your choice, along with the agent to collect logs and forward them to the ClickStack gateway, which is installed on a separate server 3. ClickStack gateway only Install the ClickStack gateway for log management |
The wizard will handle the installation automatically: it will install the certificates, configure the platform, and launch it. There's no need to edit any files; the installation is a one-time process. |
The wizard will also automatically install the platform's internal certificates and restart the container system (Docker) — this is necessary to load the platform's components. No action is required on your part. |
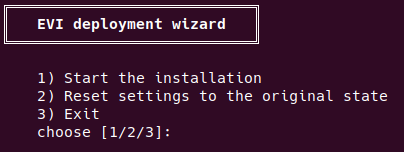
During installation, the wizard will prompt for several settings. Enter the values according to the table:
| Question from the wizard | Value |
|---|---|
| Server address (EVILIVE_GLOBAL_EXTERN_HOST) | The server address on the local network, such as 192.168.1.10 or evi-server.company.local. Operators and cameras will use this address to connect to the platform. |
| Location of the video archive (SYSTEM_ARCHIVE_PATH) | A folder on the server's disk where camera recordings will be saved. If none is specified, the “archive” folder next to the installer will be used. |
Location of backups (PSQL_BACKUP_PATH / CLICKHOUSE_BACKUP_PATH) | Folder for platform data backups. Leave the default values if necessary. |
| PACS gateway address (EVISCUD_GATEWAY_HOST) | The server address on the local network. The controller will use this address to communicate with the platform. When installed on two servers, this is the address of the “core” server. |
| Is the Peeper monitoring system installed? (IS_PEEPER_INSTALLED) | Answer “yes” if the Peeper monitoring system is already deployed at the site; otherwise, answer “no.” |
Do not specify 127.0.0.1 as the server address: this is an “internal” address, and if used, the video and web interface will be accessible only from the server itself, not from the operators' workstations. |
The platform provides the specified address to cameras and video players so they can locate the live video stream. Therefore, the address must be accessible from any workstation used to view the video. |
When the wizard is complete, the following message will appear on the screen:
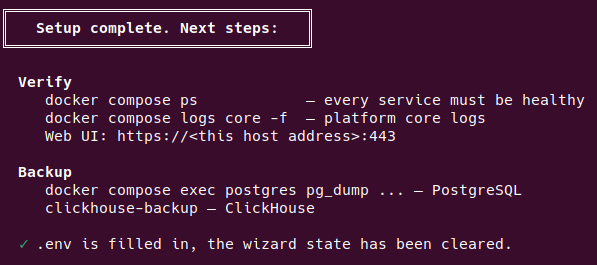
The EVI platform was successfully installed.
When you select the ClickStack gateway installation, the wizard will prompt for a few additional settings. The wizard fills these in automatically; if necessary, specify the values yourself according to the table:
| Question from the wizard | Value |
|---|---|
| Host address with Gateway (HOST_IP) | The server address on the local network, such as |
| Catalog with an additional OTel Collector configuration (CUSTOM_CONFIG_PATH) | The folder on the server containing the OTel Collector configuration. It is detected automatically; it is necessary to verify it. |
| Database name in ClickHouse (CLICKHOUSE_DB) | The name of the ClickHouse database for ClickStack logging |
| ClickHouse user (CLICKHOUSE_USER) | The username used to log in to the database |
| ClickHouse user password (CLICKHOUSE_PASSWORD) | The password for the user used to write to the database |
By default, the master uses port 443 to access the ClickStack web interface. If the master detects that the port is in use, it will automatically use port 8443 instead, which can be changed if desired or necessary. |
Next, specify the paths to the TLS certificates. If none are provided, the wizard will automatically use its own self-signed certificates. After that, the installation wizard will start the ClickStack containers and, upon completion, display the following message:
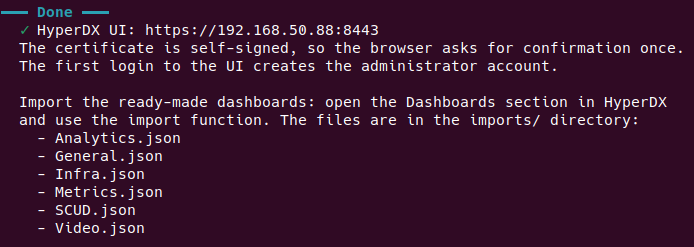
The ClickStack platform was successfully installed.
The next step is to install the ClickStack agent, which captures logs from the EVI platform's containers and forwards them to the ClickStack gateway.
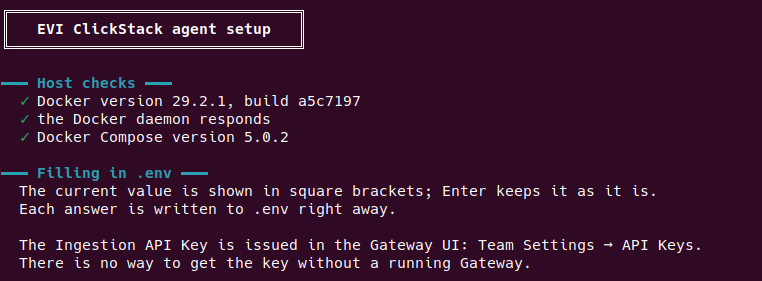
To install the agent, the wizard will prompt for two parameters. Enter the values according to the table:
| Question from the wizard | Value |
|---|---|
| OTLP gRPC address on the Gateway (GATEWAY_OTLP_ENDPOINT) | The address and port of the server on the local network, such as |
| Ingestion API Key from UI Gateway (GATEWAY_OTLP_AUTHORIZATION) | The authorization key that the agent will use to connect to ClickStack. |
To obtain the Ingestion API Key, it is necessary to:
|
After that, the installation wizard will start the agent containers and, upon completion, display the following message:
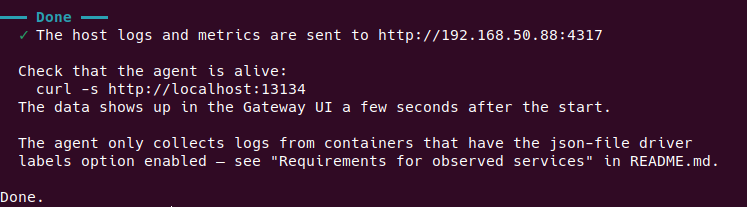
The EVI Clickstack agent was successfully installed.
For large-scale deployments, the platform can be divided into two servers: the “main” server (management, database, web interface) and the “video server”. In this case, the installation is repeated on each server. |
In the previous steps, the installation was performed on a single server. To install on two servers, extract the evi-1.7.1.tar.gz archive to the disk on each server, open a terminal in the folder containing the installer, and run:
sudo ./install.sh |
Answer the wizard's questions on each server. Be sure to enter a valid network address (not 127.0.0.1).

Open a browser on a computer on the local network and enter the address of the server on which the “core” is installed: https://IP address or https://host name.
If the platform's login page has opened, the installation was successful, and the platform is ready to use.
After installation, the default account is active: username — admin, password — password. Further configuration (adding controllers, cameras, and employees) is described in the EVI Platform. Quick start. |
Container verification:
docker compose ps # all services are in a healthy state docker compose logs core -f # platform core logs |
Certificates: the master installs the private registry CA certificates in /etc/docker/certs.d/ and restarts Docker.Without this step, docker pull will fail with the error x509: certificate signed by unknown authority.