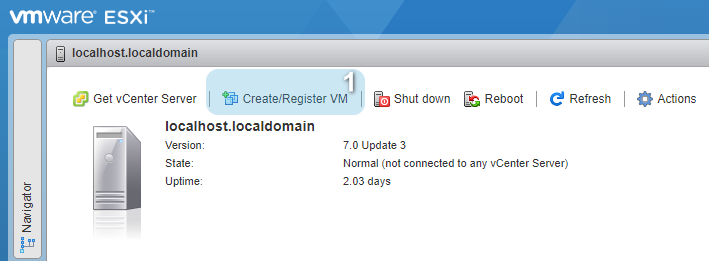
1. Click "Create/Register VM".
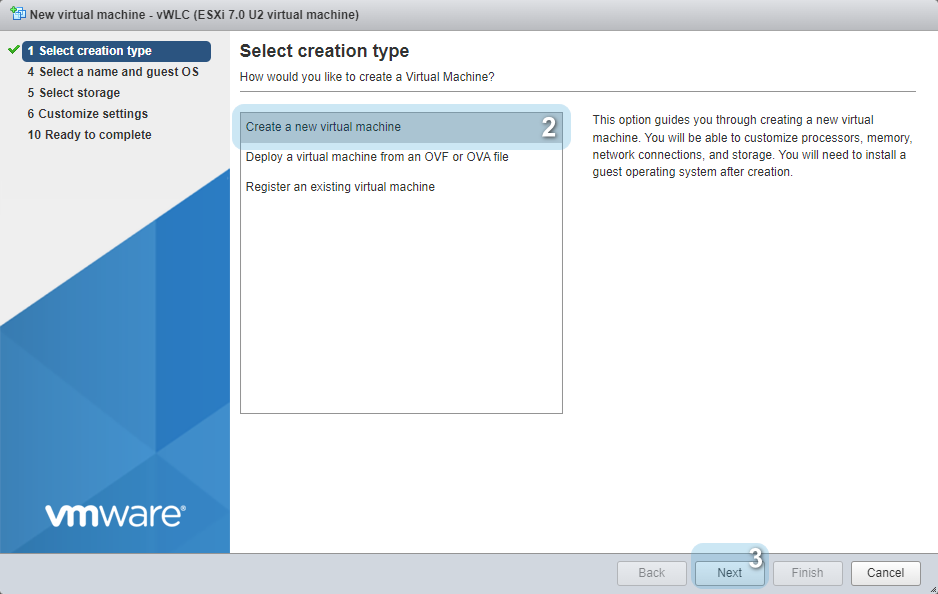
2. Select "Create a new virtual machine".
3. Click "Next".
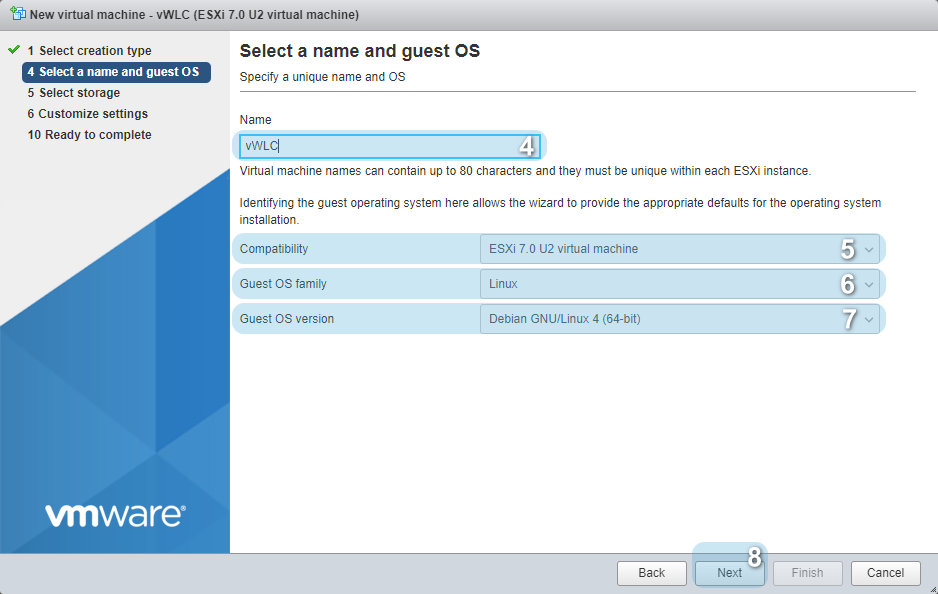
4. Specify the name of the virtual machine in the "Name" field. In the following example "vWLC" is specified.
| It is recommended to give the virtual machine a simple and descriptive name. |
5. In the "Compatibility" field, specify the ESXi version used.
6. In the "Guest OS family" field, select the "Linux" operating system.
7. In the "Guest OS version" field, select any 64-bit version, in the following example, "Debian GNU/Linux 4 (64-bit)" is selected.
8. Click "Next".
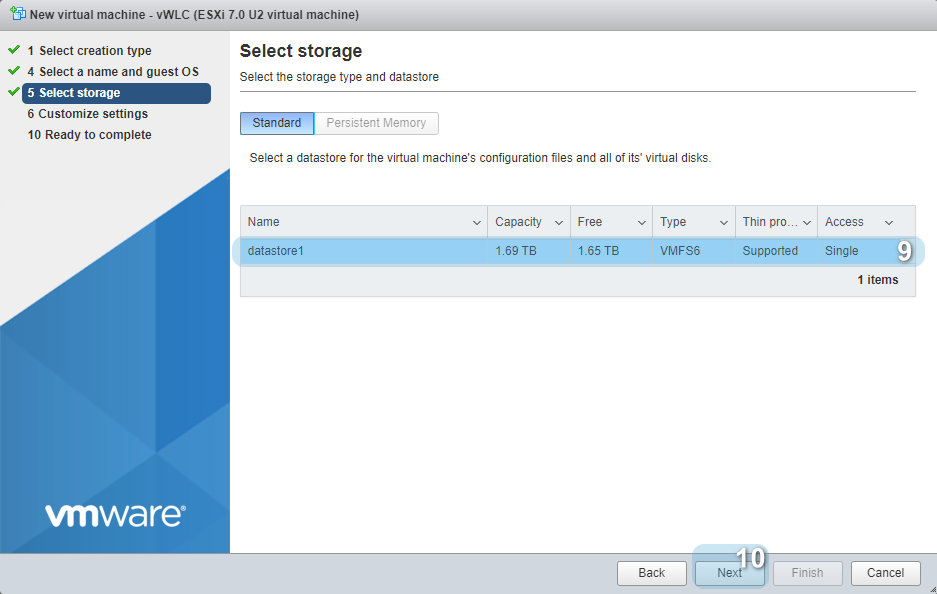
9. Select the datastore for the virtual machine.
10. Click "Next".
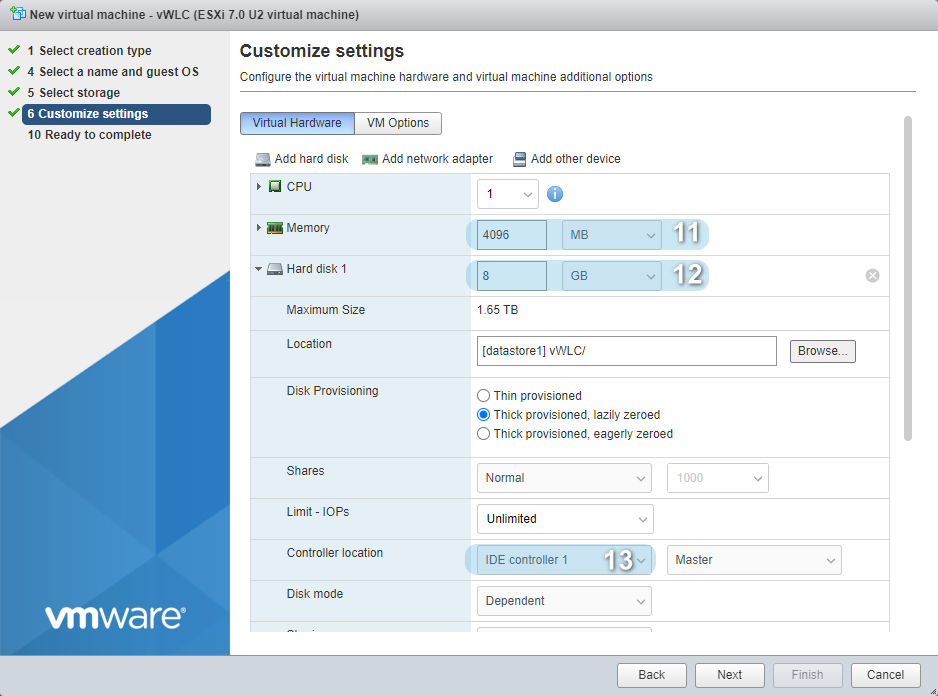
11. Select the amount of RAM to allocate to the virtual machine.
The minimum amount of RAM must be at least 4 GB. |
12. Select the disk size.
Minimum disk size is 1 GB, all space above the minimum limit will be allocated for flash/data. The recommended disk size is 8 GB. |
13. Specify "IDE controller" in "Controller location" for "Hard Disk".
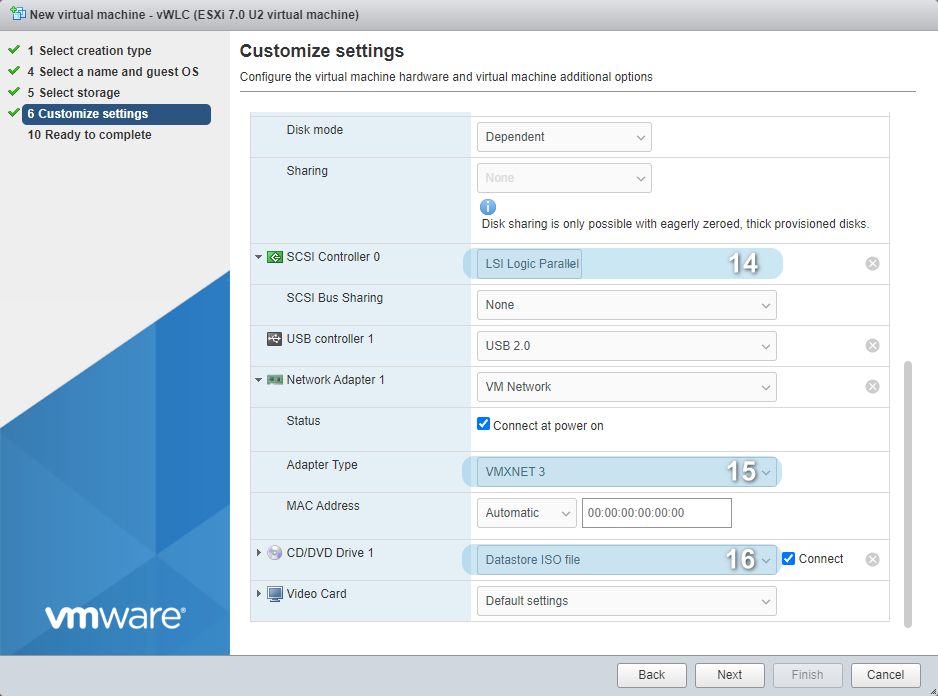
14. Specify the "LSI Logic Parallel" status in the "SCSI Controller" field.
15. Specify "VMXNET 3" in "Adapter Type" for "Network Adapter".
16. Specify the "Datastore ISO file" status for "CD/DVD Drive". The disk image selection window will be displayed.
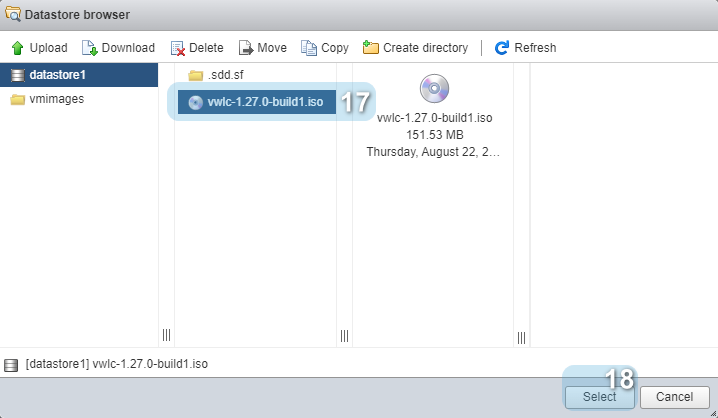
17. Select the "vwlc-1.30.0-buildX.iso" image.
18. Click "Select" to confirm the choice.
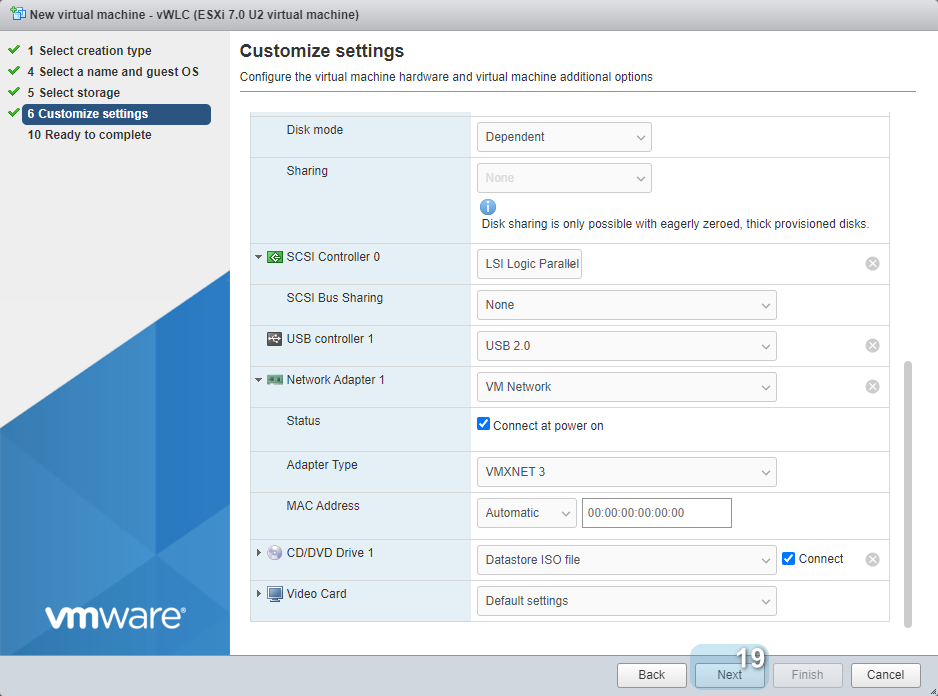
19. Click "Next".
20. Click "Finish" to create a virtual machine.
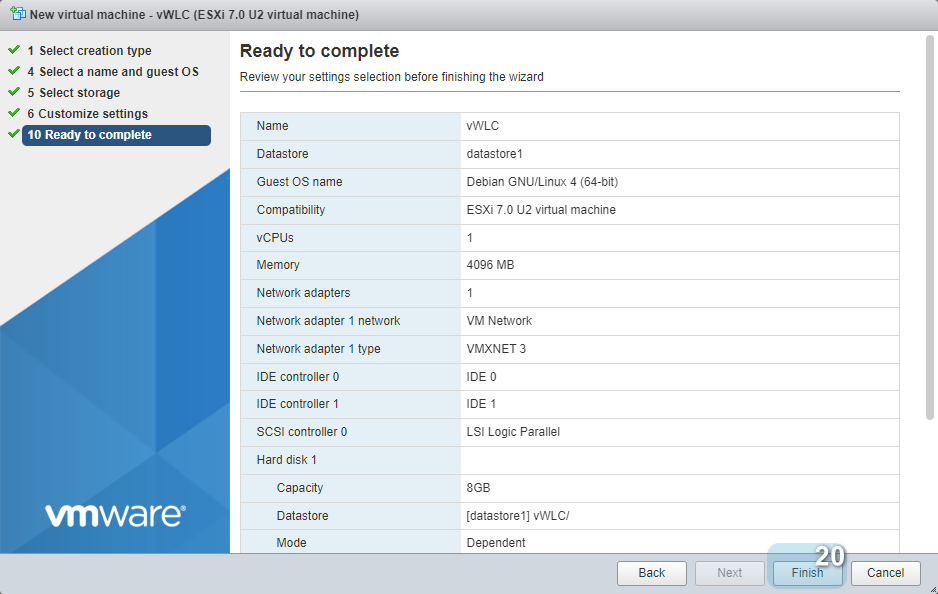
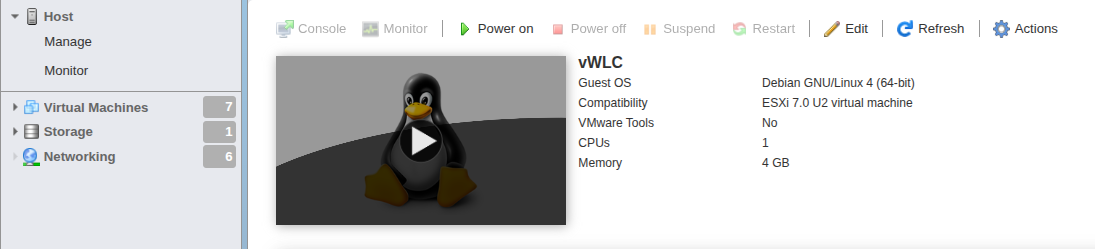
Virtual machine has been successfully created.
On the virtual machine created, perform the following steps:
1. Click "Edit":
2. Click "Add network adapter". Select a Network for the new network adapter from the drop-down list:
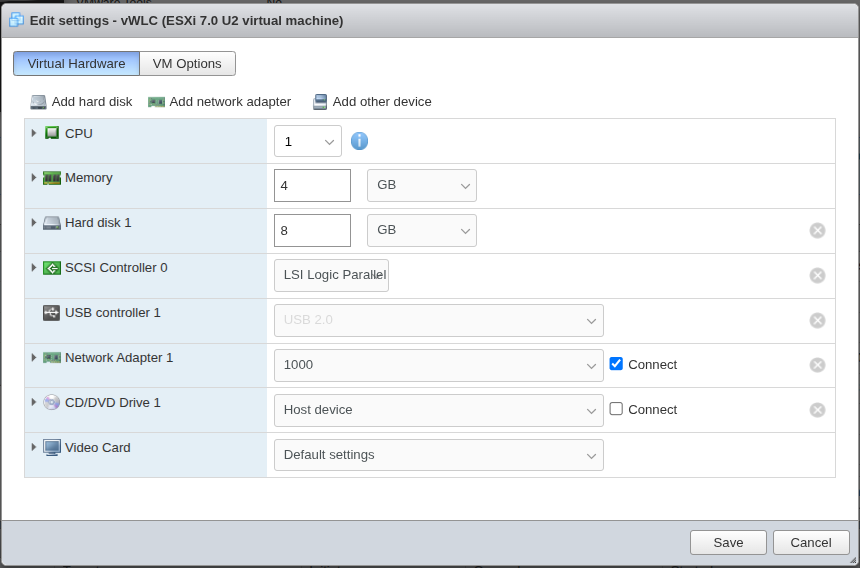
3. Click "Save" to save the settings and launch vWLC.
To connect a serial port, perform the following steps:
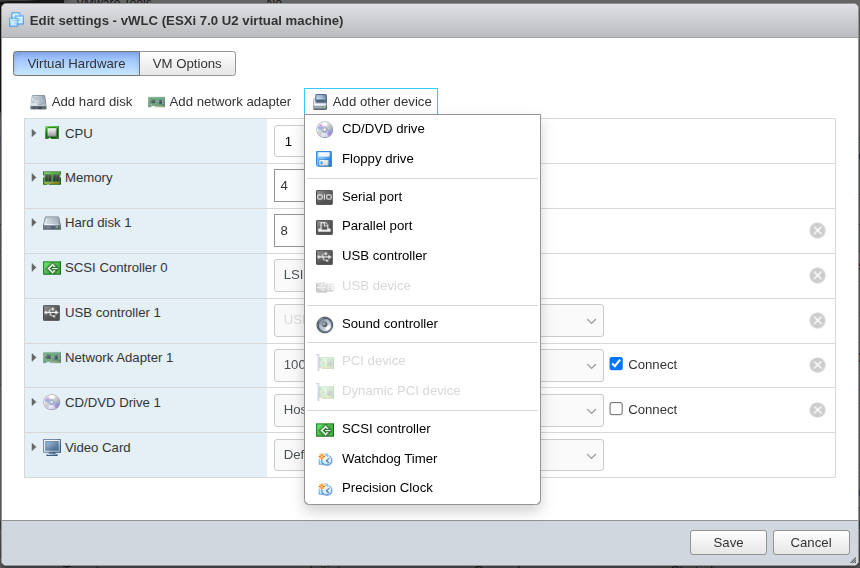
1. Click "Edit":
2. In the "Add other device" drop-down list click "Serial port":
3. In the "Serial port" menu, select one of the following options:
Belos is an example of configuration via Telnet.
In the "Serial port" menu, select "Use Network", in the "Direction" field, specify "Server", in the "Port URI" field, specify a URI for connection in the following format:
<protocol>://<ip.ad.dr.es>:<port> |
where:<ip.ad.dr.es> — an address of a server on which a VMware ESXi virtual machine is operating;
<port> — a free TCP port for connection.
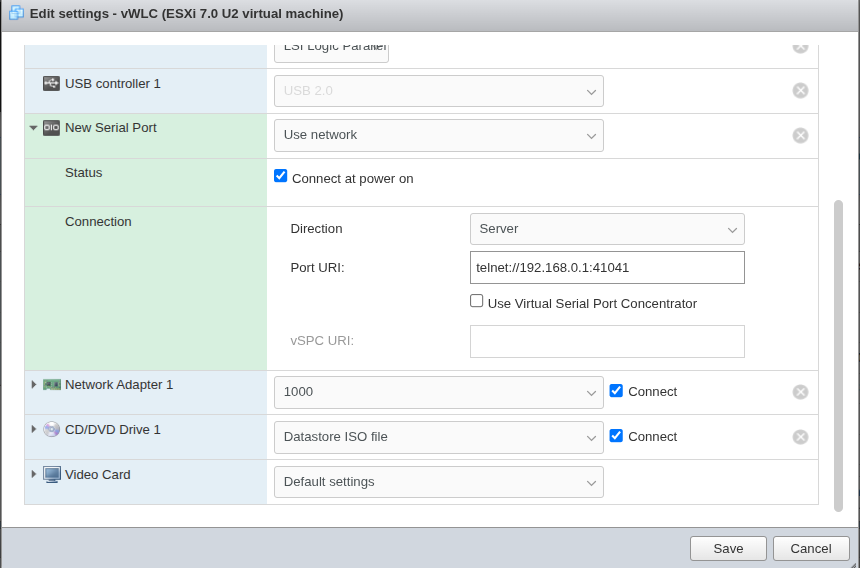
4. Click "Save" to save the settings and launch vWLC.
Use the |
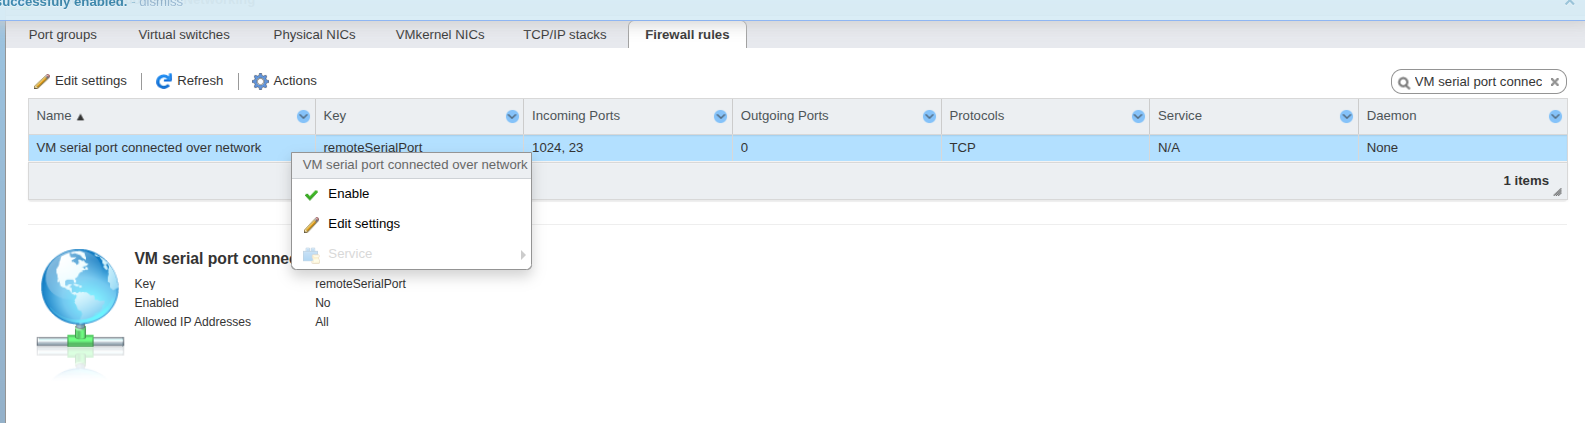
Enable the "VM serial port connected over network" parameter to enable connection to the vWLC console. |
5. To enable VM serial port connected over network, go tho the "Networking" menu, open the "Firewall rules" tab, and click "enable" in the context menu of the "VM serial port connected over network" parameter.
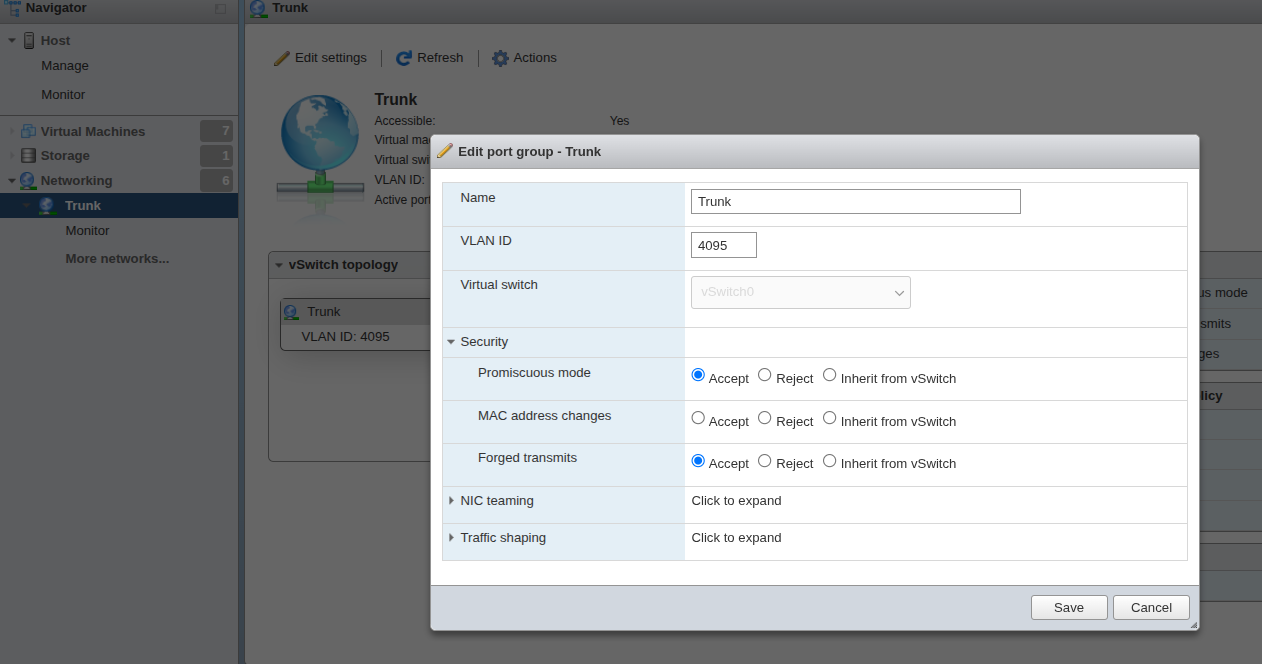
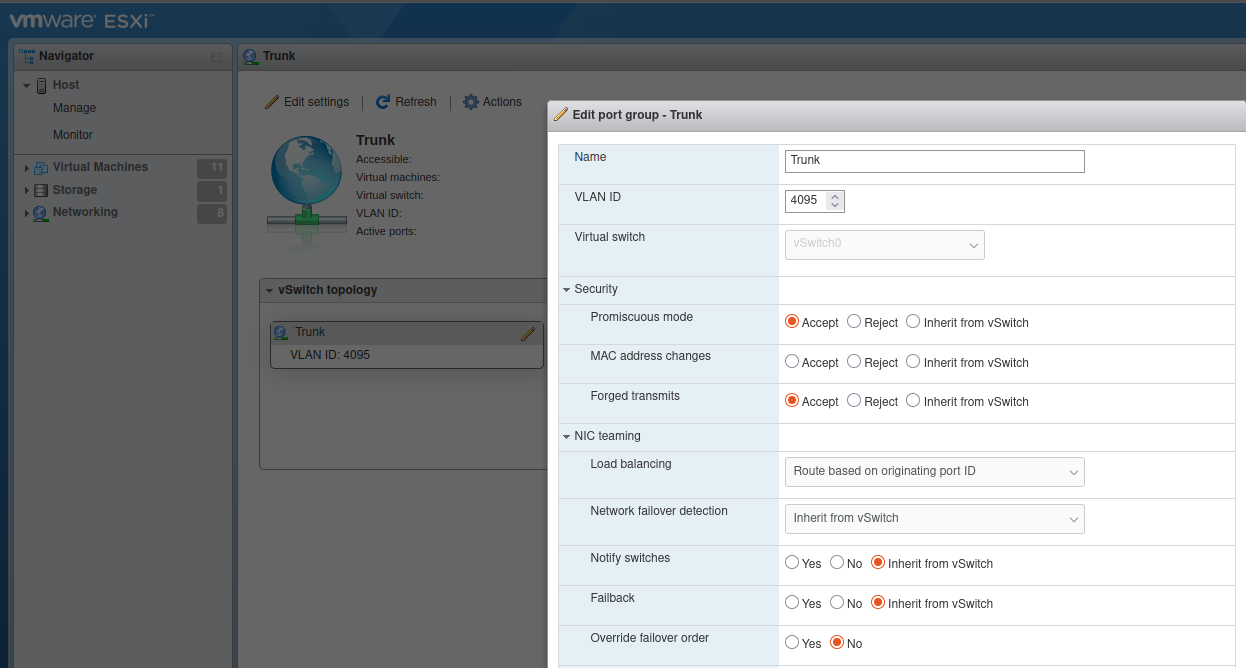
To enable Promiscuous mode, go to the "Networking" menu. Select a required network adapter (Port group), click "Edit settings", open the "Security" section, and set the "Promiscuous mode" and "Forged transmits" parameters to "Accept".
Enabling this parameter is required when using a scheme with traffic termination on Bridge vWLC. |
Depending on the traffic termination setup option, additional configuration may be required.
In a scheme with traffic termination on vWLC (for example, the factory configuration or Quick start), no additional configuration is needed.
If a scheme with L2 traffic passthrough (via a trunk interface (vlan 4095) or transparent traffic passthrough) is implemented, a problem with reverse traffic arises.
The hypervisor can be connected to the network via multiple links. If Link Aggregation is not used, problems will arise when passing L2 traffic through vWLC. Solutions for the reverse path problem are given below.
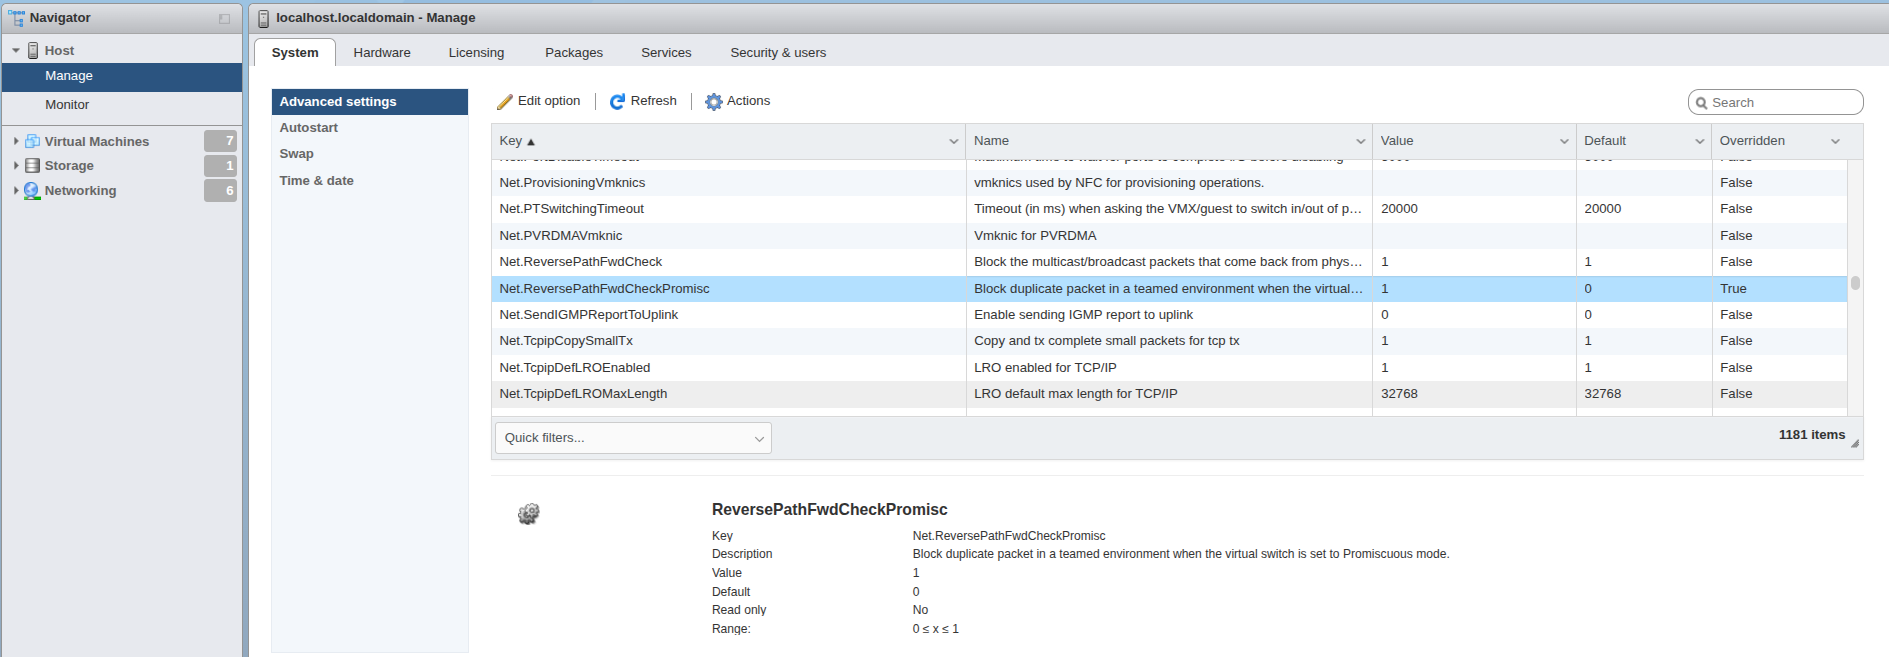
The Net.ReversePathFwdCheckPromisc parameter which controls RPF checks for packets on ports operating in Promiscuous Mode, is necessary for correct operation of vWLC in VMware when using a scheme with several Uplink interfaces. It blocks incoming traffic if its MAC address does not match the expected one for the given port. |
To enable Reverse path check, go to the "Host" menu, select "Manage", then the "System" tab, and the "Advanced setting" section. Set the "Net.ReversePathFwdCheckPromisc" key value to "1".
Disable and re-enable Promiscuous Mode. To do this, set it to Reject, click Cохранить, enable it to Accept, and Click Save.
If the "Route based on IP hash" load balance is enabled, the "ReversePathFwdCheckPromisc" parameter will not work. The "Route based on IP hash" load balance is used in the scheme implemented via link aggregation.
For correct operation, set one of the following modes: Route based on the originating port ID (standard mode, recommended) or Route based on a source MAC hash, Use explicit failover order. Learn more about the operation of defferent modes on the official website.
Port isolation can be enabled on the switch to which ESXI is connected.
MES# configure MES(config)# interface range GigabitEthernet 1/0/1-2 MES(config-if-range)# switchport protected-port |
To confugure aggregation, the "vSphere Enterprise Plus" license is required. |
Confiduration instruction are available on the official website.
In ESXI, there is an option to configure an interface that passes all tagged traffic.
1. Open the "Networking" tab and click "Add port group".
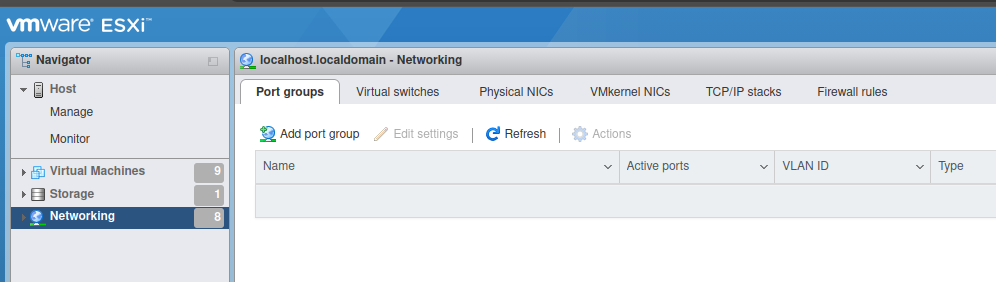
2. In the "Name" field, specify a name for the interface.
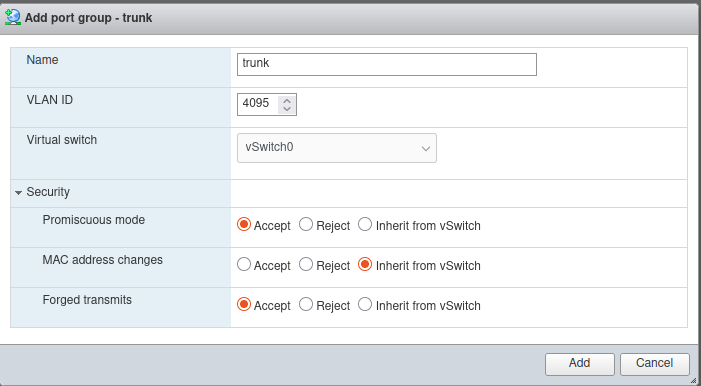
3. Set "VLAN ID" to 4095. All tagged traffic will be passed through the interface to the virtual machine without tag modification.
4. Select the"Virtual switch" to which the interface will be assigned.
5. In the "Security" section, select Promicous mode in the Accept mode, and Forged transmit in the Accept mode.
6. Click "Add".
7. The interface is ready. To connect a VM, see Connecting network interfaces.
Select the created machine in the control panel, click "Navigator" -> "Virtual Machines" -> <Created_machine's_name>, and click "Power on" to launch it:
Further steps on vWLC installation are described in the vWLC installation process section.