VirtualBox version 6.0 or later is required to install and launch vWLC.
1. Launch VirtualBox. To create virtual machine, click the 'New' button in main menu.
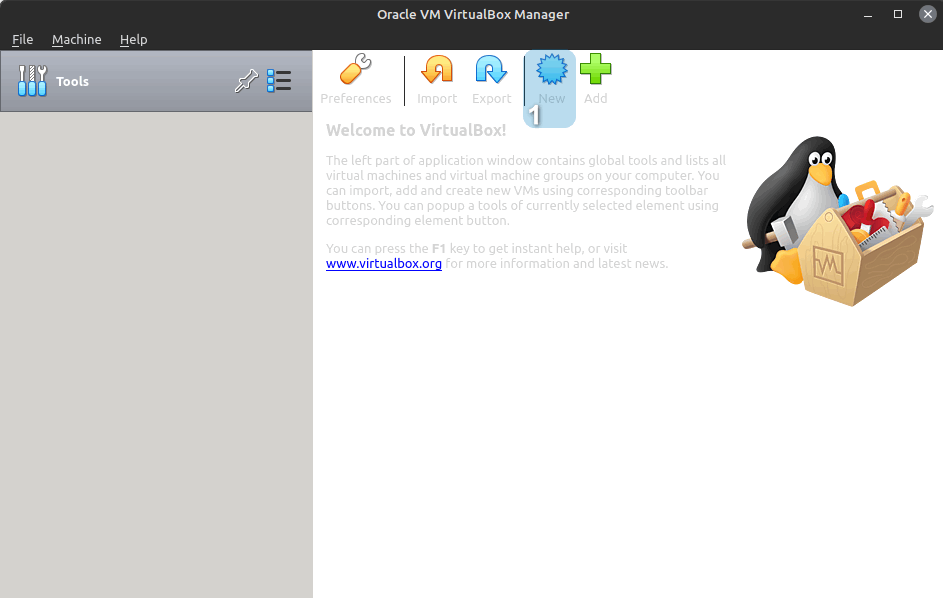
2. Specify name of the virtual machine in the 'Name' field. In the following example, "vWLC" is specified.
| It is recommended to give the virtual machine a simple and descriptive name. |
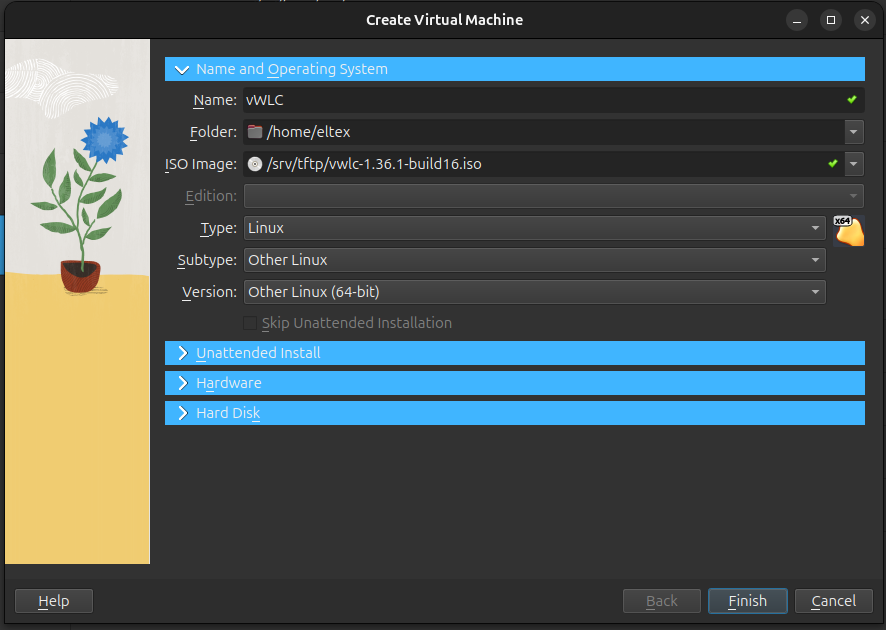
3. Before selecting a disk, make sure that the user has rights to work with this disk and that the technical condition of the disk allows it to be used as a system disk for a virtual machine.
In the 'Folder' field, specify the path where the virtual machine will be stored.
4. Select an ISO file with vWLC image.
5. In the 'Type' field, select the 'Linux' operational system.
6. In the 'Version' field, select any 64 bit version. In the given example 'Other Linux (64-bit)' is selected.
7. Click "Hardware" to go to the next step.
8. Select the amount of RAM to allocate to the virtual machine. For correct operation, it is recommended to maintain a balance between the amount of RAM of the virtual and host systems.
The minimum amount of RAM must be at least 4 GB. |
9. Select the amount of CPUs to allocate to the virtual machine.
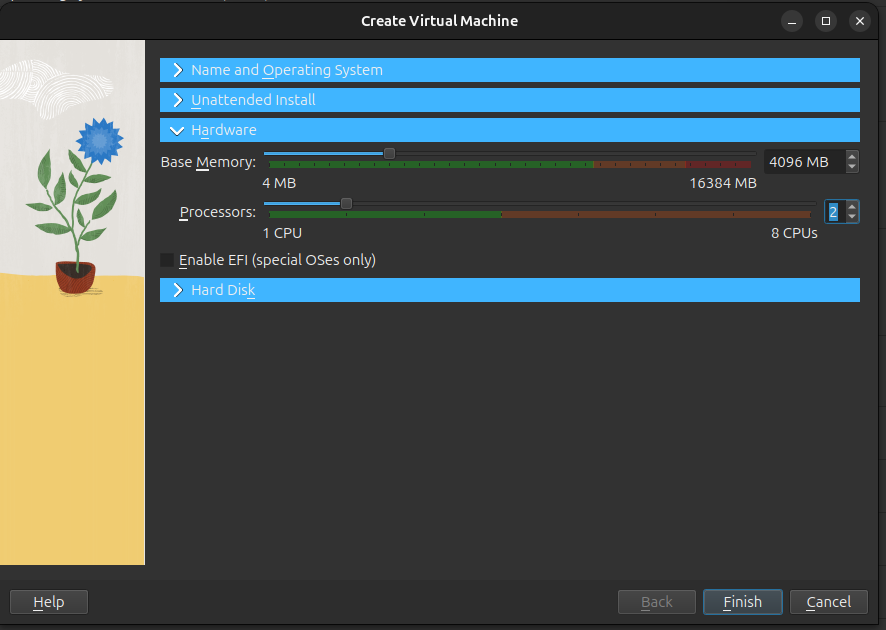
10. Click "Hard Disk" to go to the next step.
11. Set disk size for virtual machine.
Minimum disk size is 1 GB. All space above this limit will be allocated for flash/data. Recommended disk size is 8 GB. |
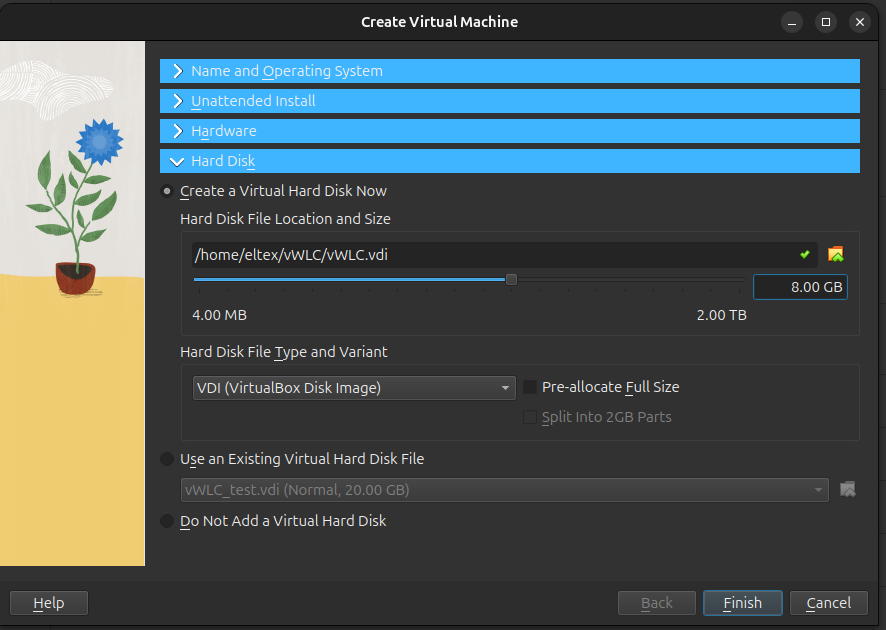
12. Check the final configuration of the virtual machine. If no changes are required, click "Finish".
Virtual machine has been successfully created.
1. Go to the settings of the virtual machine on which vWLC is installed.
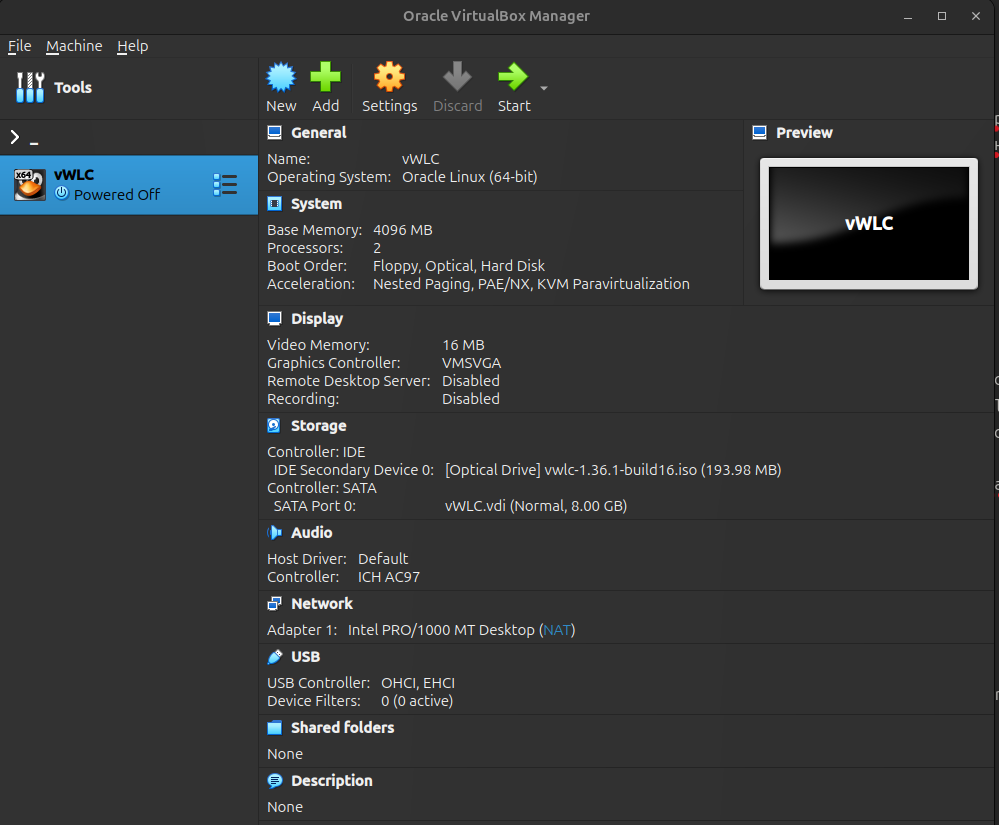
2. Open the "Network" menu.
3. Enable network adapter.
4. Select connection type.
5. Select the interface which will be used for connection on the host system. It will be connected to gi1/0/1 on vWLC.
7. Select adapter type. In the example, the settings are made by VirtualBox by default.
8. Proceed to second interface configuration.
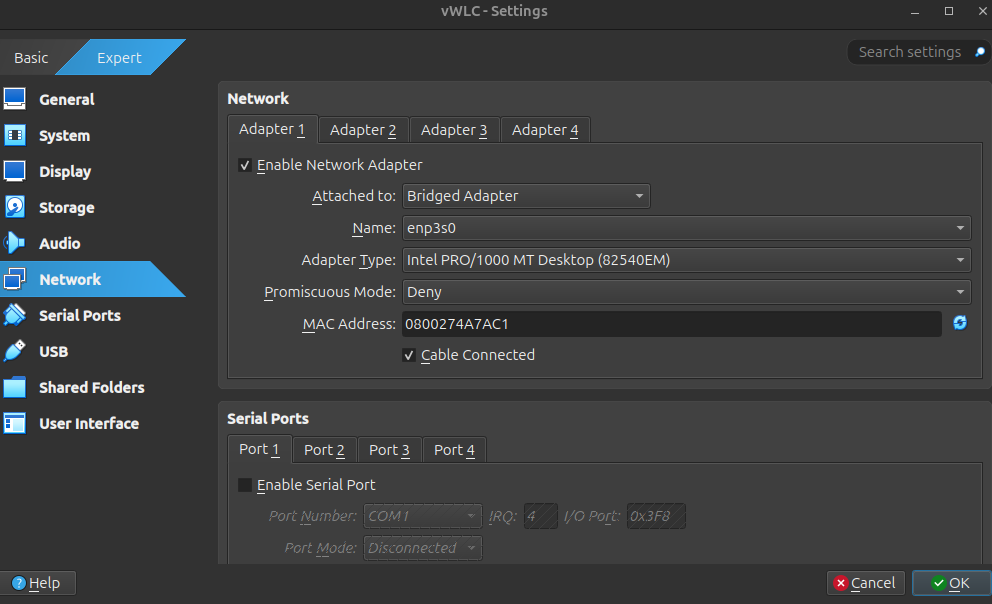
9. Enable network adapter.
10. Select connection type.
11. Select the interface which will be used for AP connection to vWLC. It will be connected to gi1/0/2 on vWLC.
12. To configure additional parameters, click "Advanced".
13. Select adapter type. In the example, paravirtualized type is selected.
14. Click 'OK' to complete interface configuration.
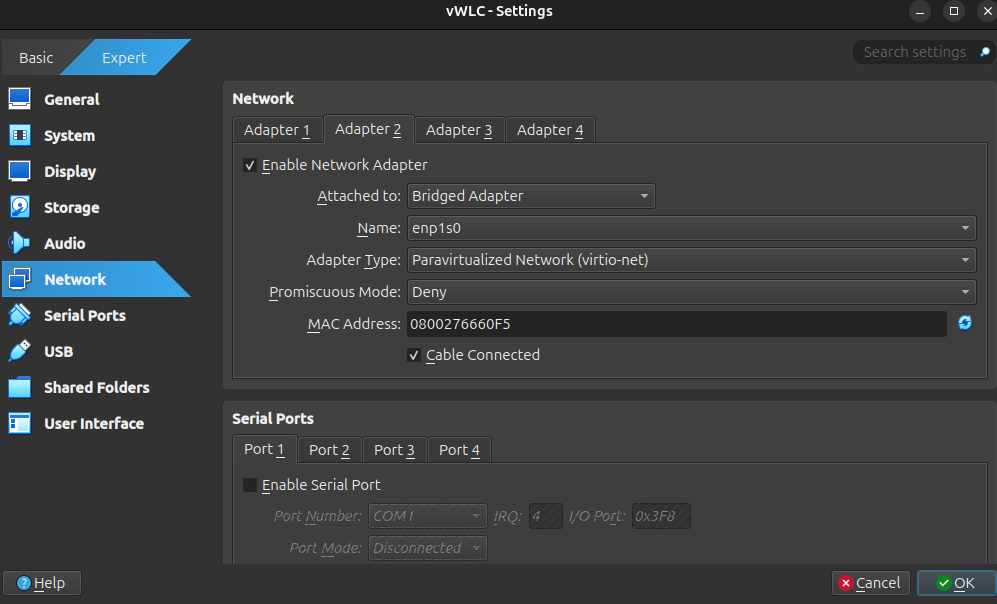
Using VLAN tagging (IEEE 802.1Q) for traffic destined for a vWLC deployed on VirtualBox is not recommended due to hypervisor limitations and cause network failures. Find more in the VirtualBox documentation. |
1. Go to the settings of the virtual machine on which vWLC is installed.
2. Open "Serial Ports" menu.
3. Enable Serial port.
4. Select COM Port.
5. Select the port type. In this example, Host Pipe is used as the port type.
6. Disable the option "Connect to existing pipe/socket".
7. Specify the connection address: the name of the file used for data transfer.
8. Click "OK" to complete configuration.
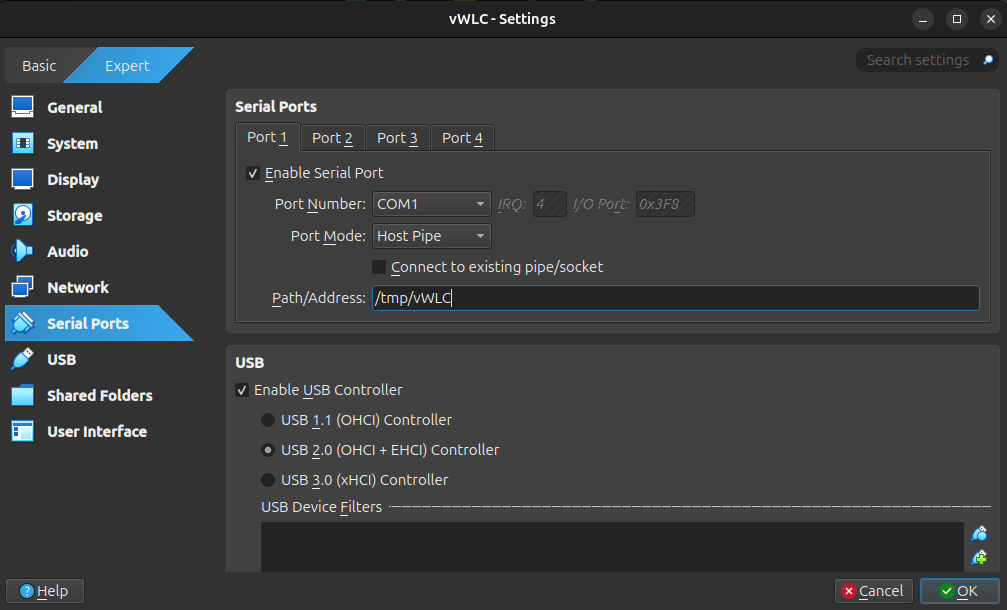
Now you can connect to vWLC via the serial port.
Example of connection via the minicom utility:
|