
It is recommended to upgrade from a fresh installation of the operating system (Ubuntu Server 18.04.x LTS 64-bit) and a new disk layout.
This section describes the process for updating the operating system and ECSS-10 software components when, for some reason, a fresh installation is not possible.
Version 3.14.15 changes the algorithm for checking license passport validity. Previous versions allowed licenses with no expiration date, but this is no longer allowed. To avoid issues after the update, we recommend checking the license passport parameters first with the following command:
/cluster/storage/ds1/licence/show-passport
SSW ID              ECSS ХХХХХХ
Description         Элтекс,
Create date         27.12.2024 07:07:09
. . .
Expired date        31.12.2025 23:59:59
. . .
If the Expired date line is missing (passport does not have an expiration date), it is necessary to contact the Eltex sales department on foreign.sales@eltex-co.ru to renew your passport and license before starting the renewal.
Preparing to update the system
Run a full backup.
If you need the latest billing data, you must finalize the current CDR and download it to a secure location, such as:
/domain/bsk.test/cdr/make_finalize_cdr bsk3
Created file(s): cdrbsk3_20210330_11_05_38_t.csv
View how many registered subscribers there are, example:
/domain/bsk.test/sip/user/registered *
....
┌───────────────┐
│ elements: 320 │
└───────────────┘
When upgrading a cluster, upgrade servers one at a time. This way, one server will always be running during an upgrade, and services won't be interrupted. To split the cluster, use the ecss-control tool on both servers.
Divert traffic to the second server by disabling keepalive on the first host:
sudo systemctl stop keepalived.service
Use the ifconfig command to verify that all IP addresses are on ecss2.
Split the SSW into two independent servers using the following command:
The ecss-control command works with standard hostnames: ecss1/ecss2.
sudo ecss-control detach
sudo ecss-control detach
detach host: ecss2, ip: 10.10.0.2
complete
sudo ecss-control status
locked ip: 10.10.0.2
After splitting the cluster, you must shut down all nodes on the server that will be updated first:
sudo systemctl stop ecss-mediator.service
sudo systemctl stop ecss-pa-sip.service
sudo systemctl stop ecss-core.service
sudo systemctl stop ecss-ds.service
sudo systemctl stop ecss-mycelium.service
Update:
sudo apt update
Installing ECSS-10 version 3.14.15
Installing ecss-mysql
Update ecss-mysql on host 1:
sudo apt install ecss-mysql
If a problem occurs with any database, you should restart the aparmor service, then remove the database from mysql, and then reinstall ecss-mysql:
sudo systemctl restart apparmor.service
mysql -uroot -p<root_mysql_password> -e 'DROP DATABASE <проблемная база данных>'
sudo apt install ecss-mysql
Monitor the replica status using SHOW SLAVE STATUS; and wait until the Seconds_Behind_Master indicator becomes equal to "0";
Installing ecss-node
Install the ecss-node package:
sudo apt install ecss-node
During the installation process, you'll be asked whether to preserve current versions of configuration files. It's recommended to install the new ones, i.e., answer "Y."
на ecss1
During installation of the ecss-node package, the system will reset the cluster configuration to the default value. Therefore, you will need to edit the file /etc/ecss/ecss-mycelium/mycelium1.config.
Run the command:
sudo nano /etc/ecss/ecss-mycelium/mycelium1.config
Enter the cluster name, in the example "test_cluster"
%%% -*- mode:erlang -*-
%%% Warning - this config file *must* end with <dot><whitespace>
[
    {mycelium_broker, [
        {cluster_name, test_cluster},
        %{cluster_nodes, []}, % additional nodes
        %{tcp_port, 5672},
        %{auto_discoverer, true},
        {compress_module, elx_data_nif}, %% elx_data_nif | elx_data
        {session_gc_timeout, 3000},
        {queue_gc_timeout, infinity}
        %{info_realm, {local, "/ssw", "ssw", "ssw", 1, [{localhost, 0, {host, "localhost"}, 5672, 10}]}},
        %{bind_ip_addresses, [{127,0,0,1}]} % do not forget to include lo interface
        ]},
Installing remaining packages
Install packages containing the main subsystems:
sudo apt install ecss-restfs
sudo apt install ecss-media-server
sudo apt install ecss-media-resources
sudo apt install ecss-web-conf
When installing ecss-media-server, it is recommended to answer the configuration question "yes".
During the installation process, you'll be asked whether to preserve current versions of configuration files. It's recommended to install the new ones, i.e., answer "Y."
Start the services with the following commands:
sudo systemctl start ecss-mycelium.service
sudo systemctl start ecss-ds.service
sudo systemctl start ecss-core.service
sudo systemctl start ecss-pa-sip.service
sudo systemctl start ecss-mediator.service
check the status of services with the command:
systemctl is-active ecss-core ecss-pa-sip ecss-ds ecss-mediator ecss-mycelium
Check the status of services in CoCon:
/system-status
Checking...
┌─┬───────────────┬──────────────────────────┬───────────────┬────────────┬──────┐
│ │     Node      │         Release          │ Erlang nodes  │Mnesia nodes│Uptime│
├─┼───────────────┼──────────────────────────┼───────────────┼────────────┼──────┤
│ │core1@ecss1    │ecss-core-3.14.15.1163    │core1@ecss1    │not running │3m 45s│
│ │ds1@ecss1      │ecss-ds-3.14.15.1163      │ds1@ecss1      │ds1@ecss1   │3m 51s│
│ │md1@ecss1      │ecss-mediator-3.14.15.1163│md1@ecss1      │md1@ecss1   │3m 32s│
│ │mycelium1@ecss1│ecss-mycelium-3.14.15.1163│mycelium1@ecss1│not running │3m 58s│
│ │sip1@ecss1     │ecss-pa-sip-3.14.15.1163  │sip1@ecss1     │sip1@ecss1  │3m 39s│
└─┴───────────────┴──────────────────────────┴───────────────┴────────────┴──────┘

All services are started.

  Active media resource selected list specific:
┌─────────────┬───────────┬─────────────┬───────────┬───────────┐
│    Node     │    MSR    │     MSR     │ Cc-status │ Cc-uptime │
│             │           │   version   │           │           │
├─────────────┼───────────┼─────────────┼───────────┼───────────┤
│ core1@ecss1 │ msr.ecss1 │ 3.14.15.221 │ connected │ 00:02:28  │
│             │ msr.ecss2 │ 3.14.14.24  │ connected │ 00:02:28  │
└─────────────┴───────────┴─────────────┴───────────┴───────────┘
In version 3.14.15 it became possible to use any host names (there are no standard names), so we need to specify which names we will use. To do this, run the following command (in the example, the host names are ecss1/ecss2):
/system/clusters/set [ecss1, ecss2]
/system/clusters/set [ecss1, ecss2]
Success: System initialized on hosts: ["ecss2","ecss1"]


/system/clusters/list
┌────────┬──────────────┬──────────────┐
│  Role  │   Cluster    │    Nodes     │
├────────┼──────────────┼──────────────┤
│storage │ds1           │ds1@ecss2     │
│        │              │ds1@ecss1     │
│core    │core1         │core1@ecss2   │
│        │              │core1@ecss1   │
│adapter │sip1          │sip1@ecss2    │
│        │              │sip1@ecss1    │
│adapter │megaco1       │megaco1@ecss2 │
│        │              │megaco1@ecss1 │
│adapter │sigtran1      │sigtran1@ecss2│
│        │              │sigtran1@ecss1│
│adapter │sorm1         │sorm1@ecss2   │
│        │              │sorm1@ecss1   │
│mediator│md1           │md1@ecss2     │
│        │              │md1@ecss1     │
│virtual │.system_bridge│              │
│virtual │.virtual      │              │
└────────┴──────────────┴──────────────┘
If you use multiple VLANs for the signaling network, you must adjust the /etc/ecss/ecss-media-server/config.xml configuration file by defining the "via" parameter:
via — specifies a list of interfaces that can be sent in the "SIP REGISTER" message. "Via" field:
- dynamic-ifaces — value = "yes" or "no";
if dynamic-ifaces="no":
— master registration proceeds as before.
— otherwise, registration occurs ONLY if the interface is listed in the via list in the config.
if dynamic-ifaces="yes" or the attribute is not specified, the previously implemented behavior remains. - ifacename — interface name;
- ip — interface IP address.
- If the IP address specified in the via section of the config doesn't exist, it is not processed (skippable).
- If a valid IP address is specified, it is appended to the Via header for registration.
- If there is no interface in the via config, the bind-address from the config is specified during master registration. For non-master registrations, the behavior remains the same.
<?xml version="1.0" encoding="utf-8"?>
<config date="14:39:00 10.03.2023">
  <general log-level="3" log-rotate="yes" max-calls="8192" max-in-group="512" load-sensor="media" load-delta="10" calls-delta="100" spool-dir-size="100M" log-name="msr.log" log-path="/var/log/ecss/media-server" use-srtp="disabled" enable-ice-transport="no" ice-update="no" aggressive-ice="yes" stun-server="" suspicious-mode="no"/>
  <transport bind-addr="192.168.1.40" port="5040" transport="udp+tcp"/>
  <!-- By default configured public TURN-server -->
  <turn-server use-turn="no" host="numb.viagenie.ca" user="webrtc@live.com" password="muazkh"/>
  <media mixer-clock-rate="8000" use-vad="no" cng-level="0" jb-size="60" rtcp-timeout="0" rtp-timeout="350" udp-src-check="no" cn-multiplier="3" port-start="12000" port-range="2048" tias-in-sdp="no" thread-cnt="2" vid-enc-threads="2" vid-dec-threads="2" video-conf-layout="evenly" keyframe-interval="1000" vid-decode-delay="100" silence-threshold="-30" dtmf-flash-disable="no" video-dscp="0" other-dscp="0" dummy-video-src="/usr/share/ecss-media-server/video/dummy_video.yuv" video-enc-width="640" video-enc-height="360" finalsilence="1000" rtcp-stat-dump="yes"/>
  <codec pcma="1" pcmu="2" ilbc="0" gsm="0" g722="3" g729="0" speex="0" l16="0" g7221="0" opus="0" h264="1" h263-1998="2" t38="1" tel-event-pt="0"/>
  <accounts>
     <dynamic msr_name="msr.name" realm="sip:192.168.1.40:5000" dtmf_mode="rfc+inband+info" auth_name="user" auth_password="password">
       <via dynamic-ifaces="no">
          <iface name="bond1.75" ip="192.168.1.27"/>
          <iface name="bond1.20" ip="192.168.1.28"/>
          <iface name="bond1.35" ip="192.168.1.29"/>
          <iface name="bond1.36" ip="192.168.1.30"/>
       </via>
     </dynamic>
  </accounts>
  <pbyte>
    <mcc bind-addr="192.168.1.40" port="5700"/>
  </pbyte>
  <conf_dir path="/etc/ecss/ecss-media-server/conf.d"/>
  <rtp>
    <auto addr-v4=""/>
  </rtp>
</config>
<?xml version="1.0" encoding="utf-8"?>
<config date="14:39:00 10.03.2023">
  <general log-level="3" log-rotate="yes" max-calls="8192" max-in-group="512" load-sensor="media" load-delta="10" calls-delta="100" spool-dir-size="100M" log-name="msr.log" log-path="/var/log/ecss/media-server" use-srtp="disabled" enable-ice-transport="no" ice-update="no" aggressive-ice="yes" stun-server="" suspicious-mode="no"/>
  <transport bind-addr="192.168.1.40" port="5040" transport="udp+tcp"/>
  <!-- By default configured public TURN-server -->
  <turn-server use-turn="no" host="numb.viagenie.ca" user="webrtc@live.com" password="muazkh"/>
  <media mixer-clock-rate="8000" use-vad="no" cng-level="0" jb-size="60" rtcp-timeout="0" rtp-timeout="350" udp-src-check="no" cn-multiplier="3" port-start="12000" port-range="2048" tias-in-sdp="no" thread-cnt="2" vid-enc-threads="2" vid-dec-threads="2" video-conf-layout="evenly" keyframe-interval="1000" vid-decode-delay="100" silence-threshold="-30" dtmf-flash-disable="no" video-dscp="0" other-dscp="0" dummy-video-src="/usr/share/ecss-media-server/video/dummy_video.yuv" video-enc-width="640" video-enc-height="360" finalsilence="1000" rtcp-stat-dump="yes"/>
  <codec pcma="1" pcmu="2" ilbc="0" gsm="0" g722="3" g729="0" speex="0" l16="0" g7221="0" opus="0" h264="1" h263-1998="2" t38="1" tel-event-pt="0"/>
  <accounts>
     <dynamic msr_name="msr.name" realm="sip:192.168.1.40:5000" dtmf_mode="rfc+inband+info" auth_name="user" auth_password="password">
       <via dynamic-ifaces="no">
          <iface name="bond1.75" ip="192.168.1.27"/>
          <iface name="bond1.20" ip="192.168.1.28"/>
          <iface name="bond1.35" ip="192.168.1.29"/>
          <iface name="bond1.36" ip="192.168.1.30"/>
       </via>
     </dynamic>
     <dynamic msr_name="msr.name" realm="sip:192.168.1.50:5000" dtmf_mode="rfc+inband+info" auth_name="user" auth_password="password">
       <via dynamic-ifaces="no">
          <iface name="bond1.75" ip="192.168.1.27"/>
          <iface name="bond1.20" ip="192.168.1.28"/>
          <iface name="bond1.35" ip="192.168.1.29"/>
          <iface name="bond1.36" ip="192.168.1.30"/>
       </via>
     </dynamic>
  </accounts>
  <pbyte>
    <mcc bind-addr="192.168.1.40" port="5700"/>
  </pbyte>
  <conf_dir path="/etc/ecss/ecss-media-server/conf.d"/>
  <rtp>
    <auto addr-v4=""/>
  </rtp>
</config>
The ecss1 host has been updated. Enable traffic with the command:
sudo systemctl start keepalived.service
Updating the second server if the system is in a cluster
To redirect traffic to the updated server, you need to stop the keepalived service on the second server:
sudo systemctl stop keepalived.service
If you need the latest billing data, you need to finalize the current cdr and download it to a safe place, for example:
admin@mycelium1@ecss1:/$ domain/bsk.test/cdr/make_finalize_cdr bsk3
Created file(s): cdrbsk3_20220128_10_06_40_t.csv
Shut down all nodes on the server that will be updated second:
sudo systemctl stop ecss-mediator.service
sudo systemctl stop ecss-pa-sip.service
sudo systemctl stop ecss-core.service
sudo systemctl stop ecss-ds.service
sudo systemctl stop ecss-mycelium.service
Perform update:
sudo apt update
Installing ecss-mysql
Update ecss-mysql on the second host:
sudo apt install ecss-mysql
If a problem occurs with any database, you should restart the aparmor service, then remove the database from mysql, and then reinstall ecss-mysql:
sudo systemctl restart apparmor.service
mysql -uroot -p<root_mysql_password> -e 'DROP DATABASE <проблемная база данных>'
sudo apt install ecss-mysql
Monitor the replica status using SHOW SLAVE STATUS; and wait until the Seconds_Behind_Master indicator becomes equal to "0";
Installing ecss-node
Install the ecss-node package:
sudo apt install ecss-node
During the installation process, you'll be asked whether to preserve current versions of configuration files. It's recommended to install the new ones, i.e., answer "Y."
на ecss2
During installation of the ecss-node package, the system will reset the cluster configuration to the default value. Therefore, you will need to edit the /etc/ecss/ecss-mycelium/mycelium1.config file.
Run the command:
sudo nano /etc/ecss/ecss-mycelium/mycelium1.config
Enter the cluster name, in the example "test_cluster":
%%% -*- mode:erlang -*-
%%% Warning - this config file *must* end with <dot><whitespace>
[
    {mycelium_broker, [
        {cluster_name, test_cluster},
        %{cluster_nodes, []}, % additional nodes
        %{tcp_port, 5672},
        %{auto_discoverer, true},
        {compress_module, elx_data_nif}, %% elx_data_nif | elx_data
        {session_gc_timeout, 3000},
        {queue_gc_timeout, infinity}
        %{info_realm, {local, "/ssw", "ssw", "ssw", 1, [{localhost, 0, {host, "localhost"}, 5672, 10}]}},
        %{bind_ip_addresses, [{127,0,0,1}]} % do not forget to include lo interface
        ]},
Installing the rest of packages
Install the packages containing the core subsystems:
sudo apt install ecss-restfs
sudo apt install ecss-media-server
sudo apt install ecss-media-resources
sudo apt install ecss-web-conf
When installing ecss-media-server, it is recommended to answer the configuration question affirmatively.
During the installation process, you'll be asked whether to preserve current versions of configuration files. It's recommended to install the new ones, i.e., answer "Y."
Check the status of services with the command:
systemctl is-active ecss-core ecss-pa-sip ecss-ds ecss-mediator ecss-mycelium
Services must be in "inactive" status:
/systemctl is-active ecss-core ecss-pa-sip ecss-ds ecss-mediator ecss-mycelium
inactive
inactive
inactive
inactive
inactive
Assembling a Cluster
After completing the steps in the previous section, you can connect servers to each other to form a cluster. On the first server, run the command sudo ecss-control attach.
Example:
sudo ecss-control attach
unlock ip: 10.10.0.2, rules: 7
complete
sudo ecss-control status
all nodes attached
Start the services with the following commands:
sudo systemctl start ecss-mycelium.service
sudo systemctl start ecss-ds.service
sudo systemctl start ecss-core.service
sudo systemctl start ecss-pa-sip.service
sudo systemctl start ecss-mediator.service
Checking system operation in a cluster
Check that the update is progressing. The CLI system-status command should show that all nodes in the cluster and subsystem versions are the same.
/system-status
Checking...
┌─┬───────────────┬──────────────────────────┬───────────────────────────────┬─────────────────────┬──────┐
│ │     Node      │         Release          │         Erlang nodes          │    Mnesia nodes     │Uptime│
├─┼───────────────┼──────────────────────────┼───────────────────────────────┼─────────────────────┼──────┤
│ │core1@ecss1    │ecss-core-3.14.15.1163    │core1@ecss1,core1@ecss2        │not running          │1h 5m │
│ │core1@ecss2    │ecss-core-3.14.15.1163    │core1@ecss1,core1@ecss2        │not running          │3m 8s │
│ │ds1@ecss1      │ecss-ds-3.14.15.1163      │ds1@ecss1,ds1@ecss2            │ds1@ecss1,ds1@ecss2  │1h 5m │
│ │ds1@ecss2      │ecss-ds-3.14.15.1163      │ds1@ecss1,ds1@ecss2            │ds1@ecss1,ds1@ecss2  │59s   │
│ │md1@ecss1      │ecss-mediator-3.14.15.1163│md1@ecss1,md1@ecss2            │md1@ecss1,md1@ecss2  │1h 5m │
│ │md1@ecss2      │ecss-mediator-3.14.15.1163│md1@ecss1,md1@ecss2            │md1@ecss1,md1@ecss2  │2m 53s│
│ │mycelium1@ecss1│ecss-mycelium-3.14.15.1163│mycelium1@ecss1,mycelium1@ecss2│not running          │1h 5m │
│ │mycelium1@ecss2│ecss-mycelium-3.14.15.1163│mycelium1@ecss1,mycelium1@ecss2│not running          │3m 17s│
│ │sip1@ecss1     │ecss-pa-sip-3.14.15.1163  │sip1@ecss1,sip1@ecss2          │sip1@ecss1,sip1@ecss2│1h 5m │
│ │sip1@ecss2     │ecss-pa-sip-3.14.15.1163  │sip1@ecss1,sip1@ecss2          │sip1@ecss1,sip1@ecss2│2m 57s│
└─┴───────────────┴──────────────────────────┴───────────────────────────────┴─────────────────────┴──────┘

All services are started.

  Active media resource selected list specific:
┌─────────────┬───────────┬─────────────┬───────────┬───────────┐
│    Node     │    MSR    │     MSR     │ Cc-status │ Cc-uptime │
│             │           │   version   │           │           │
├─────────────┼───────────┼─────────────┼───────────┼───────────┤
│ core1@ecss1 │ msr.ecss1 │ 3.14.15.221 │ connected │ 01:04:13  │
│             │ msr.ecss2 │ 3.14.15.221 │ connected │ 00:15:04  │
│ core1@ecss2 │ msr.ecss1 │ 3.14.15.221 │ connected │ 00:01:59  │
│             │ msr.ecss2 │ 3.14.15.221 │ connected │ 00:01:57  │
└─────────────┴───────────┴─────────────┴───────────┴───────────┘
The ecss2 host is updated, start the traffic with the command:
sudo systemctl start keepalived.service
Make sure subscribers are registered. Check the number of registered subscribers; it should be approximately the same as when the update began:
/domain/bsk.test/sip/user/registered *
320 make users list ...
[**********************************************************************] 223mks
320 users information read ...
[**********************************************************************] 22ms
Executed on the sip1@ecss1
┌──────────────────┬────────┬─────────┬─────────────────────────────────────────────────────────────────────┬────────────────────────────────────────────────────────────────────┐
│     Interface    │ Number │ Dynamic │                               Contact                               │                         Registration info                          │
├──────────────────┼────────┼─────────┼─────────────────────────────────────────────────────────────────────┼────────────────────────────────────────────────────────────────────┤
...
┌───────────────┐
│ elements: 320 │
└───────────────┘
Calls are processed in all directions, CFC plays messages, Web-conf and other web services are running, and no errors are written to the system log. Shell command:
journalctl -f
Uninstalling ECSS Components
Uninstalling ecss-mysql
To remove the ecss-mysql package while preserving it, use the following command:
sudo apt remove ecss-mysql
This does not delete the databases and configuration files.
To completely remove the package along with its databases and configuration files, use the purge key:
sudo apt purge ecss-mysql
Confirmation of deletion is required for each database. After this, the /var/lib/ecss-mysql/ directory will be cleared.
If you need to completely remove all mysql* packages:
Removing the mysql-* packages will also remove the ecss-web-conf and ecss-restfs packages.
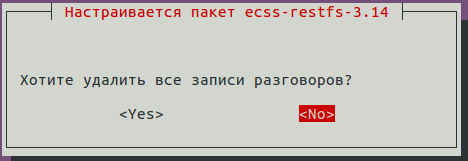
When uninstalling ecss-restfs, you are asked whether you want to delete call records:
And also about deleting all MySQL databases:

sudo apt purge mysql-*
Removing the ecss-node package
To remove the package, use the command:
sudo apt purge ecss-node
Removing the ecss-media-server package
To remove the package while preserving configuration files, use the command:
sudo apt remove ecss-media-server
However, configuration files remain in the /etc/ecss/ecss-media-server/ directory.
For a complete removal, use the command:
sudo apt purge ecss-media-server
Removing Unneeded Packages
To remove remaining packages that are no longer needed, use the autoremove switch:
sudo apt autoremove
Removing packages by mask
You can use masks to remove multiple packages at once (see man apt).
Example command to remove all ecss packages:
sudo apt purge ecss-*
Complete ECSS Uninstallation Commands
To completely remove all ECSS components, run these three commands:
sudo apt purge ecss-*
sudo apt purge mysql-*
sudo apt autoremove
Afterwards, you should reboot the server to remove some processes from RAM.
Logs remain in the /var/log/ecss/security/ directory for service purposes. They cannot be deleted using standard tools. If you need to clear this directory, please contact technical support.
Debconf
In some cases, instead of reinstalling a package, you only need to change its configuration. In this case, use the dpkg-reconfigure <package_name> command. You can also use commands from the debconf-utils package if necessary.