Initial data
| Информация |
|---|
| icon | false |
|---|
| title | Initial data |
|---|
|
Technical specification: Integration of the ECSS-10 Class 5 software switch (SSW) on 2 physical servers with SIP support is required with the following parameters of the server group load: - Maximum number of subscribers —15,000 (MUL — Max user limit);
- Maximum number of simultaneous connections — 2000 (MCL — Max call limit);
- Full backup of the ECSS system is required (all nodes are redundant on the second server);
- Number of Ethernet network interfaces — 4.
|
...
| Раскрыть |
|---|
| title | Example of drawing up hardware requirements |
|---|
|
Device | Required resource | Hardware Product Series |
|---|
| MCL | MUL
|
|---|
Server 1 | 2000 | 15000 | Heavy | | Server 2 | Heavy |
After determining the requirements of the project, make a preliminary network map. An example of components separation in the address space for a single node Server name (host)
| Role | Interface | Address | Port |
|---|
External addresses of the software switch |
|---|
ecss1 | Server management interface (port 2000 ssh) | net.10 | 10.0.10.51/24 | 2000 | ecss2 | Server management interface (port 2000 ssh) | net.10 | 10.0.10.52/24 | 2000 | ecss1 | Core address (ecss-core) | net.20 | 10.0.20.51/24 | 5000 | ecss1 | Core address (ecss-core) | net.20 | 10.0.20.52/24 | 5000 | ecss1, ecss2 | Gateway address | net.10 | 10.0.10.1 | - | ecss1, ecss2 | DNS server addresses | net.10 | 10.0.10.1, 8.8.8.8 | - | ecss1, ecss2 | NTP server addresses | net.10 | 10.136.16.211, 10.136.16.212 | 123 | | Virtual addresses of the software switch |
|---|
| ecss1 | Virtual address of the ecss1 host software adapter | net.20:SIP1 | 10.0.20.31/24 | - | | ecss2 | Virtual address of the ecss2 host software adapter | net.20:SIP2 | 10.0.20.32/24 | - | | ecss1 | Alternative virtual address of the ecss2 host software adapter on the ecss1 host | net.20:SIP2 | 10.0.20.32/24 | - | | ecss2 | Alternative virtual address of the ecss1 host software adapter on the ecss2 host | net.20:SIP1 | 10.0.20.31/24 | - |
|
Connecting to network
The topology of connecting the server to the network to ensure redundancy is recommended to be done using 2 switches.
...
Server network interfaces are also connected in pairs in switches, on which port aggregation (port-channel) is configured in LACP mode. For example, eth0 and eth1 of each server are connected to first switch (port-channel 1), eth2 and eth3 are connected to the second one (port-channel 3 and 4).
Installation of ECSS-10 in a cluster of two servers
Installation of ECSS-10 consists of two main parts:
- Preparation: installation of Ubuntu 22.04, Ubuntu packets updating, OS "optimization", installation of additional software packages, preparation of network interfaces, /etc/hosts, ssh-keygen
- Installation of ECSS-10
Preparation
This section describes the operating system installation, as well as required and optional packages. ECSS-10 version 3.18 runs on Ubuntu 22.04.
...
- Installation media with the operating system distribution;
- A prepared server with an updated BIOS, ILO (if available), and a connected network for internet access;
- Setting the installation media (USB flash drive or CD/DVD) as the first boot priority in the BIOS;
- Sufficient disk space and memory as specified in the design.
OS installationTo install the OS, do the following:
- After booting from the installation media, select "Install Ubuntu Server"
- Select the system language and keyboard layout
- Configure the network interface to connect to the Internet
- Create disk partitions according to Table 1
- Configure server and user names
- Install OpenSSH server
- Reboot the successfully installed OS
| Раскрыть |
|---|
| title | Ubuntu Server 22.04 installation |
|---|
|
| A Shared Block |
|---|
| shared-block-key | Ubuntu Server 22.04 installation |
|---|
| | панель |
|---|
| 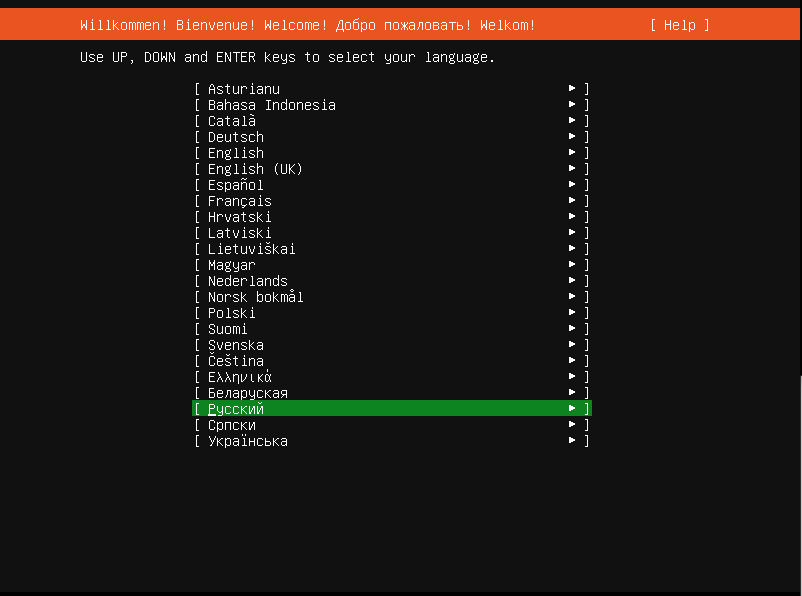 Image Added Image Added
|
| панель |
|---|
| title | Continue without update |
|---|
| 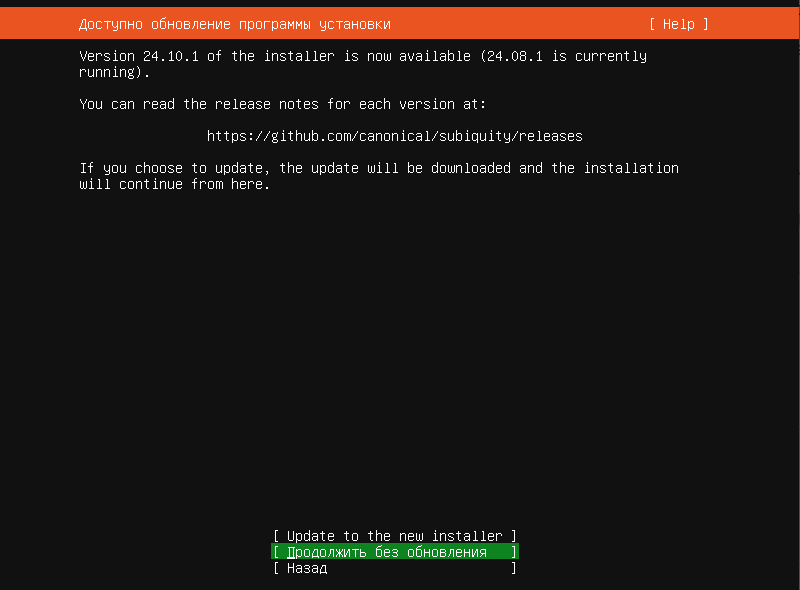 Image Added Image Added
|
| панель |
|---|
| title | Keyboard configuration |
|---|
| 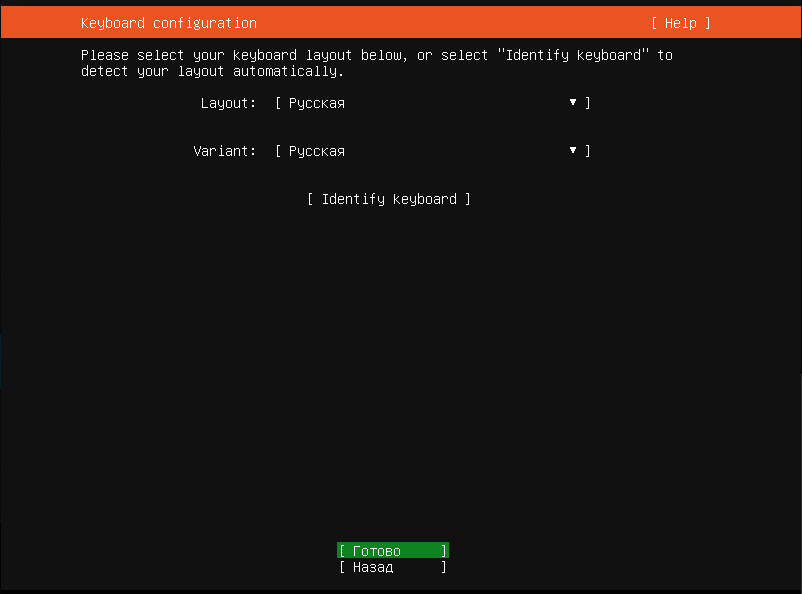 Image Added Image Added
|
| панель |
|---|
| title | Select the standard Ubuntu Server installation |
|---|
| 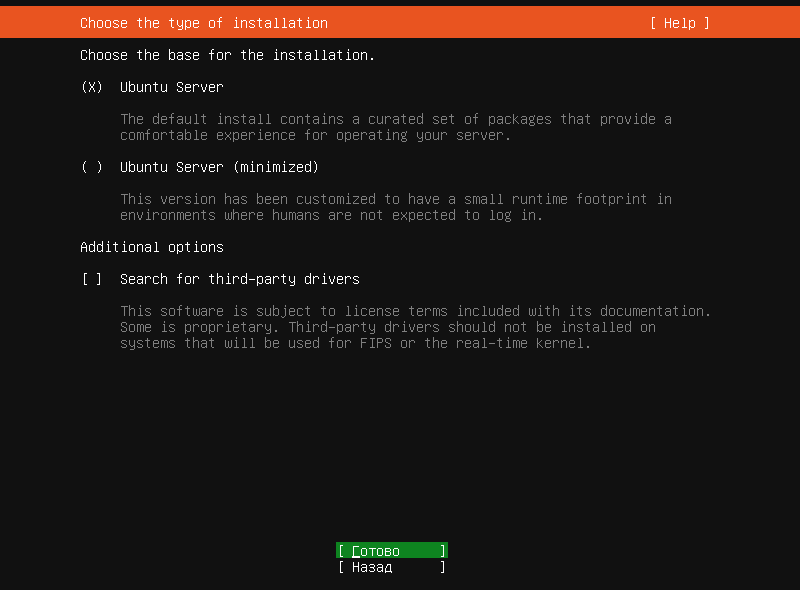 Image Added Image Added
|
| панель |
|---|
| title | Select Eht: the interface for installing Ubuntu (it should have internet access). |
|---|
| 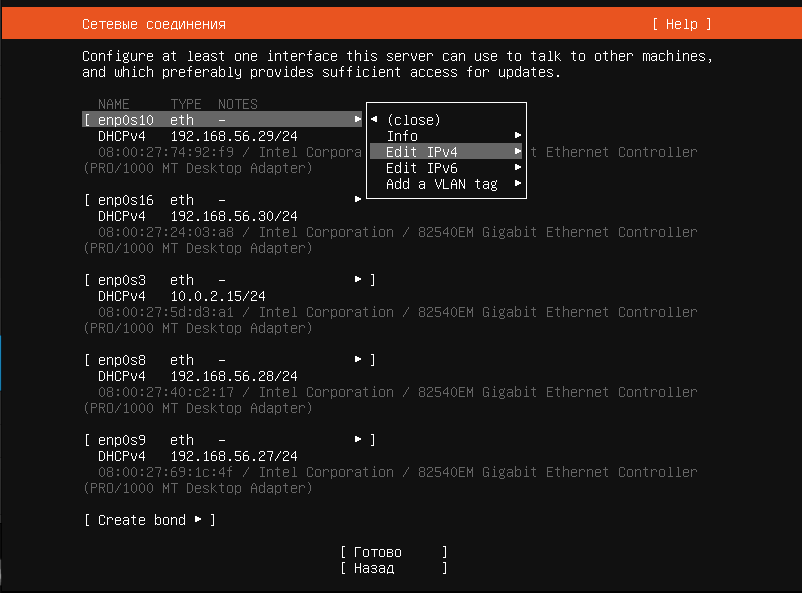 Image Added Image Added
|
| панель |
|---|
| title | Set the IP address for internet access (DHCP cannot be used). |
|---|
| 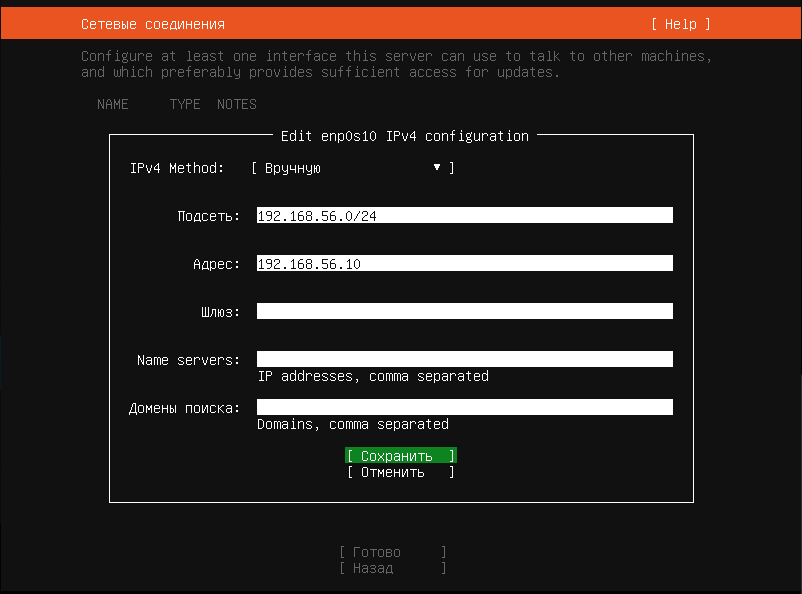 Image Added Image Added
|
| панель |
|---|
| title | Proxy server cannot be used (if it is used in your project, please specify) |
|---|
| 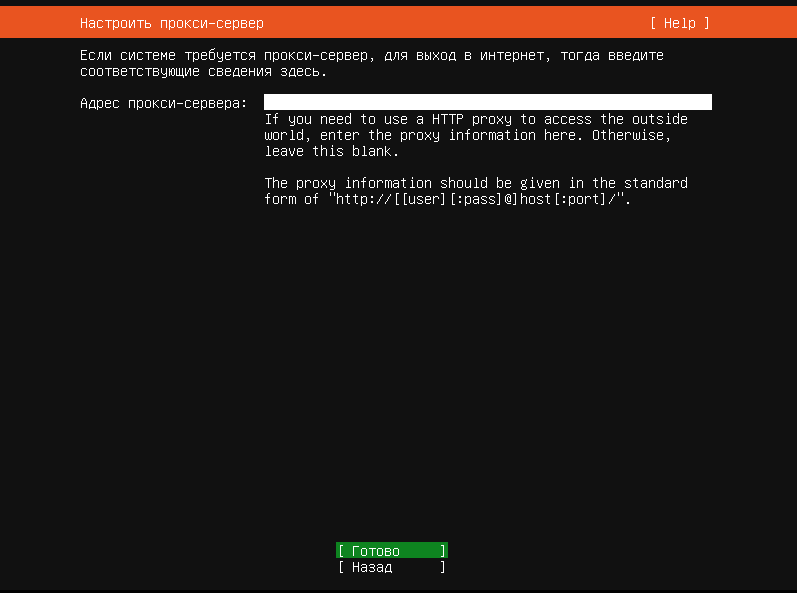 Image Added Image Added
|
| панель |
|---|
|  Image Added Image Added
|
| панель |
|---|
| title | Create partitions on the disk, using LVM |
|---|
| 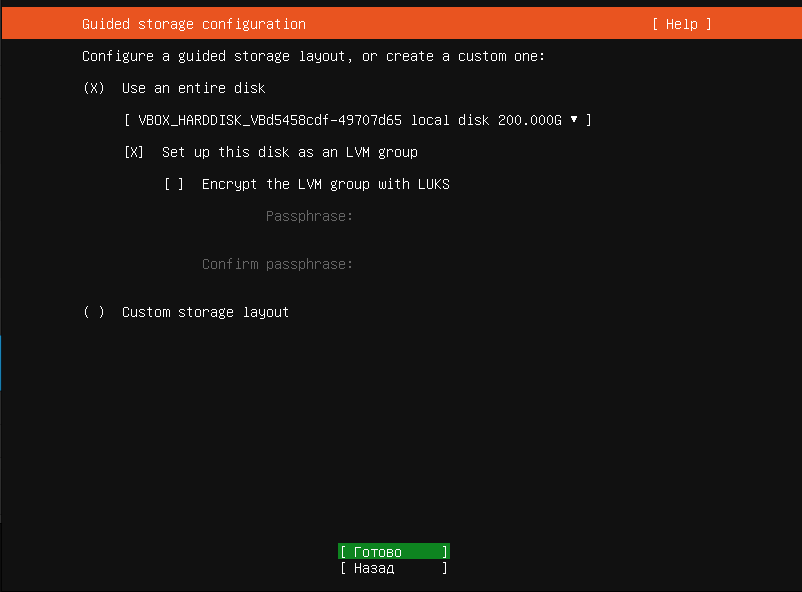 Image Added Image Added
|
| панель |
|---|
| title | By default, two partitions are created: /boot and /, we keep /boot and delete /. First, unmount |
|---|
| 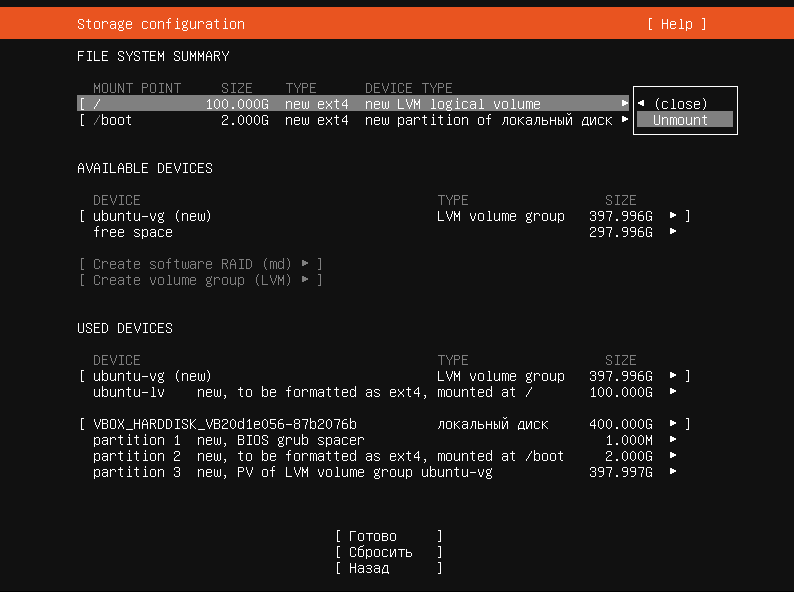 Image Added Image Added
|
| панель |
|---|
| 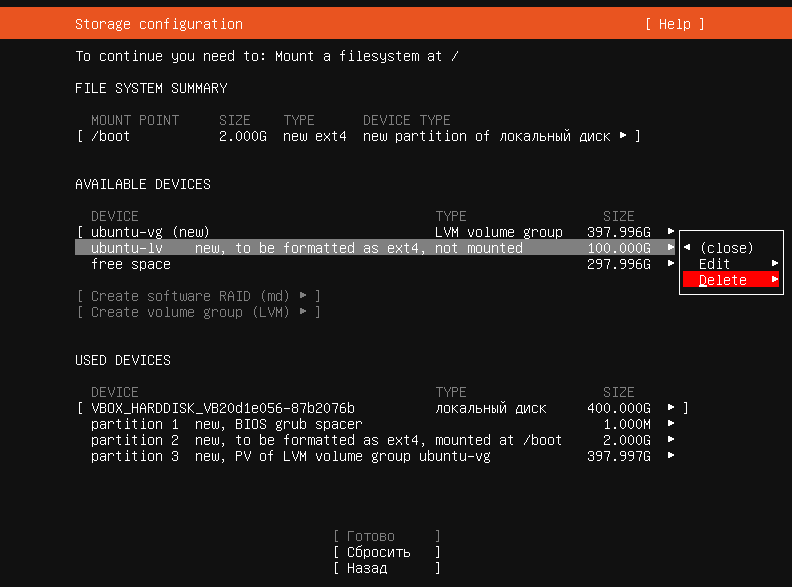 Image Added Image Added
|
| панель |
|---|
| 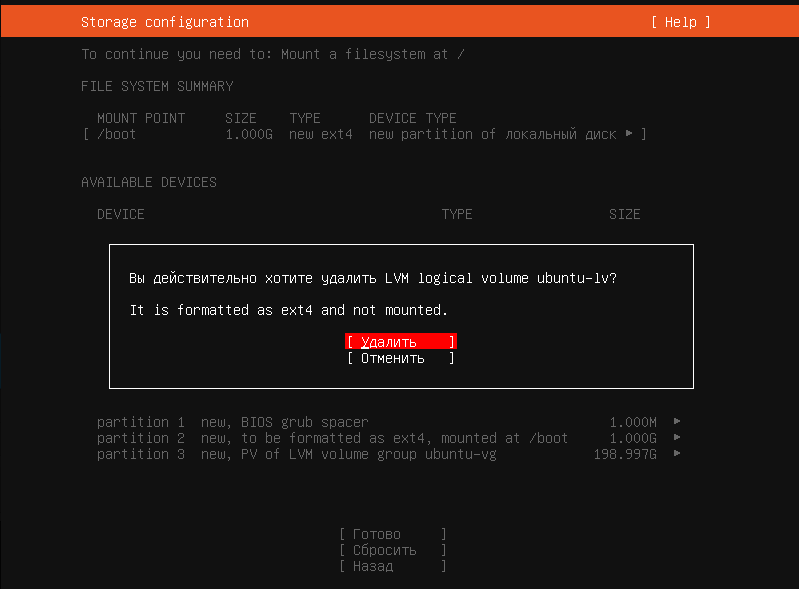 Image Added Image Added
|
| панель |
|---|
| 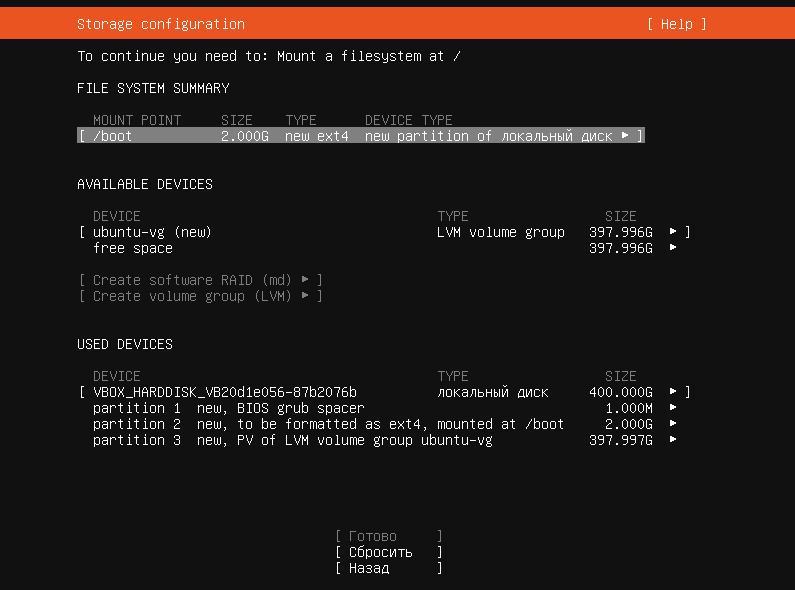 Image Added Image Added
|
| панель |
|---|
| title | Create partitions according to the dimensions specified in the table below |
|---|
| 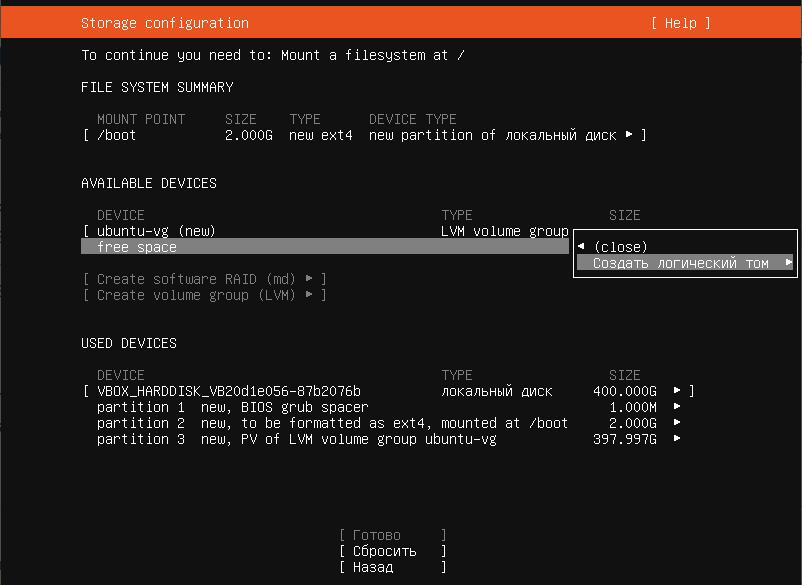 Image Added Image Added
|
| панель |
|---|
| title | root size 30 Gb, mount point / |
|---|
| 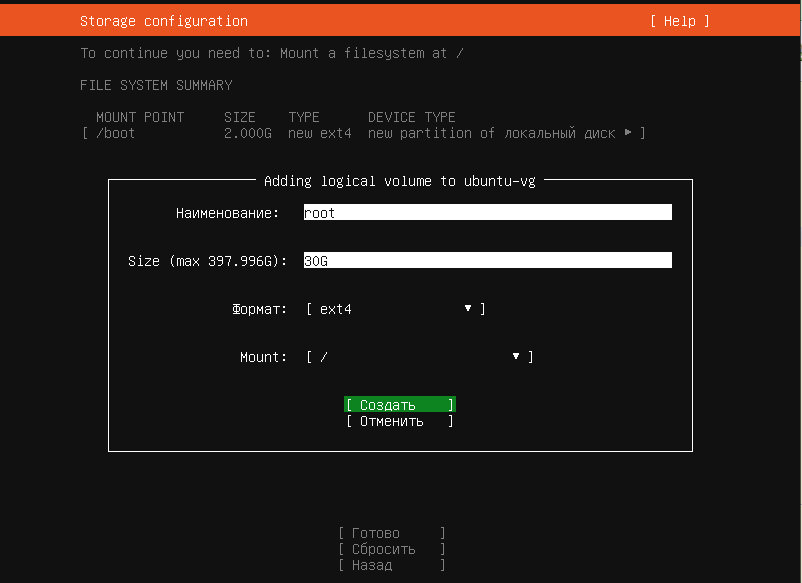 Image Added Image Added
|
| панель |
|---|
| title | mnesia size 30 Gb, mount point /var/lib/ecss |
|---|
| 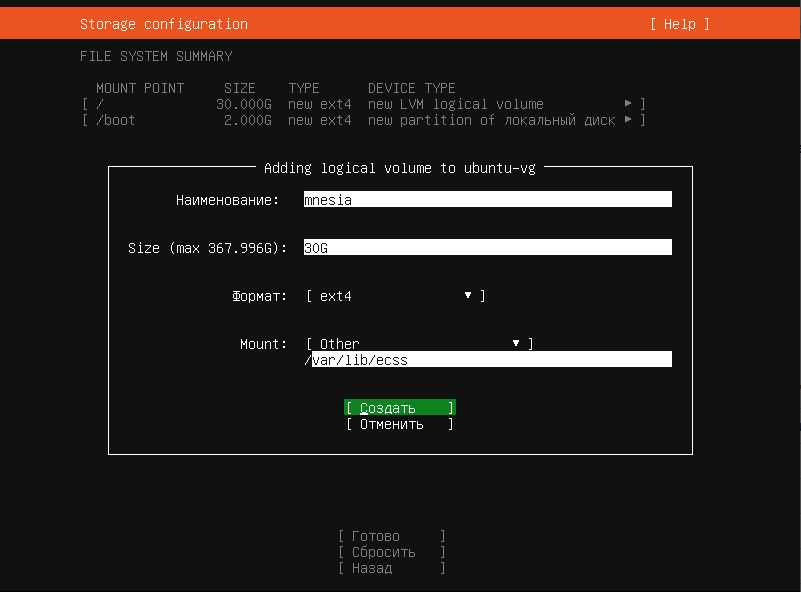 Image Added Image Added
|
| панель |
|---|
| title | log size 20 Gb, mount point /var/log |
|---|
| 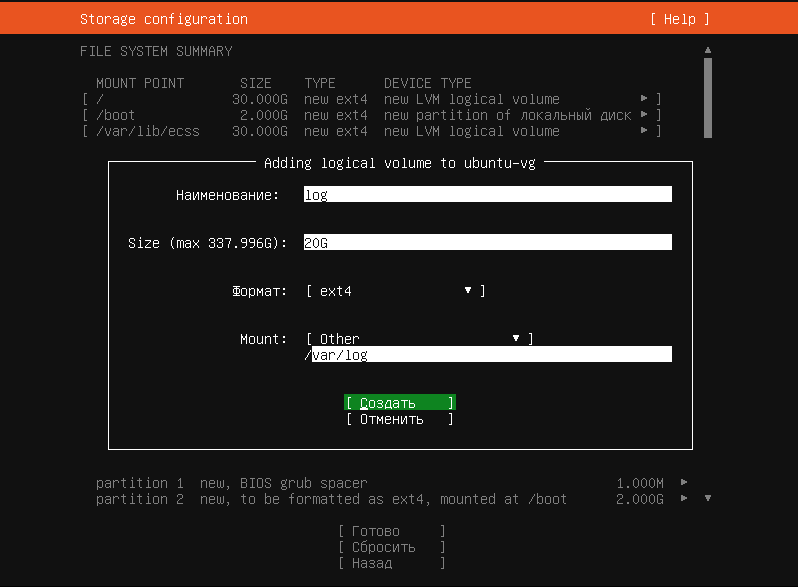 Image Added Image Added
|
| панель |
|---|
| title | mysql, size 30G, mount point - /var/lib/mysql |
|---|
| 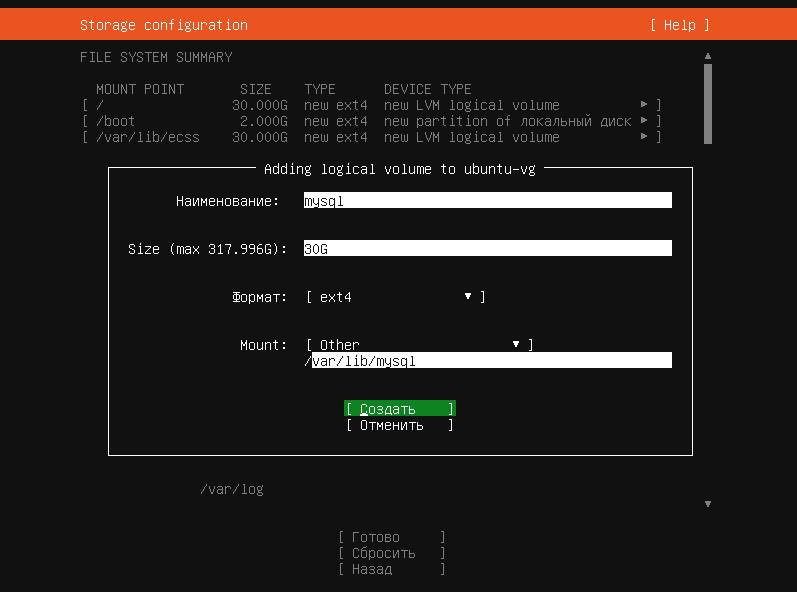 Image Added Image Added
|
| панель |
|---|
| title | ecss_log, size 20 Gb, mount point /var/log/ecss |
|---|
| 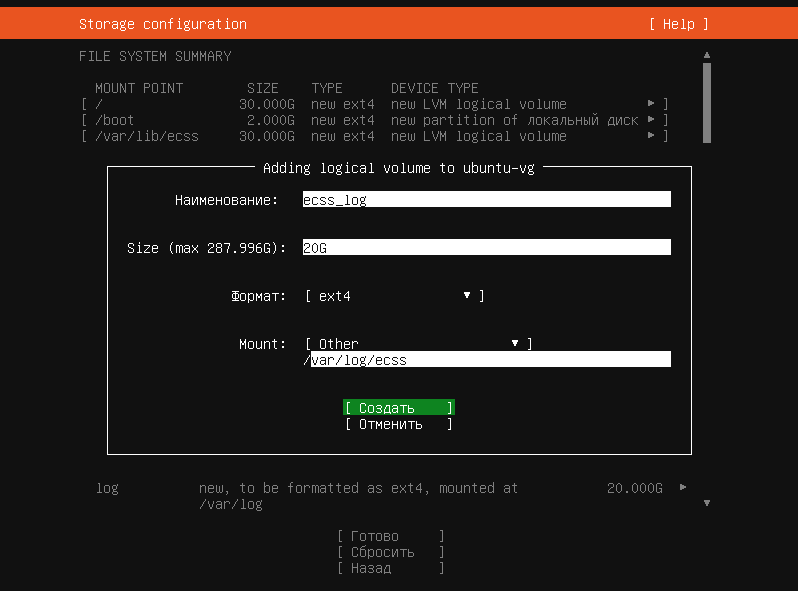 Image Added Image Added
|
| панель |
|---|
| title | ecss_db, size 100 Gb, mount point- /var/lib/ecss-mysql |
|---|
| 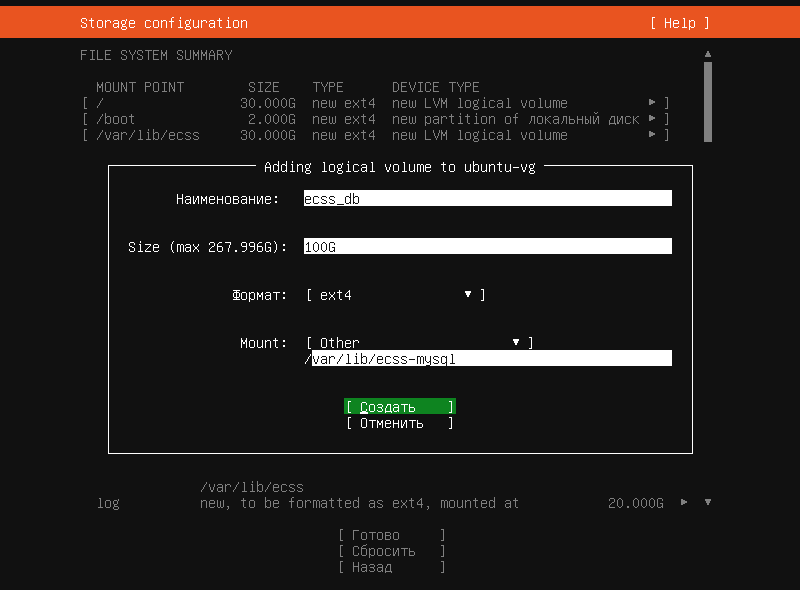 Image Added Image Added
|
| панель |
|---|
| title | home, size 10 Gb, mount point - /home |
|---|
| 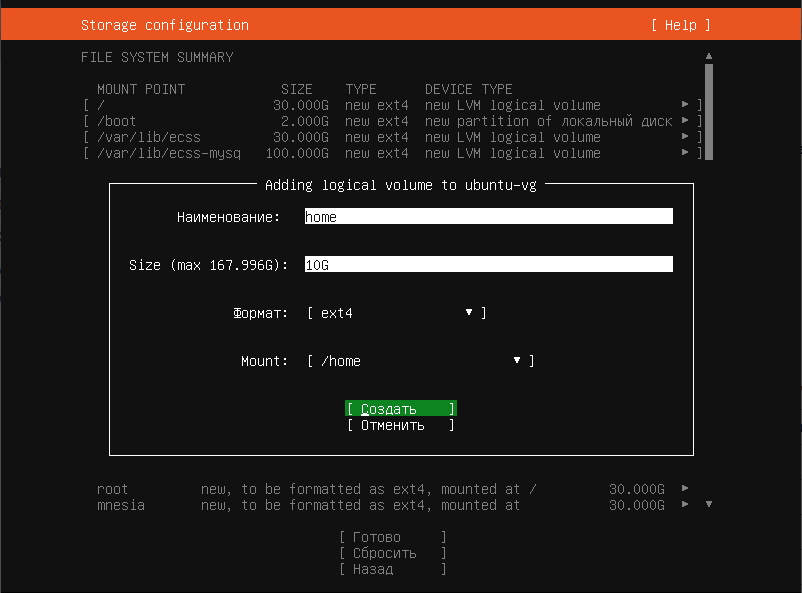 Image Added Image Added
|
| панель |
|---|
| title | glusterfs - for the cluster / for a single host - restfs, size - all remaining disk space, mount point - /var/lib/ecss/glusterfs - for the cluster, and /var/lib/ecss/restfs - for a single server |
|---|
| 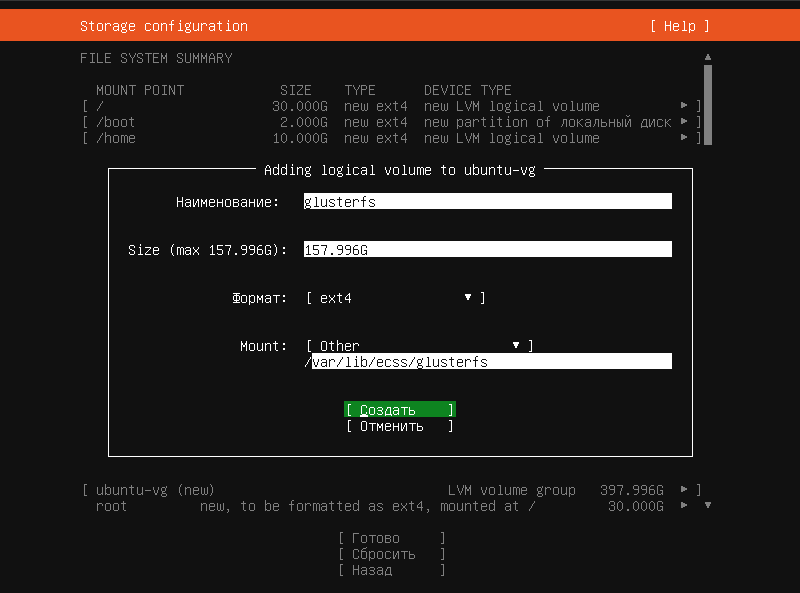 Image Added Image Added
|
| панель |
|---|
| title | obtained configuration |
|---|
| 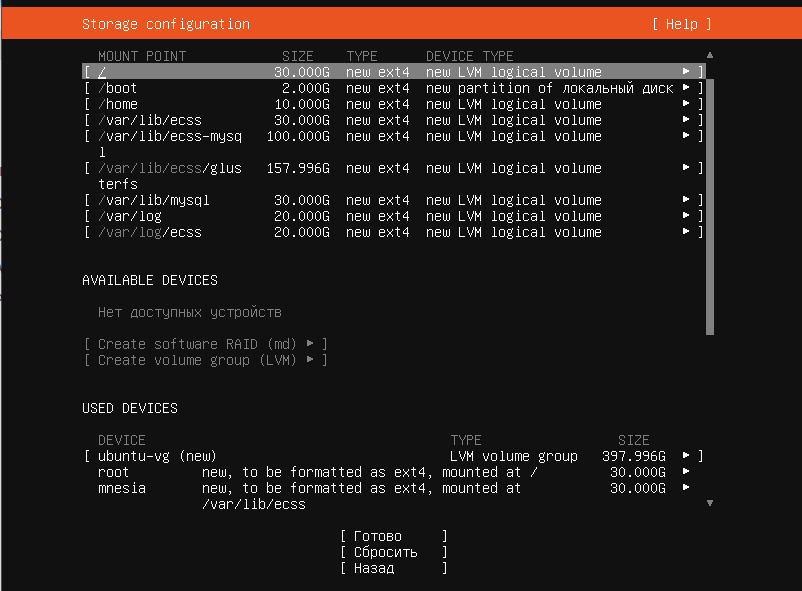 Image Added Image Added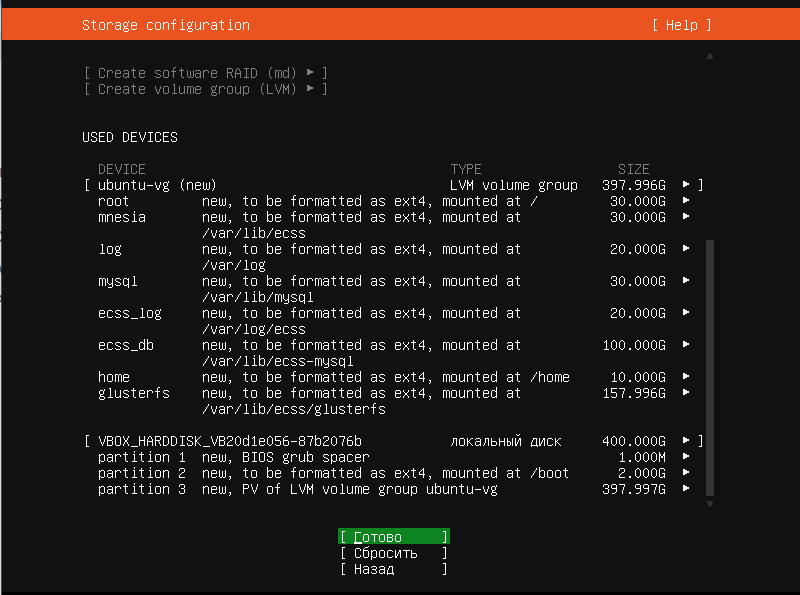 Image Added Image Added
|
| панель |
|---|
| 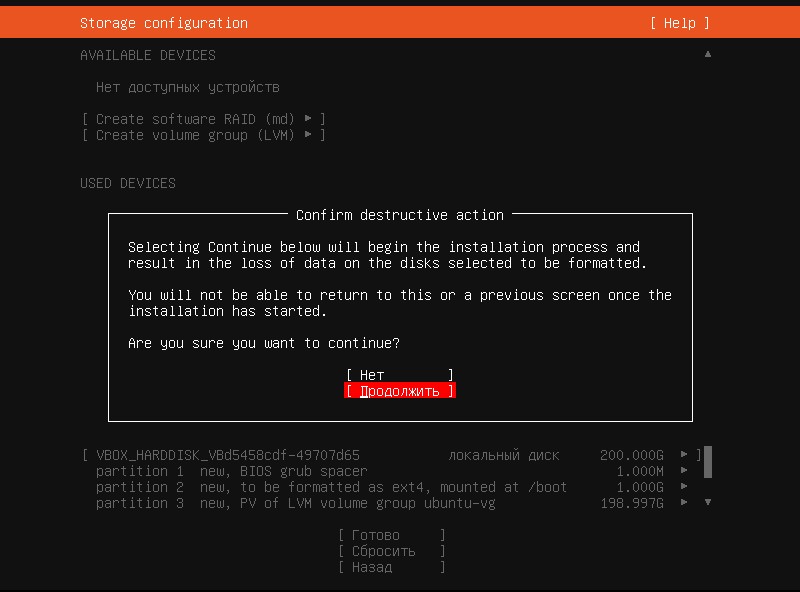 Image Added Image Added
|
| панель |
|---|
| title | Create a user and a hostname, in ECSS10 the recommended hostname is ecss1/ecss2 (used for license integration), username (in the example abf / password at your discretion) |
|---|
| 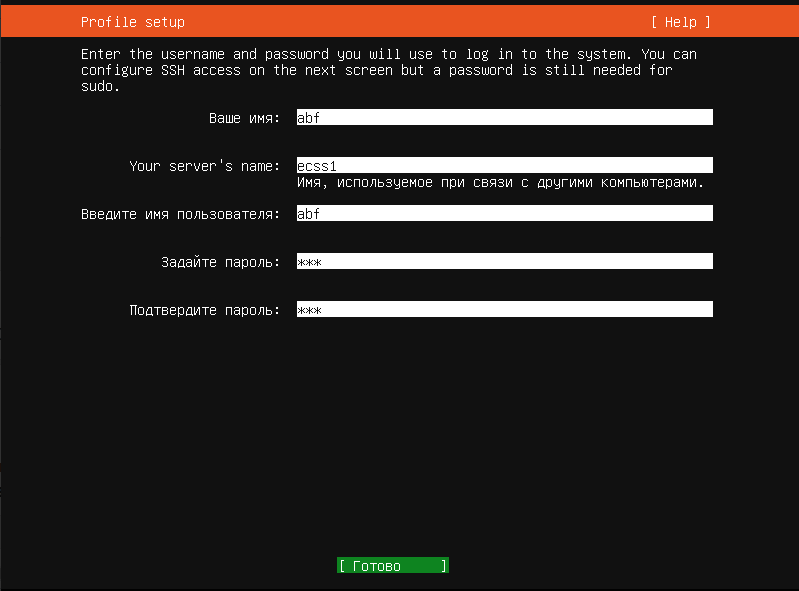 Image Added Image Added
|
| панель |
|---|
| title | When installing, select Free installation: |
|---|
| 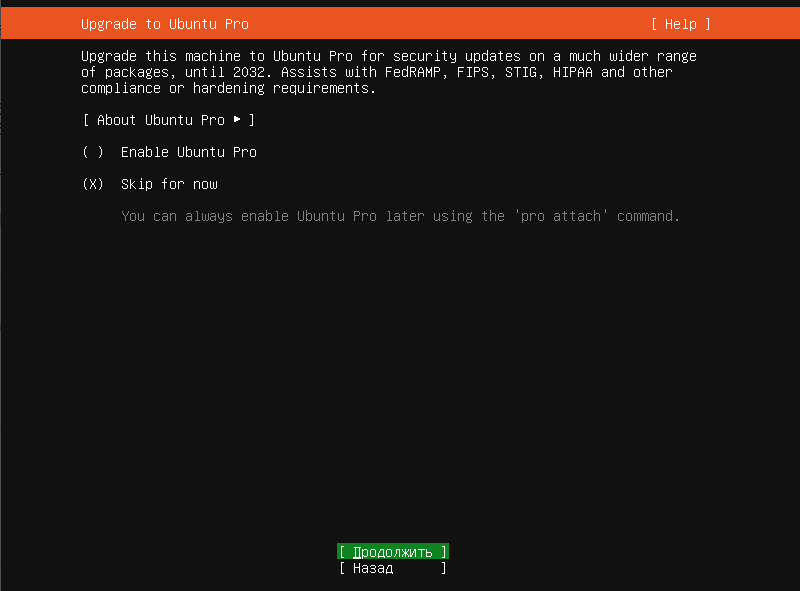 Image Added Image Added
|
| панель |
|---|
| title | When installing Ubuntu Linux, install openSSH for remote management |
|---|
| 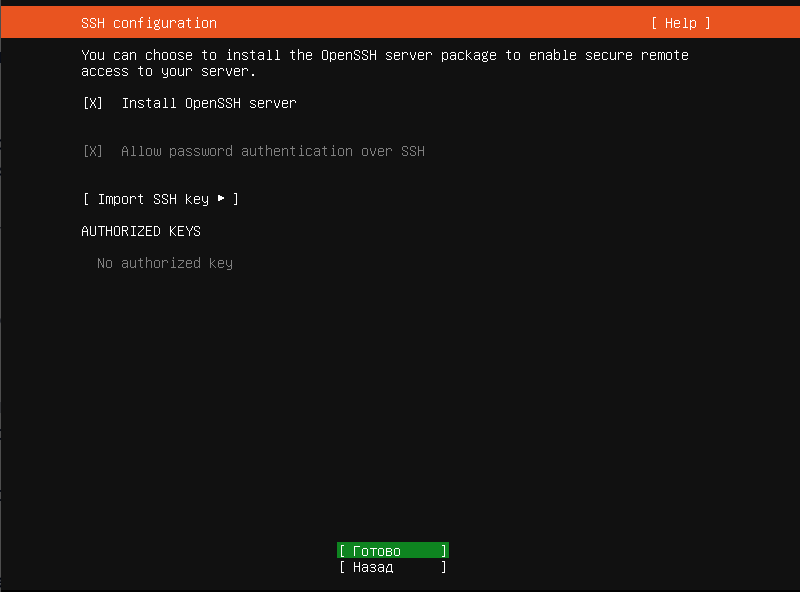 Image Added Image Added
|
| панель |
|---|
| 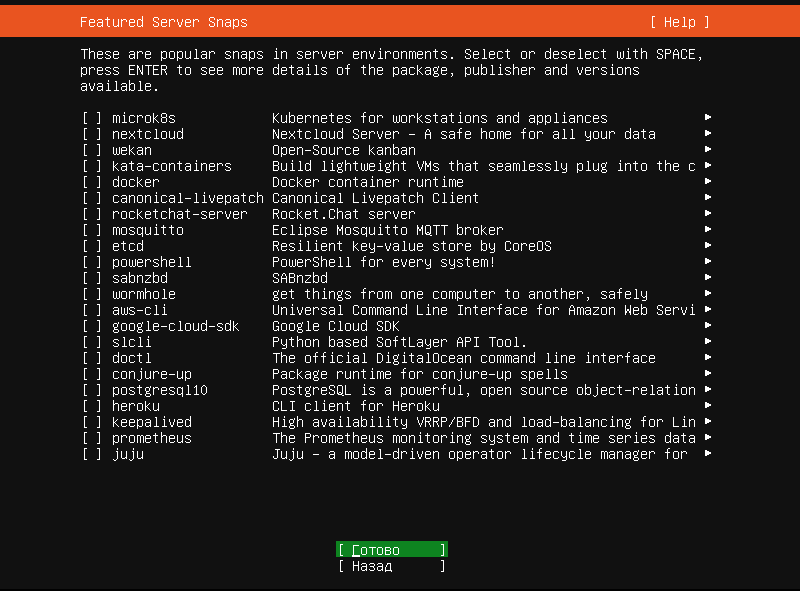 Image Added Image Added
|
| панель |
|---|
| title | Wait for the message to appear - Restart now |
|---|
| 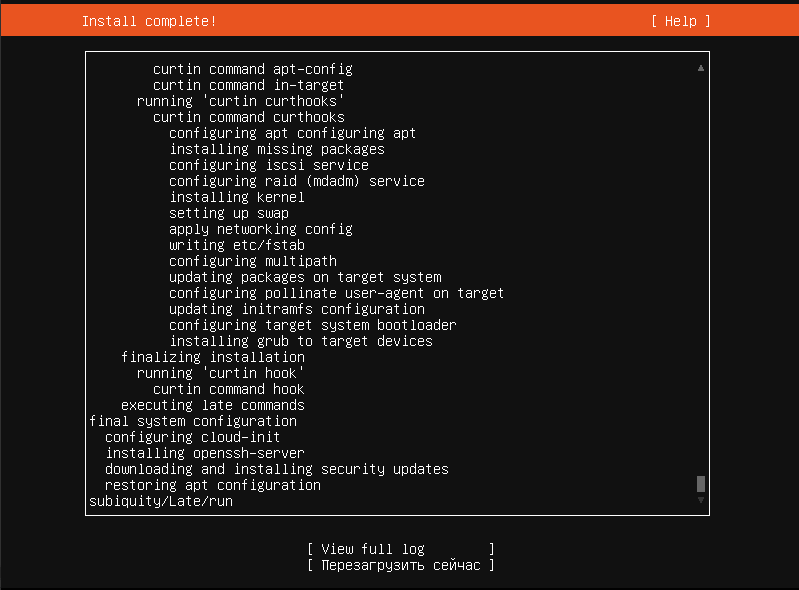 Image Added Image Added
|
| панель |
|---|
| title | Remove the installation disk/flash drive and press Enter |
|---|
| 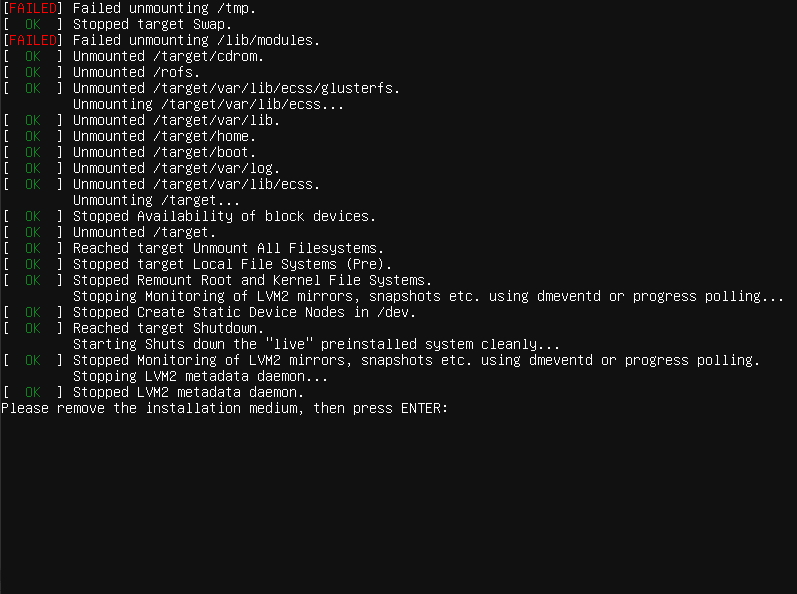 Image Added Image Added
Ubuntu Linux Server has been installed. |
|
| Раскрыть |
|---|
| title | Ubuntu Server 22.04 installation |
|---|
| | A Shared Block |
|---|
| shared-block-key | Ubuntu Server 22.04 installation |
|---|
| | панель |
|---|
| Image Added |
| панель |
|---|
| title | Continue without update |
|---|
| Image Added |
| панель |
|---|
| title | Keyboard configuration |
|---|
| Image Added |
| панель |
|---|
| title | Select the standard Ubuntu Server installation |
|---|
| Image Added |
| панель |
|---|
| title | Select Eht: the interface for installing Ubuntu (it should have internet access). |
|---|
| Image Added |
| панель |
|---|
| title | Set the IP address for internet access (DHCP cannot be used). |
|---|
| Image Added |
| панель |
|---|
| title | Proxy server cannot be used (if it is used in your project, please specify) |
|---|
| Image Added |
| панель |
|---|
| Image Added |
| панель |
|---|
| title | Create partitions on the disk, using LVM |
|---|
| Image Added |
| панель |
|---|
| title | By default, two partitions are created: /boot and /, we keep /boot and delete /. First, unmount |
|---|
| Image Added |
| панель |
|---|
| Image Added |
| панель |
|---|
| Image Added |
| панель |
|---|
| Image Added |
| панель |
|---|
| title | Create partitions according to the dimensions specified in the table below |
|---|
| Image Added |
| панель |
|---|
| title | root size 30 Gb, mount point / |
|---|
| Image Added |
| панель |
|---|
| title | mnesia size 30 Gb, mount point /var/lib/ecss |
|---|
| Image Added |
| панель |
|---|
| title | log size 20 Gb, mount point /var/log |
|---|
| Image Added |
| панель |
|---|
| title | mysql, size 30G, mount point - /var/lib/mysql |
|---|
| Image Added |
| панель |
|---|
| title | ecss_log, size 20 Gb, mount point /var/log/ecss |
|---|
| Image Added |
| панель |
|---|
| title | ecss_db, size 100 Gb, mount point- /var/lib/ecss-mysql |
|---|
| Image Added |
| панель |
|---|
| title | home, size 10 Gb, mount point - /home |
|---|
| Image Added |
| панель |
|---|
| title | glusterfs - for the cluster / for a single host - restfs, size - all remaining disk space, mount point - /var/lib/ecss/glusterfs - for the cluster, and /var/lib/ecss/restfs - for a single server |
|---|
| Image Added |
| панель |
|---|
| title | obtained configuration |
|---|
| Image AddedImage Added |
| панель |
|---|
| Image Added |
| панель |
|---|
| title | Create a user and a hostname, in ECSS10 the recommended hostname is ecss1/ecss2 (used for license integration), username (in the example abf / password at your discretion) |
|---|
| Image Added |
| панель |
|---|
| title | When installing, select Free installation: |
|---|
| Image Added |
| панель |
|---|
| title | When installing Ubuntu Linux, install openSSH for remote management |
|---|
| Image Added |
| панель |
|---|
| Image Added |
| панель |
|---|
| title | Wait for the message to appear - Restart now |
|---|
| Image Added |
| панель |
|---|
| title | Remove the installation disk/flash drive and press Enter |
|---|
| Image Added Ubuntu Linux Server has been installed. |
|
|
|
| Якорь |
|---|
| option for storing information |
|---|
| option for storing information |
|---|
|
Table 1 Table1 — An option for storing information in a file system on physical media for servers
| 1 | Operating system boot partition (created automatically) | boot | raid 1: hdd1, hdd2 | boot | /boot | ext4 | 1 GB | Primary |
| 2 | Operating system root partition | root | raid 1: hdd1, hdd2 | root | / | ext4 | 30 GB | Logical |
| 3 | Local database information | mnesia | raid 1: hdd1, hdd2 | mnesia | /var/lib/ecss | ext4 | 10 GB | Logical |
| 4 | Distributed database for storing media resources | glusterfs | raid 1: hdd1, hdd2 или or hdd3 | glusterfs | /var/lib/ecss/glusterfs* | ext4 | Max GB | Logical |
| 5 | OS subsystem operation logs | log | raid 1: hdd1, hdd2 или or hdd3 | log | /var/log | ext4 | 20 GB | Logical |
| 6 | ECSS subsystem operation logs | ecss_log | raid 1: hdd1, hdd2 или or hdd3 | ecss_log | /var/log/ecss | ext4 | 20 GB | Logical |
| 7 | Databases | ecss_db | raid 1: hdd1, hdd2 или or hdd3 | ecss_db | /srv/ecss/ecss-postgres-bdr-ssw/ | ext4 | 100–400 GB** | Logical |
| 8 | User files | home | raid 1: hdd1, hdd2 или or hdd3 | home | /home | ext4 | 10 GB | Logical |
...
| Подсказка |
|---|
When installing the system in a cluster, the recommended value for the first server is ecss1, for the second – ecss2. |
Configuring network
Install the software switch according to the parameters specified in the technical specification. In this example, it is assumed that the required operating system is already installed.
...
According to the technical specification, the following addresses are used in a given example (in brackets are differences for ecss2):
- 10.0.10.11(1252)/24 — for management, VLAN 10;
- 10.0.20.21(2252)/24 — core, VLAN 20;
- 10.0.20.31(32)/24 — virtual addresses (vrrp) for VoIP;
- 10.0.10.10 — virtual address (vrrp) for MySQL server;
- 10.0.10.1 — gateway and dns for access to external network;
- 10.0.20.1 — gateway to 10.0.3.0/24 subnet;
- 10.136.16.211, 10.136.16.212 — NTP server addresses, which are accessed via 10.0.10.1 gateway.
...
| Предупреждение |
|---|
|
Note that while editing netplan, it is necessary to follow the YAML markup rules: - Mandatory presence of two spaces before each line (except network).
- Each subsection is additionally shifted by 2 spaces:
→ Section |network → Subsection |_'_'bonds: → Subsection of the bonds section description |_'_'_'_'bonded_one: → etc. |_'_'_'_'... - There is no space before the ":" sign, after — one space.
- Before the "-" sign, the number of spaces is as if a new subsection begins, after — one space.
|
Example of netplan for active-backup mode
| Netplan for ecss1 server interfaces (/etc/netplan/ecss_netplan.yaml) | Netplan for ecss2 server interfaces (/etc/netplan/ecss_netplan.yaml) |
|---|
| Без форматирования |
|---|
# Netplan for the ecss1 host of the software switch
# Pay attention to the mandatory presence of at least two spaces in each line and section (except for the network section line)

network:
  version: 2 # netplan version
  renderer: networkd # netplan configuration executor
  ethernets: # Ethernet interfaces description section
    eth0: # Interface name
      dhcp4: no # Disabling dynamic distribution of IP address on the interfaces
    eth1:
      dhcp4: no
    eth2:
      dhcp4: no
    eth3:
      dhcp4: no

  bonds: # Section describing bonding interfaces.
    bond1: # Bonding interface name
      interfaces: # Section of determining bonding interfaces
		- eth0
		- eth1
		- eth2
		- eth3
      parameters: # Section of defining bonding interface parameters
        primary-reselect-policy: failure # allows for avoiding unnecessary switching.
        gratuitous-arp: 5 # Promotes faster switching
        all-slaves-active: true # accept incoming frames on backup interfaces
        up-delay: 1000 # make a delay of one second
        mode:  active-backup # Backup mode, one active and the rest are backup
        mii-monitor-interval: 100 # interface monitoring interval(ms)
        primary: eth0 # Main interface definition section
      optional: false # Determine whether an interface is required at startup

  vlans:
    net.10: # Management interface
      id: 10
        link: bond1
        addresses: [10.0.10.51/24]
        gateway4: 10.0.10.1 # Gateway address
        nameservers:
          addresses: [10.0.10.1, 8.8.8.8] # DNS servers addresses
        routes: # Routing for NTP subnet
          - to: 10.136.16.0/24
            via: 10.0.10.1 # Gateway address for this subnet
            on-link: true # Determines that the specified routes are directly associated with the interface
    net.20: # Interface for VoIP
        id: 20
        link: bond1
        addresses: [10.0.20.51/24]
        routes:
          - to: 10.0.3.0/24
            via: 10.0.20.1
            on-link: true
|
|
| Без форматирования |
|---|
# Netplan for the ecss2 host of the software switch
# Pay attention to the mandatory presence of at least two spaces in each line and section (except for the network section line)

network:
  version: 2 # netplan version
  renderer: networkd # netplan configuration executor
  ethernets: # Ethernet interfaces description section
    eth0: # Interface name
      dhcp4: no # Disabling dynamic distribution of IP address on the intefaces
    eth1:
      dhcp4: no
    eth2:
      dhcp4: no
    eth3:
      dhcp4: no

  bonds: # Section describing bonding interfaces.
    bond1: # Bonding interface name
      interfaces: # Section of determining bonding interfaces
		- eth0
		- eth1
		- eth2
		- eth3
      parameters: # Section of defining bonding interface parameters
        primary-reselect-policy: failure # allows for avoiding unnecessary switching.
        gratuitous-arp: 5 # Promotes faster switching
        all-slaves-active: true # accept incoming frames on backup interfaces
        up-delay: 1000 # make a delay of one second
        mode:  active-backup # Backup mode, one active and the rest are backup
        mii-monitor-interval: 100 # interface monitoring interval(ms)
        primary: eth0 # Main interface definition section
      optional: false # Determine whether an interface is required at startup

  vlans:
    net.10: # Management interface
      id: 10
        link: bond1
        addresses: [10.0.10.52/24]
        gateway4: 10.0.10.1 # Gateway address
        nameservers:
          addresses: [10.0.10.1, 8.8.8.8] # DNS servers addresses
        routes: # Routing for NTP subnet
          - to: 10.136.16.0/24
            via: 10.0.10.1 # Gateway address for this subnet
            on-link: true # Determines that the specified routes are directly associated with the interface
    net.20: # Interface for VoIP
        id: 20
        link: bond1
        addresses: [10.0.20.52/24]
        routes:
          - to: 10.0.3.0/24
            via: 10.0.20.1
            on-link: true
|
|
...
mode: active-backup - specifies the operating mode in which one link is selected as active, while the others remain in backup;
primary-reselect-policy: failure - specifies that a new active link should be selected only when the current active link fails. This avoids unnecessary switching;
gratuitous-arp: 5 - when the active link changes, five gratuitous ARP requests are sent to the switch to update its switching table. This facilitates faster switching;
all-slaves-active: true - forces incoming frames to be accepted on the backup interfaces. This ensures that traffic balancing on the MES does not interfere with operation. Data flows to the server from all links, and the server sends data only from the active link;
mii-monitor-interval: 100 - enables link monitoring via the MII interface and specifies a polling interval of 100 ms;
up-delay: 1000 - specifies that a connected interface should not be considered immediately available for operation, but rather a one-second delay should be applied after the interface has been connected. This is necessary to avoid unnecessary switching when the port repeatedly switches between the "on" and "off" states.
Example of netplan for 802.3ad mode
| Netplan for ecss1 server interfaces (/etc/netplan/ecss_netplan.yaml) | Netplan for ecss2 server interfaces (/etc/netplan/ecss_netplan.yaml) |
|---|
| Без форматирования |
|---|
# Netplan for the ecss1 host of the software switch
# Pay attention to the mandatory presence of at least two spaces in each line and section (except for the network section line)

network:
  version: 2 # netplan version
  renderer: networkd # netplan configuration executor
  ethernets: # Ethernet interfaces description section
    eth0: # Interface name
      dhcp4: no # Disabling dynamic distribution of IP address on the interfaces
    eth1:
      dhcp4: no
    eth2:
      dhcp4: no
    eth3:
      dhcp4: no

  bonds: # Section describing bonding interfaces.
    bond1: # Bonding interface name
      interfaces: # Section of determining bonding interfaces
		- eth0
		- eth1
		- eth2
		- eth3
      parameters: # Section of defining bonding interface parameters
        mode: 802.3ad # LACP mode
        mii-monitor-interval: 100 # Section of interface monitoring (ms)
        primary: eth0 # Section of determining main interface
      optional: false # Determining if an interface is required at startup

  vlans:
    net.10: # Management interface
      id: 10
        link: bond1
        addresses: [10.0.10.51/24]
        gateway4: 10.0.10.1 # Gateway address
        nameservers:
          addresses: [10.0.10.1, 8.8.8.8] # DNS servers addresses
        routes: # Routing for NTP subnet
          - to: 10.136.16.0/24
            via: 10.0.10.1 # Gateway address for this subnet
            on-link: true # Determines that the specified routes are directly associated with the interface
    net.20: # Interface for VoIP
        id: 20
        link: bond1
        addresses: [10.0.20.51/24]
        routes:
          - to: 10.0.3.0/24
            via: 10.0.20.1
            on-link: true
|
|
| Без форматирования |
|---|
# Netplan for the ecss2 host of the software switch
# Pay attention to the mandatory presence of at least two spaces in each line and section (except for the network section line)

network:
  version: 2 # netplan version
  renderer: networkd # netplan configuration executor
  ethernets: # Ethernet interfaces description section
    eth0: # Interface name
      dhcp4: no # Disabling dynamic distribution of IP address on the interfaces
    eth1:
      dhcp4: no
    eth2:
      dhcp4: no
    eth3:
      dhcp4: no

  bonds: # Section describing bonding interfaces.
    bond1: # Bonding interface name
      interfaces: # Section of determining bonding interfaces
		- eth0
		- eth1
		- eth2
		- eth3
      parameters: # Section of defining bonding interface parameters
        mode: 802.3ad # LACP mode
        mii-monitor-interval: 100 # Section of interface monitoring (ms)
        primary: eth0 # Section of determining main interface
      optional: false # Determining if an interface is required at startup

  vlans:
    net.10: # Management interface
      id: 10
        link: bond1
        addresses: [10.0.10.52/24]
        gateway4: 10.0.10.1 # Gateway address
        nameservers:
          addresses: [10.0.10.1, 8.8.8.8] # DNS servers addresses
        routes: # Routing for NTP subnet
          - to: 10.136.16.0/24
            via: 10.0.10.1 # Gateway address for this subnet
            on-link: true # Determines that the specified routes are directly associated with the interface
    net.20: # Interface for VoIP
        id: 20
        link: bond1
        addresses: [10.0.20.52/24]
        routes:
          - to: 10.0.3.0/24
            via: 10.0.20.1
            on-link: true
|
|
...
| Блок кода |
|---|
|
sudo nano /etc/hostname |
Configuring /etc/hosts
After configuring netplan, specify that the internal address 10.0.10.Х belongs to the corresponding ecssX server. To do this, configure /etc/hosts.
...
Check the connection between the servers. From the ecss1 server side - ssh ecss2, the connection should be established without asking for a password. Similarly, from the ecss2 server side - ssh ecss1.
Optimization of the operating system
Set OS settings to performance mode
Use cpufrequtils utility.
...
| Блок кода |
|---|
| language | bash |
|---|
| title | on both hosts |
|---|
|
sudo systemctl daemon-reload |
...
Disabling SWAP
The Ubuntu SSW server operates in real time, so all necessary data must be in RAM. Using a swap file (/swap.img) can increase the processing time of ECSS10 SSW application calls, which is unacceptable. Disable swap.
...
| Без форматирования |
|---|
|
free -h
              total        used        free      shared  buff/cache   available
Mem:           3,9G        110M        3,2G        820K        535M        3,5G
Swap:            0B          0B          0B
|
Setting the time zone
When installing Ubuntu 22, it is not prompted to set a time zone (UTC is the default). One should set it manually (for the rating system, scheduled tasks, etc.) to function correctly. For example:
...
| Предупреждение |
|---|
If system components are moved to different servers/VMs (ecss-node/ecss-msr), it is necessary to specify a single time zone for all system components. |
It is possible to improve the performance of high-load servers by increasing the open file limit.
...
| Предупреждение |
|---|
|
Installation of packages must be done NOT under the ssw system user. |
Operating system software update
To install the ECSS-10 system, add the ELTEX repository:
...
| Блок кода |
|---|
| language | bash |
|---|
| title | on both hosts |
|---|
|
sudo apt upgrade |
Software installation and configuration
| Предупреждение |
|---|
| title | deb package installation |
|---|
|
┌ ECSS software version. Currently, it is listed as version 3 in the certification application. | It is not changed until the next certification or
│ the release of a fundamentally new version of the system.
│
│ ┌ System Release Version. This is the common version for all components included in a specific release. | | It is changed centrally
│ │ when decided to launch a new release. Releases are usually not compatible with each other.
┌─┴┐ ┌──┴─┐
ECSS.SysRel.SubMaj.SubMin
└──┬─┘ └──┬─┘
│ └ Subsystem minor version. The minor version of a subsystem is set by the subsystem developer. | The minor version
│ is changed when a patch is added. Minor versions within a single major version are generally
│ compatible with each other and differ within specific patches.
│
└ Subsystem major version. The major version is set by the subsystem developer. The major version of a subsystem must be updated when significant changes are made to the subsystem.
The APT package installation utility analyzes package version from left to right. For example, if we have package 14.14.7.7, the repository contains packages: 14.14.7.8
14.14.7.9
14.14.8.1
14.14.20–14.14.28.
Then, when running the sudo apt install package name command → package 14.14.28 will be automatically checked and installed. Since it is the most recent, the analysis will be performed based on the third position (major), and the fourth position (minor) will not be analyzed (the same applies to sudo apt upgrade command). If a specific situation requires upgrading from version 14.14.7.7 to version 14.14.7.9, the standard command → sudo apt upgrade will not help, since the newest package will be selected. In this situation, it is needed to explicitly specify which version of the package wanted to be installed. In this example, we should select the command → sudo apt install package name=14.14.7.9. This is usually necessary for testing a specific patch; for standard updates, it is enough to select the usual command to install/update the package. |
...
| Примечание |
|---|
Before installing the ecss packages, it is needed to ensure that the network's bandwidth meets the requirements. To do this, run the command sudo ethtool <interface name> for all physical interfaces. | Раскрыть |
|---|
| sudo ethtool net.20
Settings for net.20:
Supported ports: [ TP ]
Supported link modes: 10baseT/Half 10baseT/Full
100baseT/Half 100baseT/Full
1000baseT/Full
Supported pause frame use: No
Supports auto-negotiation: Yes
Supported FEC modes: Not reported
Advertised link modes: 10baseT/Half 10baseT/Full
100baseT/Half 100baseT/Full
1000baseT/Full
Advertised pause frame use: No
Advertised auto-negotiation: Yes
Advertised FEC modes: Not reported
Speed: 1000Mb/s
Duplex: Full
Auto-negotiation: on
Port: Twisted Pair
PHYAD: 0
Transceiver: internal
MDI-X: off (auto)
Link detected: yes
|
Check the following: - Advertised auto-negotiation: Yes
- Speed: 1000 Mbps (minimum)
- Duplex: Full
|
Installing the mandatory ECSS package
Installing the ecss-dns-env package
To install, run the command:
...
| Questions ecss-dns-env | Replies for ecss1 | Ответы Answers for ecss2 |
|---|
| [Primary broker] enter address ([Primary broker] Enter IP) | 10.0.10.51 (needs to be entered) | 10.0.10.51 (needs to be entered) |
| [Secondary broker] enter address ([Secondary broker] Enter IP) | 10.0.10.52 (needs to be entered) | 10.0.10.52 (needs to be entered) |
| Предупреждение |
|---|
|
In case of subsequent correction of IP addresses, the following command should be used: | Блок кода |
|---|
| sudo dpkg-reconfigure ecss-dns-env |
|
Installing Postgres
| Предупреждение |
|---|
|
Before installing ecss-postgres-bdr-ssw, docker must be added to the apt sources on the system. To do this, run the following commands: | Блок кода |
|---|
| sudo install -m 0755 -d /etc/apt/keyrings |
| Блок кода |
|---|
| sudo curl -fsSL https://download.docker.com/linux/ubuntu/gpg -o /etc/apt/keyrings/docker.asc |
| Блок кода |
|---|
| sudo chmod a+r /etc/apt/keyrings/docker.asc |
| Блок кода |
|---|
| echo \
"deb [arch=$(dpkg --print-architecture) signed-by=/etc/apt/keyrings/docker.asc] https://download.docker.com/linux/ubuntu \
$(. /etc/os-release && echo "${UBUNTU_CODENAME:-$VERSION_CODENAME}") stable" | \
sudo tee /etc/apt/sources.list.d/docker.list > /dev/null |
| Блок кода |
|---|
| language | bash |
|---|
| title | on both hosts - update |
|---|
| sudo apt update && sudo apt upgrade |
|
Installing ecss-postgres-bdr-ssw package
Performed sequentially, first installed on the server running in "Master" mode.
...
| Questions ecss-postgres-bdr-ssw | Replies for ecss2 (Slave) |
|---|
| Current IP address of the network interface. | Select an IP address from the list to use with Postgres |
| Installing in a cluster? | Yes (default value) |
| Is this node a master node? | Yes (needs to be entered) |
| IP address used to connect to the cluster: | Specify the IP address of the Master (ecss1) |
Check that the replication settings are correct
When installing, the script postgresbdr_ssw.sh is installed in /srv/ecss/ecss-postgres-bdr-ssw directory.
...
| Раскрыть |
|---|
|
| панель |
|---|
| sudo ./postgresbdr_ssw.sh check
[sudo] password for abf:
Sorry, try again.
[sudo] password for abf:
Enter master ip please
Like 10.150.150.15
10.0.10.51
Enter slave ip please
10.0.10.52
Press enter with empty password
q - exit table view (if needed)
node table on the master using ecss_storekeeper_db
node_sysid | node_local_dsn | node_init_from_dsn
---------------------+---------------------------------------------------------------------------------------+--------------------
7569871659329171478 | host=10.0.10.51 port=5439 dbname=ecss_storekeeper_db user=postgres password=postgres1 |
(1 row)
node table on the slave using ecss_storekeeper_db
psql: error: connection to server at "10.0.10.52", port 5439 failed: Connection refused
Is the server running on that host and accepting TCP/IP connections?
connection table onthe master the master using по ecss_storekeeper_db
conn_sysid | conn_dsn
---------------------+---------------------------------------------------------------------------------------
7569871659329171478 | host=10.0.10.51 port=5439 dbname=ecss_storekeeper_db user=postgres password=postgres1
(1 row)
connection table on the slave using ecss_storekeeper_db
psql: error: connection to server at "10.0.10.52", port 5439 failed: Connection refused
Is the server running on that host and accepting TCP/IP connections?
|
| панель |
|---|
| title | connection mismatch error |
|---|
| sudo ./postgresbdr_ssw.sh check
Enter master ip please
Like 10.150.150.15
10.0.10.51
Enter slave ip please
10.0.10.52
Press enter with empty password
q - exit table view (if needed)
node table on the master using ecss_storekeeper_db
node_sysid | node_local_dsn | node_init_from_dsn
---------------------+---------------------------------------------------------------------------------------+--------------------
7569871659329171478 | host=10.0.10.51 port=5439 dbname=ecss_storekeeper_db user=postgres password=postgres1 |
(1 row)
node table on the slave using ecss_storekeeper_db
connection table on the master using ecss_storekeeper_db
conn_sysid | conn_dsn
---------------------+---------------------------------------------------------------------------------------
7569871659329171478 | host=10.0.10.51 port=5439 dbname=ecss_storekeeper_db user=postgres password=postgres1
(1 row)
connection table on the slave using ecss_storekeeper_db
conn_sysid | conn_dsn
---------------------+---------------------------------------------------------------------------------------
7569499877813944343 | host=10.0.10.51 port=5439 dbname=ecss_storekeeper_db user=postgres password=postgres1
7569514001040228374 | host=10.0.10.52 port=5439 dbname=ecss_storekeeper_db user=postgres password=postgres1
7569871659329171478 | host=10.0.10.51 port=5439 dbname=ecss_storekeeper_db user=postgres password=postgres1
(3 rows)
|
|
Installing ecss-node
Installation of the required ecss-node package includes installation and initial configuration of the main subsystems.
...
| Подсказка |
|---|
During installation, the ecss-user package will also be installed. |
Installing on ecss1 server
During installation, it will be prompted to configure the parameters necessary for generating configuration files. Examples of replies are below.
...
| Подсказка |
|---|
After installing the ecss-node package on host ecss1, run the command sudo usermod -a -G ssw <Username> on host ecss1.
Then complete the installation on host ecss2.
Use the "Copy existing certificates (copy) via ssh" option from server ecss1. |
Installing on ecss2 server
During installation, it will be prompted to configure the parameters necessary for generating configuration files. Examples of replies are below.
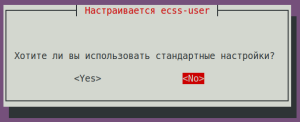
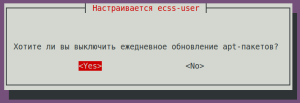
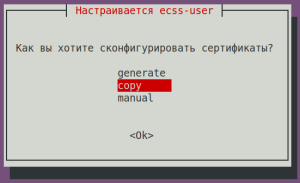
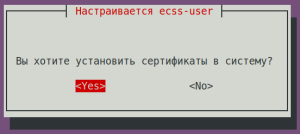
| ecss-user questions | Replies for ecss2 | Example |
|---|
| Do you want to use the default settings? | No (default) | |
Do you want to disable daily apt package updates? | Yes (default) | |
| How do you want to configure certificates? | copy (needs to be entered) | |
| Do you want to install certificates into the system? | Yes (default) | |
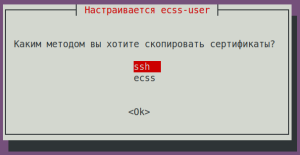
| Which method do you want to copy the certificates? | ssh (needs to be entered) | |
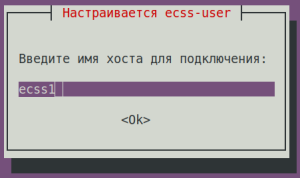
Enter the hostname to connect to: | ecss1 (needs to be entered) | |
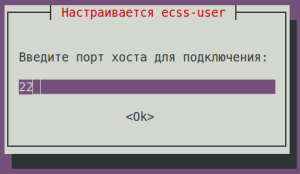
| Enter the host port to connect to: | 22 (default) | |
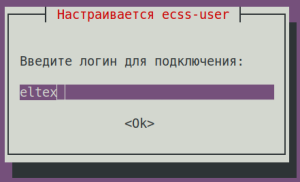
| Enter your login to connect: (for example: eltex) | eltex (needs to be entered) | |
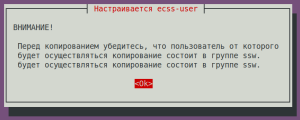
Before copying make sure, that the user from whom the copying will be performed is a member of the group ssw. |
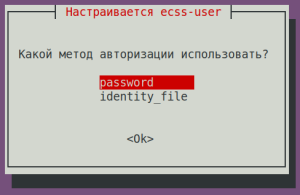
| Which authorization method to use? | password (needs to be selected) | |
| Enter the password to connect: | | |
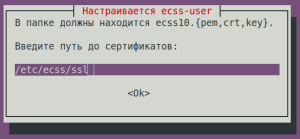
Enter the path to the certificates: | /etc/ecss/ssl (default) | |
| |
|
| ecss-node questions | Replies for ecss2 | Example |
|---|
| Якорь |
|---|
| Идентификатор ECSS-узла |
|---|
| Идентификатор ECSS-узла |
|---|
|
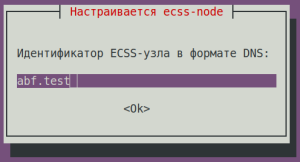
ECSS Node ID in DNS format (cluster name configuring): (any unique name, in еру the example: abf.test)
| abf.test (needs to be entered)
| Подсказка |
|---|
ECSS_ID format
It must begin and end with a Latin letter or number, while dots and dashes may be used in the body. | Без форматирования |
|---|
[A-Za-z0-9][A-Za-z0-9.-][A-Za-z0-9] |
|
| |
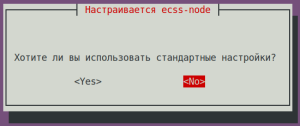
Do you want to use the standard settings? | No (needs to be selected) | |
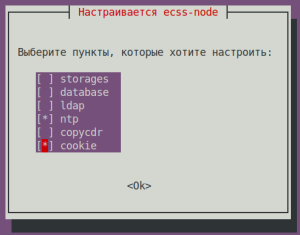
Select the items you want to configure:
| ntp + cookie (needs to be selected) | |
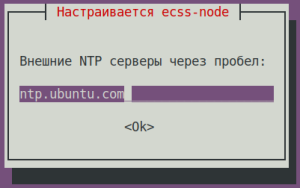
Enter external NTP servers separated by a space: | ntp.ubuntu.com (default) | |
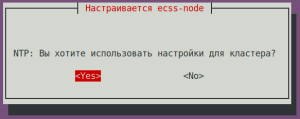
NTP: Do you want to use the settings for the cluster? | Yes (default) | |
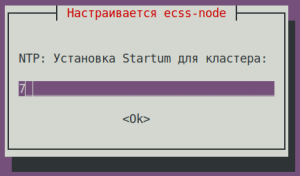
NTP: Installing Startum for a cluster: | 7 (default) | |
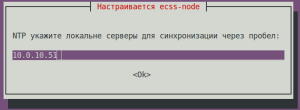
NTP specify local servers for synchronization separated by a space: (in the example ecss2 - 10.0.10.51) | 10.0.10.51 (needs to be entered) | |
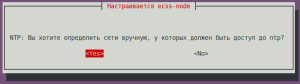
NTP: Do you want to manually define the networks that should have access to NTP? | Yes (default) | |
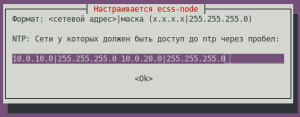
NTP: Enter networks that should have access to NTP separated by a space: (in the example: 10.0.10.0|255.255.255.0 10.0.20.0|255.255.255.0) | 10.0.10.0|255.255.255.0 10.0.20.0|255.255.255.0 (needs to be entered) | |
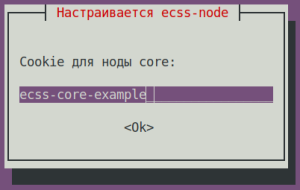
Cookie for the core node: (specify a unique cookie for the core, in the example: ecss-core-example) | Предупреждение |
|---|
In the cluster configuration, the cookies must be the same for nodes of the same type |
| ecss-core-example (needs to be entered) | |
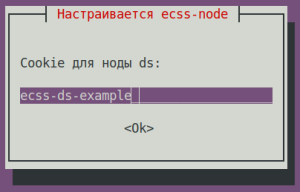
Cookie for ds node: (specify a unique cookie for the ds, in the example: ecss-ds-example) | Предупреждение |
|---|
In the cluster configuration, the cookies must be the same for nodes of the same type |
| ecss-ds-example (needs to be entered) | |
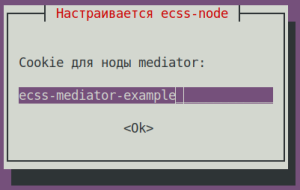
Cookie for mediator node: (specify a unique cookie for the mediator, in the example: ecss-mediator-example)
| Предупреждение |
|---|
In the cluster configuration, the cookies must be the same for nodes of the same type |
| ecss-mediator-example (needs to be entered) | |
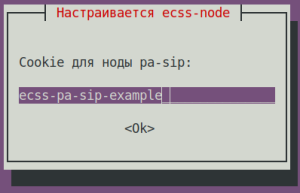
Cookie for mediator pa-sip: (specify a unique cookie for the pa-sip, in the example: ecss-pa-sip-example)
| Предупреждение |
|---|
In the cluster configuration, the cookies must be the same for nodes of the same type |
| ecss-pa-sip-example (needs to be entered) | |
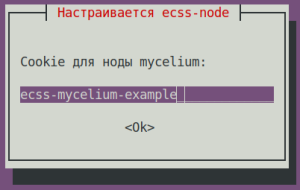
Cookie for mycelium: (specify a unique cookie for the mycelium, in the example: ecss-mycelium-example)
| Предупреждение |
|---|
In the cluster configuration, the cookies must be the same for nodes of the same type |
| ecss-mycelium-example (needs to be entered) | |
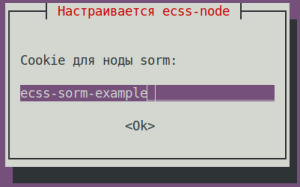
Cookie for sorm: (specify a unique cookie for the sorm, in the example: ecss-sorm-example)
| Предупреждение |
|---|
In the cluster configuration, the cookies must be the same for nodes of the same type |
| ecss-sorm-example (needs to be entered) | |
| | |
| ecss-user questions | Replies for ecss1 | Example |
|---|
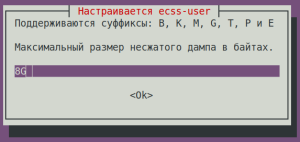
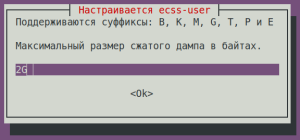
Maximum size of uncompressed dump in bytes.
| 8G (default) | |
| Maximum size of compressed dump in bytes. | 2G (default) | |
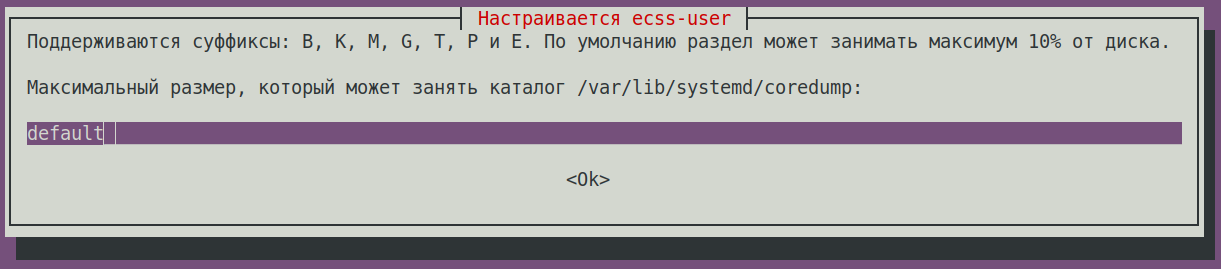
The maximum size that the /var/lib/systemd/coredump directory can occupy is: | default (default) | |
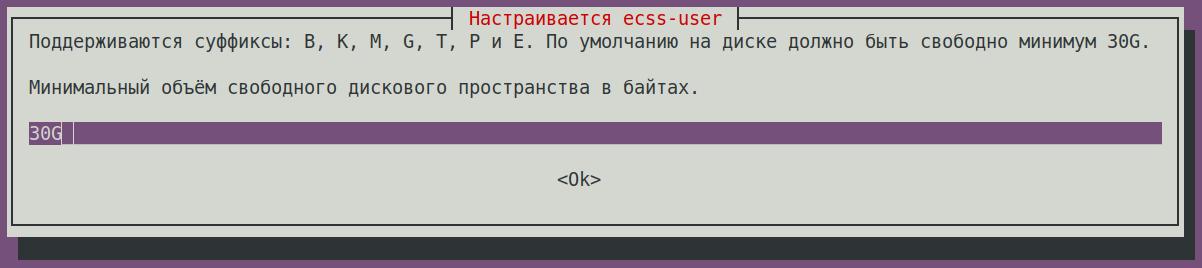
Minimum amount of free disk space in bytes. | 30G (default) | |
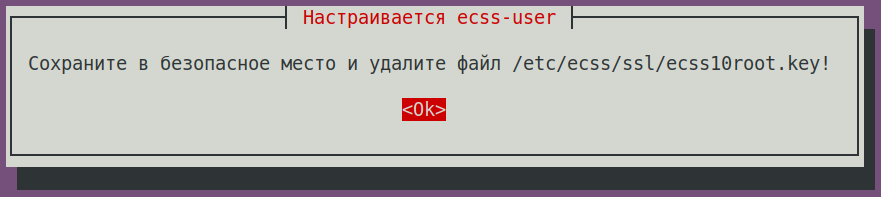
Save to a safe place and delete the file /etc/ecss/ssl/ecss10root.key! | Ok (default) | |
...
| Без форматирования |
|---|
systemctl is-active ecss-core ecss-pa-sip ecss-ds ecss-mediator ecss-mycelium
active
active
active
active
active |
NTP configuration
With the default installation (Do you want to use default settings?), NTP configuration will not be performed. Configure NTP, if needed:
| Раскрыть |
|---|
|
Time synchronization on servers| Примечание |
|---|
| Before configuring NTP, it is necessary to make sure that the ntp package is installed on the system. |
Example: | Без форматирования |
|---|
dpkg -l | grep ntp
ii  ntp                                   1:4.2.8p10+dfsg-5ubuntu7.3                      amd64        Network Time Protocol daemon and utility programs
ii sntp 1:4.2.8p10+dfsg-5ubuntu7.3 amd64 Network Time Protocol - sntp client |
Next, it is recommended to set the current system date as close to real time as possible. For this, you can use the manual time synchronization utility ntpdate. Example of setting the time from the ntp.ubuntu.com server: | Без форматирования |
|---|
sudo ntpdate ntp.ubuntu.com |
The date command without parameters displays the current system time. Installing and Configuring NTPNTP configuration is configured when installing the ecss-node package. Let's look at configuring NTP for a cluster of two ecss servers with the following parameters: | Parameter | Value |
|---|
Addresses of external NTP servers | | Local synchronization of cluster servers with each other (orphan mode) | Yes, for the following addresses: - ecss1 - 192.168.1.21
- ecss2 - 192.168.1.22
| Subnets from which other devices are allowed to synchronize with this server | - 192.168.1.0/24
- 10.16.0.0/16
|
During installation, you'll be asked several questions to generate a configuration file. Below is an example of replies: It is necessary to enter external servers separated by spaces (the default is ntp.ubuntu.com): 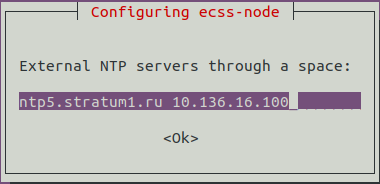
Enable (Yes) or disable (No) TOS orphan mode (a cluster mode in which servers independently manage synchronization). If the system is installed in a cluster, ECSS servers must have the same time, even if external NTP servers are unavailable. Therefore, it is necessary to select "Yes." 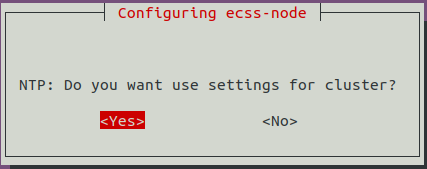
Stratum cluster time precision. Default: 7:
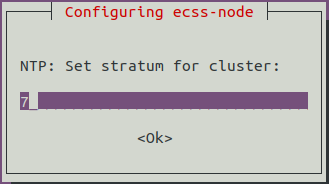 It will be prompted to enter the addresses of neighboring cluster servers to synchronize them with each other. In this example, we're configuring ecss1, so we'll enter the address of ecss2. When configuring ecss2, we'll enter the address of ecss1. If you have multiple servers, separate them with spaces. 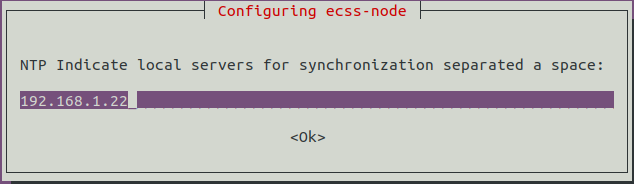
Next, configure the subnet addresses from which other devices are allowed to synchronize with this server: 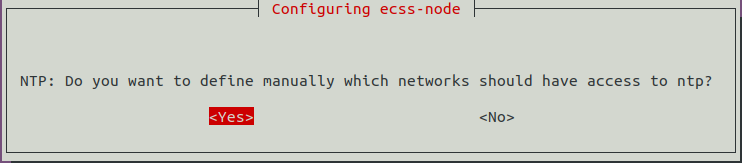
Specify the networks that can access this server so that other nodes and other devices can synchronize time with this server. The format for specifying networks is: <network_address|network_mask>. If there are multiple networks, listed them separated by spaces. 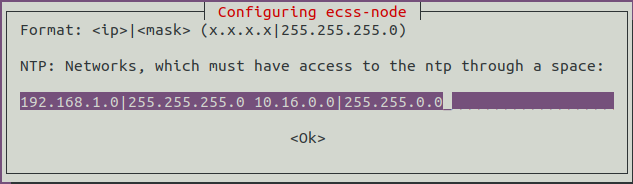
After installation, the settings are saved in the file /etc/ecss/ecss-ntp.conf. Here's an example of the resulting file for the ecss1 server: | Без форматирования |
|---|
# /etc/ntp.conf

# http://www.k-max.name/linux/ntp-server-na-linux/
# In preinst, make a backup copy of the old one and install the current one
# In postrm, load from the backup

# System clock drift
driftfile       /var/lib/ntp/ntp.drift
# Logs
logfile /var/log/ntp
# Time synchronization statistics
statsdir /var/log/ntpstats/

# Enables logging statistics:
# loopstats - loopback statistics
# peerstats - peer statistics
# clockstats - clock driver statistics
statistics loopstats peerstats clockstats
filegen loopstats file loopstats type day enable
filegen peerstats file peerstats type day enable
filegen clockstats file clockstats type day enable

# Activate Orphan mode — a time synchronization mode for clusters. Set it to stratum (precision level: a number from 1 to 16).
# tos orphan <stratum>
# TOS
tos orphan 7 ### INSTALLED AUTOMAT BY ECSS10


# Local area network servers
# peer <ip|domain>
# LOCAL_SERVERS
peer 192.168.1.22 ### INSTALLED AUTOMAT BY ECSS10


# Internet servers
# server xx.xx.xx.xx iburst
# restrict xx.xx.xx.xx
# INTERNET_SERVERS
server ntp5.stratum1.ru iburst ### INSTALLED AUTOMAT BY ECSS10
restrict ntp5.stratum1.ru ### INSTALLED AUTOMAT BY ECSS10
server 10.136.16.100 iburst ### INSTALLED AUTOMAT BY ECSS10
restrict 10.136.16.100 ### INSTALLED AUTOMAT BY ECSS10

# Restricting access to the configured server:
# By default, we ignore all
restrict -4 default kod notrap nomodify nopeer noquery limited
restrict -6 default kod notrap nomodify nopeer noquery limited
restrict source notrap nomodify noquery

# Localhost without parameters means everything is allowed. Parameters are only used for restrictions.
restrict 127.0.0.1
restrict ::1
|
For ecss2, the file will be similar, except for the peer line to the neighboring server (192.168.1.21): | Без форматирования |
|---|
peer 192.168.1.21 ### INSTALLED AUTOMAT BY ECSS10 |
In Orphan mode, servers in the cluster synchronize with each other, determine the master, and ensure that the cluster time is synchronized.
If a master NTP server appears with a stratum value lower than the one specified for the cluster, the cluster automatically reconfigures to synchronize with it. This ensures that there is always a single point of time synchronization. All dependent devices in the ECSS-10 system must synchronize with the cluster servers. If a non-redundant configuration is used, the cluster mode setting can be omitted: in this case, the configuration file will not contain a section for configuring local servers to synchronize with each other. | Примечание |
|---|
It is not recommended to edit the configuration file manually, since when updating the ecss-node package, the previous settings from the debconf database from the last package reconfiguration will be written to the file. |
The correct way is to use the dpkg-reconfigure command: | Без форматирования |
|---|
sudo dpkg-reconfigure ecss-node |
| Подсказка |
|---|
If any manual changes were made to the configuration file, then it is necessary to restart the NTP service to use the dpkg-reconfigure command: | Без форматирования |
|---|
sudo systemctl restart ntp.service |
|
To view synchronization status information, use the ntpq –p command. If you use the optional –n key, the IP address will be displayed instead of the server name: Example: | Без форматирования |
|---|
sasha@ecss1:~$ ntpq -p
     remote           refid      st t when poll reach   delay   offset  jitter
==============================================================================
 ecss2           88.147.254.229   2 s   11   64  377    0.099   -1.169   0.357
+10.136.16.100   194.58.204.148   2 u   56  128  377    4.008   -2.482   0.339
*88.147.254.229  .PPS.            1 u  124  128  377   60.440    0.691   0.098
|
Description of parameters: - remote — the name of the remote NTP server;
- refid — the IP address of the server with which the remote NTP server synchronizes;
- st — stratum (level): a number from 1 to 16 reflecting the server's accuracy;
- t — the type of remote server:
- u — unicast,
- l — local,
- m — multicast,
- s – symmetric (peer),
- b — broadcst;
- when — the time interval (in seconds) since the last packet was received from this server;
- poll — the interval between polls (in seconds), variable;
- reach — the server's availability. An octal representation of an 8-bit array reflecting the results of the last eight connection attempts to the server. If the last eight attempts to synchronize with the remote server were successful, this parameter takes the value 377;
- delay — the calculated server response time (RTT) in milliseconds;
- offset — the difference between the local and remote server times;
- jitter — jitter, a measure of statistical deviations from the offset value (the offset field) over several successful request-response connections.
Meaning of symbols before server names x — fake source by intersection algorithm;
. — excluded from candidate list due to large distance;
- — removed from candidate list by clustering algorithm;
+ — included in final candidate list;
# — selected for synchronization, but there are 6 best candidates;
* — selected for synchronization;
o — selected for synchronization, but PPS is used;
space — too high level, cycle, or obvious error; After starting the service, it may take about 10 minutes to establish time synchronization with the underlying NTP server. You can check the status of the configured NTP server using the ntpdate command: | Без форматирования |
|---|
sasha@ecss1:~$ sudo ntpdate -q localhost
server 127.0.0.1, stratum 2, offset -0.000032, delay 0.02573
28 Sep 15:00:57 ntpdate[19002]: adjust time server 127.0.0.1 offset -0.000032 sec |
The server stratum value became equal to 2. |
License installation
| A Shared Block |
|---|
| allowAnonymousAccess | true |
|---|
| shared-block-key | licence |
|---|
|
The ECSS-10 system uses the "License Provider" – the ECSS ecosystem's license distribution service, consisting of ecss-license-agent and ecss-license-provider. - ECSS License Agent – An adapter for working with the ECSS License Provider (LP). It receives a list of License Provider hosts and implements the logic for connecting and reconnecting to the LP.
- Responsible for obtaining, validating, and then sending licenses to the client.
- Sends connection statuses and received licenses to the client.
- Provides an API for sending HTTP requests and WS events to the LOLP.
- ECSS License Provider – A service for orchestrating license parameters for ECSS nodes.
- Responsible for:
- Obtaining a license for a specific ECSS node (SSW / AuP) or device (SMG)
- Distributing license parameters between ECSS nodes and ECSS services
- Monitoring ECSS node activity and validating them to prevent license replication beyond specified limits
- Monitoring changes to specified limits on ECSS nodes and dynamically distributing them according to current load.
| Информация |
|---|
ecss-license-agent is a component of the SSW and is part of the ecss-node package. It requires no separate configuration. |
| Подсказка |
|---|
The Ecss License Provider can be installed on either the SSW or a dedicated server. If the Ecss License Provider is already installed on your project, you only need to add an entry for the new component in the LP configuration file, and the next step, "LP Installation," will not be required. |
| Раскрыть |
|---|
| title | LP installation on SSW host |
|---|
| To install the ecss-license-provider package, it is necessary to run the following command: | Блок кода |
|---|
| title | если кластер, то на обоих хостахon both hosts if it is a cluster |
|---|
| sudo apt install ecss-license-provider |
When installing the ecss-license-provider package, you will be asked the following questions: | Questions | Replies | Example |
|---|
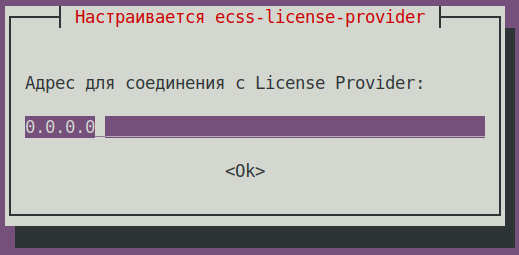
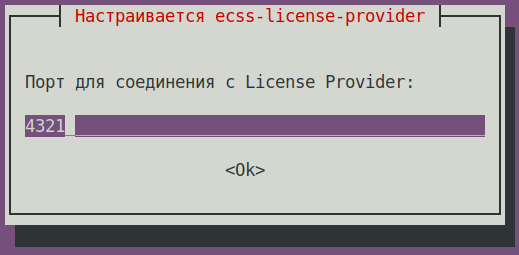
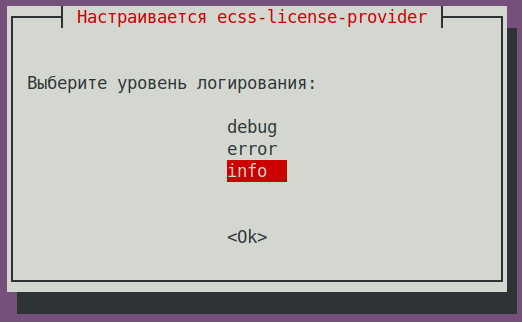
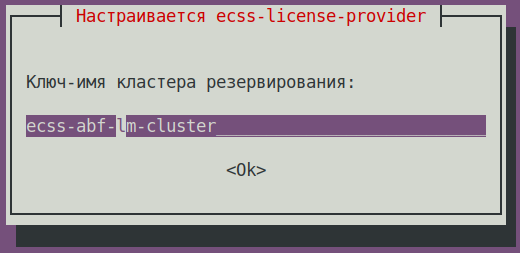
License Provider listen ip: | 0.0.0.0 (default) | | | License provider listen port: | 4321 (default) | | | Log level: | info (default),
possible options: debug, error, info | | License Provider cluster key:
| specify a unique name
ecss-lm-cluster (default)
| Подсказка |
|---|
Managers with the same name will attempt to form a cluster and back each other up. |
| | | Which services need to be restarted? | ecss-license-provider.service (default) | |
The data is saved in a file - /etc/ecss/ecss-license-provider/config.env: | Без форматирования |
|---|
ECSS_LM_HOST=0.0.0.0
ECSS_LM_PORT=4321
ECSS_LM_LOG_LEVEL=info
RELEASE_COOKIE=ecss-abf-lm-cluster |
|
LP configurationThe ecss-license-provider service uses two configuration files: /etc/ecss/ecss-license-provider/config.env and /etc/ecss/ecss-license-provider/config.yaml.
Information is saved in the config.env file when the ecss-license-provider package is installed. The config.yaml file contains the basic settings for connecting to the ELM server, including where to obtain licenses, which licenses to use, and where to transfer them. All of this must be configured manually. | Раскрыть |
|---|
| title | When installing LP on SSW |
|---|
| Run the command: | Блок кода |
|---|
| title | on both hosts If it is a cluster |
|---|
| sudo nano /etc/ecss/ecss-license-provider/config.yaml |
| Блок кода |
|---|
| title | information in file after installation |
|---|
| elm_addresses: []
licenses: []
ecss_nodes: [] |
In the elm_adresses field specify a list of ELM servers to which you want to connect to obtain licenses. The first address in the list is used as the primary address. Additional address lines act as backups. example:
- "elm.eltex-co.ru:8099"
- "192.168.111.22:8099"
- "elm-3.eltex.loc:8099"
Next, the licenses themselves are specified in the licenses field. - id – can be any, as long as it is unique for each license. This only affects the license address on the LP itself (e.g., 0, 1, 2, 3).
- kind – only ssw is supported for SSW.
- type – select elm if this license needs to be requested from the ELM server. If you need to use a file-based SSW license, select ecss_license.
- For elm type, you must specify the license_key and product_id fields to identify the license.
- For ecss_license type, specify the license field, which contains the static license key.
| Примечание |
|---|
The license_key and product_id parameters must match the data loaded on the ELM server. |
| Подсказка |
|---|
The value of the license_key, product_id or license, passport parameters must be obtained from the project manager. |
ecss_nodes block
Specify the details of the services that will receive the license. In our case, it is the SSW. The service is defined by three parameters: - id – the service identifier; must match the ECSS_ID of the licensed SSW.
- kind – the type of service being licensed. Similar to the license block, only ssw is supported for SSW.
- license_id – the identifier of the license that will be sent to this service. Corresponds to the license identifiers from the licenses block.
| Примечание |
|---|
Two SSWs with different ECSS_IDs cannot obtain the same license; a configuration with such a distribution will be marked as invalid.
Furthermore, two SSWs with the same ECSS_ID cannot simultaneously obtain the same license from the same LP.
Therefore, it is extremely important to correctly set your ECSS_ID and make it unique, at least within the visibility range of the LP being used. |
| Подсказка |
|---|
ECSS_ID format
It must begin and end with a Latin letter or number, while dots and dashes may be used in the body. | Без форматирования |
|---|
[A-Za-z0-9][A-Za-z0-9.-][A-Za-z0-9] |
|
| Примечание |
|---|
For SSW running in a cluster, specify only one entry in the ecss_nodes block per cluster; individual entries for each host are not allowed. Otherwise, two requests with the same ECSS_ID will be generated, which is unacceptable. |
| Блок кода |
|---|
| title | config.yaml file example |
|---|
| elm_addresses:
- "elm.eltex-co.ru:8099"
- "192.168.111.22:8099"
- "elm-3.eltex.loc:8099"
licenses:
- id: 0
kind: SSW
type: elm
license_key: "ssw1test"
product_id: "ECSS1000001"
- id: 1
kind: ssw
type: ecss_license
license: "af615ebb92d381125ff"
ecss_nodes:
- id: abf.test
kind: ssw
license_id: 0 |
Restart the ecss-license-provider.service to update the configuration from the /etc/ecss/ecss-license-provider/config.yaml file using the following command: | Блок кода |
|---|
| title | on both hosts if it is a cluster |
|---|
| sudo systemctl restart ecss-license-provider.service |
|
| Раскрыть |
|---|
| title | When connecting SSW to the previuosly installed LP |
|---|
| If LP is already installed and used on the local network, you need to add the new SSW parameters to the /etc/ecss/ecss-license-provider/config.yaml configuration file in the licenses and ecss_nodes blocks. Run the command: | Блок кода |
|---|
| title | on both hosts if it is a cluster |
|---|
| sudo nano /etc/ecss/ecss-license-provider/config.yaml |
Example: | Блок кода |
|---|
| elm_addresses:
- "elm.eltex-co.ru:8099"
- "192.168.111.22:8099"
- "elm-3.eltex.loc:8099"
licenses:
- id: 0
kind: SSW
type: elm
license_key: "ssw1test"
product_id: "ECSS1000001"
- id: 1
kind: ssw
type: ecss_license
license: "af615ebb92d381125ff"
- id: 2
kind: SSW
type: elm
license_key: "ssw2test"
product_id: "ECSS1000002"
ecss_nodes:
- id: 1.test
kind: ssw
license_id: 0
- id: 2.test
kind: ssw
license_id: 1
- id: 3.test
kind: ssw
license_id: 2 |
| Блок кода |
|---|
| elm_addresses:
- "elm.eltex-co.ru:8099"
- "192.168.111.22:8099"
- "elm-3.eltex.loc:8099"
licenses:
- id: 0
kind: SSW
type: elm
license_key: "ssw1test"
product_id: "ECSS1000001"
- id: 1
kind: ssw
type: ecss_license
license: "af615ebb92d381125ff"
- id: 2
kind: SSW
type: elm
license_key: "ssw2test"
product_id: "ECSS1000002"
- id: 3
kind: SSW
type: elm
license_key: "ssw3test"
product_id: "ECSS1000003"
ecss_nodes:
- id: 1.test
kind: ssw
license_id: 0
- id: 2.test
kind: ssw
license_id: 1
- id: 3.test
kind: ssw
license_id: 2
- id: abf.test
kind: ssw
license_id: 3 |
Restart the ecss-license-provider.service to update the configuration from the /etc/ecss/ecss-license-provider/config.yaml file using the following command: | Блок кода |
|---|
| title | on both hosts if it is a cluster |
|---|
| sudo systemctl restart ecss-license-provider.service |
|
To enable system nodes to become operational, it is necessary to configure the system by specifying the names of the hosts on which the ecss services are deployed. Command in CoCon: /system/clusters/set [<host1>, <host2>, ... <hostN>]. For an example cluster of two hosts (hostnames ecss1 and ecss2), run the command: | Блок кода |
|---|
| /system/clusters/set [ecss1, ecss2] |
Connecting the SSW to the License ProviderConfigure the SSW connection to the LP using the following command in CoCon (in this example, the LP is installed in a cluster, with IPadd hosts 10.0.10.51 and 10.0.10.52. The default port value from the /etc/ecss/ecss-license-provider/config.env file is 4321): | Блок кода |
|---|
| /system/licence/manager/set --hosts [https://10.0.10.51:4321, https://10.0.10.52:4321] |
| Подсказка |
|---|
If LP is installed on SSW hosts, specify OAM IP addresses. |
After completion, check the connection status with the command: | Блок кода |
|---|
| /system/licence/manager/show-status
┌───────────────────────┬───────┬─────┐
│ Host │Current│Alive│
├───────────────────────┼───────┼─────┤
│https://10.0.10.51:4321│* │true │
│https://10.0.10.52:4321│ │true │
└───────────────────────┴───────┴─────┘ |
All hosts must have the alive=true status. One must be "current." - Current - displays the host the SSW is connected to. If connected, * is indicated; otherwise, nothing is indicated.
- Alive - displays the host's availability status (healthcheck).
| Информация |
|---|
| title | Connection to License Provider |
|---|
| Failure to connect to the License Manager/ELM will be equivalent to a loss of access to the token, leading to critical crashes and a transition to emergency mode, after which, if the connection is not restored, the system will switch to the default license. This behavior only applies when operating in ELM mode. |
If the status of one of the LP hosts is shown as current, it is possible to send a request to download a license to the SSW using the command: | Блок кода |
|---|
| /cluster/storage/ds1/licence/request |
| Раскрыть |
|---|
| title | example of command /cluster/storage/ds1/licence/request execution |
|---|
| | Блок кода |
|---|
| /cluster/storage/ds1/licence/request
Licence received
[******* ] 6s 2ms
Success: Licence parameters applied |
| Подсказка |
|---|
In the "type=ecss_license" mode, the /cluster/storage/ds1/licence/request command will only be executed if the passport has been previously loaded. |
| Блок кода |
|---|
| /cluster/storage/ds1/licence/request
Waiting for licence...
[******* ] 6s
┌─┬─────────────────────────────────────────────────────┬─────────┬────────────────────────────────────────┐
│A│ Description │Old Value│ New Value │
├─┼─────────────────────────────────────────────────────┼─────────┼────────────────────────────────────────┤
│^│Support for reservation of call-processes │false │true │
│^│Maximum call duration (in seconds) │60 │2678400 │
│^│Maximum number of simultaneous calls │5 │10000 │
│^│Elph │ │ │
│^│ total count of members of the one Elph group │10 │100 │
│^│Subscribers limit │10 │500000 │
│^│Virtual subscribers limit │infinity │1000 │
│^│Add-on conferences │ │ │
│^│ total count │30 │1000 │
│^│Add-on conferences │ │ │
│^│ members of the one add-on conference │16 │300 │
│^│Chat rooms │ │ │
│^│ total count │30 │100 │
│^│Chat rooms │ │ │
│^│ members of the one chatroom │16 │300 │
│^│Meet Me │ │ │
│^│ total count │0 │100 │
│^│Meet Me │ │ │
│^│ members of the one Meet Me conference │0 │300 │
│^│SORM │ │ │
│^│ enabled │false │true │
│+│ channels on SORM mediator │ │64 │
│^│Sorm extractor │none │mfi │
│^│Support antifraud system │none │custom │
│+│Call center │ │ │
│+│ operator's capability for look at calls in queue │ │true │
│+│ operator's capability for use Intervension SS │ │true │
│^│Call center │ │ │
│^│ active agents │0 │1000 │
│^│Call center │ │ │
│^│ active supervisors │0 │100 │
│^│Teleconference │ │ │
│^│ channels │3 │2000 │
│^│Teleconference │ │ │
│^│ max members of one teleconference │0 │200 │
│^│Teleconference │ │ │
│^│ active count │0 │32 │
│^│TSMN system │ │ │
│^│ concurrent calls (active) │0 │50 │
│^│TSMN system │ │ │
│^│ concurrent calls (backup) │0 │50 │
│^│TSMN system │ │ │
│^│ backup mode │none │"backup" │
│^│Total count of simultaneous records voice calls │0 │200 │
│+│IVR │ │ │
│+│ customization enabled │ │true │
│+│ Automatic Speech Recognition (ASR) subsystem enabled│ │true │
│^│Channels on dialer outgoing calls │2 │5 │
│+│Supplementary Services licence package(s) │ │ │
│+│ name │ │'ECSS-ADV' │
│+│ limit │ │10000 │
│+│ description │ │"Additional services of 4 and 5 levels" │
│+│ SS list │ │[1,2,3,4,5] │
│+│ name │ │'ECSS-BAS' │
│+│ limit │ │10000 │
│+│ description │ │"Basic services of 1 and 2 levels" │
│+│ SS list │ │[1,2] │
│+│ name │ │'ECSS-BAS+' │
│+│ limit │ │10000 │
│+│ description │ │"Expansion of basic services of 3 level"│
│+│ SS list │ │[1,2,3] │
│^│GEO backup │ │ │
│^│ enabled │false │true │
│^│SIGTRAN │ │ │
│^│ SEP │false │true │
│^│ STP │false │true │
└─┴─────────────────────────────────────────────────────┴─────────┴────────────────────────────────────────┘
Legend:
'^' - Changed;
'-' - Deleted;
'+' - New.
[request] You are trying to add a license that is different from the current one by the pa
rameters in the table (other values will remain unchanged).
Licence received o ?> yes
[******* ] 1m 15s
Success: Licence parameters applied |
|
Depending on the selected license type for SSW: "type=elm" or "type=ecss_license", we will receive different output from the license viewing command: | Без форматирования |
|---|
| /cluster/storage/ds1/licence/list-licence
┌──┬───────────────────┬────────────┬──────┬────────────────┬────────────────────┬────────────────────┬─────────┐
│Id│Creation date(UTC) │ SSW ID │Active│ Description │Comm. Exp. Date(UTC)│Expiration date(UTC)│Time left│
├──┼───────────────────┼────────────┼──────┼────────────────┼────────────────────┼────────────────────┼─────────┤
│1 │12.03.2026 18:40:00│ECSS 010070 │* │ECSS TPM License│13.03.2027 06:59:59 │14.03.2026 10:44:05 │1d 6h 59m│
│0 │01.01.1990 00:00:00│ECSS DEFAULT│ │Default licence │ │ │ │
└──┴───────────────────┴────────────┴──────┴────────────────┴────────────────────┴────────────────────┴─────────┘ |
| Информация |
|---|
TPM is a complete analogue of the licensing that was used previously, with a token and passport, without connection to the LP. |
or | Без форматирования |
|---|
| /cluster/storage/ds1/licence/list-licence
┌──┬───────────────────┬────────────┬──────┬────────────────┬────────────────────┬────────────────────┬─────────┐
│Id│Creation date(UTC) │ SSW ID │Active│ Description │Comm. Exp. Date(UTC)│Expiration date(UTC)│Time left│
├──┼───────────────────┼────────────┼──────┼────────────────┼────────────────────┼────────────────────┼─────────┤
│1 │03.02.2026 16:26:34│ECSS2000009 │* │ECSS ELM License│03.02.2027 16:26:34 │14.03.2026 10:49:12 │1d 6h 59m│
│0 │01.01.1990 00:00:00│ECSS DEFAULT│ │Default licence │ │ │ │
└──┴───────────────────┴────────────┴──────┴────────────────┴────────────────────┴────────────────────┴─────────┘ |
|
| Якорь |
|---|
| rest ecss packages |
|---|
| rest ecss packages |
|---|
|
Installing and configuring the rest ecss packages Perform configuration for the Sip adapter by running the following command:
...
| Без форматирования |
|---|
address=/primary.broker.ecss/10.0.10.51
address=/secondary.broker.ecss/10.0.10.52 |
glusterfs
Configure glusterfs for ecss-restfs on the first host (ecss1).
To do this, install the glusterfs-server and attr packages on both hosts:
...
When viewing the information, a mounted partition should appear -
localhost:/ecss_volume 46G 59M 44G 1% /var/lib/ecss/restfs
Installing and configuring the ecss-restfs package
| Блок кода |
|---|
| language | bash |
|---|
| title | on both hosts |
|---|
|
sudo apt install -y ecss-restfs |
...
| Предупреждение |
|---|
| title | if SSW runs in cluster |
|---|
|
In a cluster configuration, to prevent simultaneous processing/conversion/deletion of the same file (.pcm/.wav/.mp3) on different ecss1/ecss2 servers, the ecss-restfs-crawler service must be running on only one of the cluster servers. To do this, run the following commands on ecss2: | Блок кода |
|---|
| sudo systemctl disable ecss-restfs-crawler.timer |
| Блок кода |
|---|
| sudo systemctl stop ecss-restfs-crawler.timer |
|
| Блок кода |
|---|
| language | bash |
|---|
| title | on both hosts |
|---|
|
sudo apt install -y ecss-media-server |
...
By default, after installation, ECSS-10 activates only the following codecs: pcma, pcmu, g722, h264, h263-1998, and t38. The rest have a status of 0 = off. If you want to activate other codecs, use the nano editor to change the priority from 0 to a priority number (the priority level should not be repeated for the audio/video/fax service).
sudo nano /etc/ecss/ecss-media-server/config.xml
| Подсказка |
|---|
|
To activate all codecs, change the line - <codec pcma="1" pcmu="2" ilbc="0" gsm="0" g722="3" g726="0" g729="0" speex="0" l16="0" g7221="0" opus="0" h264="1" h263-1998="2" t38="1" tel-event-pt="0"/>
to -
<codec pcma="1" pcmu="2" ilbc="6" gsm="4" g722="3" g726="11" g729="5" speex="7" l16="8" g7221="9" opus="10" h264="1" h263-1998="2" t38="1" tel-event-pt="0"/> |
...
| Блок кода |
|---|
|
sudo systemctl restart ecss-media-server |
ecss-web-conf
| Блок кода |
|---|
| language | bash |
|---|
| title | on both hosts |
|---|
|
sudo apt install -y ecss-web-conf |
...
Installing the ecss-web-conf package also automatically installs the ecss-subscriber-portal-ui package. The ECSS-10 Subscriber Portal application allows subscribers to independently manage services, view information on completed calls and active conferences, and configure their own IVR scripts for incoming calls. A description of the web configurator is provided in the "Subscriber Portal" section.
| ecss-web-conf questions | Replies for both hosts | Example |
|---|
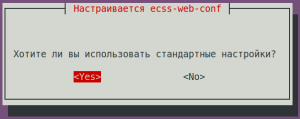
| Хотите ли вы использовать стандартные настройкиDo you want to use the default settings? | Yes (значение по умолчаниюdefault) | |
Check the connectivity of the web interface http://10.0.20.51, user/password - admin/password. Not all functions are available at the moment, but the web interface should be working and the login successful.
Configuring VRRP for the SIP adapter
Configure VRRP for the SIP adapter by creating the following files on both hosts:
...
| Без форматирования |
|---|
|
ifconfig

. . .
net.20:SIP1: flags=4163<UP,BROADCAST,RUNNING,MULTICAST> mtu 1500
inet 10.0.20.31 netmask 255.255.255.0 broadcast 0.0.0.0
ether 08:00:27:6d:4f:02 txqueuelen 1000 (Ethernet)

ifconfig

. . .
net.20:SIP2: flags=4163<UP,BROADCAST,RUNNING,MULTICAST>  mtu 1500
        inet 10.0.20.32  netmask 255.255.255.0  broadcast 0.0.0.0
ether 08:00:27:05:03:39 txqueuelen 1000 (Ethernet) |
...
snpmd
SNMP configuration is described in the "Management and Monitoring via SNMP" section.
Security Configuration. SSH
Configure the SSH server:
...
| Блок кода |
|---|
| language | bash |
|---|
| title | password on ecss1 - password |
|---|
|
ssh admin@localhost -p 8023 |
Adding Services
Installing all services specified in the license:
...
| Блок кода |
|---|
|
/cluster/storage/ds1/ss/install ds1@ecss1 ss_*
Successfully installed: /var/lib/ecss/ss/ss_dnd.xml
Successfully installed: /var/lib/ecss/ss/ss_clir.xml
. . .
Successfully installed: /var/lib/ecss/ss/ss_chunt.xml |
Example of a primary system configuration using web configurator
Initial data
- System installation is complete;
- System is ready for further configuring;
- Interfaces are running.
...
- Subscribers with numbers 42001, 42002 , 42003, 42004 ,42005, 42006, 42007, 42008, 42009, 42010;
- Trunk towards the gateway.
Preparation for work
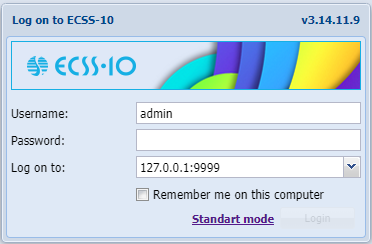
Figure 1 — Log in to the web configurator (authorization window)
...
Figure 2 — View of the web configurator workspace
Creating an operator account
After authorization, in order to increase security during the operation of the software switch, it is recommended to create accounts for operators, as well as to change the password for the admin user.
...
Figure 6 — Edit user dialog box
To begin working with the media server immediately after its registration, it is necessary to activate the MSR network interfaces. The web configurator application "MSR registrars" is used to configure media resources.
...
Figure 8 — Setting the IP address of the MSR
Creating IP-set (sip transport) and assigning it to a domain
To configure an interface, open the Clusters applicationthe Clusters application.
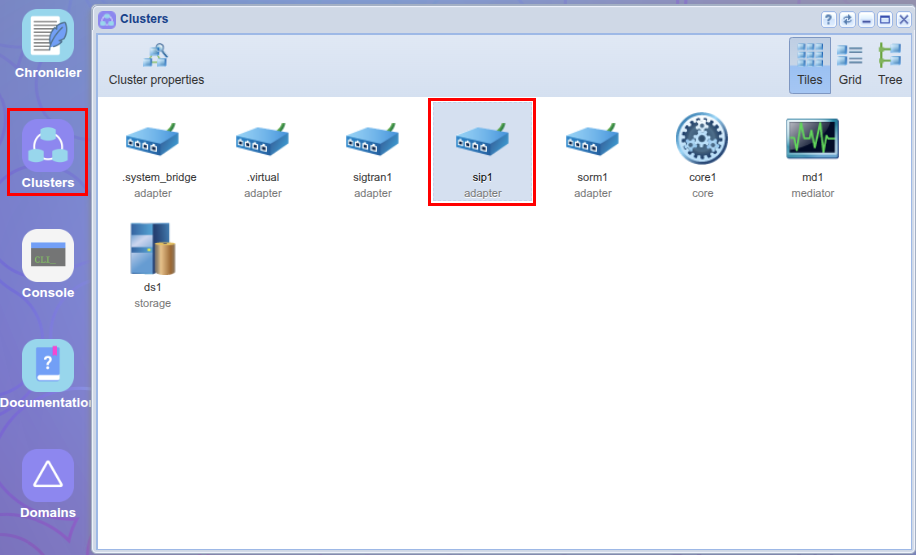
Figure 9 — Clusters application view
...
Click Save to apply the settings.
Creating a domain
Domain is a virtual PBX within our SSW. We can create as many of virtual PBXs as needed for a project.
...
To edit current domain, it must be selected in the system. To switch to a domain, use the domain selection option (see point 2 in the figure View of the web configurator workspace).
After selecting the domain, according to the current system configuration, all applications will be available:
...
To link an address group to a domain, return to the "Domain" app, select the domain, and go to the settings by clicking the "Domain Properties" button or double-clicking the domain.
...
Figure 18 — List of services now available to subscribers of the new domain
Creating subscribers
The Subscriber card application is used to create and edit subscriber parameters in the system.
...
Figure 21 — Example of adding services for a subscriber
Creating and applying routing contexts for a domain
Routing is responsible for finding the number and then addressing the call. At least one routing context must be configured for the system to operate correctly.
...
Figure 25 — Example of configuring routing context
Creating trunk
To create and edit trunk parameters in the system, use the Trunk manager application.
...
Figure 27 — Creating a trunk
Creating IVR script
To create IVR, use the IVR editor application.
...
Figure 30 — View of the IVR workspace
Completing routing configuration
To complete routing, open Routing manager application and in rules rule1 and rule3 adjust the corresponding routing results, and follow the steps below:
- rule1: select the "external" sub-item in the Result section. In the Value field of the Directions table add the trunk created earlier, then save the rule
 .
. - rule3: select the "ivr" sub-item in the Result section. In the script field add the previously created ivr script, then save the rule and the context .
...
Figure 31 — Type of routing context
Initial system configuration via the command-line interface (CLI)
| Раскрыть |
|---|
| title | Example of initial configuration via CoCon (CLI) |
|---|
|
A media resource is a description of the media server parameters required for operation. | Примечание |
|---|
To use the media resource and establish connections, it is necessary to activate it in the media resource creation command: /system/media/resource/declare (parameter "is active"=true) or /system/media/resource/set (parameter "active"=true), if activation was not performed during creation. Activation can also be performed through the web interface, application - MSR network terminations (MSR-registrars). |
| Раскрыть |
|---|
| declare The command to declare a media server connection to ECSS-10. To operate in preconfigured mode, one can pre-register media resources with known information. To do this, it is necessary to create a description of known media servers with all parameters specified, allowing to start working with the media server immediately after its registration. The command to create a media server configuration: Command path: /system/media/resource/declare Syntax: declare <node> by_contact <contact> <zone> <site> <is active> or declare <node> by_iface <msr> <acc_id> <iface> <zone> <site> <is active> Parameters: <node> — core node name; <contact> — contact uri of the declared media resource; <zone> — logical service zone of the MSR; <site> — MSR service network identifier; <is active> — media resource activity status, true/false values; <msr> — MSR name; <acc_id> — resource identifier number; <iface> — interface name. |
| Раскрыть |
|---|
| set A command for changing media resource settings. Command path: /system/media/resource/set Syntax: set <node|*> <contact> <active|zone|site> <value> Parameters: <node|*> — node name;
<contact> — contact uri of the declared media resource;
<active|zone|site> — activation | zone | site;
<value> — parameter value. |
Example: Enable communication between the MSR and Core subsystems. To do this, enter the following commands: | Блок кода |
|---|
| /system/media/resource/set core1@ecss1 net.20@msr.ecss1 active true |
| Блок кода |
|---|
| /system/media/resource/set core1@ecss2 net.20@msr.ecss2 active true |
| Блок кода |
|---|
| /system/media/resource/set core1@ecss1 net.20@msr.ecss2 active true |
| Блок кода |
|---|
| /system/media/resource/set core1@ecss2 net.20@msr.ecss1 active true |
| Без форматирования |
|---|
| /system/media/resource/set core1@ecss1 net.20@msr.ecss1 active true
Media resource:
┌─────────────┬──────────────────┬──────────┬───────┐
│ Node │ Contact │ Property │ Value │
├─────────────┼──────────────────┼──────────┼───────┤
│ core1@ecss1 │ net.20@msr.ecss1 │ active │ true │
└─────────────┴──────────────────┴──────────┴───────┘
/system/media/resource/set core1@ecss2 net.20@msr.ecss2 active true
Media resource:
┌─────────────┬──────────────────┬──────────┬───────┐
│ Node │ Contact │ Property │ Value │
├─────────────┼──────────────────┼──────────┼───────┤
│ core1@ecss2 │ net.20@msr.ecss2 │ active │ true │
└─────────────┴──────────────────┴──────────┴───────┘
/system/media/resource/set core1@ecss1 net.20@msr.ecss2 active true
Media resource:
┌─────────────┬──────────────────┬──────────┬───────┐
│ Node │ Contact │ Property │ Value │
├─────────────┼──────────────────┼──────────┼───────┤
│ core1@ecss1 │ net.20@msr.ecss2 │ active │ true │
└─────────────┴──────────────────┴──────────┴───────┘
/system/media/resource/set core1@ecss2 net.20@msr.ecss1 active true
Media resource:
┌─────────────┬──────────────────┬──────────┬───────┐
│ Node │ Contact │ Property │ Value │
├─────────────┼──────────────────┼──────────┼───────┤
│ core1@ecss2 │ net.20@msr.ecss1 │ active │ true │
└─────────────┴──────────────────┴──────────┴───────┘
|
| Раскрыть |
|---|
| info A command for viewing connection status information for a specific media resource. Command path: /system/media/resource/info Syntax: info <node> <contact> Parameters: <contact> — contact uri of the declared media resource;
<node> — node name. |
ПримерExample: | Блок кода |
|---|
| /system/media/resource/info core1@ecss1 net.20@msr.ecss1
Media resource specific for node core1@ecss1:
┌─┬─────────────────┬─────────────────────┐
│F│ Parameter │ Value │
├─┼─────────────────┼─────────────────────┤
│r│ Contact │ net.20@msr.ecss1 │
│r│ Status │ registered │
│r│ Cc-status │ connected │
│r│ Cc-status uptime│ 00:39:35 │
│r│ Cc-id │ db21af │
│r│ Address │ 10.0.20.51:5700 │
│r│ Register time │ 2025/12/02 16:43:07 │
│r│ Expired │ 84 │
│r│ Iface │ net.20(10.0.20.51) │
│ │ Active │ true │
│ │ Zone │ default │
│ │ Site │ local │
│r│ MSR version │ 3.18.1.0.10 │
│r│ MSR load │ 0 │
│r│ MSR perf coef │ 1.0 │
└─┴─────────────────┴─────────────────────┘
Legend:
Column F - means Flag, values r - flag for readonly parameter |
| Раскрыть |
|---|
| list
A command for viewing a list of media resources in the ECSS-10 system. Command path: /system/media/resource/list Syntax: list [active | all | register] Parameters: active — display only active media resources (default);
register — display only registered media resources;
short — display minimal information;
all — display all declared media resources. By default, the command displays a list of registered media servers. |
Example: | Блок кода |
|---|
| /system/media/resource/list all
All media resource selected list specific:
┌─────────────┬───────────┬─────────────┬───────────┬──────┬────────┬───────────┬───────────┬─────────────────┬────────┬────────────┬────────┬─────────┬───────┬──────────────────┬────────────┬─────────┐
│ Node │ MSR │ MSR │ MSR │ MSR │ Cc-id │ Cc-status │ Cc-uptime │ Cc-address │ Iface │ Iface │ Active │ Zone │ Site │ Contact │ Status │ Expired │
│ │ │ version │ perf coef │ load │ │ │ │ │ name │ addr │ │ │ │ │ │ │
├─────────────┼───────────┼─────────────┼───────────┼──────┼────────┼───────────┼───────────┼─────────────────┼────────┼────────────┼────────┼─────────┼───────┼──────────────────┼────────────┼─────────┤
│ core1@ecss1 │ msr.ecss1 │ 3.18.1.0.10 │ 1.0 │ 0 │ db21af │ connected │ 00:40:22 │ 10.0.20.51:5700 │ net.20 │ 10.0.20.51 │ true │ default │ local │ net.20@msr.ecss1 │ registered │ 156 │
│ │ msr.ecss2 │ 3.18.1.0.10 │ 1.0 │ 0 │ 263898 │ connected │ 00:40:22 │ 10.0.20.52:5700 │ net.20 │ 10.0.20.52 │ true │ default │ local │ net.20@msr.ecss2 │ registered │ 156 │
│ core1@ecss2 │ msr.ecss1 │ 3.18.1.0.10 │ 1.0 │ 0 │ db21af │ connected │ 00:41:11 │ 10.0.20.51:5700 │ net.20 │ 10.0.20.51 │ true │ default │ local │ net.20@msr.ecss1 │ registered │ 106 │
│ │ msr.ecss2 │ 3.18.1.0.10 │ 1.0 │ 0 │ 263898 │ connected │ 00:44:00 │ 10.0.20.52:5700 │ net.20 │ 10.0.20.52 │ true │ default │ local │ net.20@msr.ecss2 │ registered │ 177 │
└─────────────┴───────────┴─────────────┴───────────┴──────┴────────┴───────────┴───────────┴─────────────────┴────────┴────────────┴────────┴─────────┴───────┴──────────────────┴────────────┴─────────┘
|
/system/media/registrar/ - regisrtrar control commands for the MSR media manager
| Раскрыть |
|---|
| set A command for changing common and individual parameters. Command path: /system/media/registrar/set Syntax for setting common parameters: set common <FIELD> <VALUE> Parameters: <FIELD> — name of the parameter being configured; <VALUE> — value of the parameter being configured Where: - common — the type of parameter being set;
- <common parameter> — a common media registrar parameter for all nodes: registration-timeout;
- private — the type of parameter being set;
- <node name> — the name of the node on which the media registrarresides;
- <private parameter> — a media registrar parameter that is set on <node name>: is-active, listen-interface, and listen-port.
List of parameters available for configuration: - is-active — enables or disables the registrar (false - deactivates the registrar, the registrar stops receiving SIP traffic);
listen-interface — the name of the interface the registrar uses; listen-port — the port on which the registrar accepts registration requests (default 5000); registration-timeout — re-registration timer, range from 60 to 86400.
In the general settings you can set the registration time; by default it is 60 seconds. Example:
Set the registration time to 60 seconds: | Без форматирования |
|---|
/system/media/registrar/set common registration-timeout 60
Common parameter registration-timeout set to 60.
|
Syntax for configuring individual parameters: system/media/registrar/set private <CORE> <FIELD> <VALUE> Parameters: <CORE> — the core node for which the Registrar server is being configured; <FIELD> — the name of the configurable parameter; <VALUE> — the value of the configurable parameter. Configurable parameters: - is-active — whether the Registrar server is active, true | false;
- listen-ip — the IP address on which the Registrar server will accept connections (default 0.0.0.0);
- listen-port — the network port on which the Registrar server will accept connections (default 5000).
|
Set the IP address for receiving connections from the media server: | Блок кода |
|---|
| /system/media/registrar/set private core1@ecss1 listen-ip 10.0.20.51
|
| Блок кода |
|---|
| /system/media/registrar/set private core1@ecss2 listen-ip 10.0.20.52 |
| Без форматирования |
|---|
/system/media/registrar/set private core1@ecss1 listen-ip 10.0.20.51
Private parameter listen-ip set to 10.0.20.51 at node core1@ecss1.

/system/media/registrar/set private core1@ecss2 listen-ip 10.0.20.52
Private parameter listen-ip set to 10.0.20.52 at node core1@ecss2. |
| Раскрыть |
|---|
| info Command for viewing the current Registrar server settings. Command path: /system/media/registrar/info |
| Без форматирования |
|---|
/system/media/registrar/info
 Common parameters:
┌───────────────────────────┬───────┐
│         Parameter         │ Value │
├───────────────────────────┼───────┤
│ registration-timeout, sec │   180 │
└───────────────────────────┴───────┘
 Private parameters:
┌─────────────┬────────┬───────────┬────────────┬─────────────┐
│    Node     │ Status │ Is-active │ Listen-ip  │ Listen-port │
├─────────────┼────────┼───────────┼────────────┼─────────────┤
│ core1@ecss2 │ active │ true      │ 10.0.20.52 │        5000 │
│ core1@ecss1 │ active │ true      │ 10.0.20.51 │        5000 │
└─────────────┴────────┴───────────┴────────────┴─────────────┘
|
After all services are started, the nodes will take some time to establish communication. Once all nodes are loaded, the following information will be output when the system-status query is executed: | Без форматирования |
|---|
| /system-status
Checking...
┌─┬───────────────┬───────────────────────────┬───────────────────────────────┬─────────────────────┬───────┐
│ │ Node │ Release │ Erlang nodes │ Mnesia nodes │Uptime │
├─┼───────────────┼───────────────────────────┼───────────────────────────────┼─────────────────────┼───────┤
│ │core1@ecss1 │ecss-core-3.18.1.0.1656 │core1@ecss1,core1@ecss2 │not running │43m 43s│
│ │core1@ecss2 │ecss-core-3.18.1.0.1656 │core1@ecss1,core1@ecss2 │not running │47m 5s │
│ │ds1@ecss1 │ecss-ds-3.18.1.0.1656 │ds1@ecss1,ds1@ecss2 │ds1@ecss1,ds1@ecss2 │43m 43s│
│ │ds1@ecss2 │ecss-ds-3.18.1.0.1656 │ds1@ecss1,ds1@ecss2 │ds1@ecss1,ds1@ecss2 │47m 4s │
│ │md1@ecss1 │ecss-mediator-3.18.1.0.1656│md1@ecss1,md1@ecss2 │md1@ecss1,md1@ecss2 │43m 43s│
│ │md1@ecss2 │ecss-mediator-3.18.1.0.1656│md1@ecss1,md1@ecss2 │md1@ecss1,md1@ecss2 │47m 5s │
│ │mycelium1@ecss1│ecss-mycelium-3.18.1.0.1656│mycelium1@ecss1,mycelium1@ecss2│not running │43m 43s│
│ │mycelium1@ecss2│ecss-mycelium-3.18.1.0.1656│mycelium1@ecss1,mycelium1@ecss2│not running │47m 4s │
│ │sip1@ecss1 │ecss-pa-sip-3.18.1.0.1656 │sip1@ecss1,sip1@ecss2 │sip1@ecss1,sip1@ecss2│43m 43s│
│ │sip1@ecss2 │ecss-pa-sip-3.18.1.0.1656 │sip1@ecss1,sip1@ecss2 │sip1@ecss1,sip1@ecss2│47m 5s │
└─┴───────────────┴───────────────────────────┴───────────────────────────────┴─────────────────────┴───────┘
All services are started.
Active media resource selected list specific:
┌─────────────┬───────────┬─────────────┬───────────┬───────────┐
│ Node │ MSR │ MSR │ Cc-status │ Cc-uptime │
│ │ │ version │ │ │
├─────────────┼───────────┼─────────────┼───────────┼───────────┤
│ core1@ecss1 │ msr.ecss1 │ 3.18.1.0.10 │ connected │ 00:42:49 │
│ │ msr.ecss2 │ 3.18.1.0.10 │ connected │ 00:42:48 │
│ core1@ecss2 │ msr.ecss1 │ 3.18.1.0.10 │ connected │ 00:43:38 │
│ │ msr.ecss2 │ 3.18.1.0.10 │ connected │ 00:46:27 │
└─────────────┴───────────┴─────────────┴───────────┴───────────┘
Alarms list on md1:
┌──────────────┬───────────────┬───────────────┬────────────────────┬────────────────────┬────────────────────┬────────────────────────────────────────────────────────────┐
│ Date │ Severity │ Location │ Cause │ Class │ Instance │ Message │
├──────────────┼───────────────┼───────────────┼────────────────────┼────────────────────┼────────────────────┼────────────────────────────────────────────────────────────┤
└──────────────┴───────────────┴───────────────┴────────────────────┴────────────────────┴────────────────────┴────────────────────────────────────────────────────────────┘
Selected: 0
Total: 0 |
В примере выше видно, что ноды вошли в кластер и MSR зарегистрировались на ноде ecss-core.In the example above, the nodes have joined the cluster and the the MSR have registered on the ecss-core node. Creating and configuring a SIP IP address group (IP-set)Configure the SIP adapter according to the specifications: | Блок кода |
|---|
| /cluster/adapter/sip1/sip/network/set ip_set test_set node-ip node = sip1@ecss1 ip = 10.0.20.31 |
| Блок кода |
|---|
| /cluster/adapter/sip1/sip/network/set ip_set test_set node-ip node = sip1@ecss2 ip = 10.0.20.32 |
| Блок кода |
|---|
| /cluster/adapter/sip1/sip/network/set ip_set test_set listen-ports list = [5060] |
| Без форматирования |
|---|
| /cluster/adapter/sip1/sip/network/set ip_set test_set node-ip node = sip1@ecss1 ip = 10.0.20.31
Property "ip_set" successfully changed from:
to
test_set: no ports set
test_set: sip1@ecss1 10.0.20.31
test_set: dscp 0.
/cluster/adapter/sip1/sip/network/set ip_set test_set node-ip node = sip1@ecss2 ip = 10.0.20.32
Property "ip_set" successfully changed from:
test_set: no ports set
test_set: sip1@ecss1 10.0.20.31
test_set: dscp 0
to
test_set: no ports set
test_set: sip1@ecss1 10.0.20.31
test_set: sip1@ecss2 10.0.20.32
test_set: dscp 0.
/cluster/adapter/sip1/sip/network/set ip_set test_set listen-ports list = [5060]
Property "ip_set" successfully changed from:
test_set: no ports set
test_set: sip1@ecss1 10.0.20.31
test_set: sip1@ecss2 10.0.20.32
test_set: dscp 0
to
test_set: 5060
test_set: sip1@ecss1 10.0.20.31
test_set: sip1@ecss2 10.0.20.32
test_set: dscp 0.
|
Creating a domain and connecting an IP-setCreate a Domain (virtual PBX) and assign it the SIP adapter settings group (IP set) created above: | Блок кода |
|---|
| /domain/declare test_domain --add-domain-admin-privileges --add-domain-user-privileges |
| Блок кода |
|---|
| /domain/test_domain/sip/network/set ip_set [test_set] |
| Блок кода |
|---|
| /domain/declare test_domain --add-domain-admin-privileges --add-domain-user-privileges
New domain test_domain is declared
/domain/test_domain/sip/network/set ip_set [test_set]
Property "ip_set" successfully changed from:
[]
to
["test_set"]. |
After creating a domain, the system administrator should grant access to the Domain (virtual PBX) operator to manage services. To do this, use the "test_domain" command to allow the Domain (virtual PBX) operator to manage all services: | Блок кода |
|---|
| /cluster/storage/ds1/ss/access-list add test_domain * |
| Без форматирования |
|---|
| /cluster/storage/ds1/ss/access-list add test_domain *
Supplementary services successfully added in the domain test_domain. |
To enable subscribers to apply a service package immediately after creation, it is necessary to configure a licensed service package application policy. Create a license application policy named "new_sub" | Блок кода |
|---|
| language | bash |
|---|
| title | in CoCon |
|---|
| /domain/test_domain/ss/licence/politics/declare new_sub "ЗадаютсяSet when приcreating созданииa абонентаsubscriber" |
| Без форматирования |
|---|
/domain/test_domain/ss/licence/politics/declare new_sub "ЗадаютсяSet when приcreating созданииa абонентаsubscriber"
Licence politic new_sub successfully declared. |
To set the name of the additional services package, use the following commands: | Блок кода |
|---|
| language | bash |
|---|
| title | in CoCon |
|---|
| /cluster/storage/ds1/licence/show-licence 1 |
The following information is important: | Без форматирования |
|---|
| /cluster/storage/ds1/licence/show-licence 1
SSW ID < ИмяName SSW ID >
Description Testing License Лицензия для тестирования Локация Location 2.
. . .
Supplementary Services licence package(s)
name 'ECSS-ADV'
limit 50000
description "Весь пакет услугThe whole package of services"
SS list [1,2,3,4,5]
. . .
|
The service package name in this example is "ECSS-ADV". Add the license service package named "ECSS-ADV" (that's how it's described in the license) to the created policy: | Блок кода |
|---|
| language | bash |
|---|
| title | in CoCon |
|---|
| /domain/test_domain/ss/licence/politics/package-add new_sub ECSS-ADV |
| Без форматирования |
|---|
/domain/test_domain/ss/licence/politics/package-add new_sub ECSS-ADV
Licence packages ["ECSS-ADV"] successfully added to politic new_sub. |
The package has been added, but the policy is currently not active (cannot be applied to the subscriber). To activate the new_sub policy, run the following command: | Блок кода |
|---|
| language | bash |
|---|
| title | in CoCon |
|---|
| /domain/test_domain/ss/licence/politics/activate new_sub |
| Без форматирования |
|---|
/domain/test_domain/ss/licence/politics/activate new_sub
Licence politic new_sub successfully activated. |
Now we can use additional services when creating subscribers. |