
...
Предупреждение title Attention Perform a full backup - You need to mask all nodes on the server and disable node autostart:
Блок кода title on ecss1 sudo systemctl mask --now ecss-ds ecss-mycelium ecss-mediator ecss-core ecss-pa-sip ecss-sorm
Информация When the attached command is executed, a notification will be displayed.
Без форматирования Warning: The unit file, source configuration file or drop-ins of ecss-ds.service changed on disk. Run 'systemctl daemon-reload' to reload units. Warning: The unit file, source configuration file or drop-ins of ecss-mycelium.service changed on disk. Run 'systemctl daemon-reload' to reload units. Warning: The unit file, source configuration file or drop-ins of ecss-mediator.service changed on disk. Run 'systemctl daemon-reload' to reload units. Warning: The unit file, source configuration file or drop-ins of ecss-core.service changed on disk. Run 'systemctl daemon-reload' to reload units. Warning: The unit file, source configuration file or drop-ins of ecss-pa-sip.service changed on disk. Run 'systemctl daemon-reload' to reload units.
These messages are not errors. Continue with the procedure.
- Update the ssw repository:
Блок кода title on ecss1 sudo sh -c "echo deb [arch=amd64] http://archive.eltex.org/ssw/jammy/3.18 stable main extras external > /etc/apt/sources.list.d/eltex-ecss10-stable.list"
- Perform package update:
Блок кода title on ecss1 sudo apt update
Примечание If you see this system message:
Без форматирования W: http://archive.eltex.org/ssw/jammy/3.18/dists/unstable/InRelease: Key is stored in legacy trusted.gpg keyring (/etc/apt/trusted.gpg), see the DEPRECATION section in apt-key(8) for details.
Run the following command:
Блок кода title on both hosts sudo cp /etc/apt/trusted.gpg /etc/apt/trusted.gpg.d
- Updating PostgreSQL:
- Turn off the Docker container:
Блок кода title on ecss2 sudo docker compose -f /srv/ecss/ecss-postgres-bdr-ssw/docker-compose.container.yml down
Блок кода title Example: sudo docker compose -f /srv/ecss/ecss-postgres-bdr-ssw/docker-compose.container.yml down [+] down 2/2 ✔ Container ecss-postgres-bdr-ssw-postgres-container-1 Removed ✔ Network ecss-postgres-bdr-ssw_default Removed
- Remove the old deb package, since the upgrade option is not supported:
Блок кода title on ecss2 sudo apt remove ecss-postgres-bdr-ssw
Предупреждение title !!Important!! Run remove, not purge, because remove preserves the volumes directory with our database tables.
Блок кода title Example: sudo apt remove ecss-postgres-bdr-ssw Reading package lists... Done . . . The following packages will be REMOVED: ecss-postgres-bdr-ssw . . . Do you want to continue? [y/n] y Deleting ecss-postgres-bdr-ssw (17.1.0.59+ssw) …
- Install a new deb package:
Блок кода title on ecss2 sudo apt install ecss-postgres-bdr-ssw
Предупреждение title !!IMPORTANT!! During installation, you will be asked the same questions as during the initial installation:
The answers must exactly match those specified in the procedure, otherwise an attempt will be made to create a new database and the installation will fail.
Информация Question Reply Example The current IP address of the network interface.
10.0.10.41 (select) 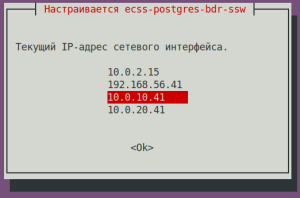
Install on a cluster?
Select <Yes> if the package is installed on a cluster node.
No (select) 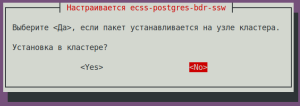
Блок кода title If the installation is successful, at the stage of raising replication we will see: sudo apt install ecss-postgres-bdr-ssw . . . ================== Create databases ================== Database ecss_storekeeper_db already exists, skipping... Database web_conf already exists, skipping... Extension btree_gist already exists, skipping... Extension bdr already exists, skipping... =================================== Creating Postgres Exporter Schema =================================== Node IP: localhost psql:/srv/ecss/ecss-postgres-bdr-ssw/schema.sql:1: NOTICE: schema "postgres_exporter" already exists, skipping CREATE SCHEMA GRANT CREATE FUNCTION CREATE VIEW GRANT CREATE FUNCTION CREATE VIEW GRANT psql:/srv/ecss/ecss-postgres-bdr-ssw/schema.sql:28: NOTICE: extension "pg_stat_statements" already exists, skipping CREATE EXTENSION CREATE FUNCTION CREATE VIEW GRANT . . . ======================================================= ======================================================= ecss-postgres-bdr-ssw successfully installed/updated! ======================================================= ======================================================= ┏┓┏┓┏┓┏┳┓┏┓┳┓┏┓┏┓ ┳┓┳┓┳┓ ┏┓┏┓┓ ┏ ┃┃┃┃┗┓ ┃ ┃┓┣┫┣ ┗┓ ┣┫┃┃┣┫ ┗┓┗┓┃┃┃ ┣┛┗┛┗┛ ┻ ┗┛┛┗┗┛┗┛ ┻┛┻┛┛┗ ┗┛┗┛┗┻┛
- After installation, check that the new image has been pulled in and Docker has started by running the command:
Блок кода title on ecss2 sudo docker ps
Блок кода title example: sudo docker ps CONTAINER ID IMAGE COMMAND CREATED STATUS PORTS NAMES bf73743d3e09 git.eltex.loc:4567/ecss/ecss-postgresbdr:3.18 "/docker-entrypoint.…" About a minute ago Up About a minute 0.0.0.0:5439->5432/tcp, [::]:5439->5432/tcp ecss-postgres-bdr-ssw-postgres-container-1
- Turn off the Docker container:
- Updating the ecss-dns-env package:
Блок кода title on ecss1 sudo apt install ecss-dns-env
After the update, you need to update the configuration by running the command. The answers to the questions are similar to the installation procedure:Блок кода title on ecss1 sudo dpkg-reconfigure ecss-dns-env
- Update the ecss-user package:
Подсказка When updating, you need to apply new configuration files (confirm with -Y).
Блок кода title on ecss1 sudo apt install ecss-user
- Update the ecss-utils package:
Блок кода title on ecss1 sudo apt install ecss-utils
Раскрыть title In case of using ELM licensing Install the License Provider package:
Блок кода title on ecss2 sudo apt install ecss-license-provider
When installing the ecss-license-provider package the following questions will be asked:
Questions Answers Examples License Provider listen ip:
0.0.0.0 (default value) 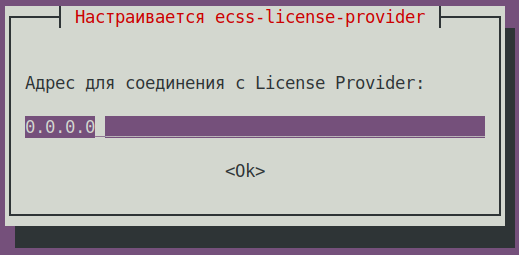
License Provider listen port: 4321 (default value) 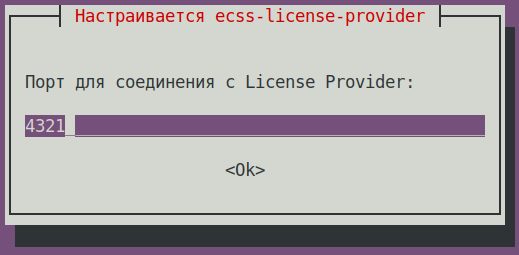
Log level: info (default value),
possible options: debug, error, info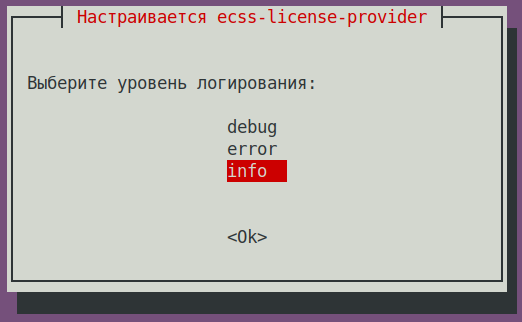
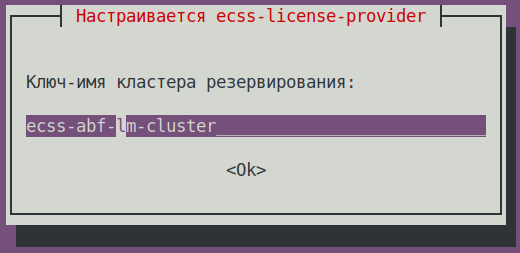
License Provider cluster key: specify a unique name
ecss-lm-cluster (default value)Подсказка Managers with the same names will attempt to form a cluster for mutual redundancy.
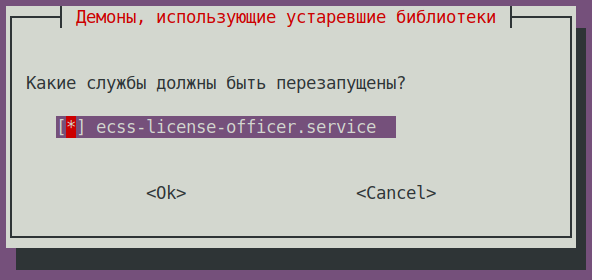
What services should be restarted? ecss-license-provider.service (default value)
The data is saved to the /etc/ecss/ecss-license-provider/config.env file:
Без форматирования ECSS_LM_HOST=0.0.0.0 ECSS_LM_PORT=4321 ECSS_LM_LOG_LEVEL=info RELEASE_COOKIE=ecss-abf-lm-cluster
Configuring License Provider (LP)
The
ecss-license-providerservice uses two configuration files:/etc/ecss/ecss-license-provider/config.envand/etc/ecss/ecss-license-provider/config.yaml.The information is saved to the
config.envfile when the ecss-license-provider is installed.The config.yaml file contains general settings for connecting to the ELM server and information about licenses: what licenses to take, where to take them from, and where to send them, all this information should be configured manually.
To fill out these fields, open theБлок кода title information in the file after installation elm_addresses: [] licenses: [] ecss_nodes: []
ecss-elm-adapterconfiguration file used in the version 3.17/etc/ecss/ecss-elm-adapter/config.env:Блок кода title on ecss2 сatcat /etc/ecss/ecss-elm-adapter/config.env ELM_HOST=elm.eltex-co.ru ELM_PORT=8099 ECSS_PRODUCT_ID=ECSS2000000 ECSS_LICENSE_KEY=ssw987654 LOG_LEVEL=info LICENCE_FAIL_TIMER_SECONDS=10 LICENCE_PULL_TIMER_SECONDS=360
In the
elm_addressesfield, you must specify a list of ELM servers to which you want to connect to obtain licenses. First address in the list is used as the main one. Additional lines contain backup addresses.
Example:
- "elm.eltex-co.ru:8099"
- "192.168.111.22:8099"
- "elm-3.eltex.loc:8099"
Then licenses in the licenses field are specified.- The id can be anything, as long as it is unique for each license. It only affects the license address on the License Provider itself (e.g., 0, 1, 2, 3).
- kind. For SSW, only SSW (in uppercase) is supported.
- type is set to elm if this license is to be requested from the ELM server. If you need to use an SSW file-based license, set the type to ecss_license.
- For the elm type, you must specify the license_key and product_id fields to identify the license.
- For the ecss_license type, specify the license field, which contains the static license key.
Примечание license_key = ECSS_LICENSE_KEY and product_id = ECSS_PRODUCT_ID parameters must match the data previously uploaded to the ELM server.
ecss_nodes block.
You must specify the details of the services that will receive the license. A service is defined by three parameters:
- id - the service identifier. In the case of SSW, this must match the ECSS_ID of the SSW being licensed.
- kind - the type of service being licensed. As with the licenses block, the SSW and AUP types are supported. For SSW, only the SSW type is supported.
- license_id - the identifier of the license that will be sent to this service. It corresponds to the license identifiers from the licenses block
Примечание Two SSWs with different ECSS_IDs cannot receive the same license; a configuration with such an assignment will be marked as invalid.
Additionally, two SSWs with identical ECSS_IDs cannot simultaneously obtain the same license from a single License Provider; therefore, it is extremely important to set your ECSS_ID correctly and ensure it is unique, at least within the scope of the License Provider being used.Подсказка ECSS_ID format.
It must begin and end with a Latin letter or a digit; periods and dashes may be used within the string.Без форматирования [A-Za-z0-9][A-Za-z0-9.-][A-Za-z0-9]
Блок кода title Example of a config.yaml file based on data from the file elm_addresses: - "elm.eltex-co.ru:8099" licenses: - id: 0 kind: SSW type: elm license_key: "ssw987654" product_id: "ECSS2000000" ecss_nodes: - id: eltex1.test kind: ssw license_id: 0
Restart the
ecss-license-provider.serviceservice to up date the configuration from the/etc/ecss/ecss-license-provider/config.yamlfile via the following command:Блок кода title on both hosts if there is a cluster sudo systemctl restart ecss-license-provider.service
- Update the ecss-node package:
Блок кода title on ecss1 sudo apt install ecss-node
During installation, you will be prompted to configure the settings required to generate the configuration files; examples of possible answers are provided below.
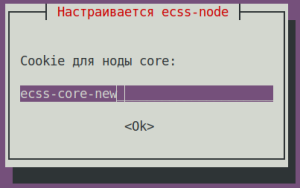
ecss-node questions Answers for ecss1 Example Cookies for the core node:
ecss-core (default value)
Подсказка It is recommended to replace this with a unique value
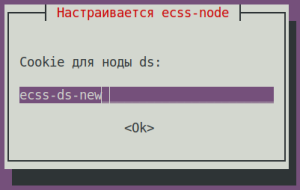
Cookies for the ds node:
ecss-ds (default value)
Подсказка It is recommended to replace this with a unique value
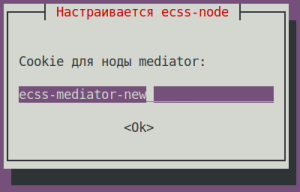
Cookies for the mediator node:
ecss-mediator (default value)
Подсказка It is recommended to replace this with a unique value
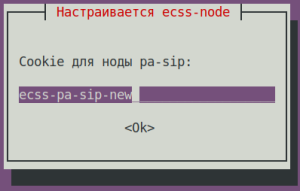
Cookies for the pa-sip node:
ecss-pa-sip (default value)
Подсказка It is recommended to replace this with a unique value
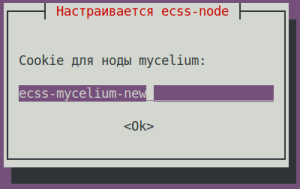
Cookies for the mycelium node:
ecss-mycelium (default value)
Подсказка It is recommended to replace this with a unique value
Use the current version of the configuration file?
No (default value)
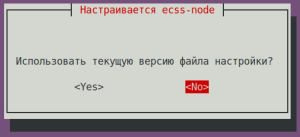
Подсказка When updating, you must apply the new configuration files (confirm with -Y).
- Enable the nodes.
Enable the SSW services using the following commands:Блок кода title on ecss1 sudo systemctl unmask ecss-ds ecss-mycelium ecss-mediator ecss-core ecss-pa-sip ecss-sorm
Блок кода title on ecss1 sudo systemctl enable ecss-ds ecss-mycelium ecss-mediator ecss-core ecss-pa-sip ecss-sorm
- Starting SSW on ecss1. Start the following services:
ecss-mycelium
ecss-dsБлок кода title on ecss1 sudo systemctl start ecss-mycelium
ecss-coreБлок кода title on ecss1 sudo systemctl start ecss-ds
ecss-mediatorБлок кода title on ecss1 sudo systemctl start ecss-core
Блок кода title on ecss1 sudo systemctl start ecss-mediator
Предупреждение Do not start PA-SIP yet
- Check the status of services by running the
system-statuscommand in CoCon:Блок кода title performed in CoCon /system-status Checking... ┌─┬───────────────┬────────────────────────┬───────────────┬────────────┬──────┐ │ │ Node │ Release │ Erlang nodes │Mnesia nodes│Uptime│ ├─┼───────────────┼────────────────────────┼───────────────┼────────────┼──────┤ │ │core1@ecss1 │ecss-core-3.18.0.271 │core1@ecss1 │not running │14m 4s│ │ │ds1@ecss1 │ecss-ds-3.18.0.271 │ds1@ecss1 │ds1@ecss1 │14m 4s│ │ │md1@ecss1 │ecss-mediator-3.18.0.271│md1@ecss1 │md1@ecss1 │14m 4s│ │ │mycelium1@ecss1│ecss-mycelium-3.18.0.271│mycelium1@ecss1│not running │14m 4s│ │ │sorm1@ecss1 │ecss-sorm-3.18.0.271 │sorm1@ecss1 │not running │14m 5s│ └─┴───────────────┴────────────────────────┴───────────────┴────────────┴──────┘ All services are started. Active media resource selected list specific: ┌─────────────┬───────────┬────────────┬───────────┬───────────┐ │ Node │ MSR │ MSR │ Cc-status │ Cc-uptime │ │ │ │ version │ │ │ ├─────────────┼───────────┼────────────┼───────────┼───────────┤ │ core1@ecss1 │ msr.ecss1 │ 3.17.1.1.7 │ connected │ 00:43:03 │ └─────────────┴───────────┴────────────┴───────────┴───────────┘
- Режимы лицензированияLicensing modes.
Раскрыть title If a file-based license is used Информация title If a file-based license is used No additional actions are required.
Без форматирования /cluster/storage/ds1/licence/list-licence ┌──┬───────────────────┬────────────────┬──────┬────────────────────────────────────────────┬────────────────────┬────────────┐ │Id│Creation date(UTC) │ SSW ID │Active│ Description │Expiration date(UTC)│ Time left │ ├──┼───────────────────┼────────────────┼──────┼────────────────────────────────────────────┼────────────────────┼────────────┤ │1 │31.10.2025 14:16:00│ECSS 010070 │* │Eltex SC softswitch │31.12.2026 23:59:59 │224d 21h 31m│ │0 │ │ECSS DEFAULT │ │Default licence │ │ │ └──┴───────────────────┴────────────────┴──────┴────────────────────────────────────────────┴────────────────────┴────────────┘
Раскрыть title If the ELM licensing is used Configure the SSW connection to the License Provider using the following command in CoCon (in this example, the License Provider is installed in the ecss1 host, hosts' IPadd is 10.0.10.41. The default port value from the
/etc/ecss/ecss-license-provider/config.envfile is 4321)Блок кода title performed in CoCon /system/licence/manager/set --hosts [https://10.0.10.41:4321]
After execution, check the connection status with the following command:
Блок кода title performed in CoCon /system/licence/manager/show-status ┌───────────────────────┬───────┬─────┐ │ Host │Current│Alive│ ├───────────────────────┼───────┼─────┤ │https://10.0.10.41:4321│* │true │ └───────────────────────┴───────┴─────┘
Teh host should have a status of alive=true and be “current.”
- Current - indicates which host the SSW is connected to. If there is a connection, * is displayed; if not, nothing is displayed.
- Alive - displays the host’s availability status (healthcheck).
Информация title Connecting to the License Manager A lack of connection to the License Provider or ELM is equivalent to a lack of access to the token, which will lead to critical failures and a transition to emergency mode; after a certain period, if the connection is not restored, the system will switch to the Default license.
This behavior applies only when operating in ELM mode.
If the status for one of the License Provider hosts is shown as “current,” you can send a request to upload the license to the SSW using the following command:
Блок кода title performed in CoCon /cluster/storage/ds1/licence/request
Блок кода title type=elm /cluster/storage/ds1/licence/request Licence received [******* ] 6s 2ms Success: Licence parameters applied
Блок кода title type=elm /cluster/storage/ds1/licence/list-licence ┌──┬───────────────────┬────────────┬──────┬────────────────┬────────────────────┬────────────────────┬─────────┐ │Id│Creation date(UTC) │ SSW ID │Active│ Description │Comm. Exp. Date(UTC)│Expiration date(UTC)│Time left│ ├──┼───────────────────┼────────────┼──────┼────────────────┼────────────────────┼────────────────────┼─────────┤ │1 │14.04.2026 11:18:34│ECSS2000000 │* │ECSS ELM License│09.04.2027 16:26:34 │06.06.2026 10:49:12 │1d 6h 59m│ │0 │01.01.1990 00:00:00│ECSS DEFAULT│ │Default licence │ │ │ │ └──┴───────────────────┴────────────┴──────┴────────────────┴────────────────────┴────────────────────┴─────────┘
- Updating the
ecss-restfspackage.Подсказка Accept all new configuration files by choosing Y.
Блок кода title on ecss1 sudo apt install ecss-restfs
- Updating the
ecss-media-serverpackage.
Perform an update:Предупреждение The Media Server analyzes the configuration in the files located in the /etc/ecss/ecss-media-server/ directory. Version 3.17 introduces a new feature for managing codec priorities. If, for any reason, multiple files contain a codec section that lists the same codec more than once, a conflict will occur after the update, and the Media Server will not function.
Therefore, there should be no conflicts regarding codec priorities in the configuration files of a single Media Server (there should be only one entry for one codec, and it should not be repeated in other files). The decision regarding which specific files need to be configured is left to the discretion of the system administrator.
Подсказка Accept all new configuration files by choosing Y.
Update the configuration:Блок кода title on ecss1 sudo apt install ecss-media-server
Блок кода title on ecss1 sudo dpkg-reconfigure ecss-media-server
- Updating the ecss-media-resources package
Блок кода title on ecss1 sudo apt install ecss-media-resources
- Updating the ecss-web-conf package
Блок кода title on ecss1 sudo apt install ecss-web-conf
Раскрыть title Updating optional service packages Updating the
ecss-teleconference-uipackage.Блок кода title on ecss1 sudo apt install ecss-teleconference-ui
Updating the
ecss-crm-serverpackage.Блок кода title on ecss1 sudo apt install ecss-crm-server
Updating the
ecss-cc-uipackage.Блок кода title on ecss1 sudo apt install ecss-cc-ui
Updating the
ecss-call-apipackage.Блок кода title on ecss1 sudo apt install ecss-call-api
Updating the
ecss-peeper-clientpackage.Блок кода title on ecss1 sudo apt install ecss-peeper-client
- Launch ecss-pa-sip:
Check the status of services by running the /system-status command:Блок кода title on ecss1 sudo systemctl start ecss-pa-sip
Verify that active registrations have been migrated to the updated host. To do this, check the registered subscribers on SSW. Execute the following command in CoCon:Блок кода title performed in CoCon /system-status Checking... ┌─┬───────────────┬────────────────────────┬───────────────┬────────────┬───────┐ │ │ Node │ Release │ Erlang nodes │Mnesia nodes│Uptime │ ├─┼───────────────┼────────────────────────┼───────────────┼────────────┼───────┤ │ │core1@ecss1 │ecss-core-3.18.0.271 │core1@ecss1 │not running │54m 27s│ │ │ds1@ecss1 │ecss-ds-3.18.0.271 │ds1@ecss1 │ds1@ecss1 │54m 27s│ │ │md1@ecss1 │ecss-mediator-3.18.0.271│md1@ecss1 │md1@ecss1 │54m 27s│ │ │mycelium1@ecss1│ecss-mycelium-3.18.0.271│mycelium1@ecss1│not running │54m 27s│ │ │sip1@ecss1 │ecss-pa-sip-3.18.0.271 │sip1@ecss1 │sip1@ecss1 │54m 27s│ │ │sorm1@ecss1 │ecss-sorm-3.18.0.271 │sorm1@ecss1 │not running │54m 27s│ └─┴───────────────┴────────────────────────┴───────────────┴────────────┴───────┘ All services are started. Active media resource selected list specific: ┌─────────────┬───────────┬──────────┬───────────┬───────────┐ │ Node │ MSR │ MSR │ Cc-status │ Cc-uptime │ │ │ │ version │ │ │ ├─────────────┼───────────┼──────────┼───────────┼───────────┤ │ core1@ecss1 │ msr.ecss1 │ 3.18.0.7 │ connected │ 00:01:17 │ └─────────────┴───────────┴──────────┴───────────┴───────────┘
Блок кода title performed in CoCon /domain/test_domain/sip/user/registered sip * 450 make users list ... [**********************************************************************] 28mks 450 users information read ... [**********************************************************************] 1ms Executed on the sip1@ecss1 ┌───────────────┐ │ elements: 436 │ └───────────────┘
- After the update is complete, verify that all SSW services are functioning properly.
...
| Блок кода | ||
|---|---|---|
| ||
free -h |
Размер Swap равен size equals 0 — значит, он выключен, which means it's disabled
| Без форматирования | ||
|---|---|---|
| ||
free -h
              total        used        free      shared  buff/cache   available
Mem:           3,9G        110M        3,2G        820K        535M        3,5G
Swap:            0B          0B          0B
|
...
| Блок кода |
|---|
sudo apt install -y ecss-dns-env |
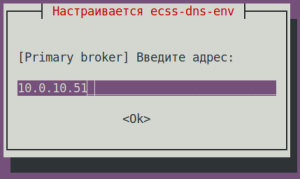
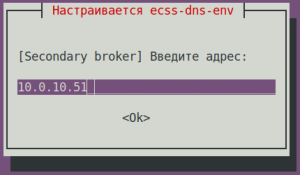
Настройщик предложит выбрать разделы для настройки по вопросам ниже. Нужно выбрать broker. (для примера The configurator will prompt you to select the sections to configure based on the questions below. Select a broker. (For example, 10.0.10.51).
| Вопрос ecss-dns-env question | Ответы для Answers for ecss1 | |
|---|---|---|
| [Primary broker] Введите адрес Enter the address ([Primary broker] Enter ip) | 10.0.10.51 (необходимо ввестиneeds to be entered) |
|
| [Secondary broker] Введите адрес Enter the address ([Secondary broker] Enter ip) | 10.0.10.51 (необходимо ввестиneeds to be entered) |
|
| Предупреждение | |||||
|---|---|---|---|---|---|
| |||||
If there will be a need to adjust the IP addresses later, use the following commandВ случае последующей коррекции IP-адресов следует использовать команду:
|
...
Installing Postgres
| Предупреждение | |||||||||||||||||||||||||||
|---|---|---|---|---|---|---|---|---|---|---|---|---|---|---|---|---|---|---|---|---|---|---|---|---|---|---|---|
| |||||||||||||||||||||||||||
Перед установкойBefore installing
|
Установка пакета Installing the ecss-postgres-bdr-ssw package
Выполнить установку пакета
Install the ecss-postgres-bdr-ssw package:
| Блок кода | ||||
|---|---|---|---|---|
| ||||
sudo apt install ecss-postgres-bdr-ssw |
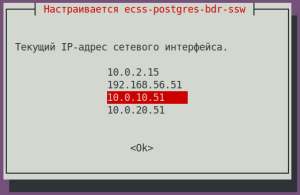
При конфигурации пакета When configuring the ecss-postgres-bdr-ssw будут заданы вопросыpackage, the following questions will be asked:
| Вопросы ecss-postgres-bdr-ssw questions | Ответы для Answers for ecss1 | ПримерExample | ||
|---|---|---|---|---|
| Текущий IP-адрес сетевого интерфейса (Выбрать адрес ранее используемый Current IP address of the network interface (Select the address used earlier by MySQL). | Выбрать из списка IP-адрес для работы с Postgres |
| Select an IP address for working with Postgres from the list |
|
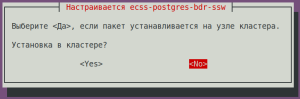
| Install on a clusterУстановка в кластере? | No (необходимо выбрать (needs to be selected) |
|
| Без форматированияcode | ||
|---|---|---|
| ||
. . . ================== Create databases ================== CREATE DATABASE CREATE DATABASE CREATE EXTENSION CREATE EXTENSION =================================== Creating Postgres Exporter Schema =================================== Node IP: localhost CREATE SCHEMA GRANT CREATE FUNCTION CREATE VIEW GRANT CREATE FUNCTION CREATE VIEW GRANT CREATE EXTENSION CREATE FUNCTION CREATE VIEW GRANT ======================================================= ======================================================= ecss-postgres-bdr-ssw successfully installed/updated! ======================================================= ======================================================= ┏┓┏┓┏┓┏┳┓┏┓┳┓┏┓┏┓ ┳┓┳┓┳┓ ┏┓┏┓┓ ┏ ┃┃┃┃┗┓ ┃ ┃┓┣┫┣ ┗┓ ┣┫┃┃┣┫ ┗┓┗┓┃┃┃ ┣┛┗┛┗┛ ┻ ┗┛┛┗┗┛┗┛ ┻┛┻┛┛┗ ┗┛┗┛┗┻┛ |
| Раскрыть | ||||||
|---|---|---|---|---|---|---|
| ||||||
|
| Раскрыть | |||||||||||||||||||||||||||||||||||||||||||||||||||||||||||||
|---|---|---|---|---|---|---|---|---|---|---|---|---|---|---|---|---|---|---|---|---|---|---|---|---|---|---|---|---|---|---|---|---|---|---|---|---|---|---|---|---|---|---|---|---|---|---|---|---|---|---|---|---|---|---|---|---|---|---|---|---|---|
| |||||||||||||||||||||||||||||||||||||||||||||||||||||||||||||
Install the License Provider packageУстановить пакет License Provider:
При установке пакета When istalling the ecss-license-provider будут заданы вопросыpackage, the following questions will be asked:
Данные сохраняются в файле The data is saved to the /etc/ecss/ecss-license-provider/config.env file:
Конфигурация License Provider (LP) configuration Сервис The ecss-license-provider использует два конфигурационных файла: service uses two configuration files: /etc/ecss/ecss-license-provider/config.env и and /etc/ecss/ecss-license-provider/config.yaml. В файл Information is saved to the config.env информация сохраняется в момент установки пакета file during the ecss-license-provider package installation. Config.yaml файл содержит основные настройки для подключения к ELM-серверу, откуда брать лицензии, какие лицензии, и куда их потом передавать, все это нужно сконфигурировать вручнуюThe config.yaml file contains main settings for connecting to the ELM server: where to take licenses from, which licenses to take, and where to send them. All of this should be configured manually.
В поле elm_adresses нужно прописать список серверов ELM, к которым мы хотим подключаться для получения лицензий. Первый адрес в списке используется как основной. Дополнительные строки с адресами работают как резерв.
The ecss_nodes block. В нем нужно задать данные сервисов, которые будут получать лицензию. Сервис задается тремя параметрамиThis block must specify the details of the services that will receive the license. A service is specified by three parameters:
Выполнить перезагрузку сервиса Restart the ecss-license-provider.service для обновления конфигурации из файла service service for updating configuration from the /etc/ecss/ecss-license-provider/config.yaml следующей командой file using the following command:
|
...
Installing ecss-node
Установка обязательного пакета ecss-node включает в себя установку и первоначальную настройку основных подсистемInstalling the required ecss-node package includes the installation and initial configuration of the core subsystems.
| Примечание |
|---|
В системе уже должен быть установлен пакет The ecss-postgres-bdr-ssw package must already be installed on the system |
To install the ecss-node package, run the following commandДля установки пакета ecss-node выполните команду:
| Блок кода | ||||
|---|---|---|---|---|
| ||||
sudo apt install -y ecss-node |
Во время установки пакета создается пользователь ssw, от имени которого запускаются все сервисы ecss*. Создаются необходимые каталоги, выполняется настройка DNS, идет настройка SSL-сертификатов.
| Подсказка |
|---|
При установке также будет установлен пакет ecss-user |
Во время установки будет предложено настроить параметры, необходимые для формирования конфигурационных файлов, примеры ответов следует ниже.
During installation, a user named ssw is created, under whose account all ecss* services are run. The necessary directories are created, DNS configuration is performed, and SSL certificates are configured.
| Подсказка |
|---|
The ecss-user package will also be installed during this process |
During installation, you will be prompted to configure the parameters needed to generate the configuration files; examples of responses are provided below.
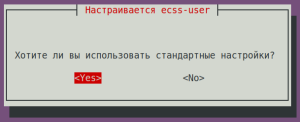
| ecss-user questions | Answers for ecss1 | Example | ||||||||||||||
|---|---|---|---|---|---|---|---|---|---|---|---|---|---|---|---|---|
Do you want to use the default settings? | Yes (default value | |||||||||||||||
| Вопросы ecss-user | Ответы для ecss1 | Пример | ||||||||||||||
Хотите ли вы использовать стандартные настройки? Yes (значение по умолчанию) |
| |||||||||||||||
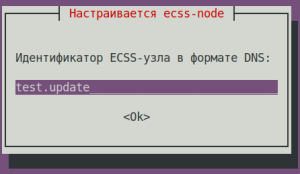
| Вопросы ecss-node questions | Ответы для Answers for ecss1 | ПримерExample | ||||||||||||||
| test.update (необходимо ввестиneeds to be entered)
|
| ||||||||||||||
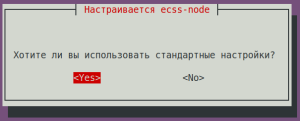
| Хотите ли вы использовать стандартные настройкиDo you want to use the default settings? | Yes (значение по умолчаниюdefault value) |
| ||||||||||||||
| Вопросы ecss-user questions | Ответы для Answers for ecss1 | Пример | Example | |||||||||||||
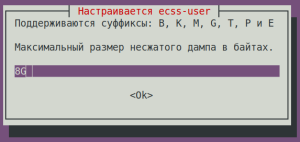
| Maximum size of an uncompressed core dump in bytesМаксимальный размер несжатого дампа в байтах. | 8G (значение по умолчаниюdefault value) |
| ||||||||||||||
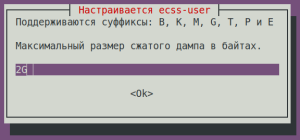
| Максимальный размер сжатого дампа в байтахMaximum size of a compressed core dump in bytes. | 2G (значение по умолчаниюdefault value) |
| ||||||||||||||
| Максимальный размер, который может занять каталог Maximum size that the /var/lib/systemd/coredump directory can occupy: | default (значение по умолчаниюdefault value) |
| ||||||||||||||
| Minimum amount of free disk space in bytes. | 30G (значение по умолчаниюdefault value) |
| ||||||||||||||
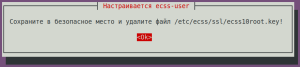
Сохраните в безопасное место и удалите файл Save the /etc/ecss/ssl/ecss10root.key file to a safe location and delete it! | Ok (значение по умолчаниюdefault value) |
| ||||||||||||||
Cookie для ноды for the core node: | ecss-core (необходимо ввестиneeds to be entered) |
| ||||||||||||||
Cookie для ноды for the ds node: | ecss-ds (необходимо ввестиneeds to be entered) |
| ||||||||||||||
Cookie для ноды for the mediator node: | ecss-mediator (необходимо ввестиneeds to be entered) |
| ||||||||||||||
Cookie для ноды for the pa-sip node: | ecss-pa-sip (необходимо ввестиneeds to be entered) |
| ||||||||||||||
Cookie для ноды for the mycelium node: | ecss-mycelium (необходимо ввестиneeds to be entered) |
| ||||||||||||||
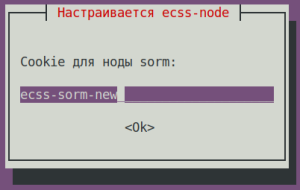
Cookie для ноды sorm: | ecss-sorm (необходимо ввести) |
| ||||||||||||||
Проверить информацию о состоянии синхронизации c NTP, используется команда ntpq –p . Если использовать дополнительный ключ –n, вместо имени сервера будет указан IP-адресTo check the NTP synchronization status, use the `ntpq -p` command. If you use the additional `-n` option, the IP address will be displayed instead of the server name:
| Без форматирования |
|---|
ntpq -p
     remote           refid      st t when poll reach   delay   offset  jitter
==============================================================================
*185.125.190.56 17.253.28.253 2 u 45 64 1 83.893 +0.470 2.177 |
Остановить сервисыStop the following services::
| Блок кода | ||
|---|---|---|
| ||
sudo systemctl stop ecss-core ecss-pa-sip ecss-ds ecss-mediator ecss-mycelium |
Создать Create a backup для for oasys (скопировать БД Mnesia со старого на новый Copy Mnesia database from old to new ecss1), выполнить следующие командыrun the following commands:
| Блок кода | ||
|---|---|---|
| ||
cd /var/lib/ecss/oasys/ |
| Блок кода | ||
|---|---|---|
| ||
sudo rsync -a <Ваш<Your_пользователь>@<IPuser>@<IP_add_of_старогоan_old_сервера>server>:/var/lib/ecss/oasys/Mnesia.ds1@ecss1/ Mnesia.ds1@ecss1/ |
| Блок кода | ||
|---|---|---|
| ||
sudo rsync -a <Ваш<Your_пользователь>@<IPuser>@<IP_add_of_an_старогоold_сервера>server>:/var/lib/ecss/oasys/Mnesia.md1@ecss1/ Mnesia.md1@ecss1/ |
| Блок кода | ||
|---|---|---|
| ||
cd ~ |
Перезапустить сервисы SSWRestart the SSW services:
| Блок кода | ||
|---|---|---|
| ||
sudo systemctl restart ecss-core ecss-pa-sip ecss-ds ecss-mediator ecss-mycelium |
Если лицензия поддерживает СОРМ3, то запустить также сервис ecss-sorm.
| Блок кода | ||
|---|---|---|
| ||
sudo systemctl start ecss-sorm |
Проверить статус сервисов, для этого выполнить в CoCon команду system-status:
To check the status of the services, run the system-status command in CoCon:
| Блок кода | ||
|---|---|---|
| ||
| Без форматирования | ||
| ||
/system-status Checking... ┌─┬───────────────┬─────────────────────────┬───────────────┬────────────┬──────┐ │ │ Node │ Release │ Erlang nodes │Mnesia nodes│Uptime│ ├─┼───────────────┼─────────────────────────┼───────────────┼────────────┼──────┤ │ │core1@ecss1 │ecss-core-3.18.0.271 │core1@ecss1 │not running │3m 55s│ │ │ds1@ecss1 │ecss-ds-3.18.0.271 │ds1@ecss1 │ds1@ecss1 │4m 40s│ │ │md1@ecss1 │ecss-mediator-3.18.0.271 │md1@ecss1 │md1@ecss1 │3m 50s│ │ │mycelium1@ecss1│ecss-mycelium-3.18.0.271 │mycelium1@ecss1│not running │5m 28s│ │ │sip1@ecss1 │ecss-pa-sip-3.18.0.271 │sip1@ecss1 │sip1@ecss1 │3m 45s│ │ │sorm1@ecss1 │ecss-sorm-3.18.0.271 │sorm1@ecss1 │not running │1m 55s│ └─┴───────────────┴─────────────────────────┴───────────────┴────────────┴──────┘ |
...
Licensing modes.
...
File-based licensing
| Раскрыть | ||||||||
|---|---|---|---|---|---|---|---|---|
| ||||||||
|
...
ELM
...
service licensing
| Раскрыть | |||||||||||||||||||||||||||||||
|---|---|---|---|---|---|---|---|---|---|---|---|---|---|---|---|---|---|---|---|---|---|---|---|---|---|---|---|---|---|---|---|
| |||||||||||||||||||||||||||||||
Configure the SSW connection to the License Provider using the following command in CoCon (in this example, the License Provider is installed on the ecss1 host, hosts IPadd is Выполнить конфигурацию подключения SSW к License Provider следующей командой в CoCon, (в примере License Provider установлен на хосте ecss1, IPadd хостов 10.0.10.51. Значение порта из файла Port value from the /etc/ecss/ecss-license-provider/config.env по умолчанию file is 4321 by default):
После выполнения проверить статус подключения командойAfter execution, check the connection status with the following command:
Хост должен иметь статус The host should have the alive=true . И быть «current».status and be "current".
If the status for one of the License Provider hosts is shown as “current,” you can send a request to upload the license to the SSW using the following command:
|
...
Installing ecss-restfs, ecss-media-server, ecss-web-conf
...
packages
Next, install the ecss-restf package, followed by Далее устанавливаются пакеты ecss-restf затем ecss-media-server, ecss-media-resources, , ecss-web-conf и другие в любом порядке, and others in any order:
ecss-restfs
| Блок кода | ||||
|---|---|---|---|---|
| ||||
sudo apt install -y ecss-restfs |
УстановкаInstalling ecss-restfs. При установке пакета
When installing the ecss-restfs будет предложено задать параметры конфигурации. Ответы на вопросы приведены ниже. Также инсталлятор предложит установить и настроить пакет Text2speech от Yandex.
...
Использование функции TTS (Use TTS service)
...
Настройка телефонной книги (Configure phone book)
...
Настроить сервис определения речи (Configure speech recognition service)
...
Ничего не выбирать
...
package, you will be prompted to specify configuration options. The answers to these questions are provided below.
| ecss-restfs questions | Answers |
|---|---|
Use TTS service | No (default value) |
Configure phone book | No (default value) |
Configure speech recognition service | No (default value) |
Select nothing | Ok |
After installing the ecss-restfs package, check for the presence of the voice guide’s WAV files in the после установки пакета ecss-restfs проверьте наличие wav файлов автоинформатора в директории /var/lib/ecss/restfs/system/sounds/ командой / directory using the command:
| Блок кода | ||
|---|---|---|
| ||
ll /var/lib/ecss/restfs/system/sounds/ |
наличие wav-файлов в указанной выше директории говорит о корректности установки пакета The presence of WAV files in the directory specified above indicates that the ecss-restfs package was installed correctly
| Информация | ||||
|---|---|---|---|---|
The absence of WAV files in the directory specified above indicates a problem with the installation of the ecss-restfs package. To resolve this, run the following command | ||||
| Информация | ||||
Отсутствия wav файлов в указанной выше директории, директории свидетельствует о проблеме при установке пакета ecss-restfs. Для ее решения выполните команду:
и повторите команду проверкиand repeat the verification command:
|
осталось проверить доступность этих файлов извне. Для проверки выполните команду:Next, you need to make sure that these files are accessible from outside. To do so, run the following command: Installing ecss-restfs.
| Блок кода |
|---|
wget http://ecss1:9990/system/sounds/ai_you.wav |
...
| Блок кода | ||
|---|---|---|
| ||
wget http://ecss1:9990/system/sounds/ai_you.wav --2026-04-18 17:43:29-- http://ecss1:9990/system/sounds/ai_you.wav Resolving ecss1 (ecss1)... 127.0.1.1, 10.0.10.51 Connecting to ecss1 (ecss1)|127.0.1.1|:9990... connected. HTTP request sent, awaiting response... 200 OK Length: 11670 (11K) [audio/x-wav] Saving to: ‘ai_you.wav’ ai_you.wav 100%[========================================================================================>] 11,40K --.-KB/s in 0s 2026-04-18 17:43:29 (301 MB/s) - ‘ai_you.wav’ saved [11670/11670] |
проверочный файл можно удалитьYou can delete the test file
| Блок кода | ||
|---|---|---|
| ||
rm ai_you.wav |
Перенести записи разговоров со старого сервера на новый, выполнив следующую командуTransfer the call recordings from the old server to the new one by running the following command:
| Блок кода | ||
|---|---|---|
| ||
sudo rsync -a <ваш<your_пользователь>@<IPuser>@<IP_add_старогоof_an_old_ecss1>:/var/lib/ecss/restfs/domain/ /var/lib/ecss/restfs/domain/ |
| Блок кода | ||
|---|---|---|
| ||
abf@ecss1:/var/lib/ecss/restfs/domain$ ls -la /var/lib/ecss/restfs/domain итого8 8total drwxr-xr-x 2 www-data www-data 4096 апрapr 22 18:21 . drwxr-xr-x 7 www-data www-data 4096 маяmay 28 15:07 .. abf@ecss1:/var/lib/ecss/restfs/domain$ sudo rsync -a abf@10.0.10.10:/var/lib/ecss/restfs/domain/ /var/lib/ecss/restfs/domain/ abf@ecss1:/var/lib/ecss/restfs/domain$ ls -la test_domain/records/2026_05_28 итого610 610total drwxrwxrwx 2 www-data www-data 4096 маяmay 28 14:56 . drwxrwxrwx 3 www-data www-data 4096 маяmay 28 14:27 .. -rw-r--r-- 1 www-data www-data 71892 маяmay 28 14:27 2026-05-28_14-27-02_t_42009-42007.pcm -rw-rw-rw- 1 www-data www-data 86 маяmay 28 14:27 2026-05-28_14-27-02_t_42009-42007.pcm.meta -rw-r--r-- 1 www-data www-data 71892 маяmay 28 14:31 2026-05-28_14-31-19_o_42007-42009.pcm -rw-rw-rw- 1 www-data www-data 86 маяmay 28 14:31 2026-05-28_14-31-19_o_42007-42009.pcm.meta -rw-r--r-- 1 www-data www-data 63904 маяmay 28 14:55 2026-05-28_14-55-24_o_42007-42009.pcm -rw-rw-rw- 1 www-data www-data 86 маяmay 28 14:55 2026-05-28_14-55-24_o_42007-42009.pcm.meta -rw-r--r-- 1 www-data www-data 39940 маяmay 28 14:55 2026-05-28_14-55-31_o_42007-42009.pcm -rw-rw-rw- 1 www-data www-data 86 маяmay 28 14:55 2026-05-28_14-55-31_o_42007-42009.pcm.meta -rw-r--r-- 1 www-data www-data 15976 маяmay 28 14:55 2026-05-28_14-55-37_o_42007-42009.pcm -rw-rw-rw- 1 www-data www-data 86 маяmay 28 14:55 2026-05-28_14-55-37_o_42007-42009.pcm.meta -rw-r--r-- 1 www-data www-data 79880 маяmay 28 14:55 2026-05-28_14-55-48_o_42007-42009.pcm -rw-rw-rw- 1 www-data www-data 86 маяmay 28 14:55 2026-05-28_14-55-48_o_42007-42009.pcm.meta -rw-r--r-- 1 www-data www-data 55916 маяmay 28 14:56 2026-05-28_14-55-59_o_42007-42009.pcm -rw-rw-rw- 1 www-data www-data 86 маяmay 28 14:55 2026-05-28_14-55-59_o_42007-42009.pcm.meta -rw-r--r-- 1 www-data www-data 47928 маяmay 28 14:56 2026-05-28_14-56-04_o_42007-42009.pcm -rw-rw-rw- 1 www-data www-data 86 маяmay 28 14:56 2026-05-28_14-56-04_o_42007-42009.pcm.meta -rw-r--r-- 1 www-data www-data 31952 маяmay 28 14:56 2026-05-28_14-56-28_t_42009-42007.pcm -rw-rw-rw- 1 www-data www-data 86 маяmay 28 14:56 2026-05-28_14-56-28_t_42009-42007.pcm.meta -rw-r--r-- 1 www-data www-data 31952 маяmay 28 14:56 2026-05-28_14-56-37_t_42009-42007.pcm -rw-rw-rw- 1 www-data www-data 86 маяmay 28 14:56 2026-05-28_14-56-37_t_42009-42007.pcm.meta -rw-r--r-- 1 www-data www-data 95856 маяmay 28 14:56 2026-05-28_14-56-42_t_42009-42007.pcm -rw-rw-rw- 1 www-data www-data 86 маяmay 28 14:56 2026-05-28_14-56-42_t_42009-42007.pcm.meta |
...
| Блок кода | ||||
|---|---|---|---|---|
| ||||
sudo apt install -y ecss-media-server |
Для медиасервера For the media server (ecss-media-server/MSR) можно выполнить начальную настройку с записью параметров в файл конфигурации,
для этого нужно провести конфигурацию transport , you can perform the initial setup by writing the parameters to a configuration file,
to do this, you need to configure transport bind-addr, mcc bind-addresaddress:
Укажите IP-адреса старого SSW версии Specify the IP address of the old SSW version 3.17 (в примере 10.0.20.41 in the example).
| Вопросы ecss-media-server questions | Ответы для Answers for ecss1 |
|---|---|
| [ MSR SIP SIP ] Введите Enter the bind-ip адрес address (Enter) | 10.0.20.41 (необходимо ввести (needs to be entered) |
| [MSR Control-Channel] Введите Enter the bind-ip -адресaddress | 10.0.20.41 (необходимо ввести) (needs to be entered) |
After generating the default configurations, run the following checkПосле формирования конфигураций по умолчанию выполните проверку:
| Блок кода |
|---|
cat /etc/ecss/ecss-media-server/config.xml |
Внутри лежит конфигурация для Inside is the configuration for msr: config.xml, в директории ; in the conf.d лежит конфигурация directory is the default.xml configuration.
По своей сути Essentially, default.xml — это дополнение xml is an extension of config.xml , которое определяет секцию аккаунтов. Это сделано для того, чтобы после обновлений пакета данная конфигурация оставалась неизменной. Вид config.xml представлен здесь: файл конфигурацииthat defines the accounts section. This is done to ensure that this configuration remains unchanged after package updates.
| Блок кода |
|---|
<?xml version="1.0" encoding="utf-8"?>
<config date="09:24:23 03.12.2025">
  <general log-level="3" log-rotate="yes" max-calls="2148" max-vid-calls="100" max-in-group="512" load-sensor="media" load-delta="10" calls-delta="100" spool-dir-size="100M" log-name="msr.log" log-path="/var/log/ecss/media-server" use-srtp="disabled" enable-ice-transport="no" ice-update="no" aggressive-ice="yes" stun-server="" suspicious-mode="no"/>
  <transport bind-addr="10.0.20.41" port="5040" transport="udp+tcp"/>
  <!-- By default configured public TURN-server -->
  <turn-server use-turn="no" host="numb.viagenie.ca" user="webrtc@live.com" password="muazkh"/>
  <media mixer-clock-rate="8000" use-vad="no" cng-level="0" jb-size="60" rtcp-timeout="0" rtp-timeout="350" udp-src-check="no" cn-multiplier="3" port-start="12000" port-range="4496" tias-in-sdp="no" thread-cnt="2" vid-enc-threads="2" vid-dec-threads="2" video-conf-layout="evenly" keyframe-interval="1000" vid-decode-delay="100" silent-codec-switch="yes" silence-threshold="-30" dtmf-flash-disable="no" video-dscp="0" other-dscp="0" dummy-video-src="/usr/share/ecss-media-server/video/dummy_video.yuv" video-enc-width="640" video-enc-height="360" finalsilence="1000" rtcp-stat-dump="yes" dtmf-tg-fpc-loop="10" dtmf-tg-fit="1" dtmf-tg-fot="2" dtmf-tg-volume="12288"/>
  <codec pcma="1" pcmu="2" ilbc="0" gsm="0" g722="3" g726="0" g729="0" speex="0" l16="0" g7221="0" opus="0" h264="1" h263-1998="2" t38="1" tel-event-pt="0"/>
  <accounts>
    <!-- <dynamic msr_name="msr.name"
            realm="sip:127.0.0.1:5000"
            dtmf_mode="rfc+inband+info"
            auth_name="user"
            auth_password="password" /> -->
  </accounts>
  <pbyte>
    <mcc bind-addr="10.0.20.41" port="5700"/>
  </pbyte>
  <conf_dir path="/etc/ecss/ecss-media-server/conf.d"/>
  <metrics enable="yes" use-pushgateway="yes" pushgateway-addr="127.0.0.1:9091" push-interval="5" port="8100" msr_name="msr2"/>
  <rtp>
    <auto addr-v4=""/>
  </rtp>
</config>
|
по умолчанию , после инсталляции By default, after installation, ECSS-10 активизирует только кодеки - enables only the following codecs: pcma, pcmu, g722, h264, h263-1998, and t38. Остальные имеют статус =0 = выкл. Если хотите активизировать остальные кодеки, в редакторе nano измените приоритет с 0 на цифру приоритета (уровень приоритета не должен повторятся для сервиса The rest have a status of 0 (disabled). If you want to enable the remaining codecs, use the nano editor to change the priority from 0 to the desired priority number (the priority level must not be duplicated for the audio/video/fax service).
sudo nano /etc/ecss/ecss-media-server/config.xml
| Подсказка | ||
|---|---|---|
| ||
| чтобы активизировать все кодеки строчку -To enable all codecs the line: <codec pcma="1" pcmu="2" ilbc="0" gsm="0" g722="3" g726="0" g729="0" speex="0" l16="0" g7221="0" opus="0" h264="1" h263-1998="2" t38="1" tel-event-pt="0"/> привести к виду -should be changed to: <codec pcma="1" pcmu="2" ilbc="6" gsm="4" g722="3" g726="11" g729="5" speex="7" l16="8" g7221="9" opus="10" h264="1" h263-1998="2" t38="1" tel-event-pt="0"/> |
| Предупреждение |
|---|
Недопустимо указывать у разных кодеков одинаковый приоритет, для примера g722It is not allowed to specify the same priority for different codecs; for example, g722="5" g729="5". В этом случае они будут работать некорректно/игнорироваться. |
Take a look at the accounts section (the default.xml fileРассмотрим секцию аккаунтов (файл default.xml):
| Блок кода | ||
|---|---|---|
| ||
cat /etc/ecss/ecss-media-server/conf.d/default.xml |
Проверить корректность данныхCheck the correctness of the data.
| Блок кода | ||
|---|---|---|
| ||
<?xml version="1.0"?>
<config>
    <accounts>
        <dynamic msr_name="msr.ecss1" realm="sip:10.0.20.41:5000" dtmf_mode="rfc+inband+info" auth_name="user" auth_password="password">
            <via dynamic-ifaces="no">
                <iface name="net.20" ip="10.0.20.41"/>
            </via>
        </dynamic>
    </accounts>
</config> |
В ней указаны текущие настройки, согласно которым происходит регистрация msr на core.
It specifies the current settings used to register the MSR on the core.
The main parameters here are msr_name and Основными параметрами здесь являются: msr_name и realm:
- msr_name — параметр, определяющий название msr. (рекомендуется задавать название msr. и к какому хосту он принадлежит, например a parameter that defines the name of the MSR. (it is recommended to specify the MSR name and the host it belongs to, for example, msr.ecss1);
- realm — определяет адрес для регистрации на ядре. Точка входа по умолчанию: порт 5000, адрес: specifies the address for registration on the core. The default entry point is port 5000, address 127.0.0.1.
После изменения конфигурации файлов After modifying the /etc/ecss/ecss-media-server/config.xml и and /etc/ecss/ecss-media-server/conf.d/default.xml необходимо выполнить перезапуск сервиса configuration files, you should restart the ecss-media-server, чтобы изменения вступили в силу, следующей командой service for the changes to take effect using the following command:
| Блок кода |
|---|
sudo systemctl restart ecss-media-server |
| Подсказка | ||
|---|---|---|
Вы увидите сообщениеYou will see the following message:
Мы указали рабочие IP адреса для media сервиса, а они пока закреплены за старым ecss1. После переключения IP адресов сервис запустится автоматическиThe operational IP addresses for the media service are specified, but they are currently still assigned to the old ecss1. After switching the IP addresses, the service will start automatically. |
ecss-web-conf
| Блок кода | ||
|---|---|---|
| ||
sudo apt install ecss-web-conf |
Web-конфигуратор позволяет сделать управление системой более наглядным и комфортным. Установка web-конфигуратора не является обязательной, но рекомендуется.
Также при установке пакета The web configurator makes system management more intuitive and convenient. Installing the web configurator is not required, but it is recommended.
Additionally, installing the ecss-web-conf автоматически устанавливается пакет package automatically installs the ecss-subscriber-portal-ui. Приложение "Портал абонента" системы ECSS-10 позволяет абонентам системы самостоятельно управлять услугами, просматривать информацию по совершенным вызовам, активным конференциям, а также настраивать собственные IVR-скрипты для входящих вызовов. Описание работы веб-конфигуратора приведено в разделе "Портал абонента". package. The ECSS-10 system’s “Subscriber Portal” application allows system subscribers to independently manage services, view information on completed calls and active conferences, and configure their own IVR scripts for incoming calls.
| Вопросы ecss-web-conf questions | Ответы для Answers for ecss1 | Пример | Example |
|---|---|---|---|
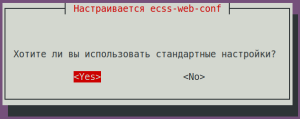
| Do you want to use the default settings Хотите ли вы использовать стандартные настройки? | Yes (значение по умолчаниюdefault value) |
|
Проверьте возможность подключения к веб-интерфейсу Check whether you can connect to the web interface at http://10.0.10.51, пользователь/пароль — ; the username and password are admin/password. В настоящий момент не все функции будут доступны, но веб-интерфейс должен работать, а вход в систему — быть успешным.
Отключение SSW версии 3.17
Для отключения старого SSW версии 3.17 выполнить следующие команды:
Отключение сервисов
Not all features will be available at this time, but the web interface should work, and you should be able to log in successfully.
Disabling SSW version 3.17
To disable the old SSW version 3.17, run the following commands:
Stopping services
| Блок кода | ||
|---|---|---|
| ||
| Блок кода | ||
| ||
sudo systemctl mask --now ecss-ds ecss-mycelium ecss-mediator ecss-core ecss-pa-sip ecss-sorm |
...
Copying the Postgres database
Скопировать БД Postgres со старого ecss1, для этого выполнить командуCopy the Postgres database from the old ecss1 server by running the following command:
| Блок кода | ||
|---|---|---|
| ||
sudo tar -Pcvf /tmp/postgres.tar /srv/ecss/ecss-postgres-bdr-ssw/volumes/ |
Скопировать Copy postgres.tar на новый сервер, выполнив командуto the new server by running the following command:
| Блок кода | ||
|---|---|---|
| ||
scp /tmp/postgres.tar <ваш_пользователь>@<IP_адрес_новый<your_user>@<IP_address_of_a_new_ecss1>:/tmp/postgres.tar |
Остановить docker БД Postgres командойStop the Postgres database Docker with the following command:
| Блок кода | ||
|---|---|---|
| ||
sudo docker compose -f /srv/ecss/ecss-postgres-bdr-ssw/docker-compose.container.yml stop |
Очистить подкаталог Clear the /srv/ecss/ecss-postgres-bdr-ssw/volumes subdirectory:
| Блок кода | ||
|---|---|---|
| ||
sudo rm -R /srv/ecss/ecss-postgres-bdr-ssw/volumes/* |
Распаковать БД Postgres на новом сервере ecss1Extract the Postgres database on the new ecss1 server.
| Блок кода | ||
|---|---|---|
| ||
sudo tar xvf /tmp/postgres.tar -C / |
Запустить docker БД Postgres командойStart the Postgres database Docker with the following command:
| Блок кода | ||
|---|---|---|
| ||
sudo docker compose -f /srv/ecss/ecss-postgres-bdr-ssw/docker-compose.container.yml start |
Замена IP адресов на старом ecss1
Replacing IP addresses on the old ecss1
Change the Изменить IP адреса 10.0.10.41/10.0.20.41 на неиспользуемые на сети (для примера на IP addresses to the ones that aren't used in the network (10.0.10.61/10.0.20.61, for example):
| Блок кода | ||
|---|---|---|
| ||
sudo nano /etc/netplan/ecss.yaml |
| Раскрыть | |||||
|---|---|---|---|---|---|
| |||||
|
| Раскрыть | |||||
|---|---|---|---|---|---|
| |||||
|
| Блок кода | ||
|---|---|---|
| ||
sudo netplan apply |
Переключение нового SSW на рабочие IP адреса
Switching the new SSW to operational IP addresses
Once the operational IP addresses have been removed from the old SSW, you can assign them to the new SSW. Run the following commandПосле освобождения рабочих IP адресов со старого SSW можно подключить их к новому SSW. Выполнить команду:
| Блок кода | ||
|---|---|---|
| ||
sudo nano /etc/netplan/ecss.yaml |
Изменить Change the IP адреса addresses 10.0.10.51/10.0.20.51 на используемые на сети для SSW (в примере to those used on the network for the SSW (in the example, 10.0.10.41/10.0.20.41):
| Раскрыть | |||||
|---|---|---|---|---|---|
| |||||
|
| Раскрыть | |||||
|---|---|---|---|---|---|
| |||||
|
| Блок кода | ||
|---|---|---|
| ||
sudo netplan apply |
Обновить IP адрес в файле Update an IP address in the /etc/hosts file:
| Блок кода | ||
|---|---|---|
| ||
sudo nano /etc/hosts |
Обновить IP адрес в файле Update an IP address in the /etc/dnsmasq.d/ecss-broker file:
| Блок кода | ||
|---|---|---|
| ||
sudo dpkg-reconfigure ecss-dns-env |
| Блок кода | ||
|---|---|---|
| ||
/system/licence/manager/set --hosts [https://10.0.10.41:4321] |
| Блок кода | ||
|---|---|---|
| ||
sudo systemctl restart ecss-ds ecss-mycelium ecss-mediator ecss-core ecss-pa-sip ecss-media-server |
После выполнения обновления проверьте работу всех сервисов SSWAfter the update is complete, verify that all SSW services are functioning properly.