Technical specification: Integration of the ECSS-10 Class 5 software switch (SSW) on 2 physical servers with SIP support is required with the following parameters of the server group load:
|
According to the technical specification, it is required to determine the hardware platform.
Table 1. Recommended hardware solutions
Requirements for SSW servers | Hardware Product Series | ||||
|---|---|---|---|---|---|
Light+ | Midi | Heavy | Super Heavy | Top (1) | |
System specifications | |||||
Maximum number of subscribers | 5000 | 10000 | 20000 | 40000 | - |
Maximum load of simultaneous connections class 5 | 800 | 1500 | 3000 | 6000 | - |
Maximum load of simultaneous connections class 4 | 2400 | 4500 | 9000 | 20000 | 80000 |
Server specifications | |||||
Model | HP (Lenovo) | HP (Lenovo) | HP (Lenovo) | HP (Lenovo) | HP / Lenovo / Depo |
Series | DL20 Gen10/DL 360 Gen10 (SR530) | DL360 Gen10 (SR530/SR630) | DL360 Gen10 (SR630) | DL360 Gen10 (SR630) | DL360 Gen10 / SR650 V2 / |
Processor | Intel Xeon 4214 | Intel Xeon 5220 | Intel Xeon 6240 | Intel Xeon 8268 | Intel Xeon 8380 |
Number of processors | 1 | 1 | 2 | 2 | 2 |
RAM | 16 GB | 24 GB | 32 GB | 64 GB | 1024 GB |
HDD | From 3X500 SATA | From 3x300 GB SAS | From 3x600 GB SAS | From 6x800 GB SSD, 2x300 GB M.2 SSD | From 6x1.2 TB SSD, 2x300 GB M.2 SSD |
RAID | No raid board | HW Raid, from 1 GB cache+battery | HW Raid, from 1 GB cache+battery | HW Raid, from 2 GB Flash cache, RAID-5 support | HW Raid, from 2 GB Flash cache, RAID-5 support |
Additional server components (not included in the basic set) | |||||
Remote management license | optional | + | + | + | + |
Redundant power supply | optional | + | + | + | + |
Storage of conversation records | Additional HDD combined in RAID-5 | HW Raid license with RAID-5 support, additional HDD for storing records | HW Raid license with RAID-5 support, additional HDD for storing records | HW Raid license with RAID-5 support, additional HDD for storing records | HW Raid license with RAID-5 support, additional HDD for storing records |
Data transmission network bandwidth The required network bandwidth: no less than 1000 Mbps. |
Table 2. Minimal requirements for installing ECSS-10 on virtual machines*
Requirements for SSW servers | Hardware Product Series | |||||
|---|---|---|---|---|---|---|
Light (2)(3) | Light+ | Midi | Heavy | Super Heavy | Top (1) | |
System specifications | ||||||
Maximum number of subscribers | 1000 | 5000 | 10000 | 20000 | 40000 | - |
Maximum load of simultaneous connections class 5 | 250 | 800 | 1500 | 3000 | 6000 | - |
Maximum load of simultaneous connections class 4 | 1000 | 4500 | 900 | 20000 | 80000 | - |
| Server specifications | ||||||
| Number of cores/threads (vCore) | 8C | 12С/24T | 18С/36T | 36С/72T | 48С/96T | 80С/160T and more |
CPU frequency | From 2.4 GHz | From 3 GHz | From 3 GHz | From 3.6 GHz | From 3.4 GHz | From 3.2 GHz |
RAM | 8 GB | 16 GB | 24 GB | 32 GB | from 64 GB | from 512 GB |
HDD | From 50 GB, 75 IOPS | From 500 GB SATA | From 500 GB SAS | From 500 GB SAS | From 800 GB SSD, 300 GB M.2 SSD | From 1.2 TB SSD, 300 GB M.2 SSD |
C — core;
T — thread, vCore;
(1) — Top series is intended for trunk gateway controller (class 4);
(2) — Light series is used for virtual machines calculations only. The minimum recommended series for hardware servers is Light+;
(3) — Light series is the minimum recommended series. It is used for calculations of virtual machines with minor subsciber number (under 1000: 100, 200);
*If it is planned to use services such as call center, call recording, and video calls, then it is necessary to coordinate the requirements with technical support.
After determining the requirements of the project, make a preliminary network map. An example of components separation in the address space for a single node
| ||||||||||||||||||||||||||||||||||||||||||||||||||||||||||||||||||||||||||||||||||
The topology of connecting the server to the network to ensure redundancy is recommended to be done using 2 switches.
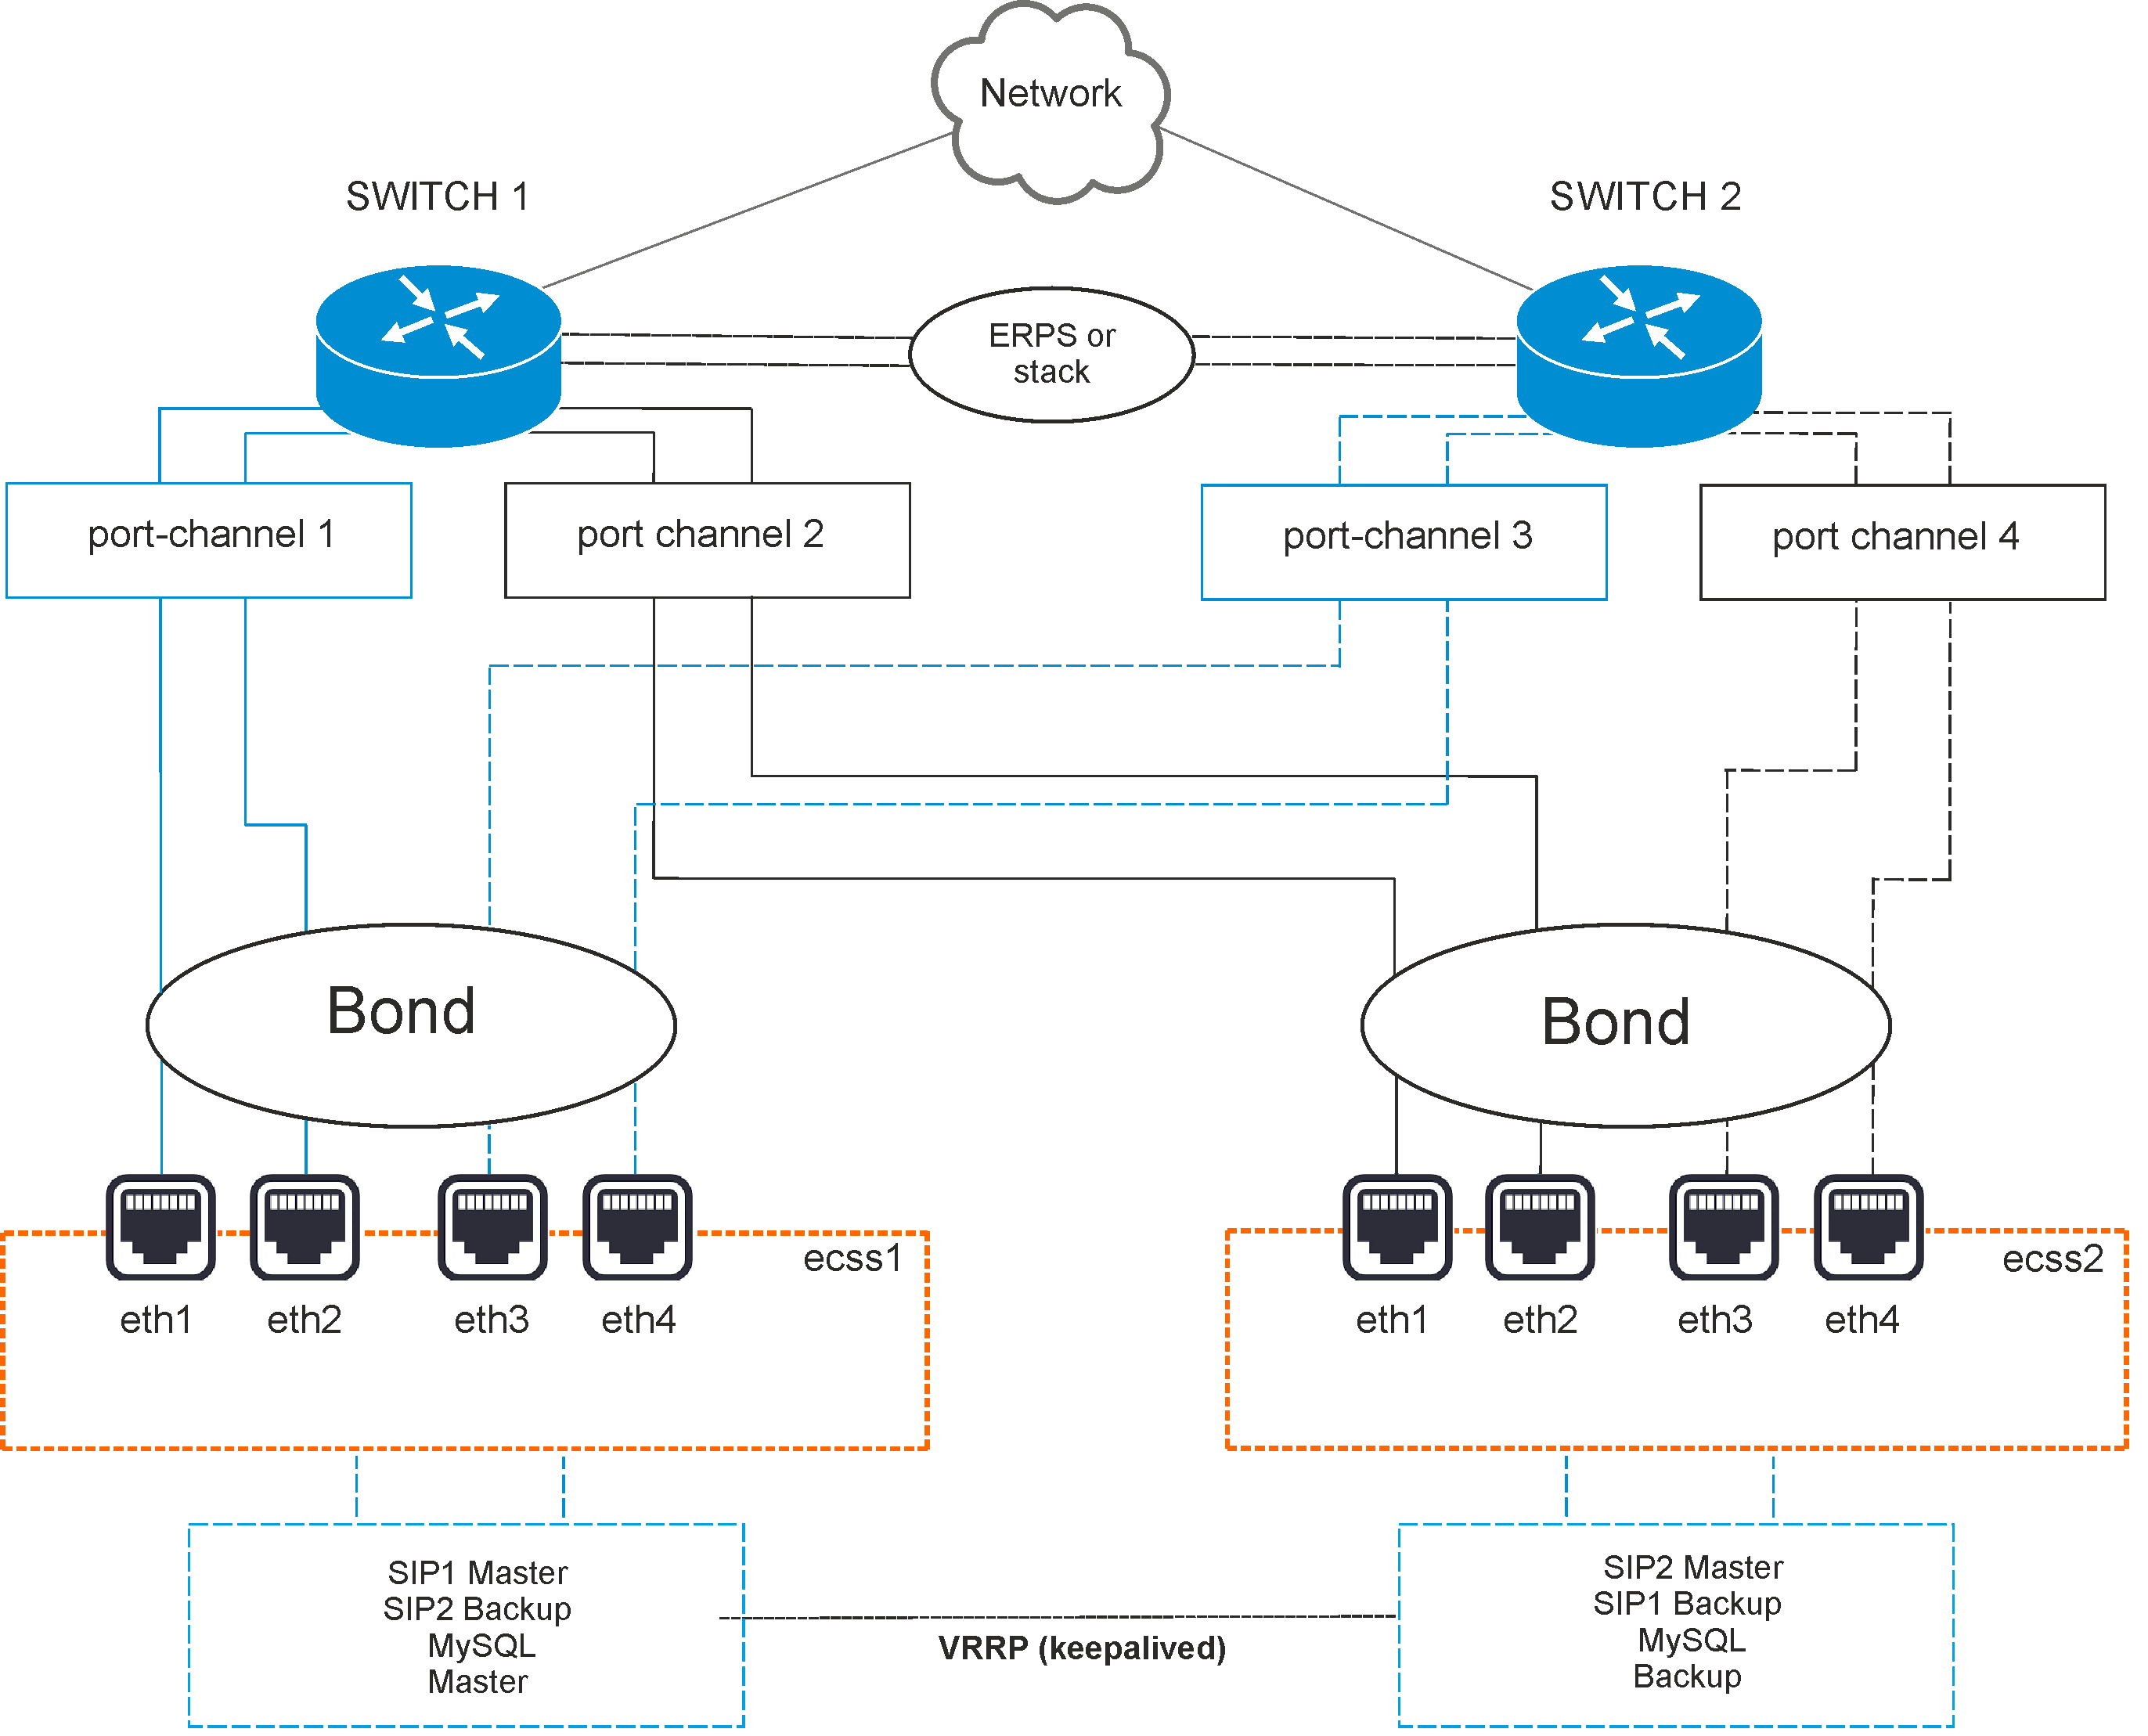
Figure 2 — Network connection diagram
Option 1. Active-backup
The switches are connected in erps ring.
All 4 physical network interfaces are connected into 1 aggregated link (bond). Server port aggregation is configured in active-backup mode, i.e. there is always only 1 network interface in operation. Server network interfaces are connected in pairs in switches, on which port aggregation (port-channel) is also configured in active-backup mode.
For example, eth0 and eth1 of each server are connected in the first switch (port-channel 1 and 2), and eth2 and eth3 (port-channel 3 and 4) are connected in the second one.
Option 2. LACP
The switches are connected in a stack. The stack must logically operate as a single switch, capable of providing port aggregation between different physical switches in LACP mode. MES-3124 with specialized firmware can be an example.
All 4 physical network interfaces are connected into 1 aggregated link (bond). Server port aggregation is configured in 802.3ad mode. Network cards aggregated groups with same rate and duplex are created. With such a combination, the transmission uses all channels in active aggregation according to the IEEE 802.3ad standard. The choice on which interface to send a packet is determined by policy. By default, it is XOR policy, also xmit_hash policy can be used. For more information, see Netplan section.
Requirements:
Server network interfaces are also connected in pairs in switches, on which port aggregation (port-channel) is configured in LACP mode. For example, eth0 and eth1 of each server are connected to first switch (port-channel 1), eth2 and eth3 are connected to the second one (port-channel 3 and 4).
Installation of ECSS-10 consists of two main parts:
This section describes the operating system installation, as well as required and optional packages. ECSS-10 version 3.18 runs on Ubuntu 22.04.
Preliminary requirements:
To install the OS, do the following:
Table1 — An option for storing information in a file system on physical media for servers
| 1 | Operating system boot partition (created automatically) | boot | raid 1: hdd1, hdd2 | boot | /boot | ext4 | 1 GB | Primary |
| 2 | Operating system root partition | root | raid 1: hdd1, hdd2 | root | / | ext4 | 30 GB | Logical |
| 3 | Local database information | mnesia | raid 1: hdd1, hdd2 | mnesia | /var/lib/ecss | ext4 | 10 GB | Logical |
| 4 | Distributed database for storing media resources | glusterfs | raid 1: hdd1, hdd2 или hdd3 | glusterfs | /var/lib/ecss/glusterfs* | ext4 | Max GB | Logical |
| 5 | OS subsystem operation logs | log | raid 1: hdd1, hdd2 или hdd3 | log | /var/log | ext4 | 20 GB | Logical |
| 6 | ECSS subsystem operation logs | ecss_log | raid 1: hdd1, hdd2 или hdd3 | ecss_log | /var/log/ecss | ext4 | 20 GB | Logical |
| 7 | Databases | ecss_db | raid 1: hdd1, hdd2 или hdd3 | ecss_db | /srv/ecss/ecss-postgres-bdr-ssw/ | ext4 | 100–400 GB** | Logical |
| 8 | User files | home | raid 1: hdd1, hdd2 или hdd3 | home | /home | ext4 | 10 GB | Logical |
* If the server will not work in a cluster, then a partition /var/lib/ecss/restfs is created instead of glusterfs. ** The recommended value for series Light, Light+, Midi is 100 GB. The recommended value for series Heavy is 200 GB, for Super Heavy is 400 GB. |
The system requires at least 256 GB of free space.
It is neccessary to configure "hostname" parameter on the system servers.
It is recommended to specify the same username (anything except ssw) on all servers in the system. The ECSS-10 license is linked to the eToken/ruToken key and the computer hostname. The system user ssw is created when installing the ecss-user package.
When installing the system in a cluster, the recommended value for the first server is ecss1, for the second – ecss2. |
Install the software switch according to the parameters specified in the technical specification. In this example, it is assumed that the required operating system is already installed.
It is recommended to split traffic used for different purposes. For example, management traffic and VoIP traffic. To do this, 2 or more VLANs are created. In the minimum case and with a small load, one VLAN can be enough. Hovewer, it will cause inconvenience in the future at traffic dump and its analysis. According to the technical specification, host IP addresses, gateways, DNS, routing in other networks are configured on VLAN.
According to the technical specification, the following addresses are used in a given example (in brackets are differences for ecss2):
There is an address structure inside the server platform and internal addresses are used for interaction between subsystems (nodes) in the cluster. For example, the internal address for a cluster on one server is 10.0.20.51, while the core (ecss-core) interacts with the multimedia data processing server (ecss-media-server). Their interaction takes place using the same address, but each software part has its own transport port: ecss-core — 5000, ecss-msr — 5040.
A single address for accessing the MySQL database is defined for all cluster nodes, for example, the ecss-mysql address 10.0.10.10. Thus, the uniformity condition is fulfilled, in which all cluster nodes have completely identical data about the current state of the dynamic components of the software switch (for example, call history).
First, the network interfaces are configured. In Ubuntu 22, the netplan utility is used for configuration:
sudo nano /etc/netplan/ecss_netplan.yaml |
In the configurations for each host, the ethernets section is declared first, which describes the existing ethernet interfaces in the system that will be used in the future. It is important for each interface to disable the use of dynamic address allocation (DHCP).
The next section describes aggregated channels — bonds. Depending on chosen network connection option, 1:1 (active - backup) or LACP (802.3ad) backup mode is configured.
Then, VLANs are configured, on which gateways for communication with the outside world and DNS server addresses are defined optionally, as well as IP addresses for each interface.
Note that while editing netplan, it is necessary to follow the YAML markup rules:
→ Section |network → Subsection |_'_'bonds: → Subsection of the bonds section description |_'_'_'_'bonded_one: → etc. |_'_'_'_'...
|
| Netplan for ecss1 server interfaces (/etc/netplan/ecss_netplan.yaml) | Netplan for ecss2 server interfaces (/etc/netplan/ecss_netplan.yaml) | ||
|---|---|---|---|
|
|
The following bond settings are required for the ECSS server to run correctly:
mode: active-backup - specifies the operating mode in which one link is selected as active, while the others remain in backup;
primary-reselect-policy: failure - specifies that a new active link should be selected only when the current active link fails. This avoids unnecessary switching;
gratuitous-arp: 5 - when the active link changes, five gratuitous ARP requests are sent to the switch to update its switching table. This facilitates faster switching;
all-slaves-active: true - forces incoming frames to be accepted on the backup interfaces. This ensures that traffic balancing on the MES does not interfere with operation. Data flows to the server from all links, and the server sends data only from the active link;
mii-monitor-interval: 100 - enables link monitoring via the MII interface and specifies a polling interval of 100 ms;
up-delay: 1000 - specifies that a connected interface should not be considered immediately available for operation, but rather a one-second delay should be applied after the interface has been connected. This is necessary to avoid unnecessary switching when the port repeatedly switches between the "on" and "off" states.
| Netplan for ecss1 server interfaces (/etc/netplan/ecss_netplan.yaml) | Netplan for ecss2 server interfaces (/etc/netplan/ecss_netplan.yaml) | ||
|---|---|---|---|
|
|
It is also recommended to check for any other files in the /etc/netplan/ directory. If other files are present, they should be moved to another directory or deleted. Otherwise, incorrect configuration of network interfaces and incorrect operation of SSW may occur. |
Apply parameters with the command:
sudo netplan apply |
You can view the resulting settings using the ifconfig or ip a commands.
It is neccessary to configure "hostname" parameter on the system servers.
It is recommended to specify the same username (anything except ssw) on all servers in the system. The ECSS-10 license is linked to the eToken/ruToken key and the computer hostname. The system user ssw is created when installing the ecss-user package.
When installing the system in a cluster, the recommended value for the first server is ecss1, for the second – ecss2. Other host names are possible only upon project approval; this will be required to generate licenses. |
Specify hostname: ecss1 / ecss2 in file /etc/hostname:
sudo nano /etc/hostname |
After configuring netplan, specify that the internal address 10.0.10.Х belongs to the corresponding ecssX server. To do this, configure /etc/hosts.
| Configuring hosts for ecss1 (/etc/hosts) | Configuring hosts for ecss2 (/etc/hosts) |
|---|---|
127.0.0.1 localhost # Local loop address, used by some ecss services 10.0.10.51 ecss1 # Host address | 127.0.0.1 localhost # Local loop address, used by some ecss services 10.0.10.52 ecss2 # Host address |
Now, if you call the ping utility on ecssX, you can contact the neighboring server:
| Accessing ecss2 from ecss1 | Accessing ecss1 from ecss2 |
|---|---|
ping ecss2 PING ecss2 (10.0.10.52) 56(84) bytes of data. 64 bytes from ecss2 (10.0.10.52): icmp_seq=1 ttl=64 time=0.047 ms | ping ecss1 PING ecss1 (10.0.10.51) 56(84) bytes of data. 64 bytes from ecss1 (10.0.10.51): icmp_seq=1 ttl=64 time=0.032 ms |
Next, one should organize access between servers via ssh using RSA keys - without using a password.
Generate an RSA key with the following command (execute the command without sudo so that the key is generated for the current user), when executing the command three questions will be asked, you can use the default value by pressing Enter three times:
ssh-keygen |
ssh-copy-id ecss2 |
The same way on ecss2.
ssh-copy-id ecss1 |
Check the connection between the servers. From the ecss1 server side - ssh ecss2, the connection should be established without asking for a password. Similarly, from the ecss2 server side - ssh ecss1.
Use cpufrequtils utility.
sudo apt install -y cpufrequtils |
By default, after installation, Ubuntu uses the "ondemand" mode (CPU performance is based on application requests, saving power, but lower performance):
cat /etc/init.d/cpufrequtils | grep GOVERNOR= |
In the system output message, the default operating mode after installation is "ondemand":
GOVERNOR="ondemand" |
Set the efficiency/performance mode - replace the value "ondemand" with "performance" in the file /etc/init.d/cpufrequtils.
sudo sed -i 's/GOVERNOR="ondemand"/GOVERNOR="performance"/g' /etc/init.d/cpufrequtils |
Restart the utility:
sudo /etc/init.d/cpufrequtils restart |
Then run the command:
sudo systemctl daemon-reload |
The Ubuntu SSW server operates in real time, so all necessary data must be in RAM. Using a swap file (/swap.img) can increase the processing time of ECSS10 SSW application calls, which is unacceptable. Disable swap.
Run three commands in sequence:
Disable swap:
sudo swapoff -a |
Delete swap.img file.
sudo rm /swap.img |
Comment out the line "/swap.img none swap sw 0 0" in the "/etc/fstab" file – change it to "# /swap.img none swap sw 0 0"
or delete this line (/swap.img none swap sw 0 0).
sudo nano /etc/fstab |
# /etc/fstab: static file system information. # # Use 'blkid' to print the universally unique identifier for a # device; this may be used with UUID= as a more robust way to name devices # that works even if disks are added and removed. See fstab(5). # # <file system> <mount point> <type> <options> <dump> <pass> # / was on /dev/sda2 during curtin installation /dev/disk/by-uuid/731728e2-4d6b-499a-afea-9362fd6726b2 / ext4 defaults 0 1 # /swap.img none swap sw 0 0 |
To check, run the command free -h:
free -h |
Swap size is 0 – that is, it is disabled
free -h
              total        used        free      shared  buff/cache   available
Mem:           3,9G        110M        3,2G        820K        535M        3,5G
Swap:            0B          0B          0B
|
When installing Ubuntu 22, it is not prompted to set a time zone (UTC is the default). One should set it manually (for the rating system, scheduled tasks, etc.) to function correctly. For example:
sudo timedatectl set-timezone Asia/Novosibirsk |
If system components are moved to different servers/VMs (ecss-node/ecss-msr), it is necessary to specify a single time zone for all system components. |
It is possible to improve the performance of high-load servers by increasing the open file limit.
To set the open file limit, follow these steps:
Check the current limit with the command:
ulimit -a |
Result:
eltex@ecss1:~$ ulimit -a core file size (blocks, -c) 0 data seg size (kbytes, -d) unlimited scheduling priority (-e) 0 file size (blocks, -f) unlimited pending signals (-i) 15515 max locked memory (kbytes, -l) 65536 max memory size (kbytes, -m) unlimited open files (-n) 1024 pipe size (512 bytes, -p) 8 POSIX message queues (bytes, -q) 819200 real-time priority (-r) 0 stack size (kbytes, -s) 8192 cpu time (seconds, -t) unlimited max user processes (-u) 15515 virtual memory (kbytes, -v) unlimited file locks (-x) unlimited |
This limit (open files 1024) is not enough for normal operation of high-load servers.
Set open file limit for each user:
sudo sed -i '55i\* soft nproc 65536\n* hard nproc 131072\n* soft nofile 65536\n* hard nofile 131072\nroot - memlock unlimited' /etc/security/limits.conf |
|
Installation of packages must be done NOT under the ssw system user. |
To install the ECSS-10 system, add the ELTEX repository:
sudo sh -c "echo 'deb [arch=amd64] http://archive.eltex.org/ssw/jammy/3.18 stable main extras external' > /etc/apt/sources.list.d/eltex-ecss10-stable.list" |
Next, import the key with the following command:
sudo apt-key adv --keyserver keyserver.ubuntu.com --recv-keys 33CB2B750F8BB6A5 |
To update the OS, run the following commands:
sudo apt update |
In case the following system message is displayed
Run the following command:
|
sudo apt upgrade |
┌ ECSS software version. Currently, it is listed as version 3 in the certification application. | It is not changed until the next certification or │ the release of a fundamentally new version of the system. │ │ ┌ System Release Version. This is the common version for all components included in a specific release. | | It is changed centrally │ │ when decided to launch a new release. Releases are usually not compatible with each other. ┌─┴┐ ┌──┴─┐ ECSS.SysRel.SubMaj.SubMin └──┬─┘ └──┬─┘ │ └ Subsystem minor version. The minor version of a subsystem is set by the subsystem developer. | The minor version │ is changed when a patch is added. Minor versions within a single major version are generally │ compatible with each other and differ within specific patches. │ └ Subsystem major version. The major version is set by the subsystem developer. The major version of a subsystem must be updated when significant changes are made to the subsystem.The APT package installation utility analyzes package version from left to right. For example, if we have package 14.14.7.7, the repository contains packages: 14.14.7.8 If a specific situation requires upgrading from version 14.14.7.7 to version 14.14.7.9, the standard command → sudo apt upgrade will not help, since the newest package will be selected. In this situation, it is needed to explicitly specify which version of the package wanted to be installed. In this example, we should select the command → sudo apt install package name=14.14.7.9. This is usually necessary for testing a specific patch; for standard updates, it is enough to select the usual command to install/update the package. |
Install all the proposed packages:
sudo apt install -y ntp ntpdate tcpdump vlan dnsmasq aptitude atop ethtool htop iotop mc minicom mtr-tiny nmap pptpd pv screen ssh tftpd vim sngrep tshark cpanminus gnuplot libgraph-easy-perl debconf-utils |
Also install packages for system with redundancy:
sudo apt install -y ifenslave keepalived attr |
List of mandatory service software:
List of recommended diagnostic and support software:
List of mandatory packages for redundant schemes:
List of additional packages for redundant schemes:
|
Before installing the ecss packages, it is needed to ensure that the network's bandwidth meets the requirements. To do this, run the command sudo ethtool <interface name> for all physical interfaces.
Check the following:
|
To install, run the command:
sudo apt install -y ecss-dns-env |
The setup wizard will prompt to select sections for configuration based on the questions below. You need to select a broker (for example, 10.0.10.51 and 10.0.10.52).
| Questions ecss-dns-env | Replies for ecss1 | Ответы for ecss2 |
|---|---|---|
| [Primary broker] enter address ([Primary broker] Enter IP) | 10.0.10.51 (needs to be entered) | 10.0.10.51 (needs to be entered) |
| [Secondary broker] enter address ([Secondary broker] Enter IP) | 10.0.10.52 (needs to be entered) | 10.0.10.52 (needs to be entered) |
In case of subsequent correction of IP addresses, the following command should be used:
|
Before installing
|
Performed sequentially, first installed on the server running in "Master" mode.
sudo apt install -y ecss-postgres-bdr-ssw |
When installing the ecss-postgres-bdr-ssw package, the following questions will be asked:
| Questions ecss-postgres-bdr-ssw | Replies for ecss1 (Master) |
|---|---|
| Current IP address of the network interface. | Select an IP address from the list to use with Postgres |
| Installing in a cluster? | Yes (default value) |
| Is this node a master node? | Yes (needs to be entered) |
sudo apt install -y ecss-postgres-bdr-ssw |
When installing the ecss-postgres-bdr-ssw package, the following questions will be asked:
| Questions ecss-postgres-bdr-ssw | Replies for ecss2 (Slave) |
|---|---|
| Current IP address of the network interface. | Select an IP address from the list to use with Postgres |
| Installing in a cluster? | Yes (default value) |
| Is this node a master node? | Yes (needs to be entered) |
| IP address used to connect to the cluster: | Specify the IP address of the Master (ecss1) |
When installing, the script postgresbdr_ssw.sh is installed in /srv/ecss/ecss-postgres-bdr-ssw directory.
To check replication, run the following commands:
cd /srv/ecss/ecss-postgres-bdr-ssw |
sudo ./postgresbdr_ssw.sh check |
The output on the hosts should be the same:
|
|
|
Installation of the required ecss-node package includes installation and initial configuration of the main subsystems.
The ecss-postgres-bdr-ssw package should already be installed on the system. |
To install the ecss-node package, run the command:
sudo apt install -y ecss-node |
During package installation, the ssw user is created, under which all ecss* services are launched. The necessary directories are created, DNS is configured, and SSL certificates are configured.
During installation, the ecss-user package will also be installed. |
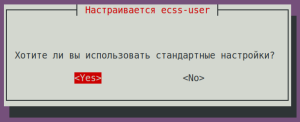
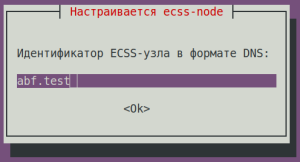
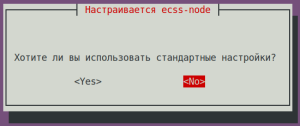
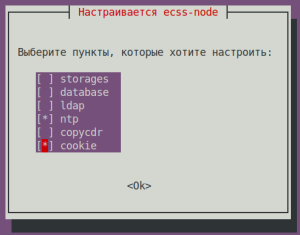
During installation, it will be prompted to configure the parameters necessary for generating configuration files. Examples of replies are below.
| ecss-user questions | Replies for ecss1 | Example | ||
|---|---|---|---|---|
| Do you want to use the default settings? | Yes (default) |
| ||
| ecss-node questions | Replies for ecss1 | Example | ||
| abf.test (needs to be entered)
|
| ||
Do you want to use the standard settings? | No (needs to be entered) |
| ||
Select the items you want to configure: | ntp + cookie (needs to be entered) |
| ||
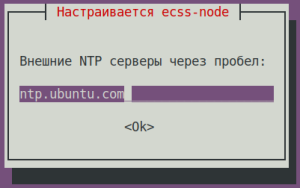
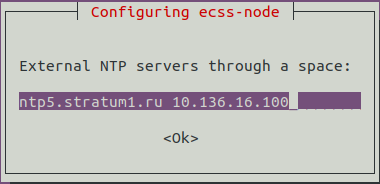
Enter external NTP servers separated by a space: | ntp.ubuntu.com (default) |
| ||
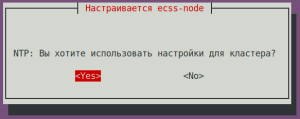
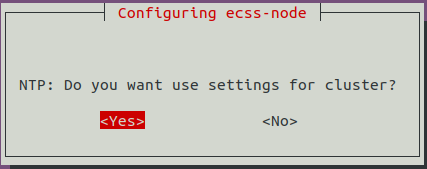
NTP: Do you want to use the settings for the cluster? | Yes (default) |
| ||
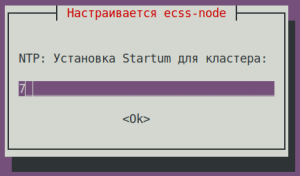
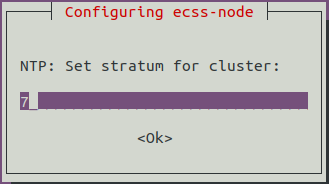
NTP: Installing Startum for a cluster: | 7 (default) |
| ||
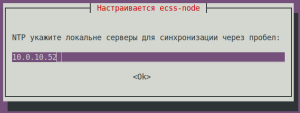
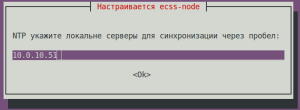
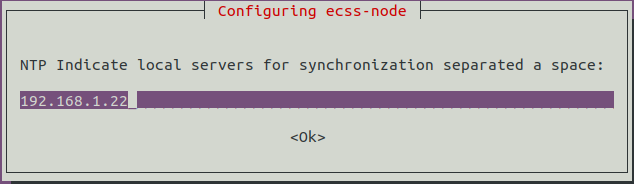
NTP specify local servers for synchronization separated by a space: (in the example ecss2 - 10.0.10.52) | 10.0.10.52 (needs to be entered) |
| ||
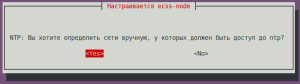
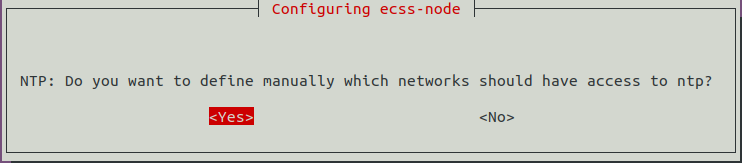
NTP: Do you want to manually define the networks that should have access to NTP? | Yes (default) |
| ||
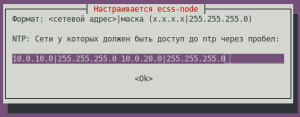
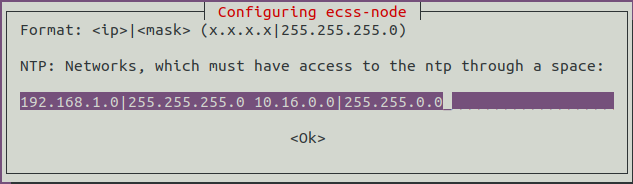
NTP: Enter networks that should have access to NTP separated by a space: (in the example: 10.0.10.0|255.255.255.0 10.0.20.0|255.255.255.0) | 10.0.10.0|255.255.255.0 10.0.20.0|255.255.255.0 (needs to be entered) |
| ||
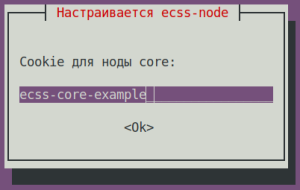
Cookie for the core node: (specify a unique cookie for the core, in the example: ecss-core-example)
| ecss-core-example (needs to be entered) |
| ||
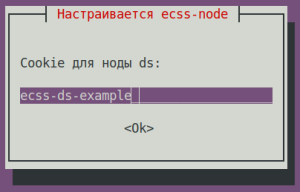
Cookie for ds node: (specify a unique cookie for the ds, in the example: ecss-ds-example)
| ecss-ds-example (needs to be entered) |
| ||
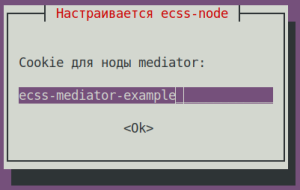
Cookie for mediator node: (specify a unique cookie for the mediator, in the example: ecss-mediator-example)
| ecss-mediator-example (needs to be entered) |
| ||
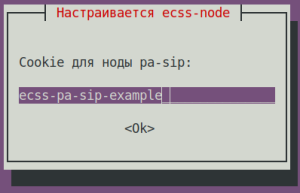
Cookie for mediator pa-sip: (specify a unique cookie for the pa-sip, in the example: ecss-pa-sip-example)
| ecss-pa-sip-example (needs to be entered) |
| ||
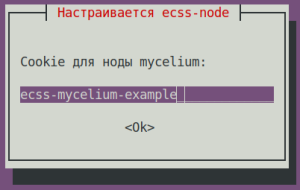
Cookie for mycelium: (specify a unique cookie for the mycelium, in the example: ecss-mycelium-example)
| ecss-mycelium-example (needs to be entered) |
| ||
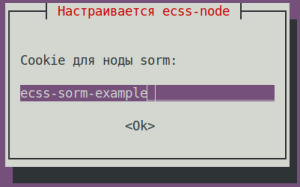
Cookie for sorm: (specify a unique cookie for the sorm, in the example: ecss-sorm-example)
| ecss-sorm-example (needs to be entered) |
| ||
| ecss-user questions | Replies for ecss1 | Example | ||
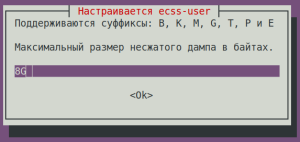
Maximum size of uncompressed dump in bytes. | 8G (default) |
| ||
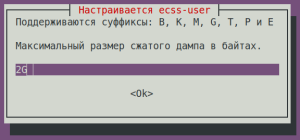
| Maximum size of compressed dump in bytes. | 2G (default) |
| ||
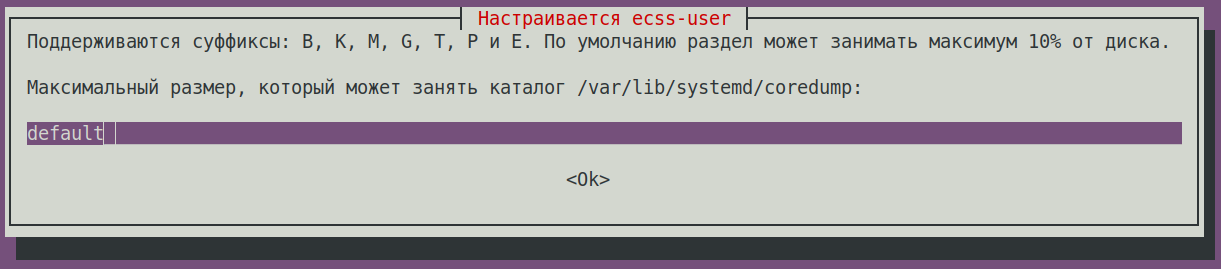
The maximum size that the /var/lib/systemd/coredump directory can occupy is: | default (default) |
| ||
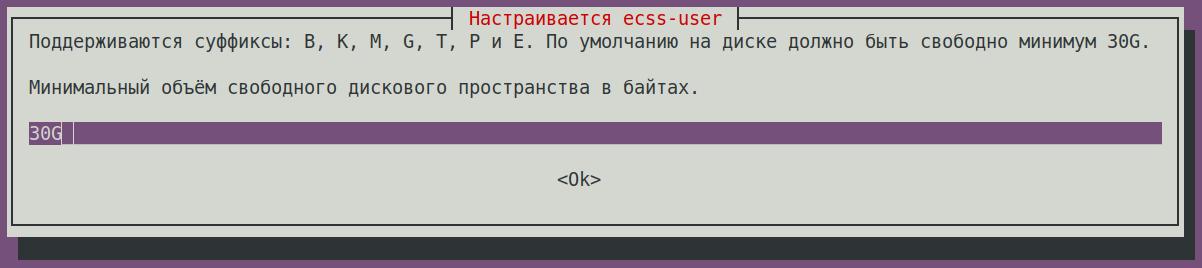
Minimum amount of free disk space in bytes. | 30G (default) |
| ||
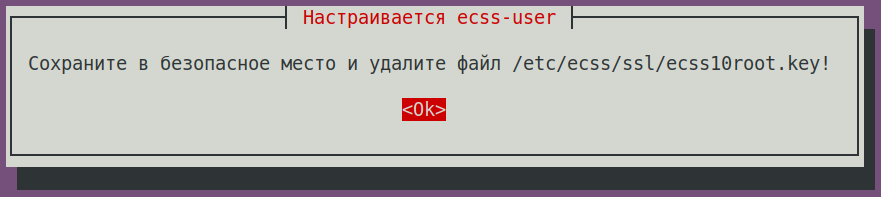
Save to a safe place and delete the file /etc/ecss/ssl/ecss10root.key! | Ok (default) |
| ||
After installing the ecss-node package on host ecss1, run the command sudo usermod -a -G ssw <Username> on host ecss1. |
During installation, it will be prompted to configure the parameters necessary for generating configuration files. Examples of replies are below.
| ecss-user questions | Replies for ecss2 | Example | ||
|---|---|---|---|---|
| Do you want to use the default settings? | No (default) |
| ||
Do you want to disable daily apt package updates? | Yes (default) |
| ||
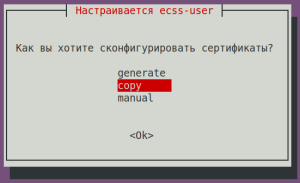
| How do you want to configure certificates? | copy (needs to be entered) |
| ||
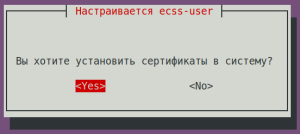
| Do you want to install certificates into the system? | Yes (default) |
| ||
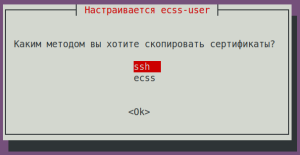
| Which method do you want to copy the certificates? | ssh (needs to be entered) |
| ||
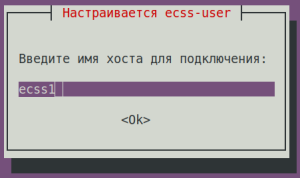
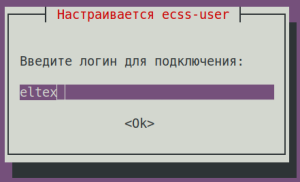
Enter the hostname to connect to: | ecss1 (needs to be entered) |
| ||
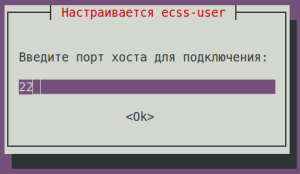
| Enter the host port to connect to: | 22 (default) |
| ||
| Enter your login to connect: (for example: eltex) | eltex (needs to be entered) |
| ||
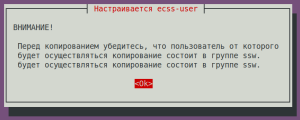
Before copying make sure, that the user from whom the copying will be performed is a member of the group ssw.
| ||||
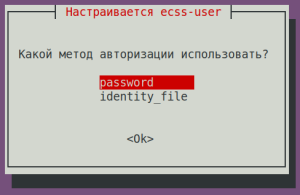
| Which authorization method to use? | password (needs to be selected) |
| ||
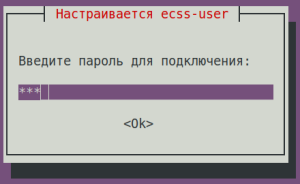
| Enter the password to connect: |
| |||
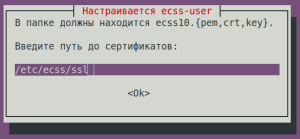
Enter the path to the certificates: | /etc/ecss/ssl (default) |
| ||
| ecss-node questions | Replies for ecss2 | Example | ||
| abf.test (needs to be entered)
|
| ||
Do you want to use the standard settings? | No (needs to be selected) |
| ||
Select the items you want to configure: | ntp + cookie (needs to be selected) |
| ||
Enter external NTP servers separated by a space: | ntp.ubuntu.com (default) |
| ||
NTP: Do you want to use the settings for the cluster? | Yes (default) |
| ||
NTP: Installing Startum for a cluster: | 7 (default) |
| ||
NTP specify local servers for synchronization separated by a space: (in the example ecss2 - 10.0.10.51) | 10.0.10.51 (needs to be entered) |
| ||
NTP: Do you want to manually define the networks that should have access to NTP? | Yes (default) |
| ||
NTP: Enter networks that should have access to NTP separated by a space: (in the example: 10.0.10.0|255.255.255.0 10.0.20.0|255.255.255.0) | 10.0.10.0|255.255.255.0 10.0.20.0|255.255.255.0 (needs to be entered) |
| ||
Cookie for the core node: (specify a unique cookie for the core, in the example: ecss-core-example)
| ecss-core-example (needs to be entered) |
| ||
Cookie for ds node: (specify a unique cookie for the ds, in the example: ecss-ds-example)
| ecss-ds-example (needs to be entered) |
| ||
Cookie for mediator node: (specify a unique cookie for the mediator, in the example: ecss-mediator-example)
| ecss-mediator-example (needs to be entered) |
| ||
Cookie for mediator pa-sip: (specify a unique cookie for the pa-sip, in the example: ecss-pa-sip-example)
| ecss-pa-sip-example (needs to be entered) |
| ||
Cookie for mycelium: (specify a unique cookie for the mycelium, in the example: ecss-mycelium-example)
| ecss-mycelium-example (needs to be entered) |
| ||
Cookie for sorm: (specify a unique cookie for the sorm, in the example: ecss-sorm-example)
| ecss-sorm-example (needs to be entered) |
| ||
| ecss-user questions | Replies for ecss1 | Example | ||
Maximum size of uncompressed dump in bytes. | 8G (default) |
| ||
| Maximum size of compressed dump in bytes. | 2G (default) |
| ||
The maximum size that the /var/lib/systemd/coredump directory can occupy is: | default (default) |
| ||
Minimum amount of free disk space in bytes. | 30G (default) |
| ||
Save to a safe place and delete the file /etc/ecss/ssl/ecss10root.key! | Ok (default) |
| ||
Check the status of services with the following command:
systemctl is-active ecss-core ecss-pa-sip ecss-ds ecss-mediator ecss-mycelium |
If the status is "active", continue; if the status is "inactive", run the command "sudo systemctl restart ecss-<package name>"
systemctl is-active ecss-core ecss-pa-sip ecss-ds ecss-mediator ecss-mycelium active active active active active |
With the default installation (Do you want to use default settings?), NTP configuration will not be performed. Configure NTP, if needed:
Time synchronization on servers
Example:
Next, it is recommended to set the current system date as close to real time as possible. For this, you can use the manual time synchronization utility ntpdate. Example of setting the time from the ntp.ubuntu.com server:
The date command without parameters displays the current system time. Installing and Configuring NTPNTP configuration is configured when installing the ecss-node package. Let's look at configuring NTP for a cluster of two ecss servers with the following parameters:
During installation, you'll be asked several questions to generate a configuration file. Below is an example of replies: It is necessary to enter external servers separated by spaces (the default is ntp.ubuntu.com):
Enable (Yes) or disable (No) TOS orphan mode (a cluster mode in which servers independently manage synchronization). If the system is installed in a cluster, ECSS servers must have the same time, even if external NTP servers are unavailable. Therefore, it is necessary to select "Yes."
Stratum cluster time precision. Default: 7: It will be prompted to enter the addresses of neighboring cluster servers to synchronize them with each other. In this example, we're configuring ecss1, so we'll enter the address of ecss2. When configuring ecss2, we'll enter the address of ecss1. If you have multiple servers, separate them with spaces.
Next, configure the subnet addresses from which other devices are allowed to synchronize with this server:
Specify the networks that can access this server so that other nodes and other devices can synchronize time with this server. The format for specifying networks is: <network_address|network_mask>. If there are multiple networks, listed them separated by spaces.
After installation, the settings are saved in the file /etc/ecss/ecss-ntp.conf. Here's an example of the resulting file for the ecss1 server:
For ecss2, the file will be similar, except for the peer line to the neighboring server (192.168.1.21):
In Orphan mode, servers in the cluster synchronize with each other, determine the master, and ensure that the cluster time is synchronized. All dependent devices in the ECSS-10 system must synchronize with the cluster servers. If a non-redundant configuration is used, the cluster mode setting can be omitted: in this case, the configuration file will not contain a section for configuring local servers to synchronize with each other.
The correct way is to use the dpkg-reconfigure command:
To view synchronization status information, use the ntpq –p command. If you use the optional –n key, the IP address will be displayed instead of the server name: Example:
Description of parameters:
Meaning of symbols before server names x — fake source by intersection algorithm; After starting the service, it may take about 10 minutes to establish time synchronization with the underlying NTP server. You can check the status of the configured NTP server using the ntpdate command:
The server stratum value became equal to 2. |
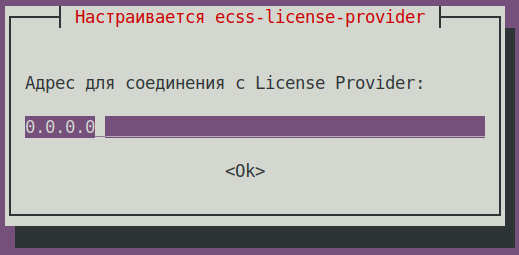
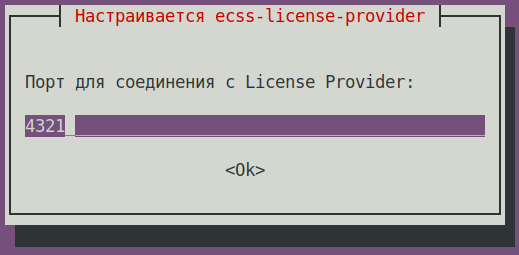
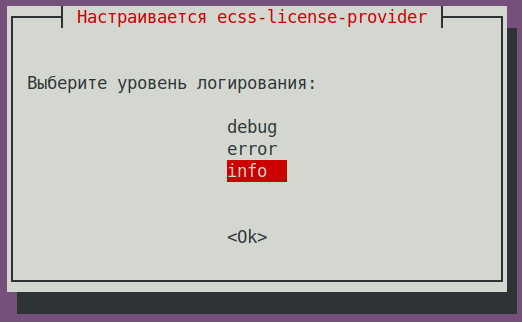
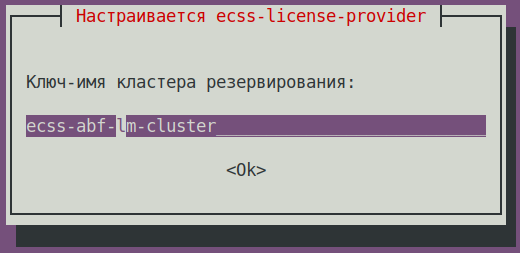
The ECSS-10 system uses the "License Provider" – the ECSS ecosystem's license distribution service, consisting of ecss-license-agent and ecss-license-provider.
LP configurationThe ecss-license-provider service uses two configuration files: /etc/ecss/ecss-license-provider/config.env and /etc/ecss/ecss-license-provider/config.yaml. The config.yaml file contains the basic settings for connecting to the ELM server, including where to obtain licenses, which licenses to use, and where to transfer them. All of this must be configured manually.
To enable system nodes to become operational, it is necessary to configure the system by specifying the names of the hosts on which the ecss services are deployed. Command in CoCon: /system/clusters/set [<host1>, <host2>, ... <hostN>]. For an example cluster of two hosts (hostnames ecss1 and ecss2), run the command:
Connecting the SSW to the License ProviderConfigure the SSW connection to the LP using the following command in CoCon (in this example, the LP is installed in a cluster, with IPadd hosts 10.0.10.51 and 10.0.10.52. The default port value from the /etc/ecss/ecss-license-provider/config.env file is 4321):
After completion, check the connection status with the command:
All hosts must have the alive=true status. One must be "current."
If the status of one of the LP hosts is shown as current, it is possible to send a request to download a license to the SSW using the command:
Depending on the selected license type for SSW: "type=elm" or "type=ecss_license", we will receive different output from the license viewing command:
or
|
Perform configuration for the Sip adapter by running the following command:
sudo systemctl edit ecss-pa-sip.service |
Add the following data to the configuration file:
[Service] LimitNOFILE=65536 |
These two lines need to be inserted in a specific location. (Starting with Ubuntu 22.04.2, there are a few important points. The file that opens is completely commented out, but the first few lines look like in the image below. Any edits you make should be between these two comment blocks). |
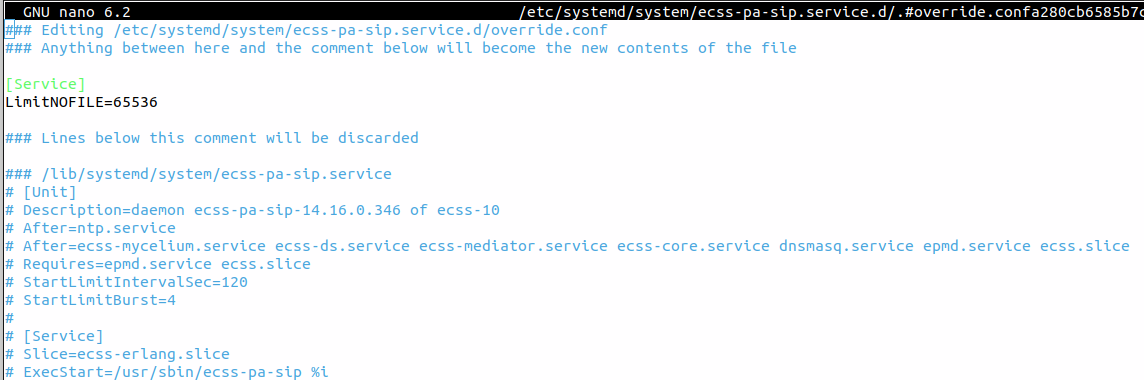
Reload the configuration
sudo systemctl daemon-reload |
Update the configuration file by rebooting the server:
sudo systemctl restart ecss-mycelium ecss-ds ecss-core ecss-pa-sip ecss-mediator |
For the cluster configuration to function correctly, it is necessary to configure RestFS to run on the GlusterFS server.
Check the /etc/dnsmasq.d/ecss-broker file to ensure the primary and secondary broker addresses match those specified during installation of the ecss-node package.
cat /etc/dnsmasq.d/ecss-broker |
Example of file contents on ecss1 and ecss2 (file contents must be the same on both servers):
address=/primary.broker.ecss/10.0.10.51 address=/secondary.broker.ecss/10.0.10.52 |
Configure glusterfs for ecss-restfs on the first host (ecss1).
To do this, install the glusterfs-server and attr packages on both hosts:
sudo apt install -y glusterfs-server attr |
Start glasterd on both cluster hosts:
sudo systemctl start glusterd |
After launching, create a connection with a remote virtual host, run the command on ecss1:
sudo gluster peer probe 10.0.10.52 |
Check the existence of the created connection, run the command on ecss2:
sudo gluster peer status |
Information about the first host, ecss1, should appear:
Number of Peers: 1 Hostname: ecss1 Uuid: d7319720-ea3a-43a4-a7d5-e97bf9d205b9 State: Peer in Cluster (Connected) |
Perform a similar check on another host, ecss1. You should also see information about the ecss2 partner (or its IP address).
Create a replication cluster, start replication, and check its status. Run the following commands on ecss1:
sudo gluster volume create ecss_volume replica 2 transport tcp 10.0.10.51:/var/lib/ecss/glusterfs 10.0.10.52:/var/lib/ecss/glusterfs force |
On ecss1:
sudo gluster volume start ecss_volume |
On both ecss1 and ecss2 hosts:
sudo gluster volume info |
Thus, the replication status will look like this. Pay attention to the "Status" and "Bricks" fields - they should look like this:
Volume Name: ecss_volume Type: Replicate Volume ID: 3bfc7587-0f85-48ed-9612-21f0d79c6e52 Status: Started Snapshot Count: 0 Number of Bricks: 1 x 2 = 2 Transport-type: tcp Bricks: Brick1: 10.0.10.51:/var/lib/ecss/glusterfs Brick2: 10.0.10.52:/var/lib/ecss/glusterfs Options Reconfigured: transport.address-family: inet nfs.disable: on performance.client-io-threads: off |
To mount the glusterfs partition, perform the following steps on both hosts ecss1 and ecss2:
sudo nano /etc/systemd/system/ecss-glusterfs-mount.service |
[Unit] Description=mount glusterfs After=network.target Requires=network.target [Service] RemainAfterExit=no Type=forking RestartSec=10s Restart=always ExecStart=/sbin/mount.glusterfs localhost:/ecss_volume /var/lib/ecss/restfs -o fetch-attempts=10 ExecStop=/bin/umount /var/lib/ecss/restfs [Install] WantedBy=multi-user.target |
sudo systemctl enable glusterd.service |
sudo systemctl enable ecss-glusterfs-mount.service |
sudo mkdir /var/lib/ecss/restfs |
Run the following commands on both hosts:
sudo systemctl daemon-reload |
sudo systemctl restart ecss-glusterfs-mount.service |
Check that the partition is mounted by running the command df -h on both hosts:
|
When viewing the information, a mounted partition should appear -
localhost:/ecss_volume 46G 59M 44G 1% /var/lib/ecss/restfs
sudo apt install -y ecss-restfs |
Installing ecss-restfs. During installation, you'll be asked a series of questions to create the necessary configuration files. The installer will also prompt you to install and configure the Text2speech package from Yandex.
| ecss-restfs questions | Replies | Example |
|---|---|---|
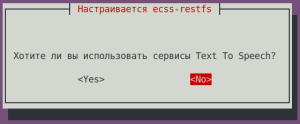
| Do you want to use Text To Speeh (TTS service)? | No (default) |
|
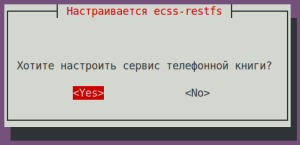
| Do you want to configure phone book? | Yes (needs to be selected) |
|
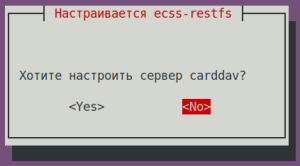
| Do you want to configure carddav server? | No (default) |
|
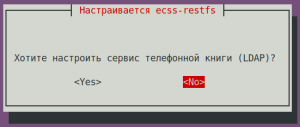
Do you want to configure phone book (LDAP)? | No (default) |
|
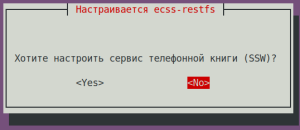
| Do you want to configure phone book (SSW)? | No (default) |
|
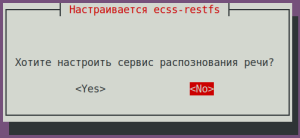
| Do you want to configure speech recognition service? | No (default) |
|
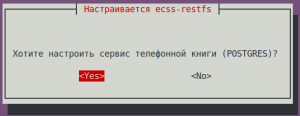
| Do you want to configure phone book (POSTGRES)? | Yes (default) |
|
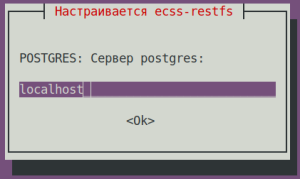
| POSTGRES: postgres service: | localhost (default) |
|
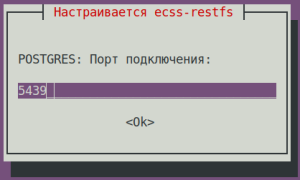
| POSTGRES: Connection port: | 5439 (default) |
|
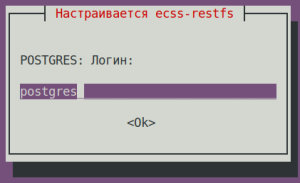
| POSTGRES: Login: | postgres (default) |
|
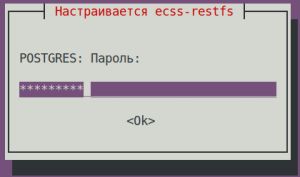
| POSTGRES: Password: | postgres1 (default) |
|
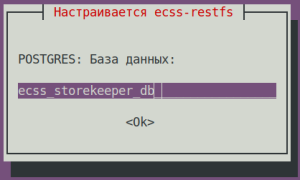
| POSTGRES: database: | ecss_storekeeper_db (default) |
|
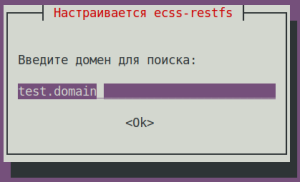
| Enter a domain to search: | test.domain (default) |
|
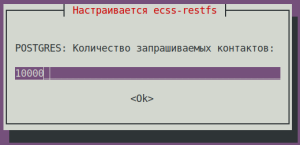
| POSTGRES: Number of contacts requested: | 10000 (default) |
|
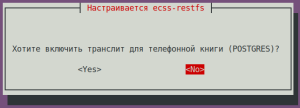
| Do you want to enable transliteration for your phone book (LDAP)? | No (default) |
|
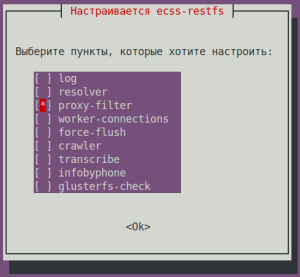
| Select the items you want to customize: | proxy-filter (needs to be selected) |
|
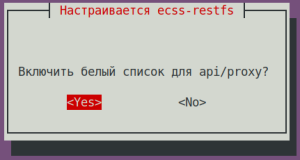
Enable whitelist for api/proxy? |
|
# ------------------------------------------------------------------- |
In case of successful proxying (200), the cache is stored for 28 days, therefore, to apply the filter configuration, in case of changes, the cache (/var/cache/ecss/restfs-api) should be deleted and the ecss-restfs service should be restarted. |
After installing the ecss-restfs package, check for the presence of auto-informer wav files in the /var/lib/ecss/restfs/system/sounds/ directory using the command:
ll /var/lib/ecss/restfs/system/sounds/ |
The presence of wav files in the directory specified above indicates that the ecss-restfs package was installed correctly.
The absence of wav files in the above directory indicates a problem installing the ecss-restfs package. To resolve this, run the following command:
and repeat the verification command:
|
Check the accessibility of these files from the outside. To do this, execute the command on the host ecss1 and ecss2 one by one:
wget http://ecss1:9990/system/sounds/ai_you.wav |
wget http://ecss2:9990/system/sounds/ai_you.wav |
wget http://ecss1:9990/system/sounds/ai_you.wav --2023-12-18 17:43:29-- http://ecss1:9990/system/sounds/ai_you.wav Resolving ecss1 (ecss1)... 127.0.1.1, 10.0.10.51 Connecting to ecss1 (ecss1)|127.0.1.1|:9990... connected. HTTP request sent, awaiting response... 200 OK Length: 11670 (11K) [audio/x-wav] Saving to: ‘ai_you.wav’ ai_you.wav 100%[========================================================================================>] 11,40K --.-KB/s in 0s 2023-12-18 17:43:29 (301 MB/s) - ‘ai_you.wav’ saved [11670/11670] |
verification files can be deleted
rm ai_you.wav rm ai_you.wav.1 |
In a cluster configuration, to prevent simultaneous processing/conversion/deletion of the same file (.pcm/.wav/.mp3) on different ecss1/ecss2 servers, the ecss-restfs-crawler service must be running on only one of the cluster servers. To do this, run the following commands on ecss2:
|
sudo apt install -y ecss-media-server |
For the media server (ecss-media-server/MSR), initial configuration is possible by writing parameters to a configuration file. To do this, configure transport bind-addr,mcc bind-addres:
| ecss-media-server questions | Replies for ecss1 | Replies for ecss2 |
|---|---|---|
| [ MSR SIP ] Enter bind-ip address | 10.0.20.51 (needs to be entered) | 10.0.20.52 (needs to be entered) |
| [MSR Control-Channel] Enter bind-ip address | 10.0.20.51 (needs to be entered) | 10.0.20.52 (needs to be entered) |
After creating the default configurations, perform a check:
cat /etc/ecss/ecss-media-server/config.xml |
The msr configuration is located inside: config.xml, and the default.xml configuration is in the conf.d directory.
Default.xml is an extension of config.xml that defines the accounts section. This is done to ensure that this configuration remains unchanged after package updates. The config.xml file is presented here: configuration file.
<?xml version="1.0" encoding="utf-8"?>
<config date="02:30:33 07.12.2023">
  <general log-level="3" log-rotate="yes" max-calls="8192" max-in-group="512" load-sensor="media" load-delta="10" calls-delta="100" spool-dir-size="100M" log-name="msr.log" log-path="/var/log/ecss/media-server" use-srtp="disabled" enable-ice-transport="no" ice-update="no" aggressive-ice="yes" stun-server="" suspicious-mode="no"/>
  <transport bind-addr="10.0.20.51" port="5040" transport="udp+tcp"/>
  <!-- By default configured public TURN-server -->
  <turn-server use-turn="no" host="numb.viagenie.ca" user="webrtc@live.com" password="muazkh"/>
  <media mixer-clock-rate="8000" use-vad="no" cng-level="0" jb-size="60" rtcp-timeout="0" rtp-timeout="350" udp-src-check="no" cn-multiplier="3" port-start="12000" port-range="2048" tias-in-sdp="no" thread-cnt="2" vid-enc-threads="2" vid-dec-threads="2" video-conf-layout="evenly" keyframe-interval="1000" vid-decode-delay="100" silence-threshold="-30" dtmf-flash-disable="no" video-dscp="0" other-dscp="0" dummy-video-src="/usr/share/ecss-media-server/video/dummy_video.yuv" video-enc-width="640" video-enc-height="360" finalsilence="1000" rtcp-stat-dump="yes" silent-codec-switch="yes"/>
  <codec pcma="1" pcmu="2" ilbc="0" gsm="0" g722="3" g726="0" g729="0" speex="0" l16="0" g7221="0" opus="0" h264="1" h263-1998="2" t38="1" tel-event-pt="0"/>
  <accounts>
    <!-- <dynamic msr_name="msr.name"
            realm="sip:127.0.0.1:5000"
            dtmf_mode="rfc+inband+info"
            auth_name="user"
            auth_password="password" /> -->
  </accounts>
  <pbyte>
    <mcc bind-addr="10.0.20.51" port="5700"/>
  </pbyte>
  <conf_dir path="/etc/ecss/ecss-media-server/conf.d"/>
  <rtp>
    <auto addr-v4=""/>
  </rtp>
</config>
|
By default, after installation, ECSS-10 activates only the following codecs: pcma, pcmu, g722, h264, h263-1998, and t38. The rest have a status of 0 = off. If you want to activate other codecs, use the nano editor to change the priority from 0 to a priority number (the priority level should not be repeated for the audio/video/fax service).
sudo nano /etc/ecss/ecss-media-server/config.xml
To activate all codecs, change the line - <codec pcma="1" pcmu="2" ilbc="0" gsm="0" g722="3" g726="0" g729="0" speex="0" l16="0" g7221="0" opus="0" h264="1" h263-1998="2" t38="1" tel-event-pt="0"/> |
It's not allowed to specify the same priority for different codecs, for example, g726="5" g729="5". Otherwise, they will not work correctly or will be ignored. |
Consider the accounts section (default.xml file):
cat /etc/ecss/ecss-media-server/conf.d/default.xml |
After installing the packages, the file will indicate ip-add 127.0.0.1, and only for one host.
Specify real IP-add in the configuration for both hosts. |
After installing the packages, the file will only contain local IP-add. Add a line with the partner's IP-add and change the file contents to look like the one below (in the example, ecss1 has an IP-add of 10.0.20.51/ecss2 has an IP-add of 10.0.20.52):
sudo nano /etc/ecss/ecss-media-server/conf.d/default.xml |
| Configuring msr for ecss1 (/etc/ecss/ecss-media-server/conf.d/default.xml) | Configuring msr for ecss2 (/etc/ecss/ecss-media-server/conf.d/default.xml) | ||
|---|---|---|---|
|
|
It specifies the current settings used to register msr on core.
The main parameters here are msr_name and realm:
After changing the configuration files /etc/ecss/ecss-media-server/config.xml and /etc/ecss/ecss-media-server/conf.d/default.xml, restart the ecss-media-server for the changes to take effect, using the following command:
sudo systemctl restart ecss-media-server |
sudo apt install -y ecss-web-conf |
The web configurator makes system management more intuitive and convenient. Installing the web configurator is optional, but recommended.
Installing the ecss-web-conf package also automatically installs the ecss-subscriber-portal-ui package. The ECSS-10 Subscriber Portal application allows subscribers to independently manage services, view information on completed calls and active conferences, and configure their own IVR scripts for incoming calls. A description of the web configurator is provided in the "Subscriber Portal" section.
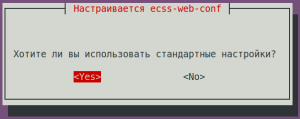
| ecss-web-conf questions | Replies for both hosts | Example |
|---|---|---|
| Хотите ли вы использовать стандартные настройки? | Yes (значение по умолчанию) |
|
Check the connectivity of the web interface http://10.0.20.51, user/password - admin/password. Not all functions are available at the moment, but the web interface should be working and the login successful.
Configure VRRP for the SIP adapter by creating the following files on both hosts:
The global configuration file, keepalived.conf. The file contents are the same on both hosts:
sudo nano /etc/keepalived/keepalived.conf |
Copy and paste the following text into the /etc/keepalived/keepalived.conf file
global_defs {
    vrrp_version 3          # VRRP protocol version (2 or 3)
    script_user nobody      # a limited system user under which accessibility check scripts will be run
    enable_script_security  # Do not run scripts as root if part of the path to them is writable by regular users
}

include /etc/keepalived/sip.conf
|
Configuration file sip.conf:
sudo nano /etc/keepalived/sip.conf |
| etc/keepalived/sip.conf for ecss1 | etc/keepalived/sip.conf for ecss2 | ||
|---|---|---|---|
|
|
In this case, support for virtual interfaces with a Master-Backup relationship was added. For ecss1, the primary interface will be net.20:SIP1, and the backup interface will be net.20:SIP2. It's important to note that the configuration takes into account the use of address variables. In the "interface" section, you must specify the interface on which VRRP messages will be listened, and in the "virtual_ipaddress" section, you must specify the interface on which the virtual address will be restored.
Restart keepalived:
sudo systemctl restart keepalived.service |
To check the correct installation, run the ifconfig command, at the end of the output message you should see a new interface - net.20:SIP1 with the selected IP address
ifconfig

. . .
net.20:SIP1: flags=4163<UP,BROADCAST,RUNNING,MULTICAST> mtu 1500
inet 10.0.20.31 netmask 255.255.255.0 broadcast 0.0.0.0
ether 08:00:27:6d:4f:02 txqueuelen 1000 (Ethernet)

ifconfig

. . .
net.20:SIP2: flags=4163<UP,BROADCAST,RUNNING,MULTICAST>  mtu 1500
        inet 10.0.20.32  netmask 255.255.255.0  broadcast 0.0.0.0
ether 08:00:27:05:03:39 txqueuelen 1000 (Ethernet) |
SNMP configuration is described in the "Management and Monitoring via SNMP" section.
Configure the SSH server:
sudo nano /etc/ssh/sshd_config |
Specify the port and address to which the server can be accessed in the configuration file:
| Configuring ssh for ecss1 (/etc/ssh/sshd_config) | Configuring ssh for ecss2 (/etc/ssh/sshd_config) |
|---|---|
# This is the sshd server system-wide configuration file. See # This sshd was compiled with PATH=/usr/bin:/bin:/usr/sbin:/sbin # The strategy used for options in the default sshd_config shipped with Port 2000 <...> | # This is the sshd server system-wide configuration file. See # This sshd was compiled with PATH=/usr/bin:/bin:/usr/sbin:/sbin # The strategy used for options in the default sshd_config shipped with Port 2000 <...> |
Restart ssh:
sudo systemctl restart ssh.service |
Open CLI - CoCon:
ssh admin@localhost -p 8023 |
Installing all services specified in the license:
/cluster/storage/ds1/ss/install ds1@ecss1 ss_* |
/cluster/storage/ds1/ss/install ds1@ecss1 ss_* Successfully installed: /var/lib/ecss/ss/ss_dnd.xml Successfully installed: /var/lib/ecss/ss/ss_clir.xml . . . Successfully installed: /var/lib/ecss/ss/ss_chunt.xml |
It is recommended to use the latest available browser versions. Recommended browsers: Opera, Chrome.
To start configuring the system, go to the web configurator: http://<Ipadd SSW>.
To determine and register in the system, the following are planned:
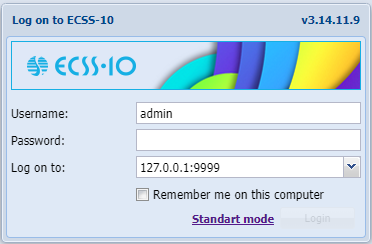
Figure 1 — Log in to the web configurator (authorization window)
In the authorization window, enter the values defined during the installation of the web configurator.
Default values for authorization: Login: admin Password: password |
After logging in, the main workspace with application icons will be visible, as well as status bar with available options, in particular:
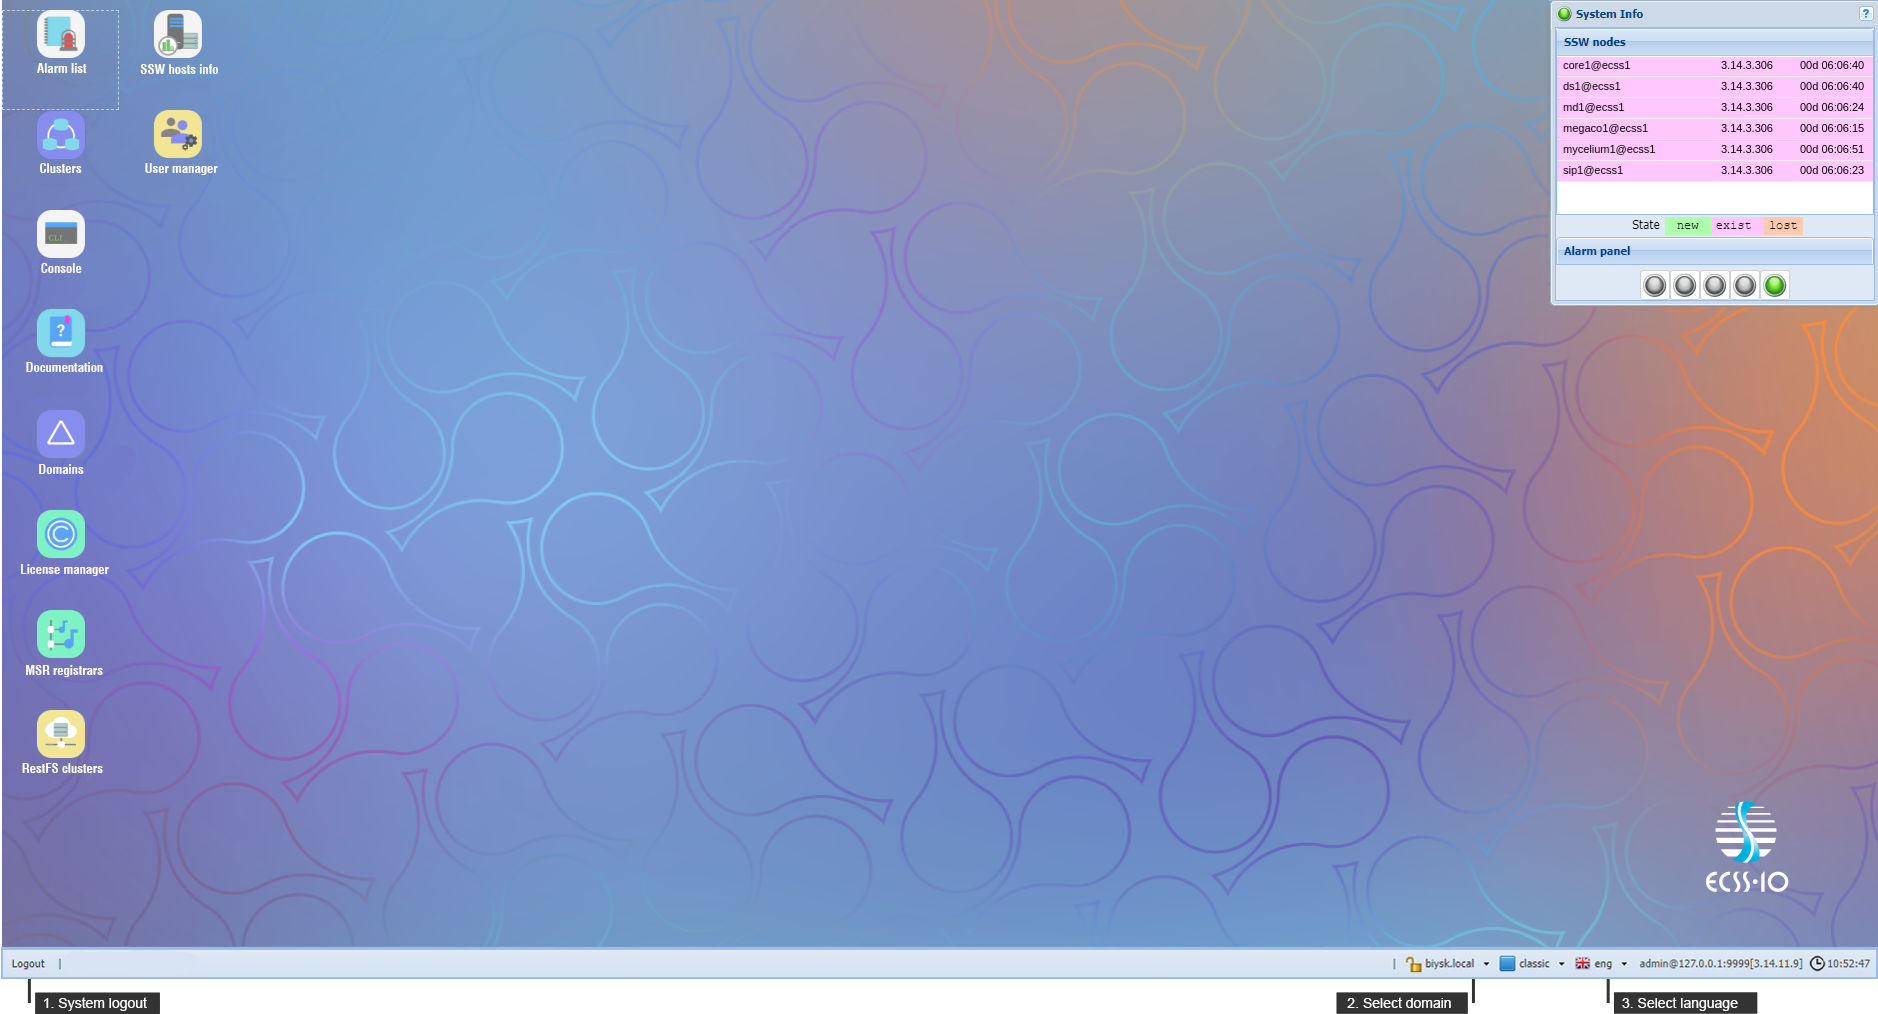
Figure 2 — View of the web configurator workspace
After authorization, in order to increase security during the operation of the software switch, it is recommended to create accounts for operators, as well as to change the password for the admin user.
To create a new operator account, use User manager application:
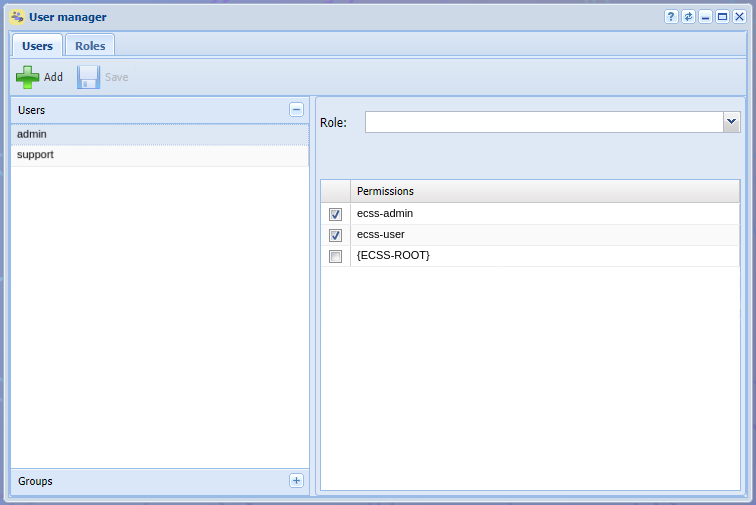
Figure 3 — Application view "User Manager"
Click the "Add" button  . In the window that opens, define a new account, for this:
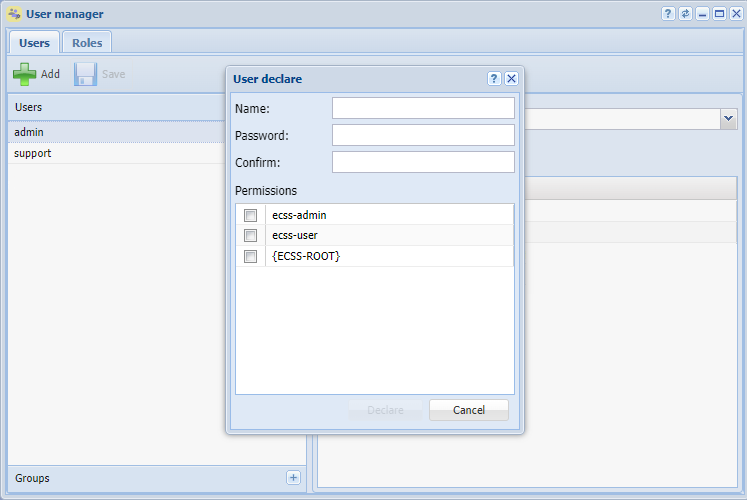
Figure 4 — Operator account creation dialog box
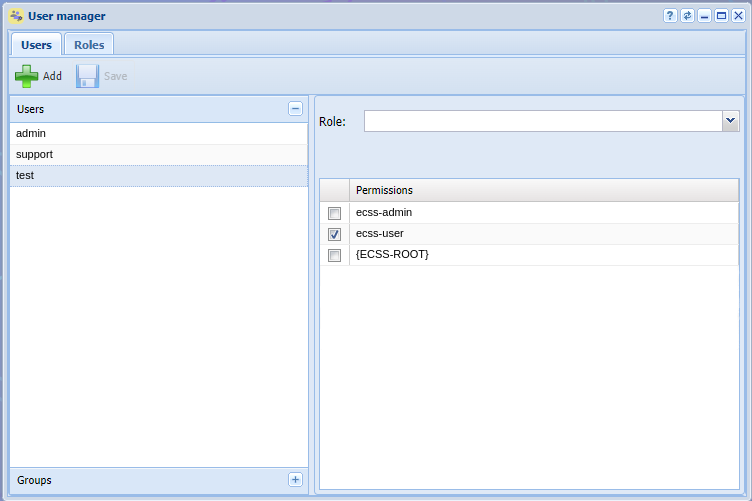
Figure 5 — Application view with created operator account
To change the password, click the edit button next to the user name. In the dialog box that opens, enter:
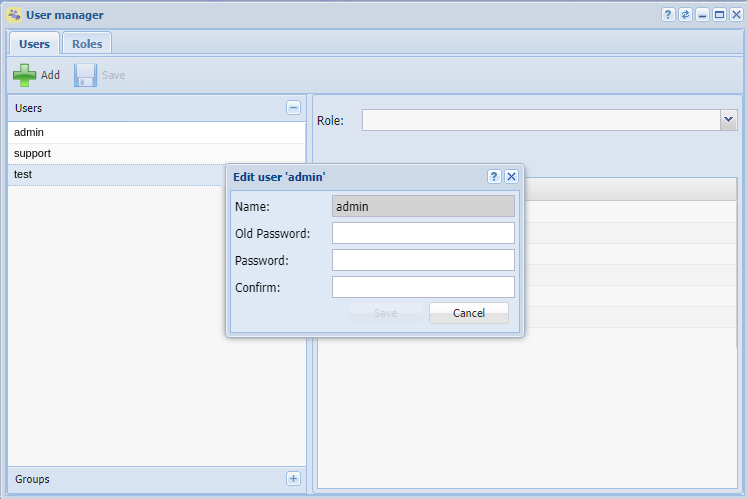
Figure 6 — Edit user dialog box
To begin working with the media server immediately after its registration, it is necessary to activate the MSR network interfaces. The web configurator application "MSR registrars" is used to configure media resources.
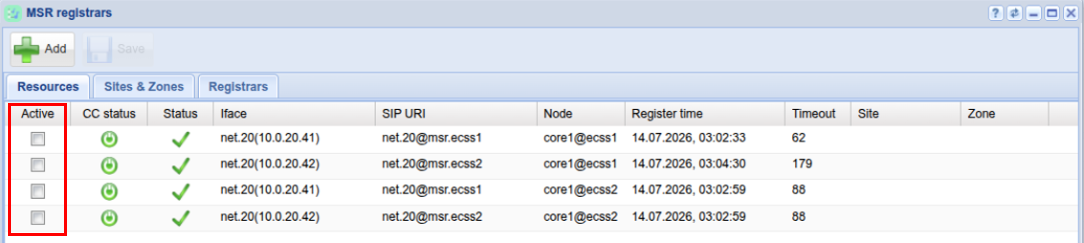
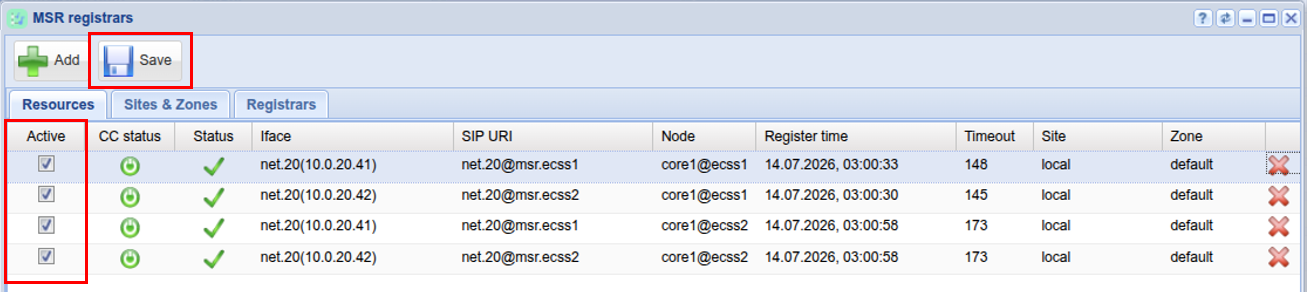
Figure 7 — MSR registrars
Set the IP address for receiving connections from the media server, changing the value 0.0.0.0 to the actual MSR addresses:
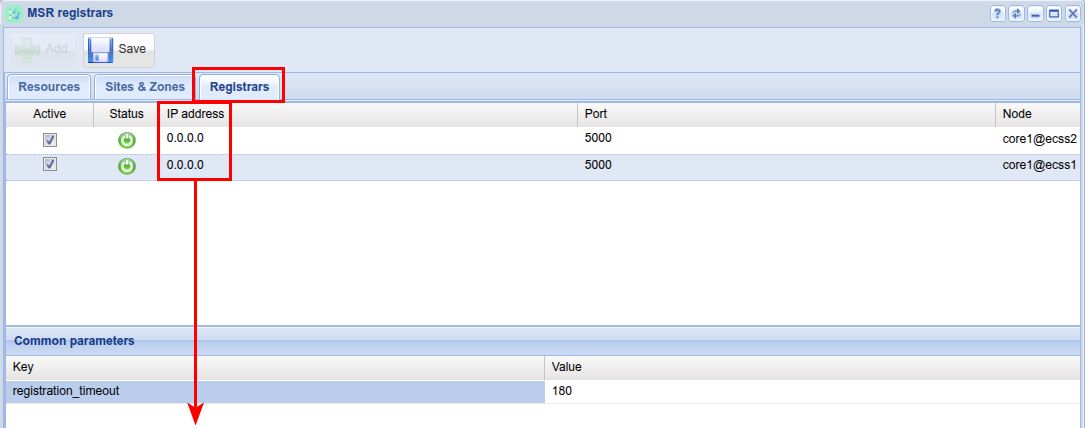
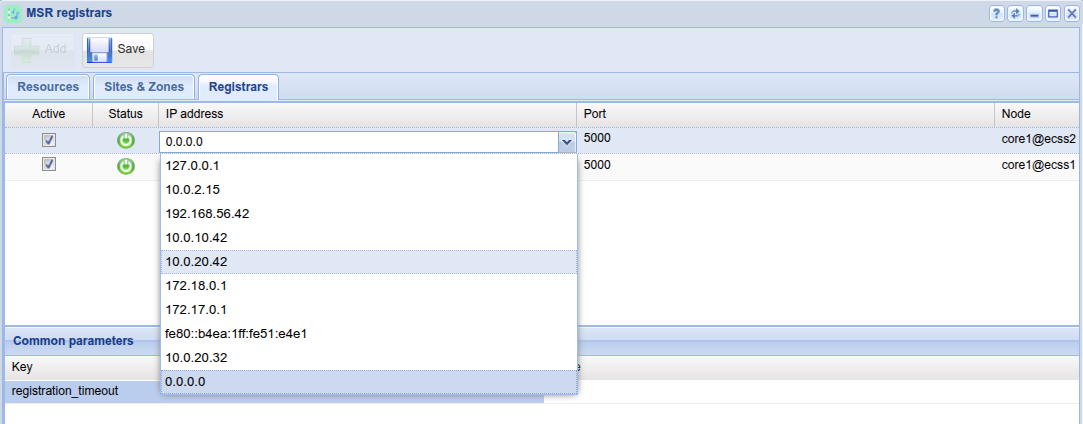
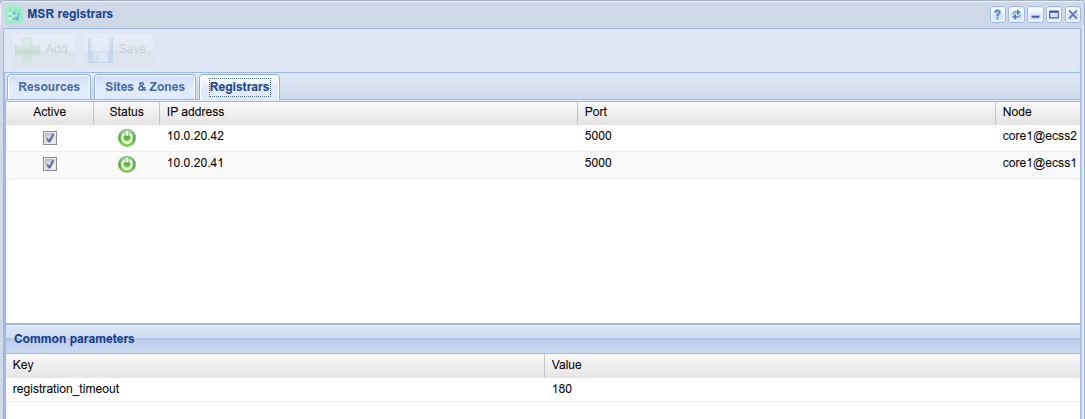
Figure 8 — Setting the IP address of the MSR
To configure an interface, open the Clusters application.
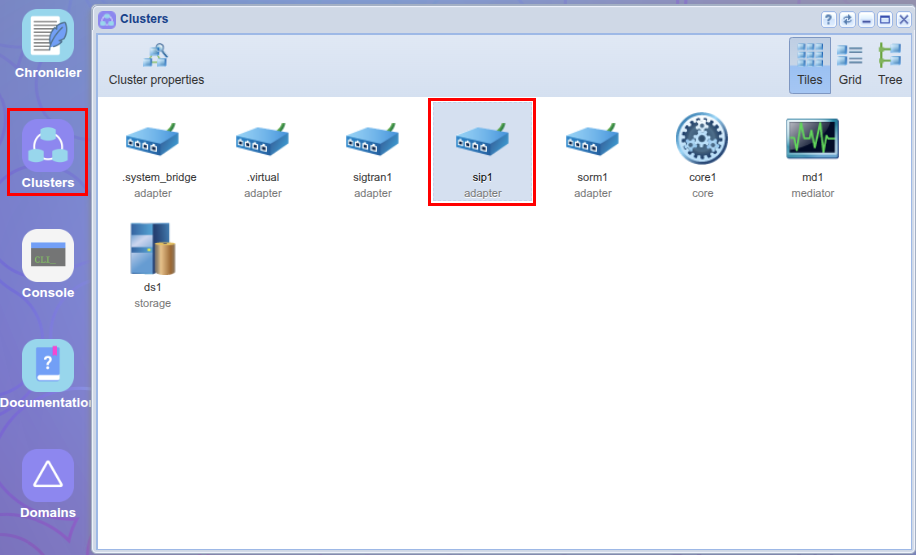
Figure 9 — Clusters application view
To create a new IP address group (IP-set), select the SIP adapter cluster "sip1" and click on the Cluster Properties button (or double-click on the cluster icon with left mouse button).
In the dialog box that appears, go to the Transport tab. Next, click on Add button. New group will appear. To edit the fields, double-click the one you need:
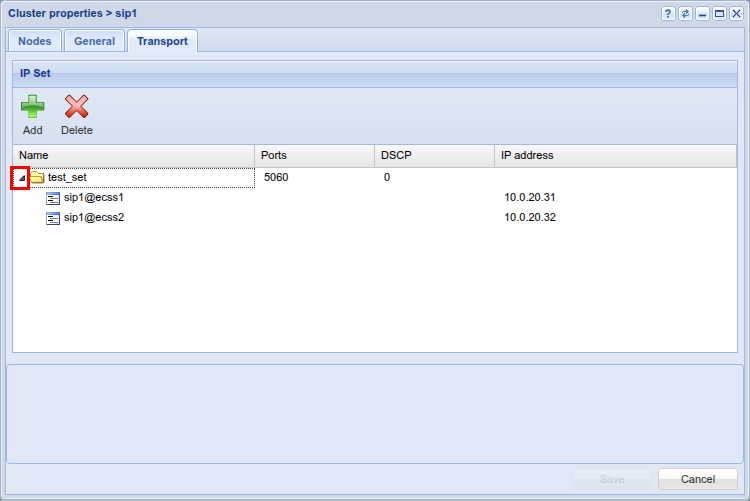
Figure 12 — Clusters/Transport application view for a cluster
Click Save to apply the settings.
Domain is a virtual PBX within our SSW. We can create as many of virtual PBXs as needed for a project.
To create a domain, log in to the Domains application. In the window that opens, create a domain:
1. Click the Add domain button:
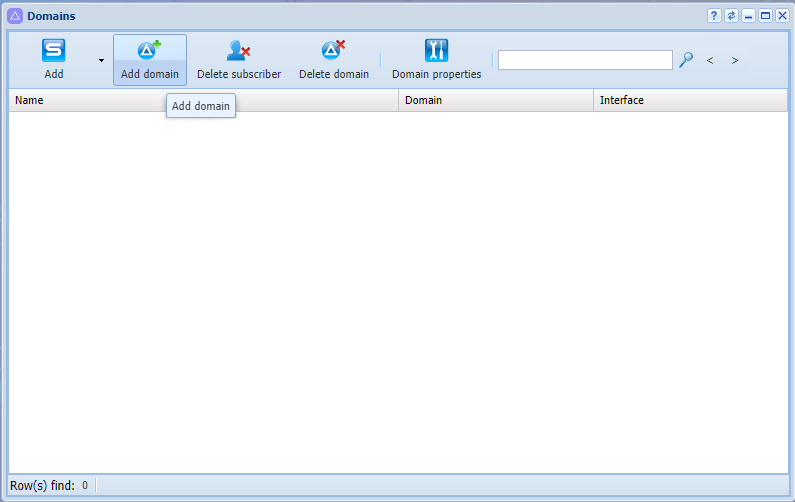
Figure 11 — Adding domain to the system
2. The following settings are available in the dialog box that opens:
Enter the domain name, for example "test_domain";
3. Click Ok:
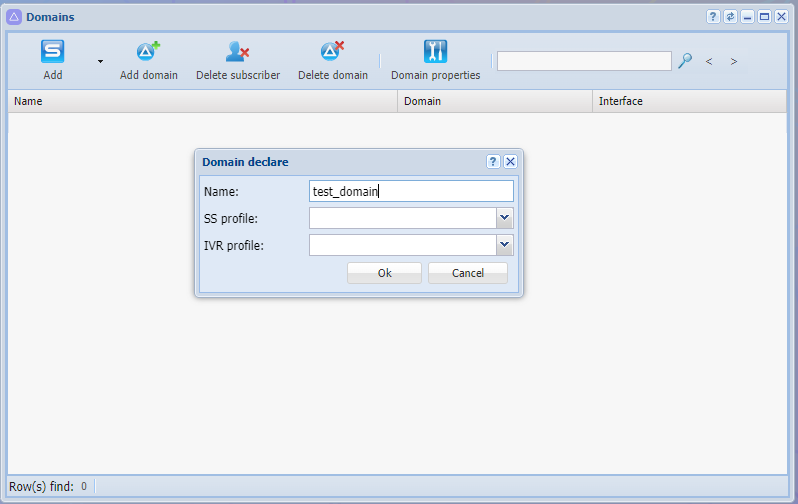
Figure 12 — Domain declare
4. Click the Update button.
Created domain will be displayed in the current configuration:
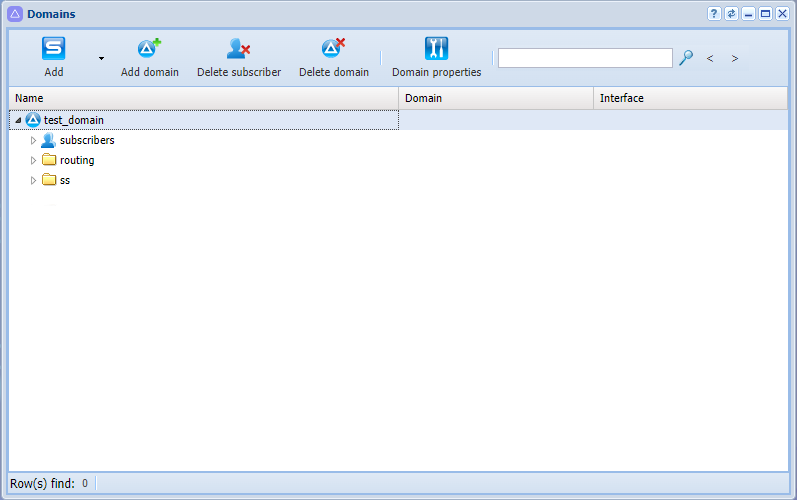
Figure 13 — Displaying created domain
To edit current domain, it must be selected in the system. To switch to a domain, use the domain selection option (see point 2 in the figure View of the web configurator workspace).
After selecting the domain, according to the current system configuration, all applications will be available:
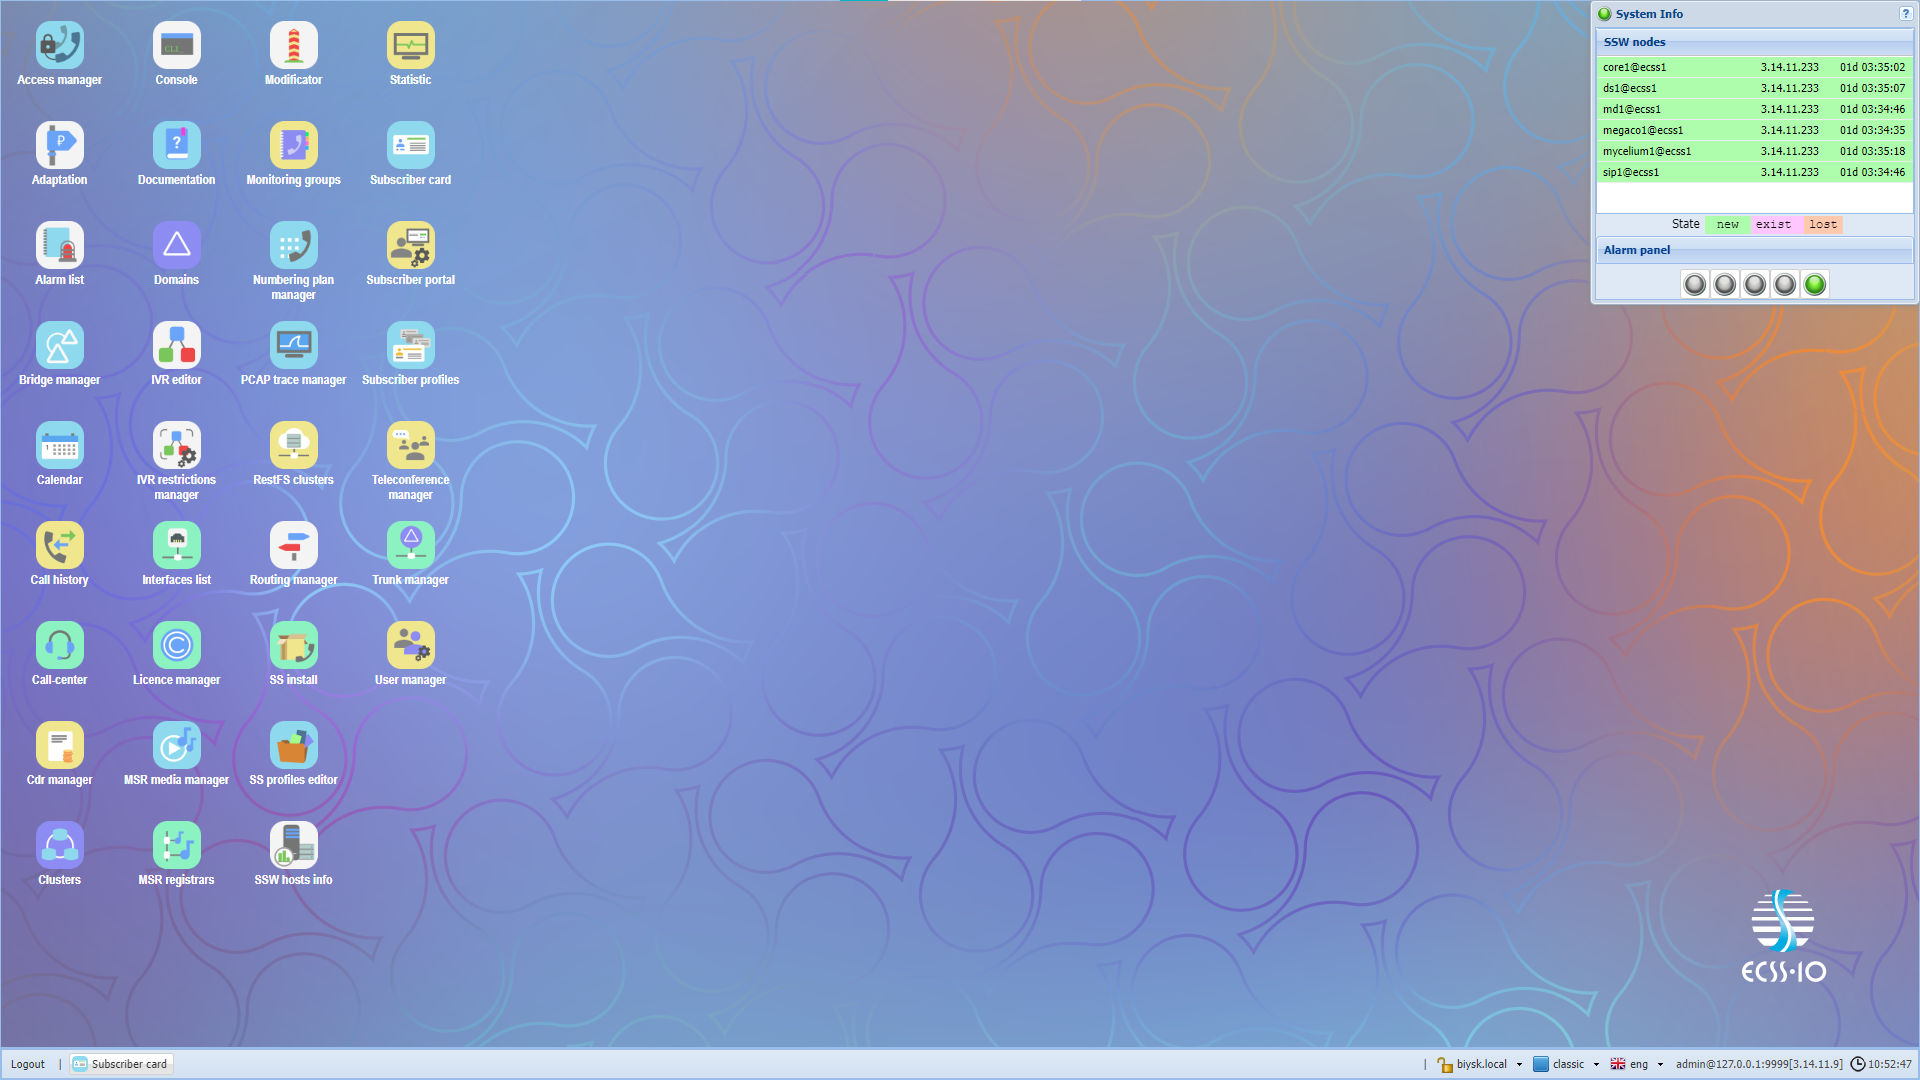
Figure 14 — Displaying applications in current system configuration
To link an address group to a domain, return to the "Domain" app, select the domain, and go to the settings by clicking the "Domain Properties" button or double-clicking the domain.
In the list settings, open the "SIP" branch, then "SIP Transport," then select the newly created address group in the IP set field. Click "Save" to apply the settings.
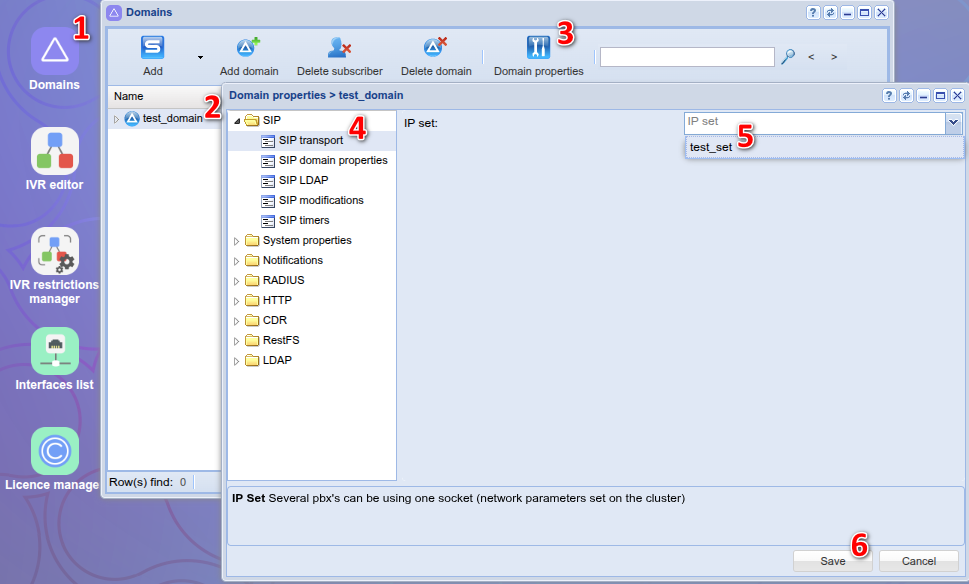
Figure 15 — SIP transport settings
Select the required services for the created domain that will be used (for example, for a subscriber domain, trunk services are not required, and vice versa for a transit domain. There is no need to specify services for the subscriber).
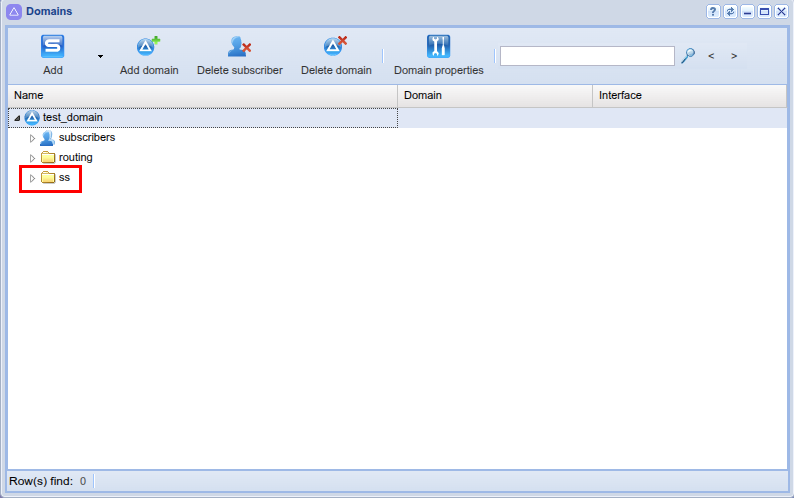
Figure 16 — After creating a new domain, there are no services
Save configuration.
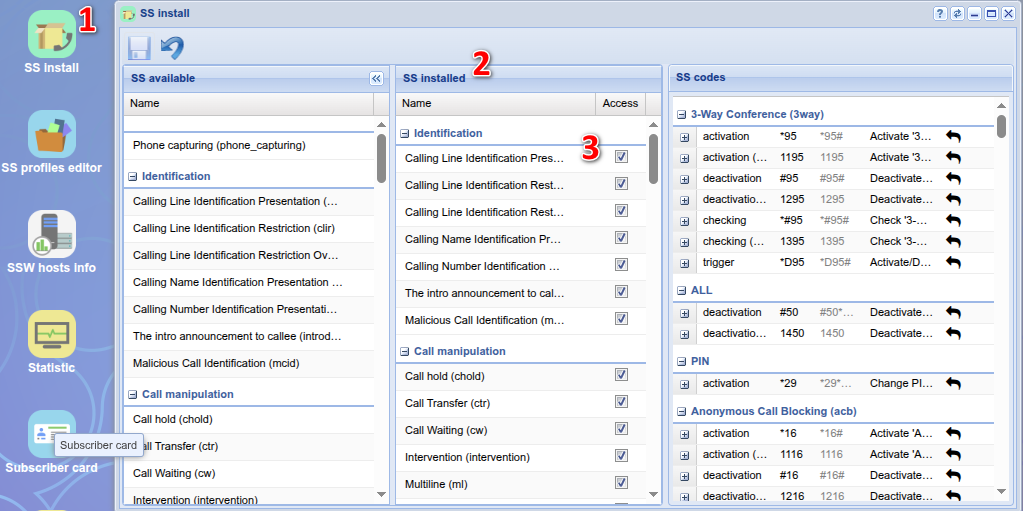
Figure 17 — Selection of services for subscribers/trunks of the new domain
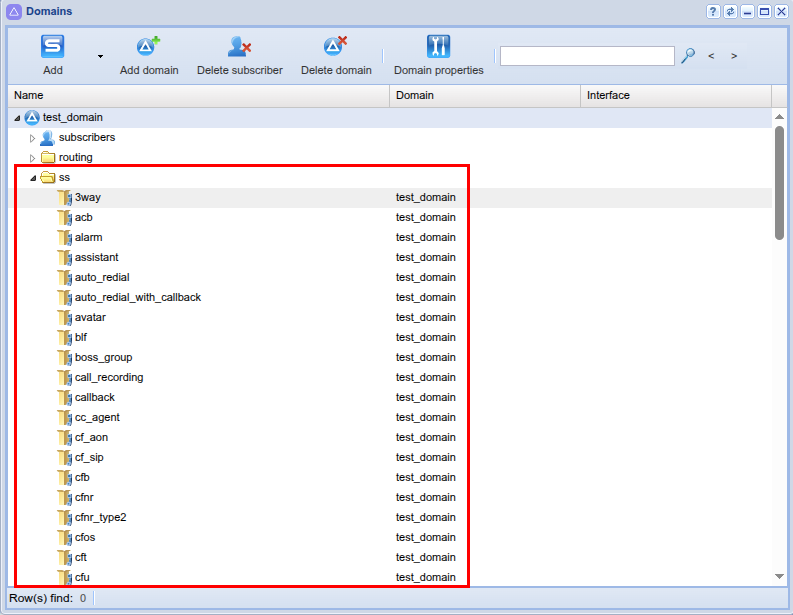
Figure 18 — List of services now available to subscribers of the new domain
The Subscriber card application is used to create and edit subscriber parameters in the system.
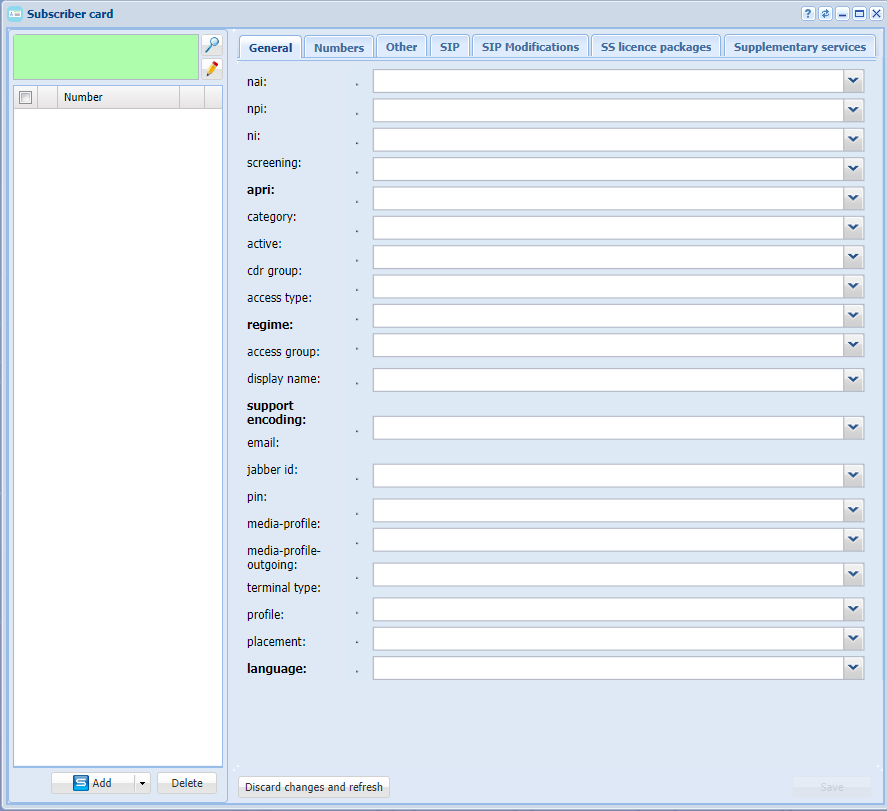
Figure 19 — Subscriber card application view
It is possible to create SIP subscribers and virtual subscribers in the application.
For users with a physical termination, the functionality of the SIP subscriber is used, while the virtual subscriber is used when functionality without physical endings is needed. For example, the number for accessing the ivr script.
To create new subscribers, click on the Add button.
In the dialog box that opens, specify the following parameters:
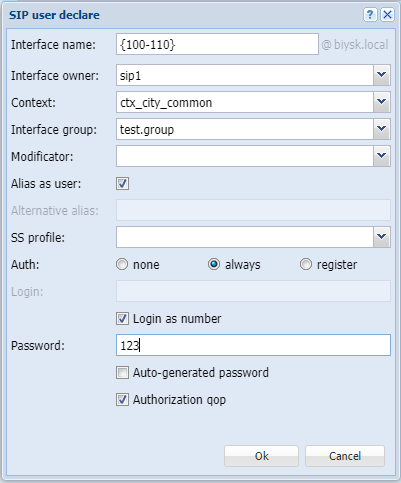 ↓
↓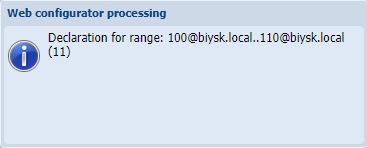
Figure 20 — Example of identifying subscribers in a domain
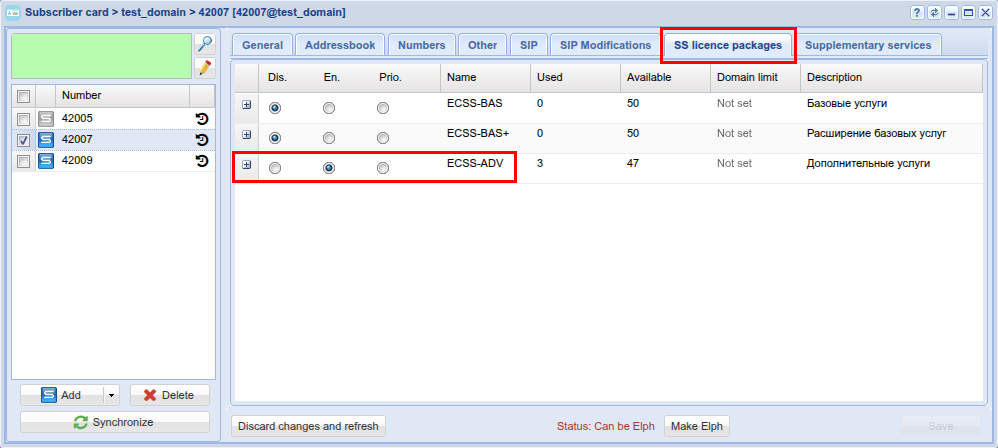
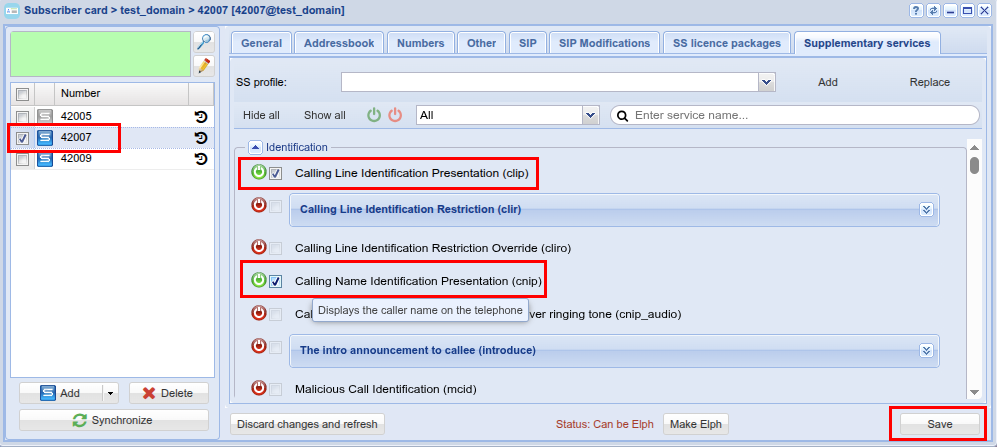
Figure 21 — Example of adding services for a subscriber
Routing is responsible for finding the number and then addressing the call. At least one routing context must be configured for the system to operate correctly.
Routing is configured in Routing Manager application.
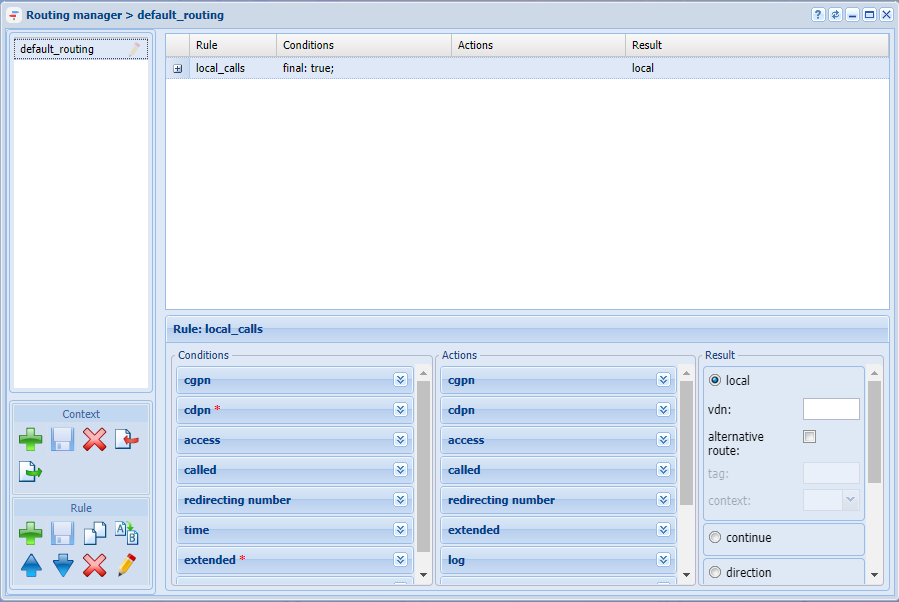
Figure 22 — Routing manager application view
Example of creating a context and a few rules in it:
1. In the left part of the window in the Context section click the Create context button ;
2. In the dialog box that opens, indicate the name of the context, as well as the type of context — empty context:
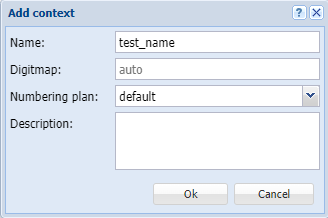
3. Click Save context  ;
;
Create 4 rules in this context:
To create a new rule, select the created context and click Create rule. In the window that appears, enter name of the rule. Then save the newly created rules.
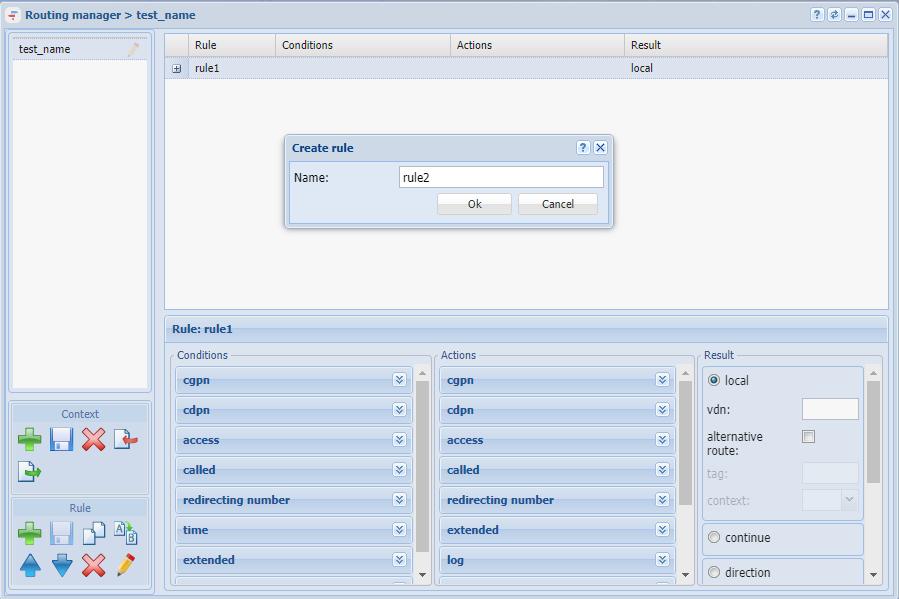
Figure 23 — Creating routing context rule
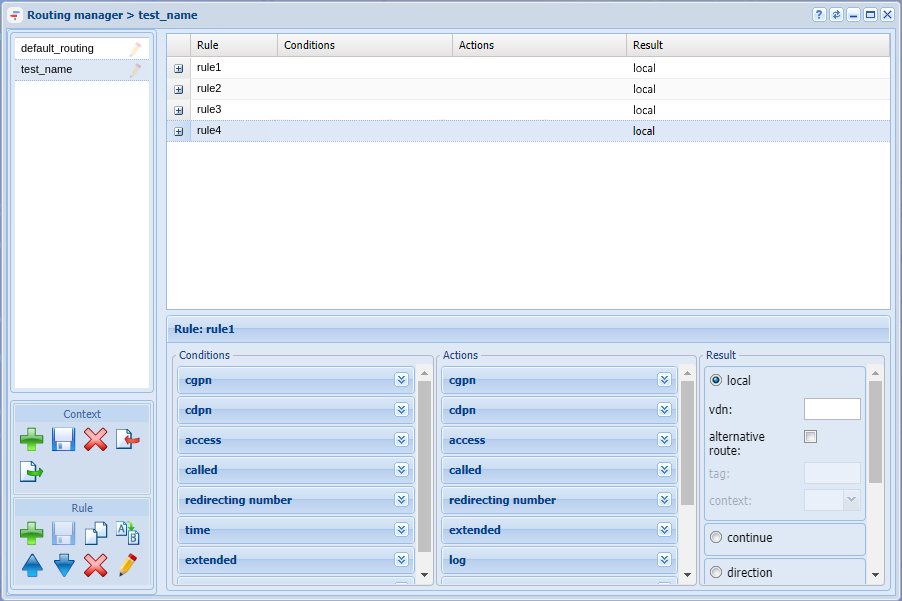
Figure 24 — Defining rules
At the moment, the trunk that can be referred in a rule is not defined, however it is possible to specify the numbers by which the selection will be made.
Go to the lower part of the screen by clicking on the rule1, where the areas for editing the routing context are located. It is conditionally defined in the example that selection for entering the trunk will be carried out based on the characteristics of the called subscriber number (CDPN), and the numbers in the trunk should start with digit 4.
Functionally, the routing context is divided into three parts:
rule1: To access the trunk, edit each part correctly:
To configure the result field, the trunk must be defined in the system, so return to configuring this rule a little later.
Configure remaining rules in the same way.
For rule2:
For rule 3, assume that subscribers with numbers 108, 109 and 110 get into the informant ivr script before calling further.
To configure the result field, ivr script must be defined in the system, so return to configuring this rule later.
For rule 4, define an exception rule — this is a rule that works in case any other rules fail.
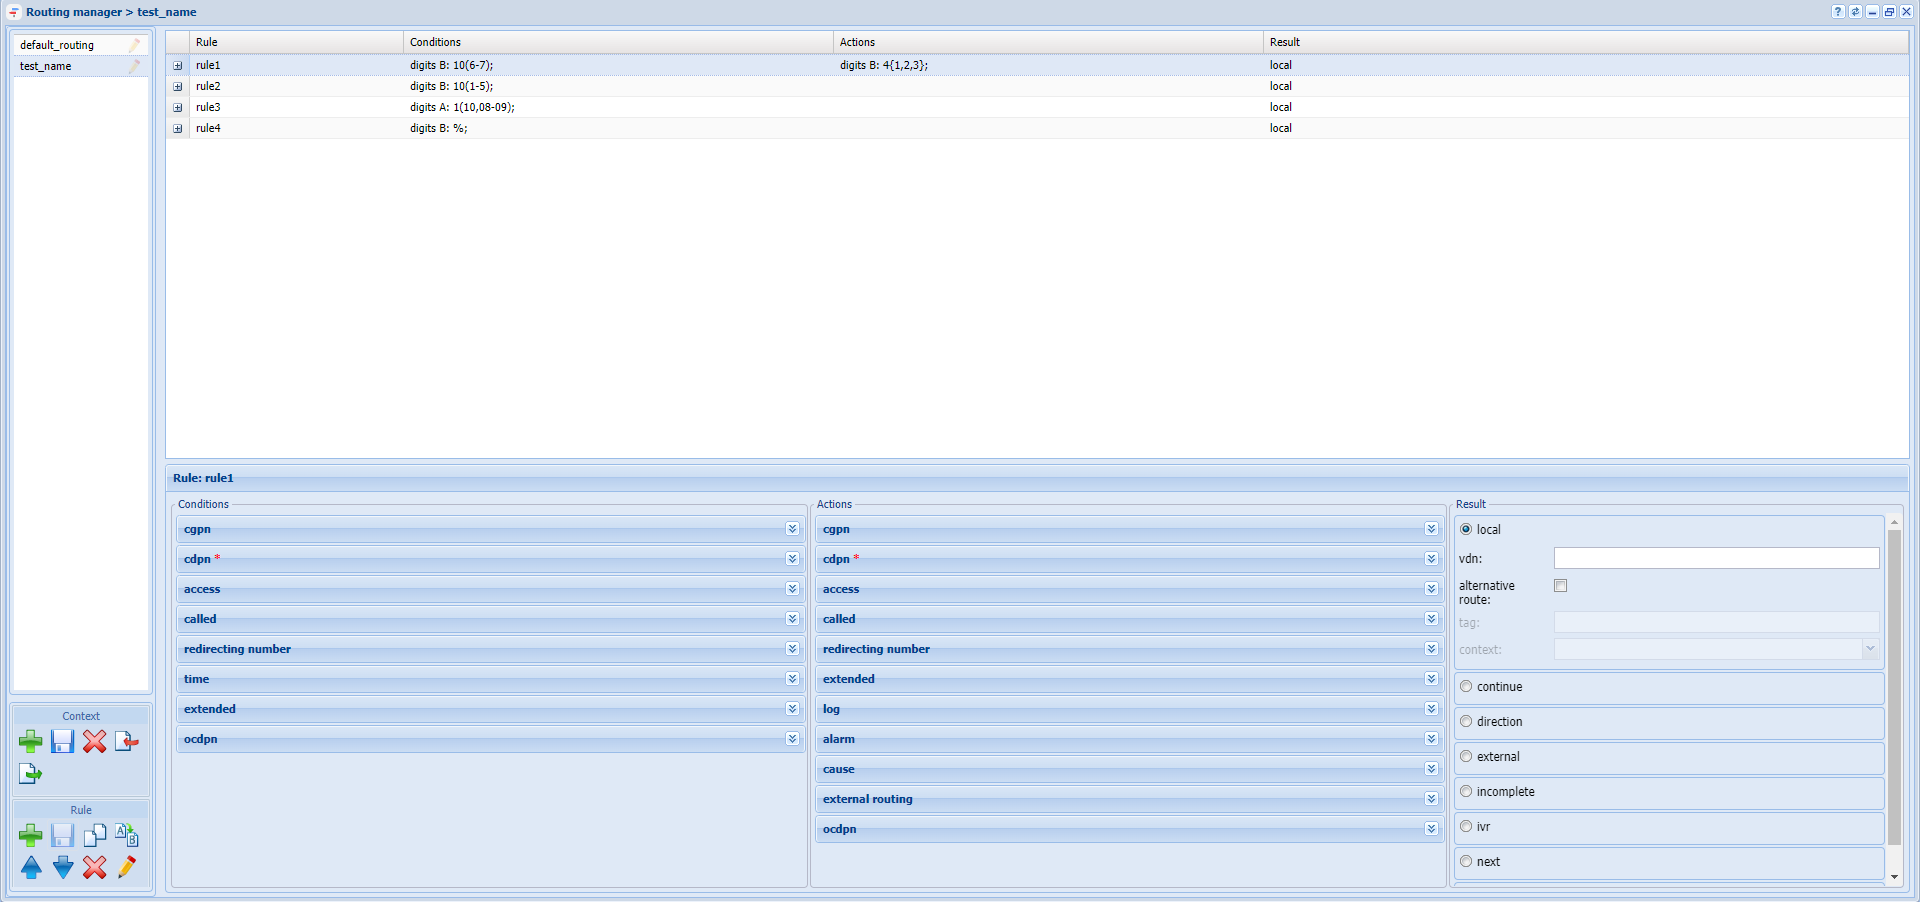
Figure 25 — Example of configuring routing context
To create and edit trunk parameters in the system, use the Trunk manager application.
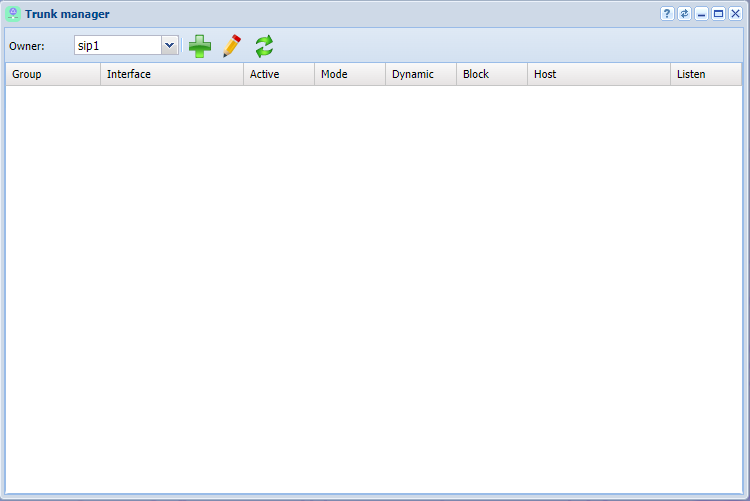
Figure 26 — Trunk Manager application view
To define a trunk in the system, click on the Trunk declare button, define parameters in the dialog box that opens:
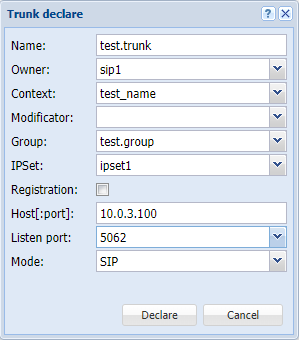 ↓
↓
Figure 27 — Creating a trunk
To create IVR, use the IVR editor application.
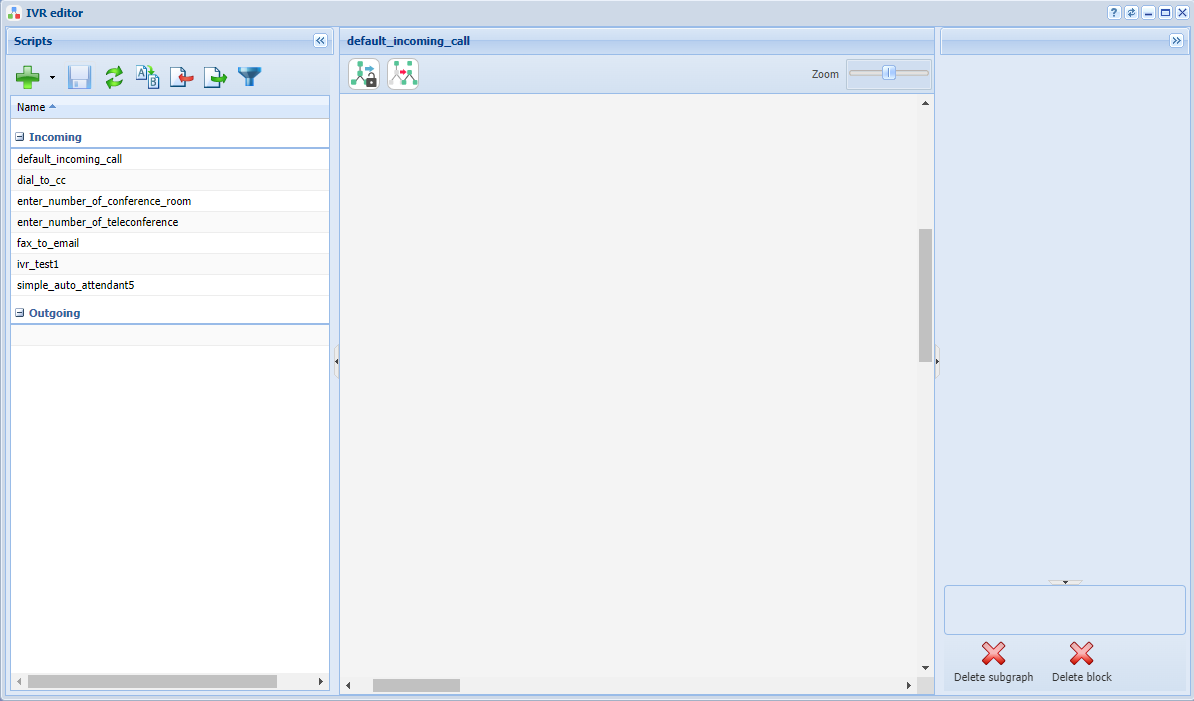
Figure 28 — IVR editor application view
To create a script, click on the Add button, select script type (in this case there is a script for incoming calls), specify the name of the script in the dialog box, for example "test_ivr".
After creating the script, a flowchart will appear in the main editor window.
In figures below is shown an example of making a script that plays a pre-recorded phrase to the caller when triggered, and then continues the call.
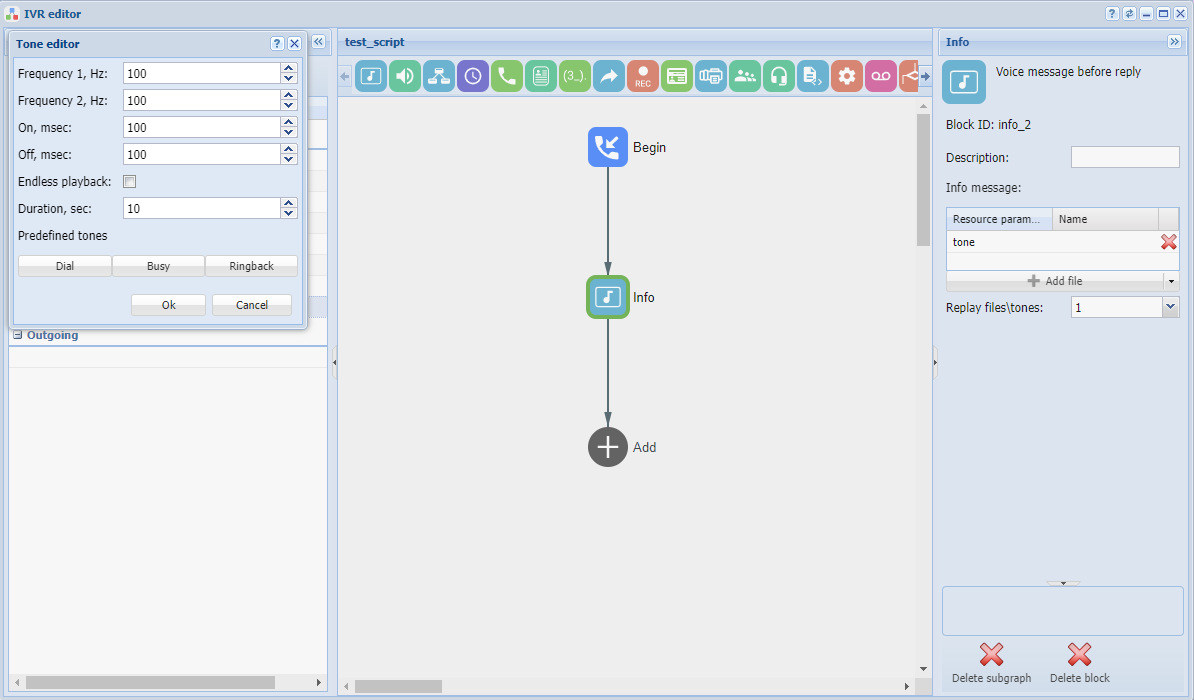
Figure 29 — View of the IVR workspace with the Info block settings
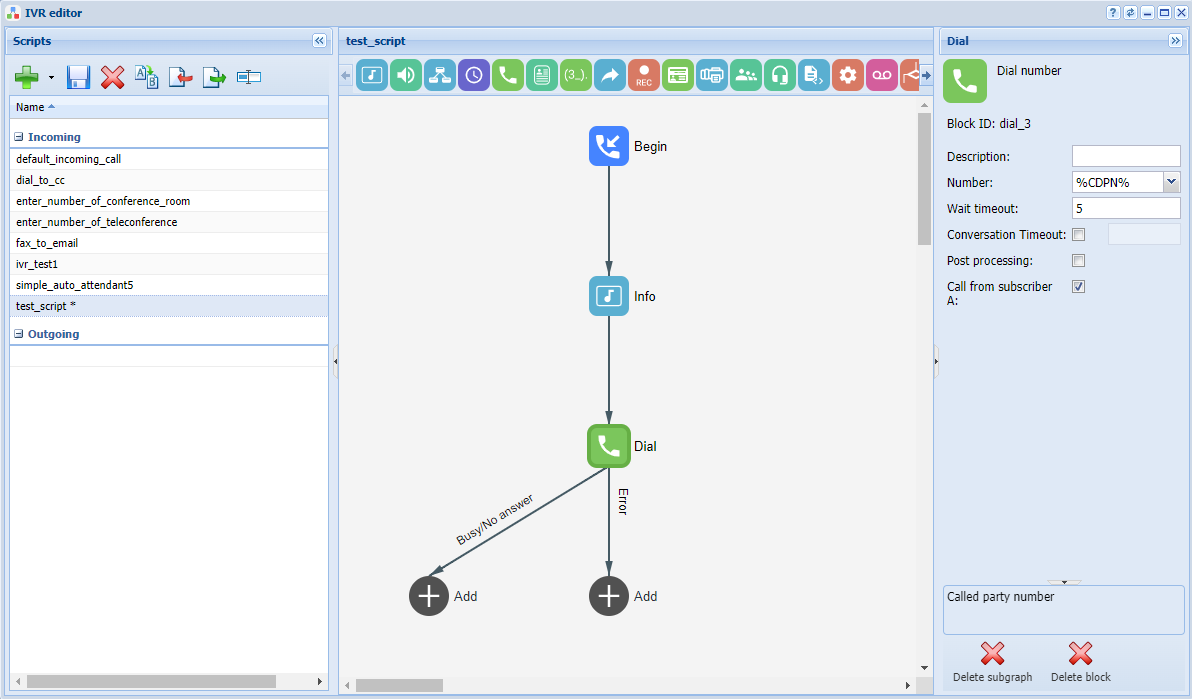
Figure 30 — View of the IVR workspace
To complete routing, open Routing manager application and in rules rule1 and rule3 adjust the corresponding routing results, and follow the steps below:
..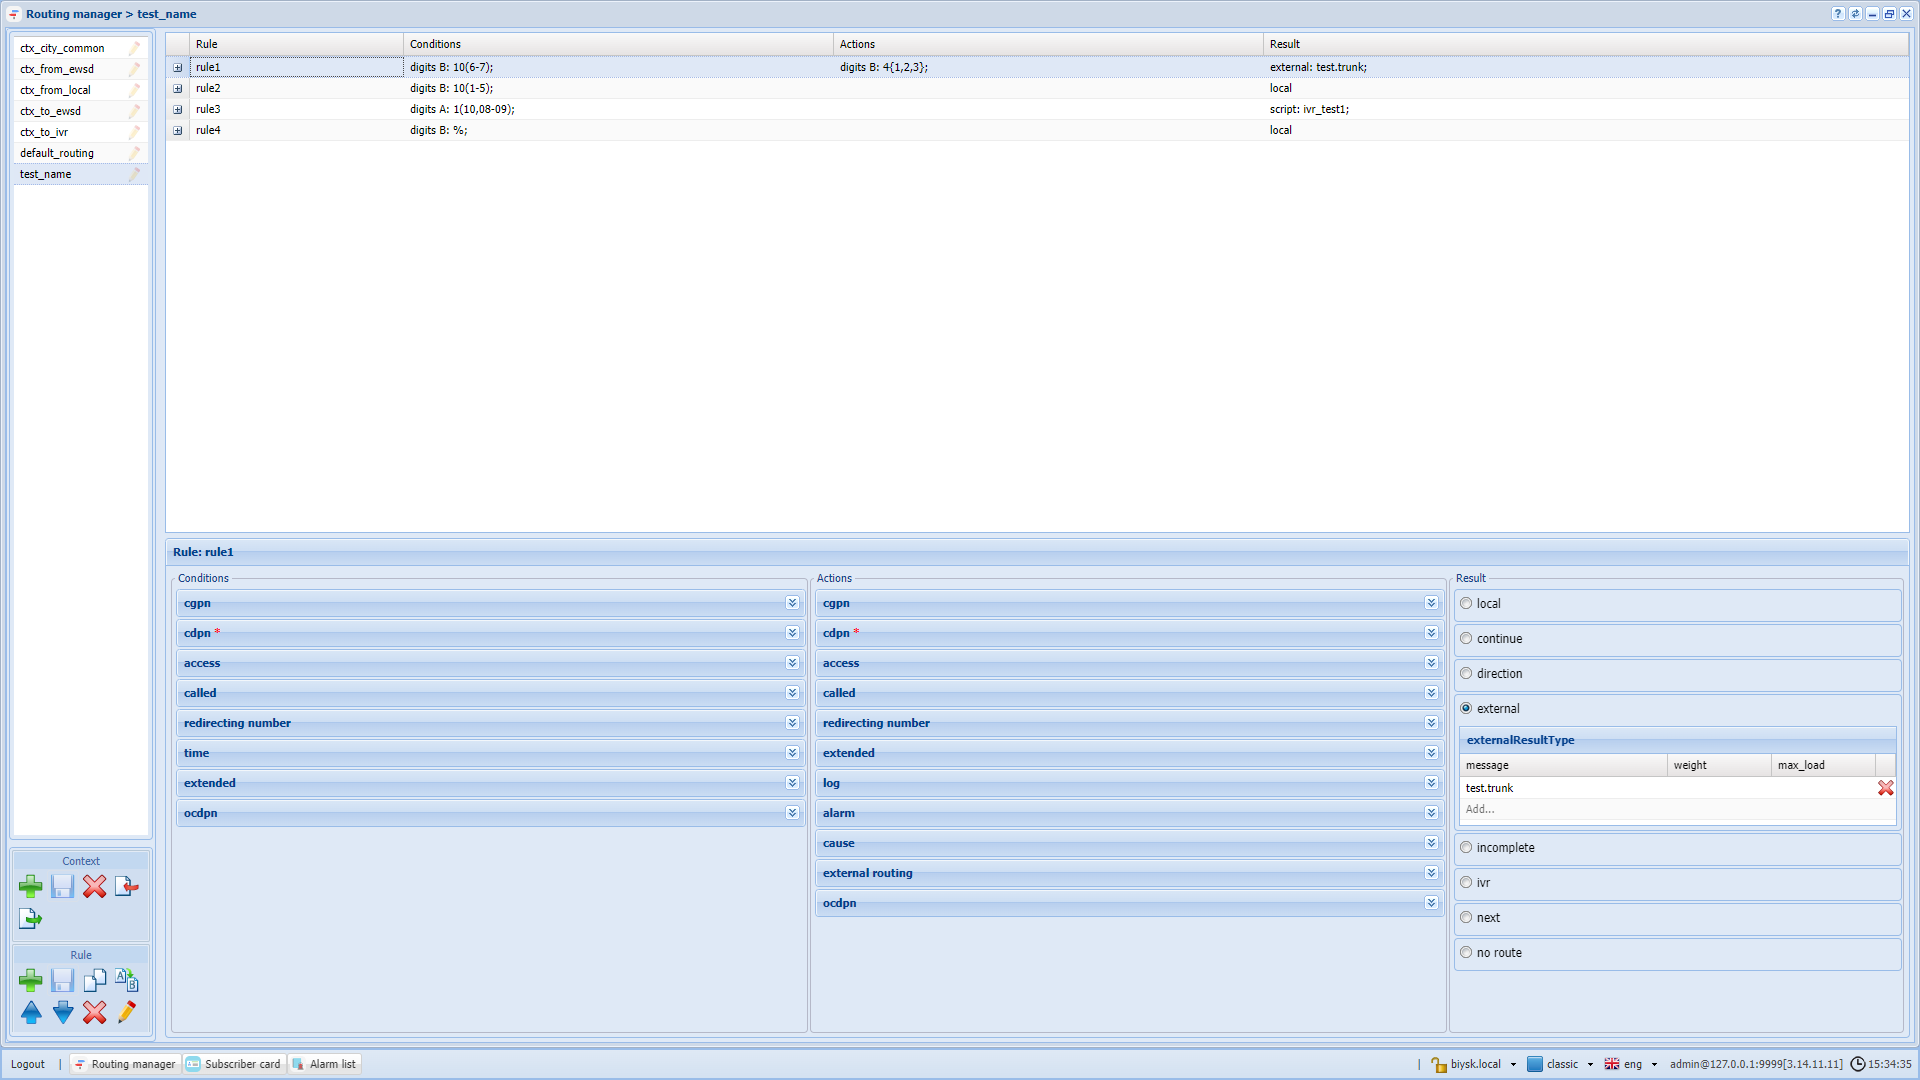
Figure 31 —Type of routing context
|
Для возможности использования медиаресурса и установления соединений , необходимо выполнить активизацию в команде создания медиаресурса - /system/media/resource/declare (параметр "is active"=true) или /system/media/resource/set (параметр "active"=true), если при создании активизация не была выполнена. Так же можно выполнить активизацию через веб интерфейс , приложение - сетевые окончания MSR (MSR-registrars). |
declare Для работы в режиме предварительно настроенной системы можно заранее прописать медиаресурсы, информация о которых известна. Для этого необходимо создать описание известных медиасерверов с указанием всех параметров, что позволить начать работу с медиасервером сразу после его регистрации. Команда для создания конфигурации медиасервера: Путь команды: /system/media/resource/declare Синтаксис: declare <node> by_contact <contact> <zone> <site> <is active> или declare <node> by_iface <msr> <acc_id> <iface> <zone> <site> <is active> Параметры: <node> — имя ноды core; |
set Команда для изменения настроек медиаресурсов. Путь команды: /system/media/resource/set Синтаксис: set <node|*> <contact> <active|zone|site> <value> Параметры: <node|*> - имя ноды; |
Пример:
Активируем связь MSR- и Core-подсистем. Для этого пропишите команды:
/system/media/resource/set core1@ecss1 net.20@msr.ecss1 active true |
/system/media/resource/set core1@ecss2 net.20@msr.ecss2 active true |
/system/media/resource/set core1@ecss1 net.20@msr.ecss2 active true |
/system/media/resource/set core1@ecss2 net.20@msr.ecss1 active true |
/system/media/resource/set core1@ecss1 net.20@msr.ecss1 active true Media resource: ┌─────────────┬──────────────────┬──────────┬───────┐ │ Node │ Contact │ Property │ Value │ ├─────────────┼──────────────────┼──────────┼───────┤ │ core1@ecss1 │ net.20@msr.ecss1 │ active │ true │ └─────────────┴──────────────────┴──────────┴───────┘ /system/media/resource/set core1@ecss2 net.20@msr.ecss2 active true Media resource: ┌─────────────┬──────────────────┬──────────┬───────┐ │ Node │ Contact │ Property │ Value │ ├─────────────┼──────────────────┼──────────┼───────┤ │ core1@ecss2 │ net.20@msr.ecss2 │ active │ true │ └─────────────┴──────────────────┴──────────┴───────┘ /system/media/resource/set core1@ecss1 net.20@msr.ecss2 active true Media resource: ┌─────────────┬──────────────────┬──────────┬───────┐ │ Node │ Contact │ Property │ Value │ ├─────────────┼──────────────────┼──────────┼───────┤ │ core1@ecss1 │ net.20@msr.ecss2 │ active │ true │ └─────────────┴──────────────────┴──────────┴───────┘ /system/media/resource/set core1@ecss2 net.20@msr.ecss1 active true Media resource: ┌─────────────┬──────────────────┬──────────┬───────┐ │ Node │ Contact │ Property │ Value │ ├─────────────┼──────────────────┼──────────┼───────┤ │ core1@ecss2 │ net.20@msr.ecss1 │ active │ true │ └─────────────┴──────────────────┴──────────┴───────┘ |
info Путь команды: /system/media/resource/info Синтаксис: info <node> <contact> Параметры: <contact> — contact uri декларируемого медиаресурса; |
Пример:
/system/media/resource/info core1@ecss1 net.20@msr.ecss1 Media resource specific for node core1@ecss1: ┌─┬─────────────────┬─────────────────────┐ │F│ Parameter │ Value │ ├─┼─────────────────┼─────────────────────┤ │r│ Contact │ net.20@msr.ecss1 │ │r│ Status │ registered │ │r│ Cc-status │ connected │ │r│ Cc-status uptime│ 00:39:35 │ │r│ Cc-id │ db21af │ │r│ Address │ 10.0.20.51:5700 │ │r│ Register time │ 2025/12/02 16:43:07 │ │r│ Expired │ 84 │ │r│ Iface │ net.20(10.0.20.51) │ │ │ Active │ true │ │ │ Zone │ default │ │ │ Site │ local │ │r│ MSR version │ 3.18.1.0.10 │ │r│ MSR load │ 0 │ │r│ MSR perf coef │ 1.0 │ └─┴─────────────────┴─────────────────────┘ Legend: Column F - means Flag, values r - flag for readonly parameter |
list Путь команды: /system/media/resource/list Синтаксис: list [active | all | register] Параметры: active — отображать только активные медиаресурсы (по умолчанию); |
Пример:
/system/media/resource/list all All media resource selected list specific: ┌─────────────┬───────────┬─────────────┬───────────┬──────┬────────┬───────────┬───────────┬─────────────────┬────────┬────────────┬────────┬─────────┬───────┬──────────────────┬────────────┬─────────┐ │ Node │ MSR │ MSR │ MSR │ MSR │ Cc-id │ Cc-status │ Cc-uptime │ Cc-address │ Iface │ Iface │ Active │ Zone │ Site │ Contact │ Status │ Expired │ │ │ │ version │ perf coef │ load │ │ │ │ │ name │ addr │ │ │ │ │ │ │ ├─────────────┼───────────┼─────────────┼───────────┼──────┼────────┼───────────┼───────────┼─────────────────┼────────┼────────────┼────────┼─────────┼───────┼──────────────────┼────────────┼─────────┤ │ core1@ecss1 │ msr.ecss1 │ 3.18.1.0.10 │ 1.0 │ 0 │ db21af │ connected │ 00:40:22 │ 10.0.20.51:5700 │ net.20 │ 10.0.20.51 │ true │ default │ local │ net.20@msr.ecss1 │ registered │ 156 │ │ │ msr.ecss2 │ 3.18.1.0.10 │ 1.0 │ 0 │ 263898 │ connected │ 00:40:22 │ 10.0.20.52:5700 │ net.20 │ 10.0.20.52 │ true │ default │ local │ net.20@msr.ecss2 │ registered │ 156 │ │ core1@ecss2 │ msr.ecss1 │ 3.18.1.0.10 │ 1.0 │ 0 │ db21af │ connected │ 00:41:11 │ 10.0.20.51:5700 │ net.20 │ 10.0.20.51 │ true │ default │ local │ net.20@msr.ecss1 │ registered │ 106 │ │ │ msr.ecss2 │ 3.18.1.0.10 │ 1.0 │ 0 │ 263898 │ connected │ 00:44:00 │ 10.0.20.52:5700 │ net.20 │ 10.0.20.52 │ true │ default │ local │ net.20@msr.ecss2 │ registered │ 177 │ └─────────────┴───────────┴─────────────┴───────────┴──────┴────────┴───────────┴───────────┴─────────────────┴────────┴────────────┴────────┴─────────┴───────┴──────────────────┴────────────┴─────────┘ |
/system/media/registrar/ - команды управления регистратором для MSR медиа менеджера
set Команда для изменения общих и индивидуальных параметров. Путь команды: /system/media/registrar/set Синтаксис настройки общих параметров: set common <FIELD> <VALUE> Параметры: <FIELD> - имя настраиваемого параметра; <VALUE> - значение настраиваемого параметра Где
Cписок параметров доступных для настройки:
В общих параметрах доступна настройка времени регистрации, по умолчанию установлено 60 секунд. Пример:
Синтаксис настройки индивидуальных параметров: system/media/registrar/set private <CORE> <FIELD> <VALUE> Параметры: <CORE> - нода ядра, для которой настраивается Registrar-сервер; <FIELD> - имя настраиваемого параметра; <VALUE> - значение настраиваемого параметра. Настраиваемые параметры:
|
Установить ipадрес для приема соединений от медиасервера:
/system/media/registrar/set private core1@ecss1 listen-ip 10.0.20.51 |
/system/media/registrar/set private core1@ecss2 listen-ip 10.0.20.52 |
/system/media/registrar/set private core1@ecss1 listen-ip 10.0.20.51 Private parameter listen-ip set to 10.0.20.51 at node core1@ecss1. /system/media/registrar/set private core1@ecss2 listen-ip 10.0.20.52 Private parameter listen-ip set to 10.0.20.52 at node core1@ecss2. |
info Команда просмотра текущих настроек Registrar-сервера. Путь команды: /system/media/registrar/info |
/system/media/registrar/info Common parameters: ┌───────────────────────────┬───────┐ │ Parameter │ Value │ ├───────────────────────────┼───────┤ │ registration-timeout, sec │ 180 │ └───────────────────────────┴───────┘ Private parameters: ┌─────────────┬────────┬───────────┬────────────┬─────────────┐ │ Node │ Status │ Is-active │ Listen-ip │ Listen-port │ ├─────────────┼────────┼───────────┼────────────┼─────────────┤ │ core1@ecss2 │ active │ true │ 10.0.20.52 │ 5000 │ │ core1@ecss1 │ active │ true │ 10.0.20.51 │ 5000 │ └─────────────┴────────┴───────────┴────────────┴─────────────┘ |
После того как все сервисы будут запущены, ноды какое-то время будут устанавливать связь. Как только все ноды загрузятся , при выполнении запроса system-status, последует вывод следующей информации:
/system-status Checking... ┌─┬───────────────┬───────────────────────────┬───────────────────────────────┬─────────────────────┬───────┐ │ │ Node │ Release │ Erlang nodes │ Mnesia nodes │Uptime │ ├─┼───────────────┼───────────────────────────┼───────────────────────────────┼─────────────────────┼───────┤ │ │core1@ecss1 │ecss-core-3.18.1.0.1656 │core1@ecss1,core1@ecss2 │not running │43m 43s│ │ │core1@ecss2 │ecss-core-3.18.1.0.1656 │core1@ecss1,core1@ecss2 │not running │47m 5s │ │ │ds1@ecss1 │ecss-ds-3.18.1.0.1656 │ds1@ecss1,ds1@ecss2 │ds1@ecss1,ds1@ecss2 │43m 43s│ │ │ds1@ecss2 │ecss-ds-3.18.1.0.1656 │ds1@ecss1,ds1@ecss2 │ds1@ecss1,ds1@ecss2 │47m 4s │ │ │md1@ecss1 │ecss-mediator-3.18.1.0.1656│md1@ecss1,md1@ecss2 │md1@ecss1,md1@ecss2 │43m 43s│ │ │md1@ecss2 │ecss-mediator-3.18.1.0.1656│md1@ecss1,md1@ecss2 │md1@ecss1,md1@ecss2 │47m 5s │ │ │mycelium1@ecss1│ecss-mycelium-3.18.1.0.1656│mycelium1@ecss1,mycelium1@ecss2│not running │43m 43s│ │ │mycelium1@ecss2│ecss-mycelium-3.18.1.0.1656│mycelium1@ecss1,mycelium1@ecss2│not running │47m 4s │ │ │sip1@ecss1 │ecss-pa-sip-3.18.1.0.1656 │sip1@ecss1,sip1@ecss2 │sip1@ecss1,sip1@ecss2│43m 43s│ │ │sip1@ecss2 │ecss-pa-sip-3.18.1.0.1656 │sip1@ecss1,sip1@ecss2 │sip1@ecss1,sip1@ecss2│47m 5s │ └─┴───────────────┴───────────────────────────┴───────────────────────────────┴─────────────────────┴───────┘ All services are started. Active media resource selected list specific: ┌─────────────┬───────────┬─────────────┬───────────┬───────────┐ │ Node │ MSR │ MSR │ Cc-status │ Cc-uptime │ │ │ │ version │ │ │ ├─────────────┼───────────┼─────────────┼───────────┼───────────┤ │ core1@ecss1 │ msr.ecss1 │ 3.18.1.0.10 │ connected │ 00:42:49 │ │ │ msr.ecss2 │ 3.18.1.0.10 │ connected │ 00:42:48 │ │ core1@ecss2 │ msr.ecss1 │ 3.18.1.0.10 │ connected │ 00:43:38 │ │ │ msr.ecss2 │ 3.18.1.0.10 │ connected │ 00:46:27 │ └─────────────┴───────────┴─────────────┴───────────┴───────────┘ Alarms list on md1: ┌──────────────┬───────────────┬───────────────┬────────────────────┬────────────────────┬────────────────────┬────────────────────────────────────────────────────────────┐ │ Date │ Severity │ Location │ Cause │ Class │ Instance │ Message │ ├──────────────┼───────────────┼───────────────┼────────────────────┼────────────────────┼────────────────────┼────────────────────────────────────────────────────────────┤ └──────────────┴───────────────┴───────────────┴────────────────────┴────────────────────┴────────────────────┴────────────────────────────────────────────────────────────┘ Selected: 0 Total: 0 |
В примере выше видно, что ноды вошли в кластер и MSR зарегистрировались на ноде ecss-core.
Произведите настройку адаптера SIP согласно ТЗ:
/cluster/adapter/sip1/sip/network/set ip_set test_set node-ip node = sip1@ecss1 ip = 10.0.20.31 |
/cluster/adapter/sip1/sip/network/set ip_set test_set node-ip node = sip1@ecss2 ip = 10.0.20.32 |
/cluster/adapter/sip1/sip/network/set ip_set test_set listen-ports list = [5060] |
/cluster/adapter/sip1/sip/network/set ip_set test_set node-ip node = sip1@ecss1 ip = 10.0.20.31 Property "ip_set" successfully changed from: to test_set: no ports set test_set: sip1@ecss1 10.0.20.31 test_set: dscp 0. /cluster/adapter/sip1/sip/network/set ip_set test_set node-ip node = sip1@ecss2 ip = 10.0.20.32 Property "ip_set" successfully changed from: test_set: no ports set test_set: sip1@ecss1 10.0.20.31 test_set: dscp 0 to test_set: no ports set test_set: sip1@ecss1 10.0.20.31 test_set: sip1@ecss2 10.0.20.32 test_set: dscp 0. /cluster/adapter/sip1/sip/network/set ip_set test_set listen-ports list = [5060] Property "ip_set" successfully changed from: test_set: no ports set test_set: sip1@ecss1 10.0.20.31 test_set: sip1@ecss2 10.0.20.32 test_set: dscp 0 to test_set: 5060 test_set: sip1@ecss1 10.0.20.31 test_set: sip1@ecss2 10.0.20.32 test_set: dscp 0. |
Создайте Домен (виртуальную АТС) и присвойте ему созданную выше группу (IP-set) настроек SIP-адаптера:
/domain/declare test_domain --add-domain-admin-privileges --add-domain-user-privileges |
/domain/test_domain/sip/network/set ip_set [test_set] |
/domain/declare test_domain --add-domain-admin-privileges --add-domain-user-privileges New domain test_domain is declared /domain/test_domain/sip/network/set ip_set [test_set] Property "ip_set" successfully changed from: [] to ["test_set"]. |
После создания домена, администратор системы должен открыть доступ на управление услугами оператору Домена (виртуальной АТС). Для этого использовать команду разрешения оператору Домена (виртуальной АТС) "test_domain" управлять всеми услугами :
/cluster/storage/ds1/ss/access-list add test_domain * |
/cluster/storage/ds1/ss/access-list add test_domain * Supplementary services successfully added in the domain test_domain. |
Для возможности применения пакета услуг у абонентов сразу после создания, необходимо настроить политику применения лицензионных пакетов услуг (детальную информацию вы можете посмотреть здесь )
Создать политику применения лицензии с именем -"new_sub"
/domain/test_domain/ss/licence/politics/declare new_sub "Задаются при создании абонента" |
/domain/test_domain/ss/licence/politics/declare new_sub "Задаются при создании абонента" Licence politic new_sub successfully declared. |
Задать имя пакета услуг дополнительных сервисов, для этого использовать следующие команды:
/cluster/storage/ds1/licence/show-licence 1 |
нас интересует следующая информация :
/cluster/storage/ds1/licence/show-licence 1
SSW ID                                                < Имя SSW ID >
Description                                           Лицензия для тестирования Локация 2.

. . .

Supplementary Services licence package(s)
 name                                                 'ECSS-ADV'
 limit                                                50000
 description                                          "Весь пакет услуг"
 SS list                                              [1,2,3,4,5]

. . .
|
имя пакета услуг в примере "ECSS-ADV".
Добавить в созданную политику пакет лицензионных услуг с именем "ECSS-ADV"(именно так он описан в лицензии):
/domain/test_domain/ss/licence/politics/package-add new_sub ECSS-ADV |
/domain/test_domain/ss/licence/politics/package-add new_sub ECSS-ADV Licence packages ["ECSS-ADV"] successfully added to politic new_sub. |
Пакет добавлен, но в настоящий момент политика не активна (не может быть применена к абоненту). Для активации политики new_sub выполнить следующую команду:
/domain/test_domain/ss/licence/politics/activate new_sub |
/domain/test_domain/ss/licence/politics/activate new_sub Licence politic new_sub successfully activated. |
Теперь при создании абонентов можем использовать дополнительные услуги.