Installation of NAICE as an OVA image has been supported since version 1.0.
In version 1.1, NAICE installation using an OVA image is supported only in single-host mode (without high availability).
Building a cluster from two separate single-host NAICE installations is not possible.
Supported hypervisors
In version 1.0, the following hypervisors are supported for system installation:
- Oracle VirtualBox
- VMware ESXi 6.7
- VMware ESXi 7.0
- VMware ESXi 8.0
System requirements
By default, the system image is installed with the following minimum parameters:
- CPU: 4
- RAM: 10 GB
- HDD: 100 GB
If necessary, the system parameters can be increased to the recommended values:
- CPU: 8
- RAM: 16 GB
- HDD: 1000 GB
Downloading the OVA image
The latest stable virtual machine OVA image can be downloaded from the page: v1.2_1.5 Stable versions.
OVA image based on Ubuntu 24.04 naice-v1.2-3237-ubuntu-24.04.ova
OVA image based on RedOS 7.3 naice-v1.2-3237-redos-7.3.ova
OVA image based on Debian 13 naice-v1.2-3237-debian-13.ova
Installation on Oracle VirtualBox
1) Open the Oracle VirtualBox interface.
2) Right-click Tools → Import Appliance.
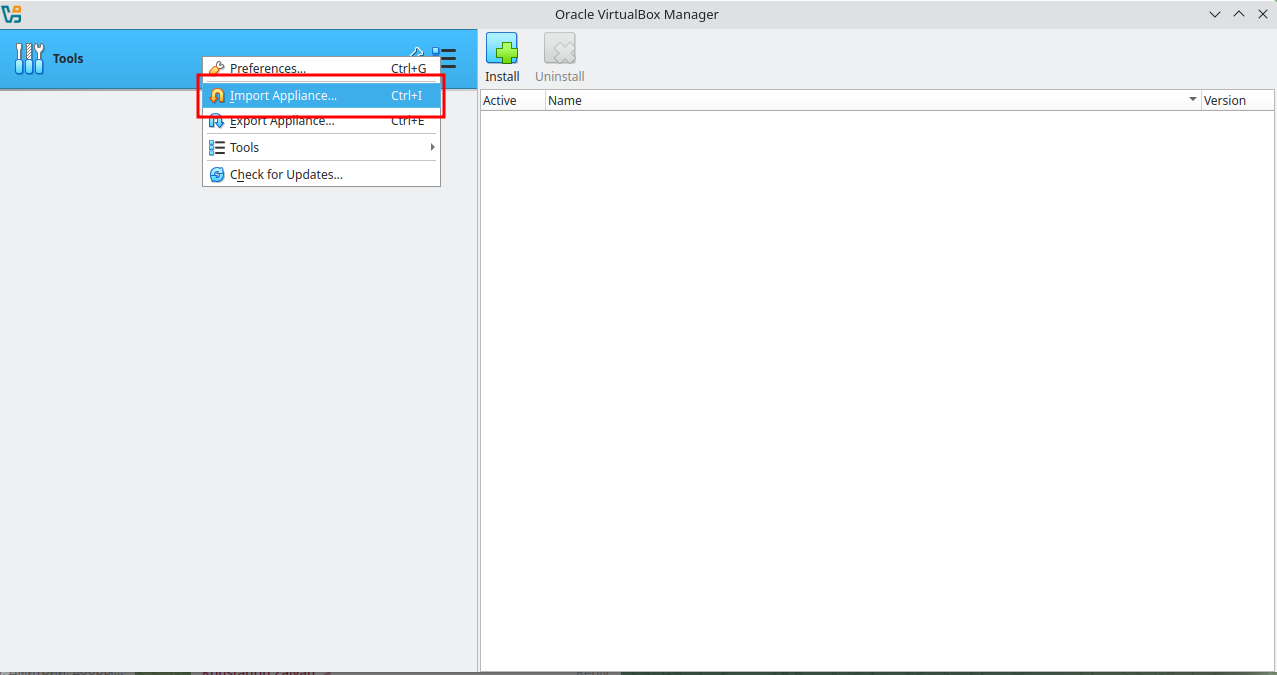
3) Select the required OVA image file and upload it.
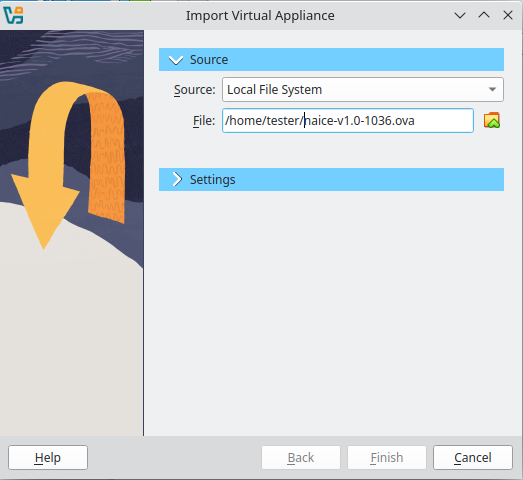
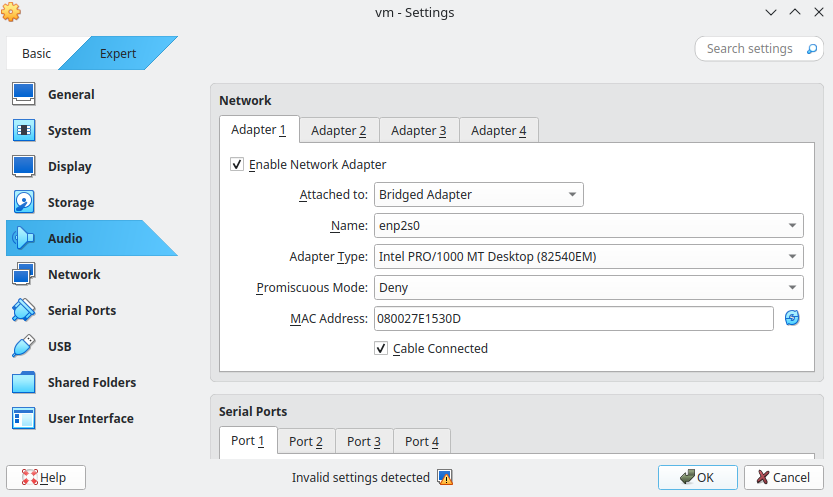
4) After the virtual machine image has been fully loaded, open the network settings (Network), select the bridged mode (Bridged Adapter), and select the required network interface.
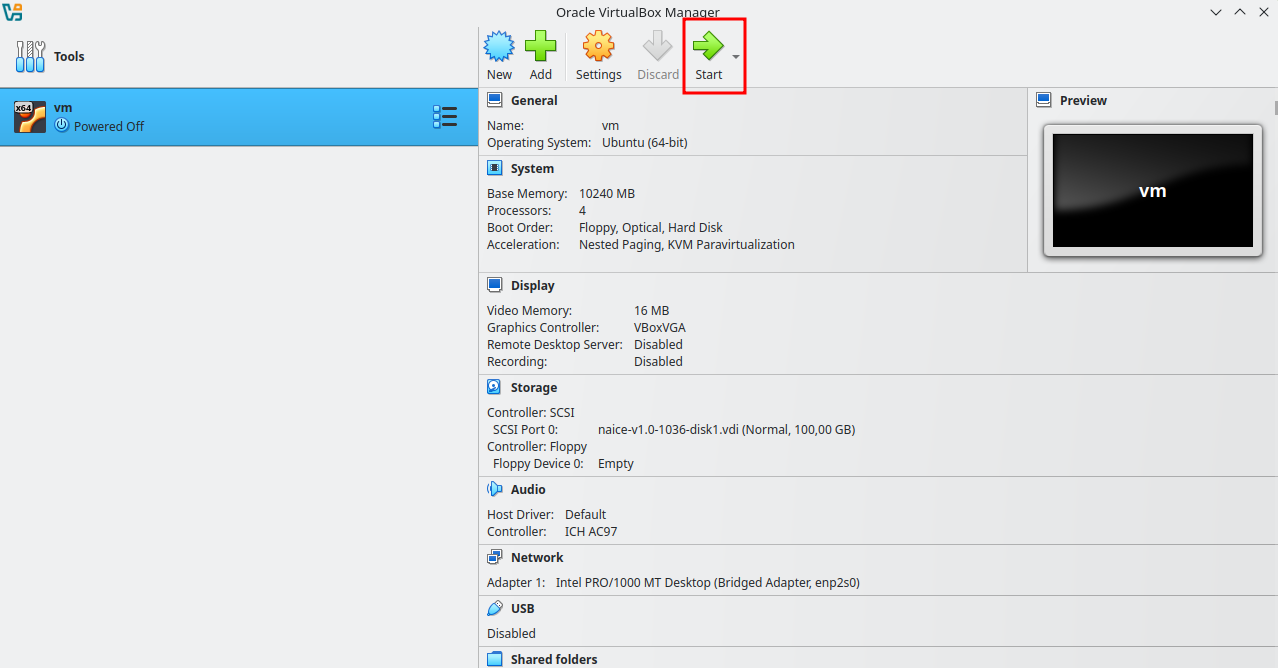
5) Click the Start button.
6) After the installation is complete, log in to the system:
- Login: eltex;
- Password: eltex.
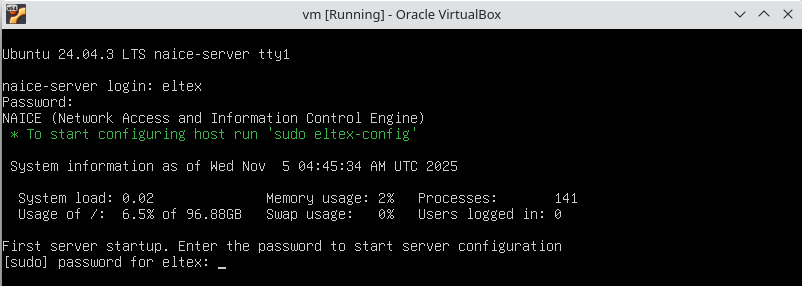
7) (Optional) After logging in, the NAICE server configuration process is started. During the configuration, you can set the following parameters:
- Change the eltex user password;
- Set the server hostname (default: naice-server);
- Change the server locale;
- Change the server time zone;
- Enable the DHCP client or set a static network interface address;
- Configure DNS;
- Configure NTP.
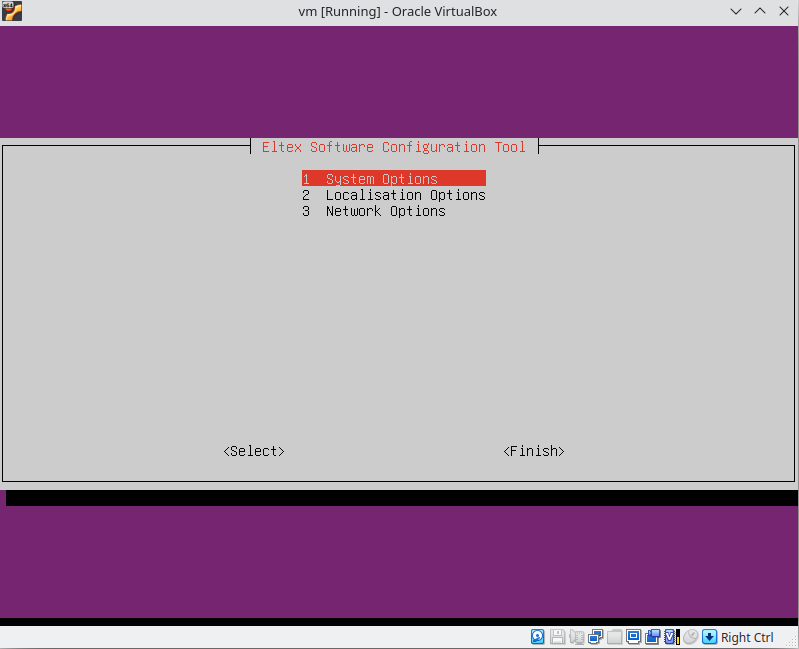
8) After all required parameters have been configured, click the Finish button. The following message will appear upon completion of the installation:

If the basic settings listed in step 7 need to be reconfigured (for example, to change the IP address), run the configurator again with the following command:
sudo eltex-config
Installation on VMware ESXi
1) Click the Create/Register VM button.

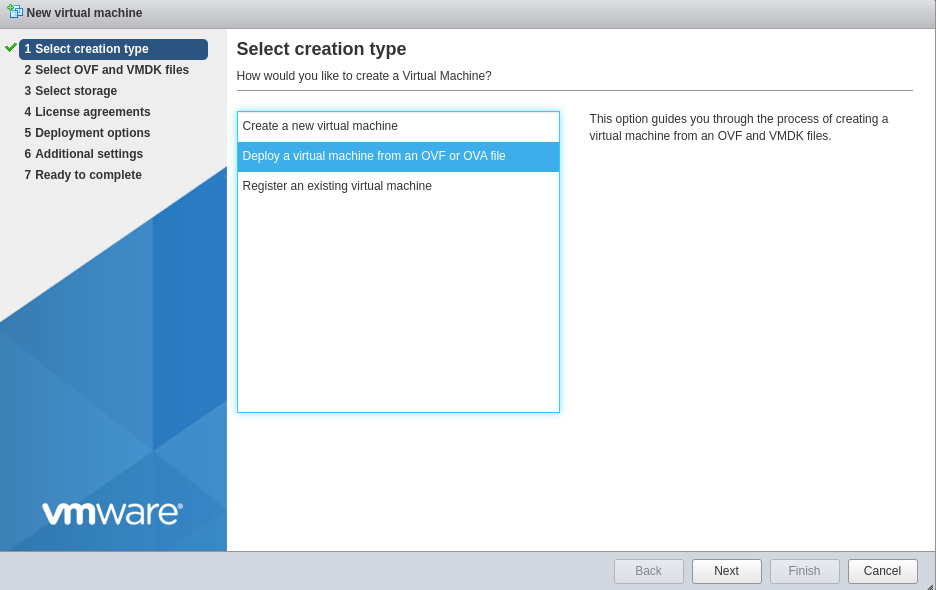
2) Select the Deploy a virtual machine from an OVF or OVA file mode.
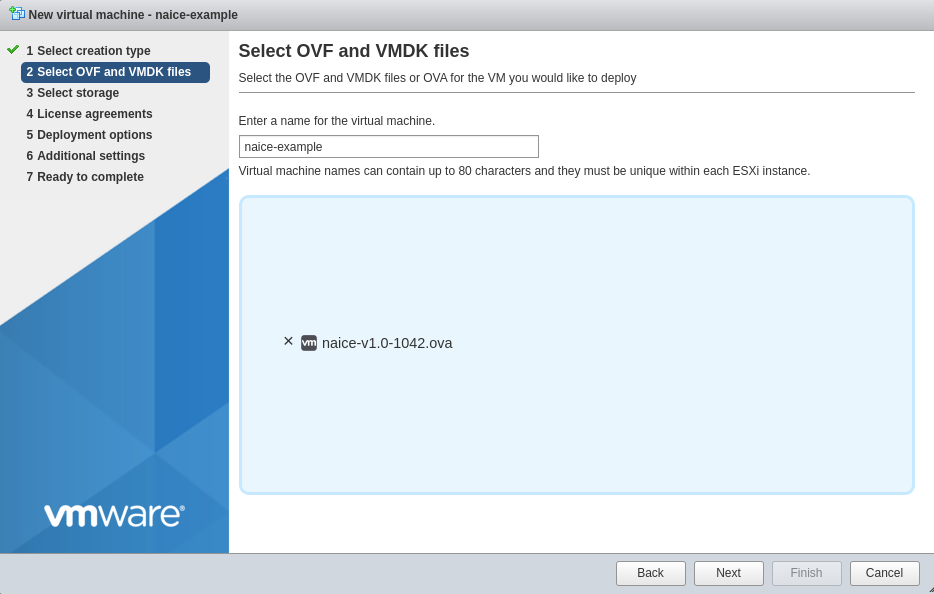
3) Enter the virtual machine name and select the image file.
4) Select the required datastore for the virtual machine installation.
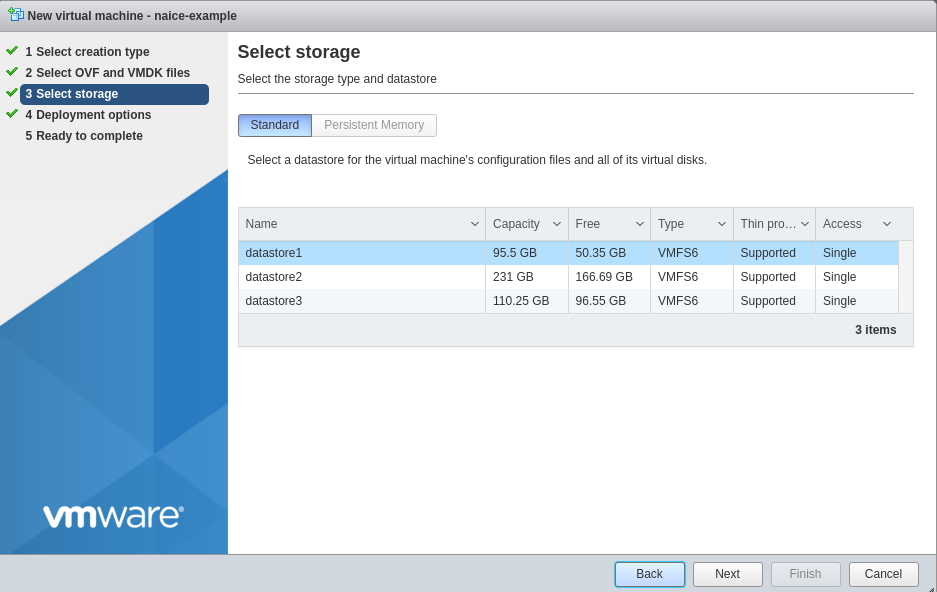
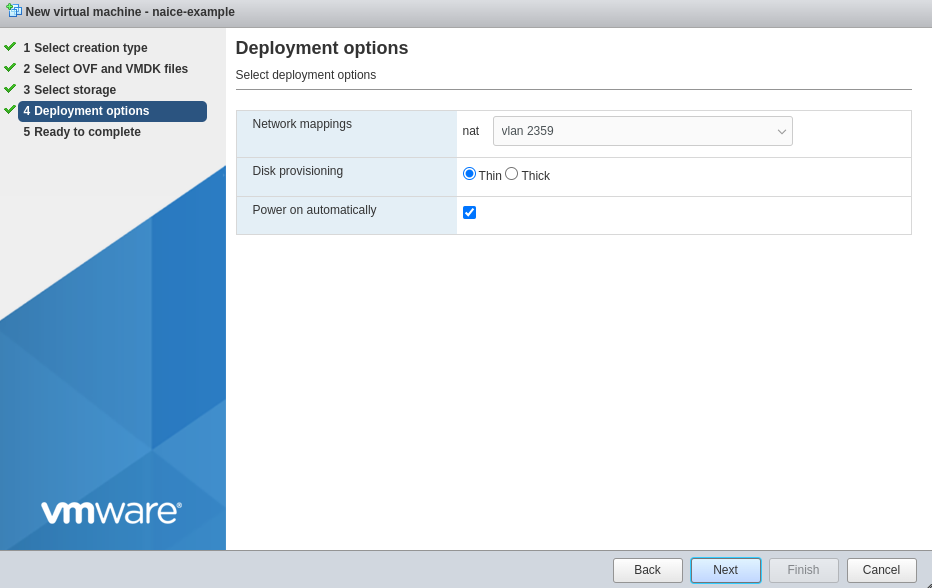
5) Configure the required virtual machine placement settings in ESXi, including network interface settings.
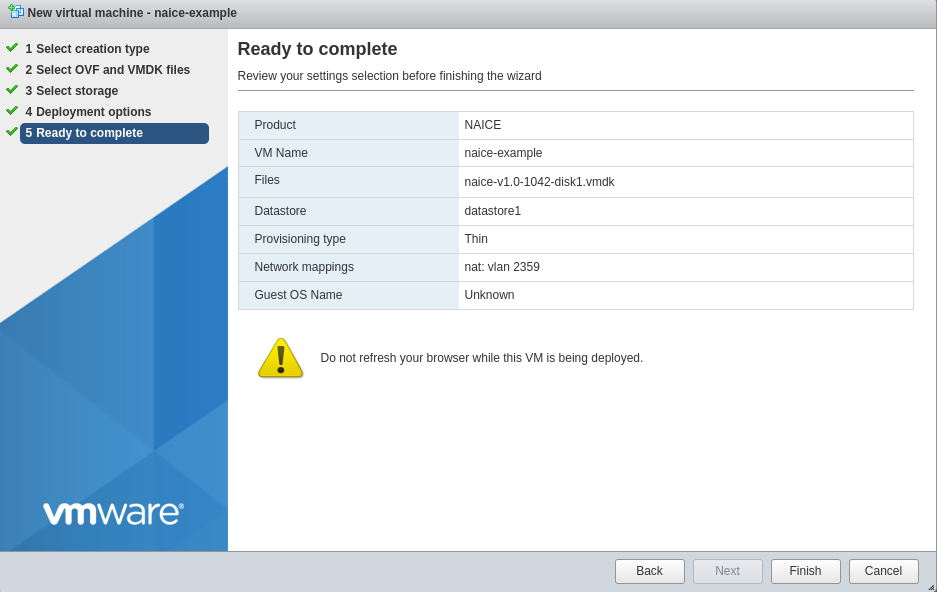
6) Click the Finish button.
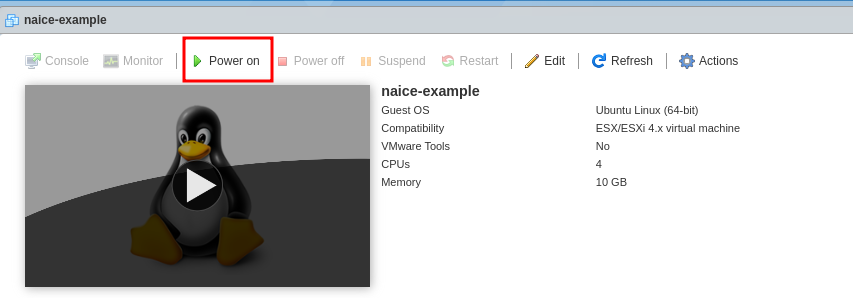
7) Go to the virtual machine and click the Power on button.
8) After the virtual machine is powered on, switch to the Console mode.
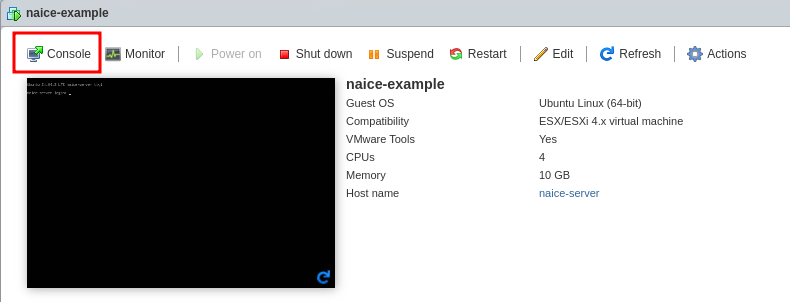
9) After the installation is complete, log in to the system:
- Login: eltex;
- Password: eltex.
10) (Optional) After logging in, the NAICE server configuration process is started. During the configuration, you can set the following parameters:
- Change the eltex user password;
- Set the server hostname (default: naice-server);
- Change the server locale;
- Change the server time zone;
- Enable the DHCP client or set a static network interface address;
It is highly recommended to set a static network interface address for the virtual machine.
- Configure DNS;
- Configure NTP.
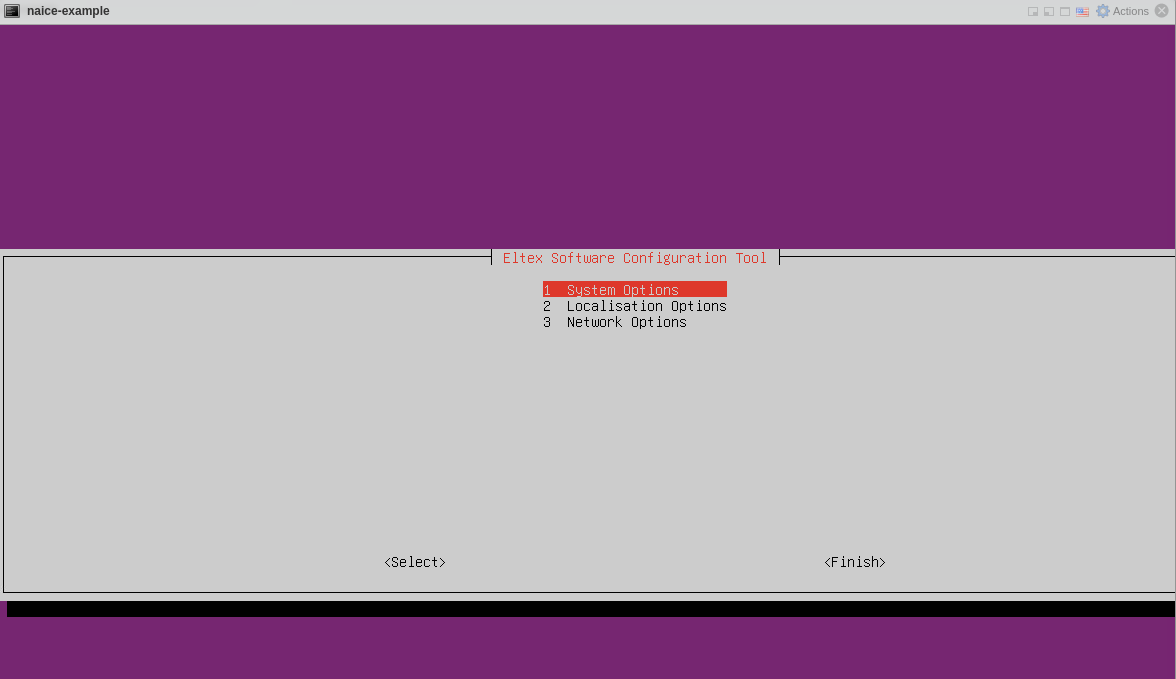
11) After all required parameters have been configured, click the Finish button. The following message will appear upon completion of the installation:
If the basic settings listed in step 10 need to be reconfigured (for example, to change the IP address), run the configurator again with the following command:
sudo eltex-config
Accessing the web interface
After the OVA image is installed, two web interfaces are available:
1) OVA web interface at the following address.
https://<NAICE installation IP address>:8000
This web interface is intended to simplify the initial setup and configuration of the NAICE software.
Default login credentials:
- Login: eltex;
- Password: eltex (unless it was changed during installation).
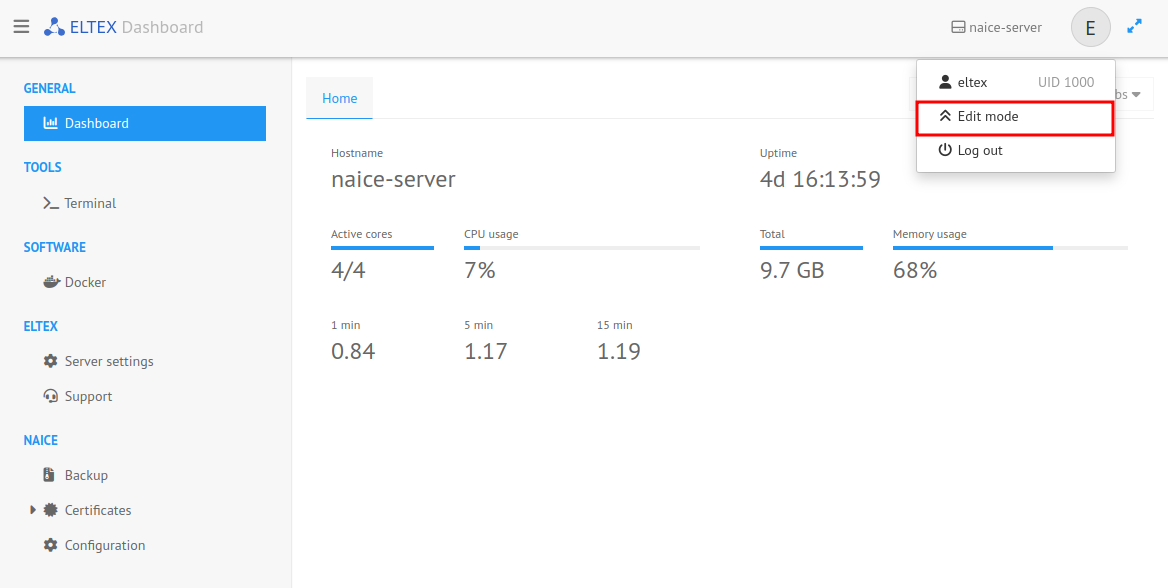
By default, the web interface runs in Read-Only mode. To switch to editing mode, click the E button in the upper right corner of the screen and select Edit Mode.
2) NAICE web interface.
https://<NAICE installation IP address>
Default login credentials:
- Login: admin;
- Password: admin.