Installation of NAICE as a QCOW2 image has been supported since version 1.1.
In version 1.1, NAICE installation using a QCOW2 image is supported only in single-host mode (without high availability).
Building a cluster from two separate single-host NAICE installations is not possible.
Basic terms
- QEMU (Quick Emulator) — a general-purpose open-source program for emulation and virtualization.
It is used to run virtual machines, test software, develop and debug operating systems, emulate various hardware devices, and migrate servers between different hardware platforms.
QEMU is often used in virtualization systems such as Proxmox and virt-manager to create and manage virtual machines. - KVM (Kernel-based Virtual Machine) — a virtualization technology built into the Linux kernel that allows turning an ordinary server into a hypervisor for running virtual machines.
- QCOW2 (QEMU Copy-On-Write) — a virtual disk file format used in virtualization systems.
It is used to create virtual machines, store the operating system and all data within a single file, perform convenient backup and system migration between servers, and test and safely apply changes.
The format is especially widely used in KVM/QEMU-based virtualization environments.
System requirements
By default, the system image is installed with the following minimum parameters:
- CPU: 4
- RAM: 10 GB
- HDD: 100 GB
If necessary, the system parameters can be increased to the recommended values:
- CPU: 8
- RAM: 16 GB
- HDD: 1000 GB
Installation
- Detailed instructions for deploying and connecting a QCOW2 image depend on the hypervisor used.
For step-by-step installation instructions, refer to the official documentation of your hypervisor. - The QCOW2 image download archive can be found on the v1.2_1.5 Stable versions
QCOW2 image based on Ubuntu 24.04 naice-v1.2-3237-ubuntu-24.04.qcow2
QCOW2 image based on RedOS 7.3 naice-v1.2-3237-redos-7.3.qcow2
- QCOW2 image based on Debian 13 naice-v1.2-3237-debian-13.qcow2
Actions after installation
After the virtual machine is deployed, log in to the system:
- Login: eltex;
- Password: eltex.
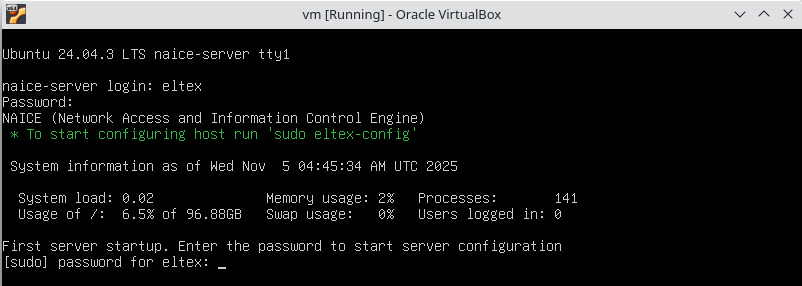
(Optional) After logging in, the NAICE server configuration process is started. During the configuration, you can set the following parameters:
- Change the eltex user password;
- Set the server hostname (default: naice-server);
- Change the server locale;
- Change the server time zone;
- Enable the DHCP client or set a static network interface address;
- Configure DNS;
- Configure NTP.
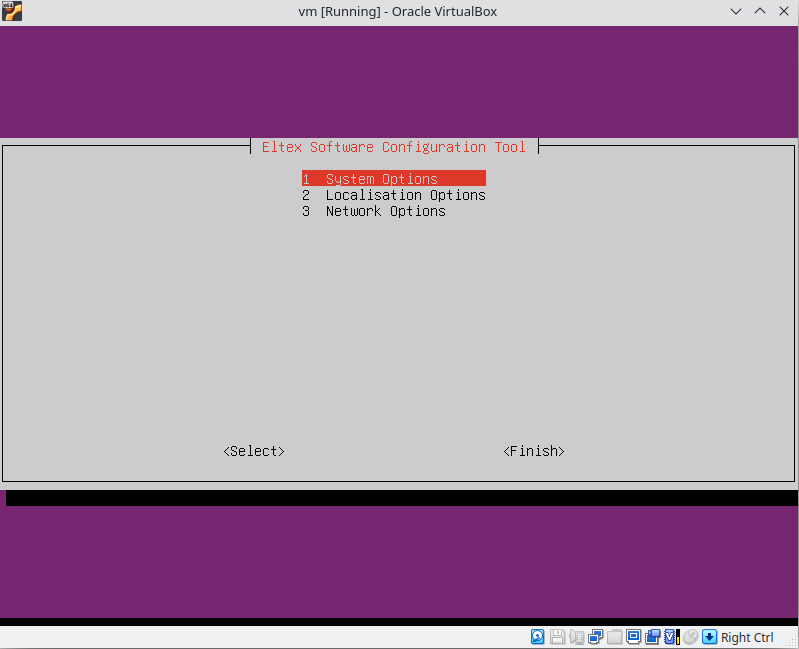
After all required parameters have been configured, click the Finish button. The following message will appear upon completion of the installation:

If the basic settings listed in step 7 need to be reconfigured (for example, to change the IP address), run the configurator again with the following command:
sudo eltex-config
Accessing the web interface
After the OVA image is installed, two web interfaces are available:
1) OVA web interface at the following address.
https://<NAICE installation IP address>:8000
This web interface is intended to simplify the initial setup and configuration of the NAICE software.
Default login credentials:
- Login: eltex;
- Password: eltex (unless it was changed during installation).
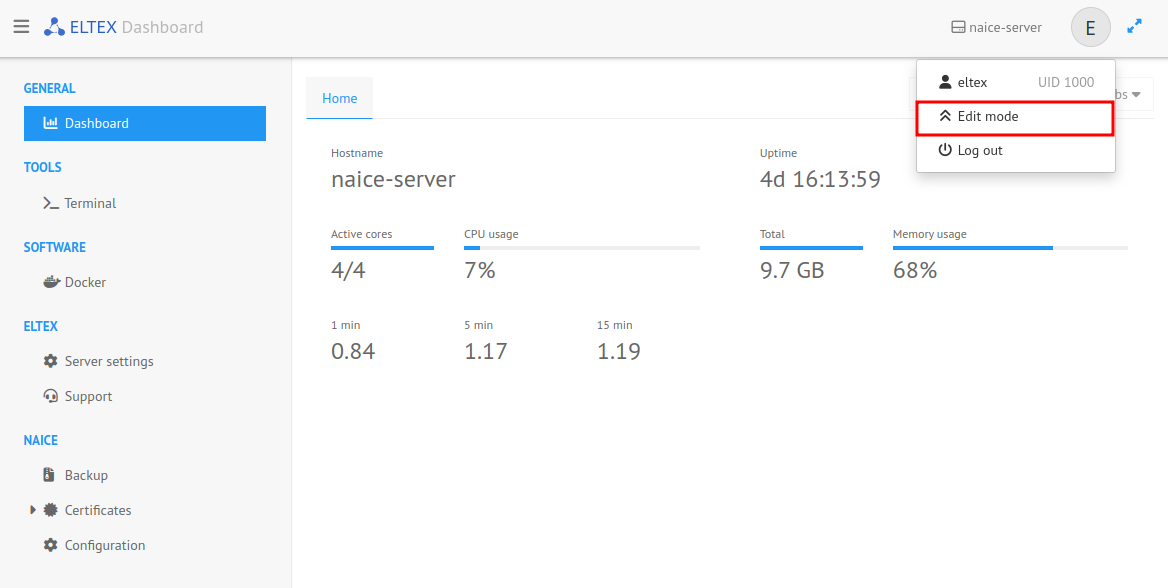
By default, the web interface runs in Read-Only mode. To switch to editing mode, click the E button in the upper right corner of the screen and select Edit Mode.
2) NAICE web interface.
https://<NAICE installation IP address>
Default login credentials:
- Login: admin;
- Password: admin.